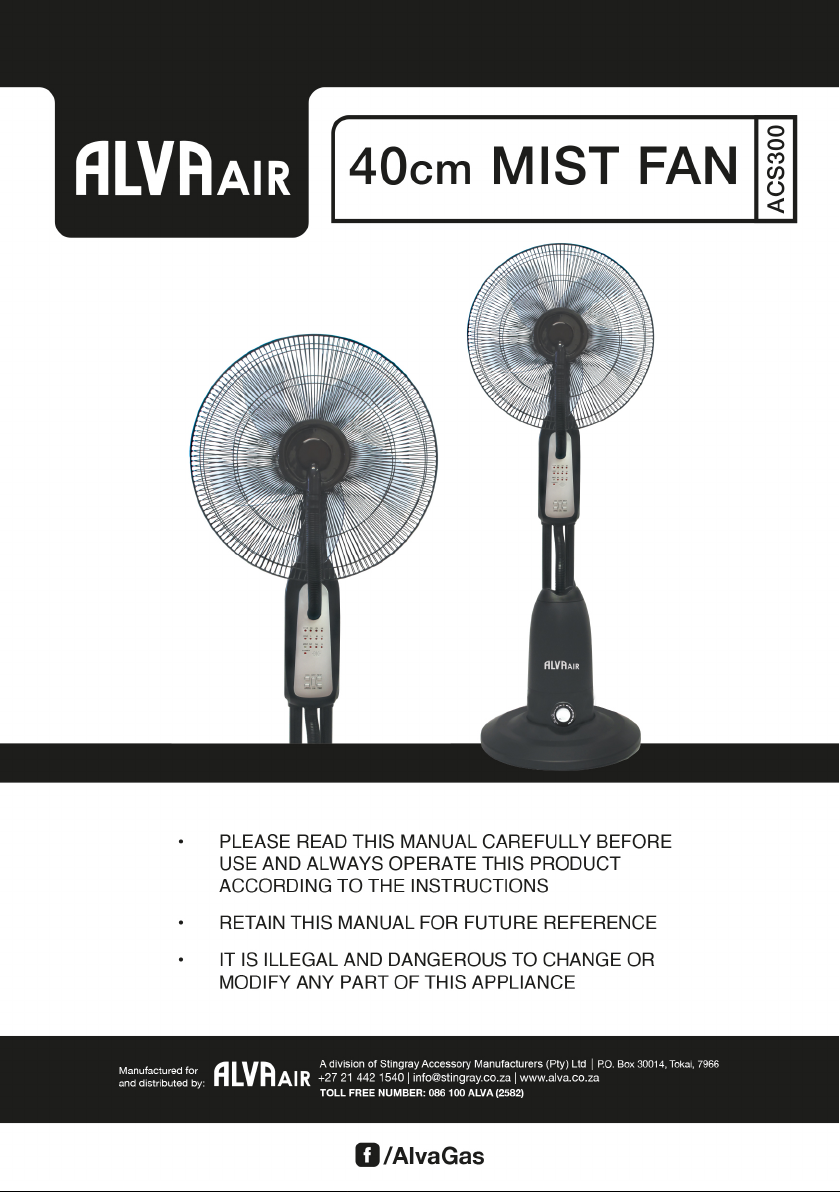
Stingray ALVA Air ACS300 User manual

Thank you for your
purchase of this
Mist Fan, Please read
these instructions
carefully before use
and keep them in a
safe place, for future
reference.
WARNING:
TO AVOID THE RISK
OF ELECTRICAL
SHOCK, ALWAYS
MAKE SURE THE
PRODUCT IS UN-
PLUGGED FROM
THE ELECTRICAL
OUTLET BEFORE
ASSEMBLING,
DISASSEMBLING,
RELOCATING,
SERVICING, OR
CLEANING.
For indoor use only.
Assembly required
IMPORTANT SAFETY INFORMATION
• Please read these instructions carefully before using your
Mist Fan. The operator must understand all safety
requirements as detailed in this manual before using the
unit.
• The manufacturer’s warranty may be voided by incorrect
use of this product. If you have any queries regarding these
instructions, contact your local dealer for clarication before
using your Mist Fan.
• Always remove unit from all packaging materials prior to
use.
• Failure to follow the manual’s instructions could result in
damage or serious injury.
• When using electrical appliances, in order to reduce the
risk of re, electric shock, and/or injury, these basic safety
precautions should always be followed.
• This product is intended for general domestic use to cool
rooms and is not intended for use in windows.
• Do not use the product for any other purpose.
• Keep the product out of the reach of children and pets.
This product is not intended for use by children.
• Do not leave the product unattended while it is in use,
especially when children are present. Always unplug the
product from the electrical outlet when it is not in use.
• Always operate the product on a at, level, steady
and stable surface to avoid it overturning.
• Do not hang or wall-mount the product.
• Do not place the product in or near an open window. Rain,
snow, and other weather elements may create an electrical
hazard.
• Keep the power cord and product away from sharp edges
and heated surfaces.
• Always unplug the product from the electrical outlet when
cleaning and when lling the water tank.

• Do not plug/unplug the product into/from the electrical
outlet with a wet hand. Never insert ngers or any other
object through the fan guards. Never drop or insert objects
into any opening of the product.
• Do not attempt to open any part of the motor housing, as a
risk of electrical shock may exist.
• Never operate the product without the fan guards in place,
as serious personal injury may result. Plug the product into a
standard outlet.
• Do not allow the power cord to hang (i.e., over the edge of a
table or counter) where it may be tripped over or pulled.
• Do not operate product if the power cord is cut, damaged, or
if the wires are exposed. Contact 086 100 ALVA (2582) or an
Authorised Service agent to replace the power cord.
• Do not immerse or expose the motor housing, power cord,
or plug into water or other liquids. Disconnect the plug (do
not pull on the power cord) from the electrical outlet.
• Do not put any stress on the power cord where it connects
to the product, as the power cord could fray and break.
• Do not operate the product if it has a damaged power cord
or plug, malfunctions, is dropped, or damaged. This product
has no user–serviceable parts.
• Do not attempt to examine or repair this product yourself.
Qualied service personnel should perform any servicing.
This product is intended for indoor, non-commercial, non-
industrial, household use only.
• Do not use outdoors. This appliance is not intended
for use by persons(including children) with reduced
physical,sensory or mental capabilities or lack of experience
and knowledge, unless they have been given supervision
or instruction concerning use of the appliance by a person
responsible for their safety.
How to unplug your fan correctly
To remove from the socket pull on the
plug, not the electrical cord
Using the mist function
of this product will
result in a humidity
increase.

WARRANTY
PLEASE RETAIN YOUR PROOF OF PURCHASE FOR
WARRANTY CLAIMS.
ALVA warrants this appliance to be free of defects in material and
quality for a period of 12 months from date of original purchase.
This warranty covers the intended use of this appliance – within
a domestic setting and not for commercial or industrial purposes.
Any damage caused by willful abuse, tampering, modication or
unauthorized repair will not be warranted.
Please retain all packaging material, as items returned without
original packaging material may be subject to a withholding fee.
Where this appliance is found to be defective, damaged, broken,
or does not work correctly for the intended purpose, you must
return the appliance to the retailer from where it was purchased.
The warranty will only be effected with valid proof of purchase.
Failure to provide the proof of purchase will most likely result in
the repair or service required being chargeable.
If you have any questions while setting up or using this Mist Fan,
please visit www.alva.co.za or call 086 100 ALVA (2582) or
e-mail info@stingray.co.za
GENERAL INFORMATION
Before using this Mist Fan, please read through this manual
and make sure you understand everything. If you are not sure,
call 086 100 ALVA (2582) or visit www.alva.co.za for help.
Reading and understanding this manual should give you a good
indication of what to expect from your Mist Fan.
Always keep your proof of purchase. Keep these instructions for
future use.
If you lose this copy, you can obtain a new copy from your dealer
or online at www.alva.co.za.

KEY
Notes marked with the
following;
Contain important
information
Notes marked with the
following;
Contain cautions and
warnings.
2
3-4
5
5
6-8
9
9
10
10
11
INDEX
PARTS LIST
ASSEMBLING THE FAN
CONTROL PANEL
REMOTE CONTROL
OPERATING THE FAN
CLEANING AND MAINTENANCE
DISPOSAL
TROUBLE SHOOTING
SPECIFICATIONS
AFTER SALES SERVICE

2
PARTS LIST ASSEMBLING THE FAN
1. Mist Outlet
2. Front Guard
3. Blade Lock Nut
4. Plastic Blade
5. Rear Guard
6. Guard Ring
7. Rear Guard Lock Nut
8. Motor Cover
9. Rear Shell
10. Nuts
11. Control Panel
12. Buttons
13. Lower Mist Tube
14. Top Cap
15. Water Tank
16. Mist Generator
17. Mist Control Knob
18. Base Cover
19. Base Weight
20. Castors
21. Screws
22. Washers
23. Support Tubes
24. Remote Control
25. Upper Mist Tube
24
25

ASSEMBLING THE FAN
1. Remove all the appliance parts from the packaging.
2. Place Base Cover (18) over the Base Weight (19) and line-up
holes.
3. Put threaded end of both Support Tubes (23) into the holes in
Base Cover (18) and secure tightly with Washers (22) and
Screws (21) through the Base Weight (19).
4. Place the motor and switch body assembly onto both Support
Tubes (23) and secure in place with the two Nuts (10). Ensure
it is tightly fastened.
5. Put the Rear Guard (5) onto the motor ensuring the Motor Cover
(8) plastic studs protude through the slots in the Rear Guard (5).
Secure in place with the plastic Rear Guard Lock Nut (7),
ensuring it is tightly fastened.
6. Slide Plastic Blade (4) onto motor shaft, making sure grooves in
the back of the blade locate in the pin through the shaft. Secure
in place with Blade Lock Nut (3). This is a left hand thread to
ensure the nut does not come loose during operation.
7. Fix the Mist Oulet (1) to Front Guard (2) with the screws, making
sure securely tightened.
8. Attach the Front Guard (2) to the Rear Guard (5) using the plastic
Guard Ring (6). Secure Guard Ring (6) by tightening integrated
Guard Ring (6) screw and nut assembly which should be
positioned at the bottom.
9. Lay mist fan down carefully and mly press ve Castors (20) into
Base Weight (19). Lift fan up onto castors.
10. Connect free end of Upper Mist Tube (25) to the Mist Outlet (1).
Ensure well connected so there is no leak when using fan mist
function.
11. Place Mist Generator (16) onto Base Cover (18) in its
designated area, with the Mist Control Knob (17) facing the
front of the fan.
12. Place the Water Tank (15) onto the Mist Generator (16), with
Alva Air name facing the front of the fan.
13. Connect free end of the Lower Mist Tube (13) to the Top Cap
(14). Ensure well connected so there is no leak when using
the mist function.
14. Place Top Cap (14) onto the top of Water Tank (15) and ensure
it seats correctly.
3

4
Loosen Tighten (Fig.1)
23
15
16
18
14
Fill the water tank (15):
Unscrew the valve cover to open the water tank turning it anticlock-
wise. Fill the water tank with cold and clean water making sure not
to overll it.
To close the water tank, screw the valve cover back on securely
turning it clockwise.
Turn the water tank over and place it back into its designated space
on the Mist Generator (16) (Fig.1) with Alva Air name facing the front
of the fan.
Place Top Cap (14) on the Water Tank (15)
Make sure the fan is
unplugged from the
mains before lling
or relling the water
tank.
ONLY USE WATER IN
THE WATER TANK.
Do not use any
chemicals, oils or other
additives.
ONLY USE COLD OR
LUKE WARM WATER
IN THE WATER TANK.
The water temparature
must not be
warmer than 40ºC.

5
CONTROL PANEL
REMOTE CONTROL
Indicator light:
1. Timer indicator
2. Speed: low-medium-high
3. Mode: Nature/Normal/Sleep
4. Oscillation
5. Mist indicator
6. Power on indicator
7. Water Indicator
Buttons:
A. On/Off
B. Speed
C. Mode
D. Timer
E. Oscillation
F. Mist
Buttons:
A. On/Off
B. Speed
D.Timer
E.Oscillation
F. Mist
Rotary Knob:
17. Mist Control Knob
OSC L
MIST NT NL SL
POWE R
OSC MIS T
TIME
OFF
0.5H 1H 2H 4H
SPEED ON
A
D
F
1
2
3
6
4
5
E
F
D
B
E
C
A
Inserting batteries into the remote control
Remove the battery cover from
the back of the unit and insert
the batteries in accordance with
the polarity of the batteries .
(Figure I)
Replace the old batteries with
the same type of batteries or
the Mist Fan function may be
impaired.
Remove the batteries before
long periods of non-use to
prevent leakage which will
damage the remote control.
Fig.I
7
17
B
Please read these
instructions carefully
before use and keep
them in a safe place
for future reference.
Before using the
remote control,
remove the clear
plastic protector
protruding from the
battery compartment
of the remote control.
Replacement
Battery
CR2025
Available from
www.stingray.co.za

6
OPERATING THE FAN
ON/OFF Button (A):
• Press the On/Off button once to activate the fan.
The indicator light (6) will illuminate on the control panel.
You can now press the MIST (F) button to select the mist
function without fan operation (mist only).
• Press the On/Off button a second time to turn on the fan: the
unit will operate at low speed and the related indicator light (2)
will illuminate on the control panel. You can now select other
functions (speed, mode, timer, mist).
• Press the On/Off button when the unit is on to turn it off.
SPEED Button (B):
• To start the fan at low speed, press the On/Off button (A) once
(when unit is Off): the unit will operate at low speed and the
L indicator light (2) will illuminate on the control panel.
• Press the speed button once to select the medium speed:
the M indicator light (2) will illuminate on the control panel.
• Press the speed button a second time to select the high
speed: the H indicator light (2) will illuminate on the control panel.
Cyclic function.
MODE Button (C):
• When you press the On/Off button once, the fan will operate in
Normal mode. The set speed will operate continously and the NL
indicator light (3) will illuminate on the control panel.
• On the remote control press the mode button once to change
to Nature mode: the unit simulates a gentle breeze and the
NT indicator light (3) will iluminate on on the control panel.
These functions below can be operated either from the buttons on
the fan control panel, or by using the remote control.
The remote control has a direct line of sight range of approximately
6m.
This product has both a mist and fan function which can be used
togther or separately.
The mist both cools and humidies the air for more comfortable living
conditions when very hot and the air is dry.
Table of contents
Other Stingray Fan manuals


Popular Fan manuals by other brands

ELTA FANS
ELTA FANS H03VV-F installation guide

Hunter
Hunter 20714 Owner's guide and installation manual

Emerson
Emerson CARRERA VERANDA CF542ORB00 owner's manual

Hunter
Hunter Caraway Owner's guide and installation manual

Panasonic
Panasonic FV-15NLFS1 Service manual

Kompernass
Kompernass KH 1150 operating instructions


