Sony CDU948S User manual

CDU948S
CD-R Drive Unit
User’s Guide
©1997 by Sony Corporation Printed in Japan
CDU948S
CD-R Drive Unit
User’s Guide
3-862-158-13(1)

2
Owner’s Record
The model and serial numbers are located on the bottom of the drive. Record these
numbers in the spaces provided below. Refer to them whenever you call upon your sales
representative regarding this product.
Model No. Serial No.
Safety Regulations
WARNING
To prevent fire or shock hazard, do not expose the unit to rain or moisture.
To avoid electrical shock, do not open the cabinet. Refer servicing to qualified personnel
only.
CAUTION
As the laser beam in this CDU948S is harmful to the eyes, do not attempt to disassemble
the cabinet. Refer servicing to qualified personnel only.
The use of optical instruments with this product will increase eye hazard.
The use of controls or adjustments or performance of procedures other than those
specified herein may result in hazardous radiation.
DANGER
INVISIBLE LASER RADIATION WHEN OPEN.
AVIOD DIRECT EXPOSIRE TO BEAM
VORSICHT
UNSICHTBARE LASERSTRAHLUNG. WENN ABDECKUNG
GEOFFNET
NICHT DEMSTRAHL AUSSETZEN.
This label is located on the drive unit’s internal
chassis.
Dieses Etikett befindet sich auf dem inneren Chassis
des Laufwerkes.
DANGER
DANGER
VORSICHT
ADVARSEL
ADVARSEL
VARNING
VAROI
INVISIBLE LASER RADIATION WHEN OPEN.
AVOID DIRECT EXPOSURE TO BEAM.
RADIATIONS INVISIBLES DU LASER EN CAS D'OUVERTURE.
EVITER TOUTE EXPOSITION DIRECTE AU FAISCEAU.
UNSICHTBARE LASERSTRAHLUNG, WENN ABDECKUNG GEÖFFNET.
NICHT DEM STRAHL AUSSET ZEN.
USYNLIG LASERSTRÅLING VED ÅBNING.
UNDGÅ UDS/ETTELSE FOR STRÅLING.
USYNLIG LASERSTRÅLING NÅR DEKSEL ÅPNES.
UNNGÅ EKSPONERING FOR STRÅLEN.
OSYNLIG LASERSTRÅLING NÅR DENNA DEL AR ÖPPNAD.
STRÅLEN ÄR FARLIG.
NÄKYMÄTÖN AVATTAESSA OLET ALTTINA LASERSÄTEILYLLE.
ÄLÄ KATSO SÄTEESEN.
This label is located on the bottom of the drive unit enclosure.
Dieses Etikett befindet sich am Boden des Laufwerksgehäuses.

3
This unit uses CD-R discs with the following mark.
This unit uses CD-ROM discs with the following mark.
When you use this unit as a CD player, use compact
discs with the following mark.
WARNING — For the customers in U.S.A.
You are cautioned that any changes or modifications not expressly approved in this
manual could void your authority to operate this equipment.
Note:
This equipment has been tested and found to comply with the limits for a Class B digital
device, pursuant to Part 15 of the FCC Rules. These limits are designed to provide
reasonable protection against harmful interference in a residential installation. This
equipment generates, uses, and can radiate radio frequency energy and, if not installed
and used in accordance with the instructions, may cause harmful interference to radio
communications. However, there is no gurantee that interference will not occur in a
particular installation. If this equipment does cause harmful interference to radio or
television reception, which can be determined by turning the equipment off and on, the
user is encouraged to try to correct the interference by one or more of the following
measures:
- Reorient or relocate the receiving antenna.
- Increase the separation between the equipment and receiver.
- Connect the equipment into an outlet on a circuit different from that to which the
receiver is connected.
- Consult the dealer or an experienced radio/TV technician for help.
CLASS 1
LASER PRODUCT
LASER KLASSE 1
PRODUKT
This CD-R drive unit is classified as a CLASS 1 LASER
PRODUCT.
The CLASS 1 LASER PRODUCT label is located at the
bottom of the enclosure.
Bei diesem CD-R-Laufwerk Serie handelt es sich um ein Laser-Produkt der Klasse 1.
Dieses Etikett befindet sich am Boden des Laufwerksgehäuses.

4
Contents
Introduction 5
Location and Function of Parts and Controls 6
Front Panel ......................................................................................... 6
Rear Panel .......................................................................................... 7
Precautions 8
Example of System Setup 9
Installing the Drive Unit into the Computer 10
Getting Started ................................................................................. 10
Setting the Jumpers.......................................................................... 10
Opening the Computer ..................................................................... 12
Connecting the Drive ........................................................................ 13
Mounting the Drive ........................................................................... 14
Host Adapter Installation .................................................................. 16
Closing the Computer ....................................................................... 17
Installing the Software Driver 18
Using Discs and Caddies 19
Loading a Caddy with a Disc ............................................................ 19
Storing Discs and Caddies ............................................................... 21
Care of Discs .................................................................................... 21
Operating the Drive 22
Starting Up........................................................................................ 22
Ejecting a Caddy .............................................................................. 23
Specifications 25

5
Introduction
The CDU948S is a drive unit for CD-R discs, which stores a
maximum of 650 Mbytes of digital data.
The drive unit has the following features:
• Reads and writes data in each CD-ROM, CD-ROM XA and
Multi-Session standard formats.
• Reads standard CD-DA (“Red Book”) encoded discs, and reads
and writes CD-R discs conforming to “Orange Book Part II.”
• Supports the following write modes: Disc at once, Session at once,
Track at once, Variable packet, Fixed packet and Multisession.
• Outputs the audio as 16-bit digital data over the SCSI interface.
• Supports read and write operation at each standard speed, double
speed and quadruple speed, and read-only operation at eightfold
speed.
Supports real time error correction at all speeds.
• 5 1/4 inch half-height drive form factor.
• SCSI bus interface embedded. (Based on SCSI-2)
• 2 MB buffer memory.
• Capable of audio CD playback provided with audio line output
and headphones jack.
• Fast access time assures high-speed reading and writing opera-
tions.
• CD caddy for disc protection.
• Power loading and power eject.
• Emergency eject function which allows the caddy to be ejected
manually.
• Capable of real time layered error correction.
• Employs a casing with an airtight frame.
■Software requirement
Install the appropriate application software before using this unit.
Introduction

6
Location and Function of Parts and Controls
Front Panel
CD CaddyCD Caddy
11
11
1Caddy insertion slot
Accepts a caddy loaded with a CD-ROM or CD-R disc.
22
22
2Emergency eject hole
Insert a fine rod into this hole to eject a caddy manually in
emergencies.
33
33
3Eject button
Ejects the caddy from the drive unit.
44
44
4Busy indicator
This indicator shows the unit’s status in various phases of
operation.
* Seek, read and write: Flashes amber
* Error: Lights up amber and stays lit
When the power is turned on, the indicator lights up green.
55
55
5Volume control
Controls the volume of the analog audio output provided via a
headphones jack.
66
66
6Headphones jack
Provides two channel analog audio output.
Location and Function of Parts and Controls

7
Rear Panel
11
11
1Jumper block for SCSI bus
Specify assignment of the SCSI bus.
22
22
2Terminators
The terminator resistors are inserted into the sockets. Remove the
resistors when the SCSI bus is to be terminated externally.
Note:
Some models are shipped without terminators.
When installing the terminators, orient them so that the GND pin
(the end marked with a dot) is toward the right side of the socket.
33
33
3Power-in connector
Connect to the power supply of the host computer.
44
44
4SCSI bus interface connector
Connect to a SCSI host adapter using a connecting cable.
55
55
5Audio output connector
Outputs analog audio signals.
See page 14 for detail.
66
66
6Frame ground tab
Connect to one of the host computer’s ground cables when the
drive frame is not in direct contact with the computer.
Location and Function of Parts and Controls

8
Precautions
■Installation
• Avoid placing the drive in a location subject to:
–high humidity
–high temperature
–excessive dust
–mechanical vibration
–direct sunlight.
We recommend to use the drive in a horizontal position. Do not use
it in a tilted position.
■Operation
• Do not move the drive during operation. This may cause it to
malfunction during reading or writing.
• Avoid exposing the drive to sudden changes in temperature as
condensation may form on the lens inside the drive as a result.
Should the surrounding temperature suddenly rise while the drive
is on, wait at least one hour before you turn off the power.
Operating the drive immediately after a sudden increase in
temperature, may result in a malfunction during reading or
writing.
■Transportation
• Keep the original packing materials for future transport of the
drive.
• Remove the caddy before moving the drive and, if you take the
drive out of the computer, repack the drive as you received it.
Precautions

9
Example of System Setup
To use the CD-R device, the following components are required:
• Computer (IBM-PC/AT* compatible)
• SCSI-Host adapter
• SCSI-Interface cable (50 to 50 pin flat cable)
• Software (Device driver, utilities)
Example of System Setup
* IBM-PC/AT is a registered trademark of International Business Machines
Corporation.

10
Installing the Drive Unit into the Computer
As you go through this section, you may wish to refer to your
computer’s manual for a more detailed description of how to install
internal drives.
Getting Started
• Prepare the necessary parts and tools that have not been supplied:
–Screwdriver
–four screws 3 mm in diameter (Screws must not extend more
than 4.0 mm into the side panels or the bottom plate.)
–two mounting rails if your computer has mounting tracks.
• Unplug the computer and disconnect the cables attached to the
back for your own safety. Do not turn on the power of the
computer before completing the entire installation process.
Setting the Jumpers
Set the jumpers on the rear panel of the drive unit in accordance
with the configuration of your computer system.
The jumpers are preset, as illustrated below, at the factory.
Installing the Drive Unit into the Computer
Other manuals for CDU948S
1
Table of contents
Other Sony CD/CDR Drive manuals
Popular CD/CDR Drive manuals by other brands

SmartDisk
SmartDisk Firewire CD-R/W user guide

Axis
Axis CD-ROM SERVER Quick installation guide

LG
LG CRD-8322B owner's manual

Memorex
Memorex 32023234 - 52x32x52x External USB2.0 CD... Hardware guide
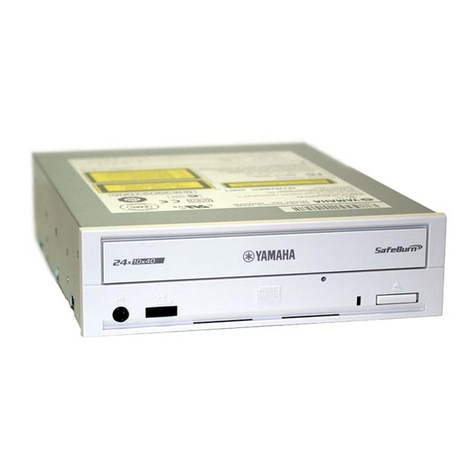
Yamaha
Yamaha CD Recordable/Rewritable Drive CRW3200 owner's manual
Panasonic
Panasonic KX-LD742 operating instructions