
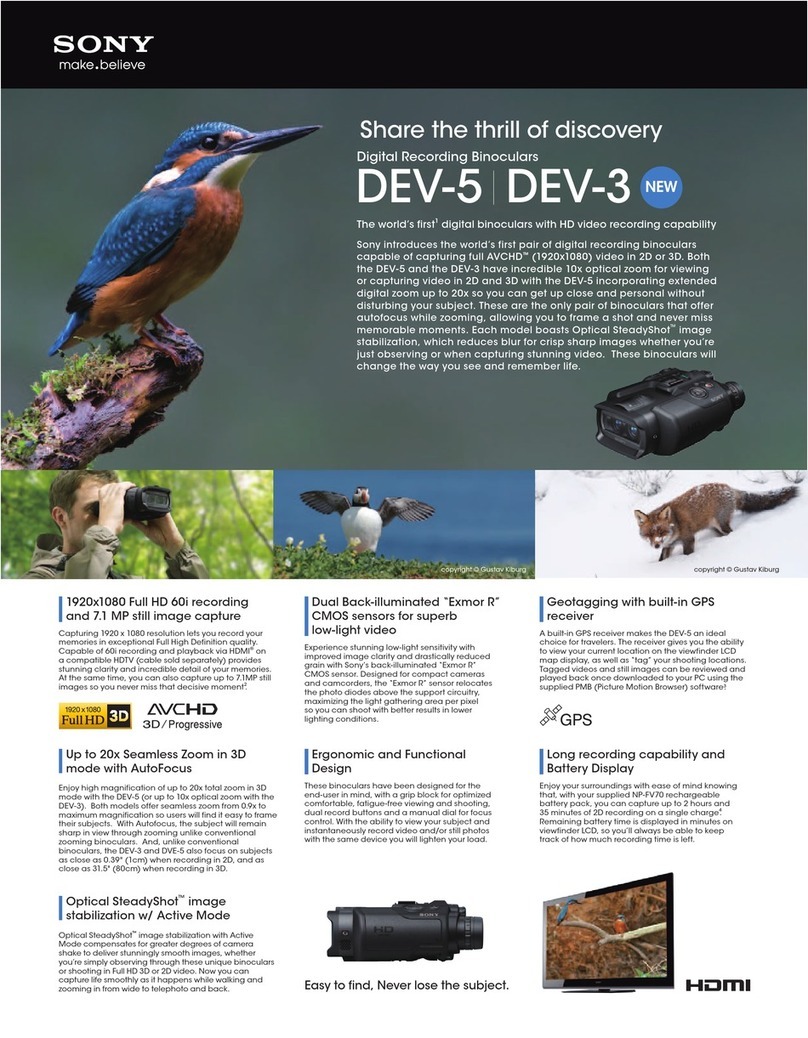
Sony DEV-3 Digital Recording Binoculars User manual

クイックスタートガイド JP
Quick Start Guide ENG
Guide de démarrage FR
Guía de inicio rápido ES
Kurzanleitung DE
Beknopte handleiding NL
Guia de início rápido PT
Guida rapida IT
Οδηγός γρήγορης έναρξης χρήσης
GR
Skrócona instrukcja PL
Průvodce pro rychlý start
CZ
Sprievodca rýchlym spustením
SK
Ghid de pornire rapidă RO
Руководство по быстрому запуску
RU
Посібник для швидкого початку роботи
UA
快速⼊门指南 CS
快速⼊⾨指南 CT
빠른 시작 설명서 KR
TH
Digital Recording Binoculars
Quick Start Guide
DEV-3/5/5K
4-410-133-01(1)
JP
2
クイックスタートガイド
1 バッテリーを取り付ける
バッテリーカバーロックを回し、
OPENにあわせて、バッテリーカ
バーを開ける。
溝に合わせる
バッテリーをスライド溝に合わせ
て()、「カチッ」と音がするまで
バッテリーを押し込む()。
バッテリーカバーを閉じて、ロック
する。
バッテリーはあらかじめ充電してお使いください。
2 電源を入れる
緑のボタンを押しながら、POWER
スイッチをONにする。
3 視度を調整する
視度調整ダイヤルを回して左右の眼そ
れぞれで画像がはっきり見えるように
合わせる。
使用者が変わる場合は、使用のたびに視度
調整を行ってください。
視度調整は、右眼と左眼で交互に行ってく
ださい。

JP
3
4 眼幅を調整する
IPD ADJダイヤルを引き出す。
ファインダーの画像を見ながらIPD
ADJダイヤルを回して、左右のファ
インダーの間隔を自分の眼幅に合
わせる。
左右のファインダーの画像が見やすく
重なる位置に合わせてください。
映像が二重に見えていないことを確認
してください。
使用者が変わる場合は、使用のたびに
眼幅調整を行ってください。
IPD ADJダイヤルを押し込む。
5 初期設定を行う
Enterボタン ////Enterボタンを使って、
言語設定、エリア設定、サマータイ
ム設定、日付表示設定、日付設定を
行い、各設定を確認する。
お使いの国、地域のテレビ方式
に合わせて[60i(NTSC)]または
[50i(PAL)]を選び、 を選んで
Enterを押す。
60i/50i切換の設定をすると、システ
ム変更のため本機は再起動します。
お使いの国、地域のテレビ方式につい
ては、5ページを参照してください。
JP
GB

JP
4
ファインダーの表示位置を確認す
る。
横線が縦線と重なって見えること
を確認します。
横線と縦線が重なって見えない場
合は、 /で横線と縦線が重
なるように画像を調整して、
を選んでください。
インジケーター
[実行]を選び、
3Dレンズを調整する。
被写体を画面に表示して、インジ
ケーターの目盛りがを超えたとき
に、 を選ぶ。
屋外の明るい場所や、さまざまな色や
形などがある被写体を映すと目盛りが
上がりやすいです。
操作方法の詳細については、取扱説明書、デジタル録画双眼鏡ハンドブックをご覧くだ
さい。
使ってみる
START/STOPボタン
ズームレバー
本機を両手で持ち、被写体に向ける。
本機のズームレバーで倍率を調整できます。
本機はオートフォーカス機能により、ピン
ト調節が自動で行われます(お買い上げ時
の設定)。マニュアルでピント調節するこ
ともできます。
START/STOPボタンを押すと、動画を記録
できます。
操作方法の詳細については、取扱説明書、デ
ジタル録画双眼鏡ハンドブックをご覧くだ
さい。

JP
5
防水/防滴について
本機は防水/防滴仕様ではありません。
3D映像の視聴について
3D映像の視聴中に目の疲労、疲れ、気分が悪くなるなどの不快な症状が出ることがありま
す。
3D映像を視聴するときは、定期的に休憩をとることをおすすめします。必要な休憩の長
さや頻度は個人によって異なりますので、ご自身でご判断ください。
不快な症状が出たときは、回復するまで3D映像の視聴をやめ、必要に応じて医師にご相談
ください。
本機に接続する機器やソフトウェアの取扱説明書もあわせてご覧ください。
なお、お子さま(特に6歳未満の子) の視覚は発達段階にあります。お子さまが3D映像を視
聴する前に、小児科や眼科などの医師にご相談いただくことをおすすめします。
大人のかたは、お子さまが上記注意点を守るよう監督してください。
テレビで見るには
本機で撮影した動画をテレビで見るには、あらかじめ[60i/50i切換]をご覧になる国や地
域で採用されているテレビ方式に合わせて設定して撮影してください。
60i(NTSC)、50i(PAL)に設定するそれぞれの国と地域は下記の通りです。
[60i/50i切換]を[60i(NTSC)]に設定する国と地域
日本、アメリカ、エクアドル、カナダ、韓国、コロンビア、ジャマイカ、スリナム、台湾、中央ア
メリカ、チリ、バハマ、フィリピン、ベネズエラ、ペルー、ボリビア、メキシコなど
[60i/50i切換]を[50i(PAL)]に設定する国と地域
アルゼンチン、イギリス、イタリア、イラク、イラン、インドネシア、ウクライナ、ウルグアイ、
オーストラリア、オーストリア、オランダ、ギリシャ、クウェート、クロアチア、シンガポー
ル、スウェーデン、スイス、スペイン、スロバキア、タイ、チェコ、中国、デンマーク、ドイツ、
トルコ、ニュージーランド、ノルウェー、パラグアイ、ハンガリー、フィンランド、ブラジル、
フランス領ギアナ、フランス、ブルガリア、ベトナム、ベルギー、ポーランド、ポルトガル、香
港、マレーシア、モナコ、ルーマニア、ロシアなど
使用上のご注意

ENG
2
Quick Start Guide
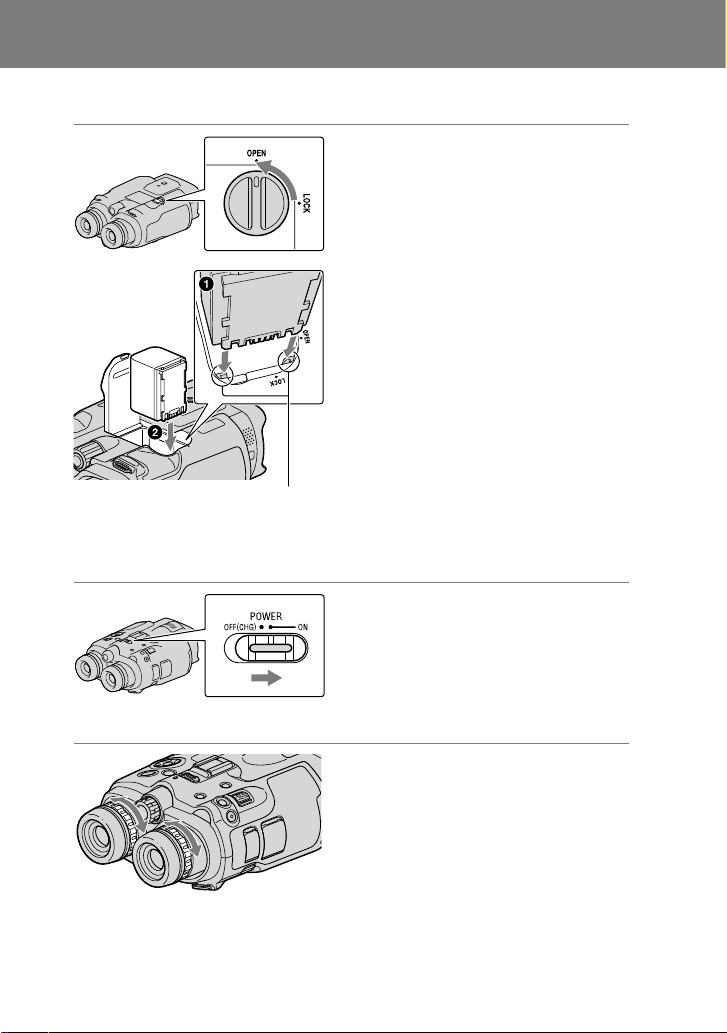
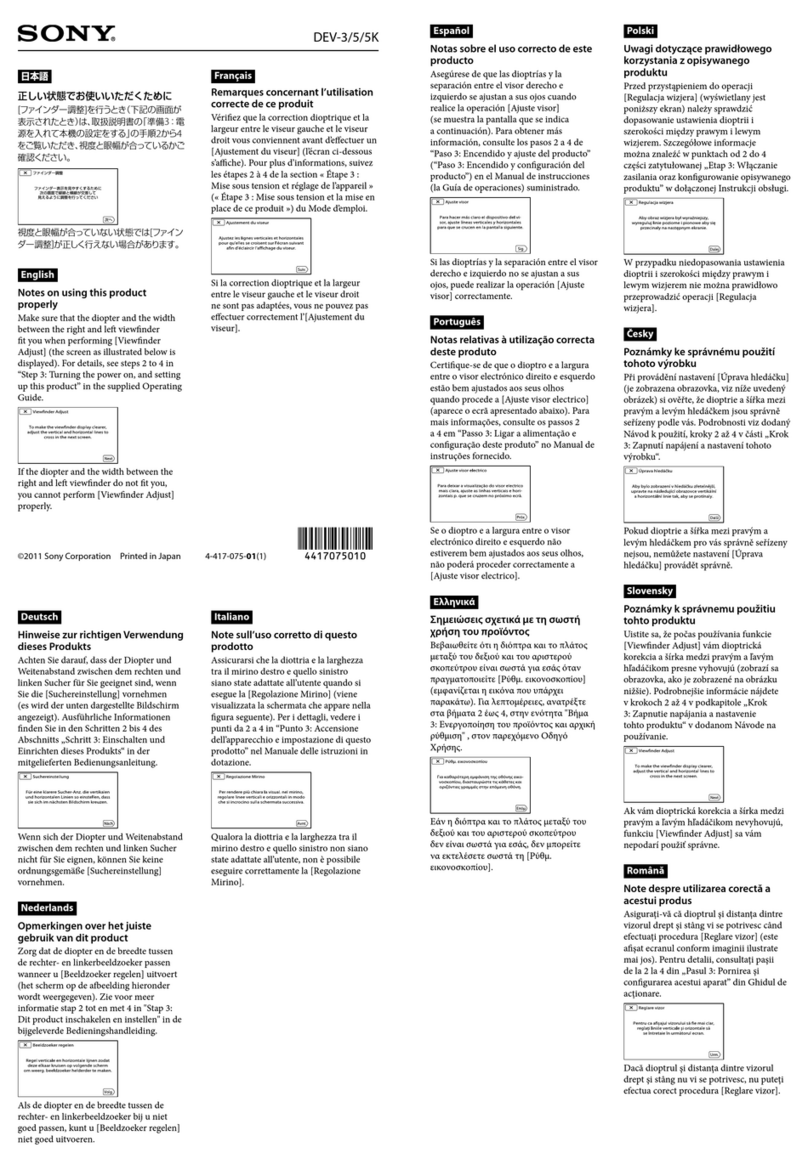
1 Installing the battery pack
Turn the battery cover lock to OPEN
and open the battery cover.
Align the battery
with the groove.
Align the battery with the groove in
the battery compartment (), and
slide the battery until it clicks ().
Close the battery cover and turn the
battery cover lock to LOCK.
Please be sure to charge the battery pack before use.
2 Turning on the power
Set the POWER switch to ON by
pressing the green button.
3 Adjusting the diopter
Adjust the diopter until you can see a
clear image with each eye by turning
the diopter adjustment dial.
If this product is used by more than one
person, adjust the diopter each time the
user changes.
Adjust the diopter for each eye separately.

ENG
3
4 Adjusting the eyepiece position
Pull out the IPD ADJ dial.
Adjust the width between the left
and right viewfinder to fit your eyes
using the IPD ADJ dial.
Adjust the width so that left and right
images overlap.
Make sure that the image in the
viewfinder does not look like it has a
double image.
If this product is used by more than one
person, adjust the width each time the
user changes.
Push the IPD ADJ dial back into this
product.
5 Setting up this product
Enter button Set the language, area, summer
time, date & time format, and date
& time using the ////Enter
button, then confirm each setting.
Select [60i (NTSC)] or [50i (PAL)] to
suit the TV color system used in
your country/region, then press
Enter.
When the 60i/50i selection is made,
this product restarts to update the
system.
See page 5 for details on the TV color
system in your country/region.
ENG
ENG
4
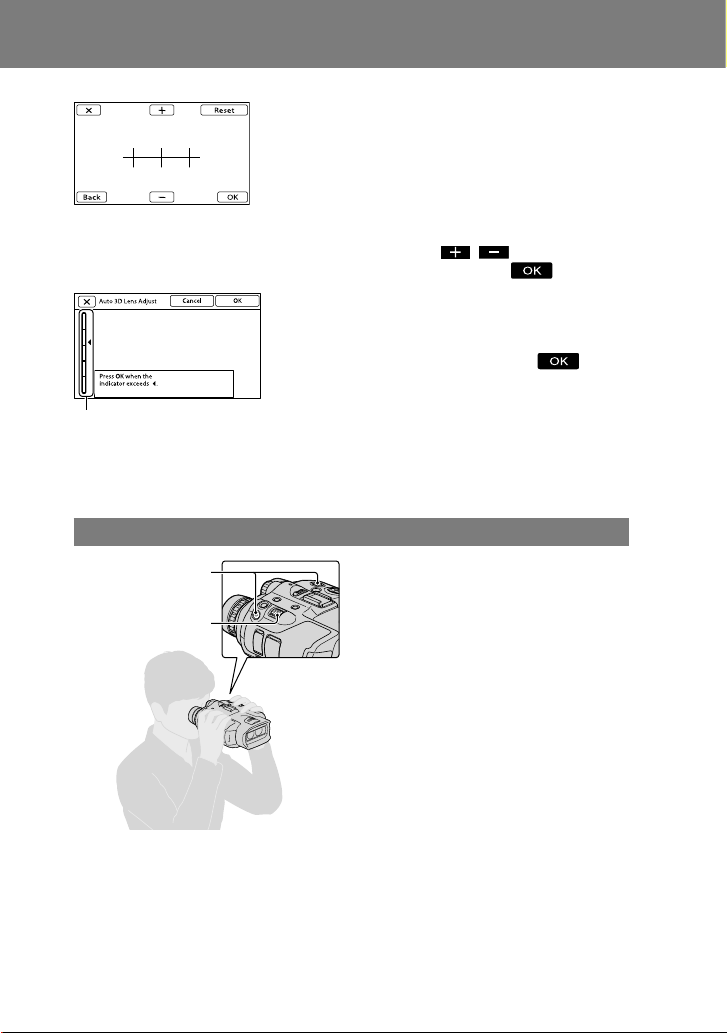
Adjust the relative vertical position
of the right and left viewfinder.
Make sure that the horizontal line
overlaps the vertical lines.
If the horizontal line and the vertical
lines do not overlap, adjust the
position of the horizontal line by
selecting / until the lines
overlap, then select .
Scale
Select [Run] and adjust the 3D lens.
Display a subject on the screen.
When the scale shows a level higher
than the mark, select .
The scale shows a higher level when
bright subjects such as objects outdoors
in daylight or subjects with various
colors and shapes are displayed on the
[Auto 3D Lens Adjust] screen.
Refer to the operating guide or Digital Recording Binoculars Handbook for details.
Using the product
START/STOP button
Power zoom lever
Hold this product with both hands and
aim it at the subject.
You can magnify images with the power
zoom lever of this product.
This product adjusts the focus automatically
with the auto-focus function (default
setting). You can also adjust the focus
manually.
You can record a movie by pressing START/
STOP.
Refer to the operating guide or Digital
Recording Binoculars Handbook for details.

ENG
5
About waterproof/dripproof performance
This product is not waterproofed or dripproofed.
Viewing 3D video images
Some people may experience discomfort (such as eye strain, fatigue, or nausea) while
watching 3D video images.
Sony recommends that all viewers take regular breaks while watching 3D video images. The
length and frequency of necessary breaks will vary from person to person. You must decide
what works best.
If you experience any discomfort, you should stop watching the 3D video images until the
discomfort ends; consult a doctor if you believe necessary.
You should also review the instruction manual of any other device or media used with this
product.
The vision of young children (especially those under six years old) is still under development.
Consult your doctor (such as a pediatrician or eye doctor) before allowing young children to
watch 3D video images.
Adults should supervise young children to ensure they follow the recommendations listed
above.
Watching the recorded movies on a TV
To watch recorded movies on a TV, record movies after selecting the appropriate [60i/50i Sel]
setting for the TV color system of the country/region where you are using this product.
The following are the countries and regions where you need to set 60i(NTSC) or 50i(PAL).
Countries/regions where you need to set [60i/50i Sel] to [60i (NTSC)]
Bahama Islands, Bolivia, Canada, Central America, Chile, Colombia, Ecuador, Guyana, Jamaica,
Japan, Korea, Mexico, Peru, Surinam, Taiwan, the Philippines, the USA, Venezuela, etc.
Countries/regions where you need to set [60i/50i Sel] to [50i (PAL)]
Argentina, Australia, Austria, Belgium, Bulgaria, Brazil, China, Czech Republic, Denmark,
Finland, France, Germany, Guiana, Holland, Hong Kong, Hungary, Iran, Iraq, Italy, Kuwait,
Malaysia, Monaco, New Zealand, Norway, Paraguay, Poland, Portugal, Russia, Singapore,
Slovak Republic, Spain, Sweden, Switzerland, Thailand, Ukraine, United Kingdom, Uruguay,
etc.
Notes on use

FR
2
Guide de démarrage
1 Installation de la batterie
Tournez le verrou du cache de
protection de la batterie sur OPEN,
puis ouvrez-le.
Alignez la batterie
sur la rainure.
Alignez la batterie sur la rainure qui
se trouve dans le compartiment de
la batterie (), puis faites-la glisser
jusqu’à ce qu’elle s’enclenche ().
Fermez le cache de protection de la
batterie puis faites tourner le verrou
sur LOCK.
Veillez à recharger la batterie avant toute utilisation.
2 Mise sous tension
Réglez le commutateur POWER sur ON
en appuyant sur la touche verte.
3 Réglage de la correction dioptrique
Réglez la correction dioptrique jusqu’à
ce que l’image soit nette pour chaque
œil en tournant la molette de
correction dioptrique.
Si plusieurs personnes utilisent l’appareil,
réglez la correction dioptrique à chaque
changement d’utilisateur.
Réglez la correction de dioptrique pour
chaque œil séparément.
Other manuals for DEV-3 Digital Recording Binoculars
5
This manual suits for next models
2
Table of contents
Languages:
Other Sony Binoculars manuals
Sony
Sony DEV-50 User manual

Sony
Sony DEV-50 User manual
Sony
Sony DEV-50 User manual

Sony
Sony DEV-3 Digital Recording Binoculars Use and maintenance manual
Sony
Sony DEV-3 Digital Recording Binoculars User manual
Sony
Sony DEV-3 Digital Recording Binoculars Guide

Sony
Sony DEV-30 User manual
Sony
Sony DEV-3 Digital Recording Binoculars User manual

Sony
Sony DEV-50 User manual

Sony
Sony DEV-3 Digital Recording Binoculars User manual


