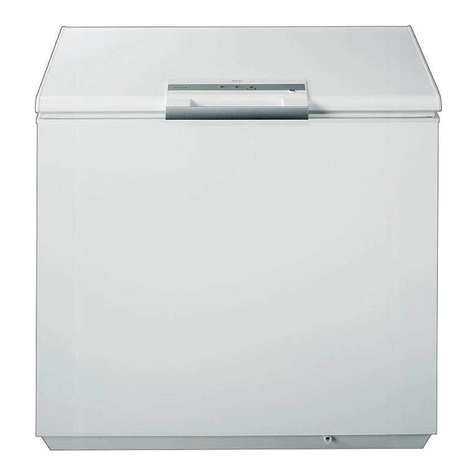
Smeg CV235BNF User manual

Instructions for use
Upright freezer

142541
Thank you for your condence in buying our
appliance and congratulations on the excellent
choice. We hope it will successfully serve its
purpose for many years.
Upright freezer is used in households for freezing
fresh food and storage of frozen food for up to one
year (depending on the type of food).
Before rst operation ....................................... 3
Description of the appliance ............................ 5
Installation and connection.............................. 7
Reverse door swing ........................................ 9
Control panel .................................................. 10
Freezing and storage of frozen food ............. 13
Defrosting the appliance................................. 16
Cleaning .......................................................... 17
Troubleshooting guide.................................... 18
Noise level ....................................................... 20
2

142541
•Before connecting the appliance read these
instructions carefully. They describe the appliance
and provide instructions for its safe and correct
use. The instructions are prepared for different
types and models of the appliance so they may
contain descriptions of functions and components
your appliance may not have.
Instructions also contain the NO FROST freezer
version, with integrated fan and automatic defrost.
•Remove the wrapping protecting the appliance
during transport. Door corners are tted with
protective spacers. Remove the spacers and
replace them with the attached pegs.
•Before connecting the appliance to the mains
supply, leave it in upright position for about 2
hours. This will reduce possibility of malfunctions
in the cooling system resulting from prior transport
and handling.
•The appliance must be connected to the
mains supply in accordance with the standing
regulations and local requirements.
•The appliance must not be used in open air or
exposed to weather precipitation.
•Always disconnect the appliance from power
supply (pull the power cord from wall socket)
before cleaning and before replacing the light
bulb.
•If the power supply cord is damaged, in order to
avoid hazard it must be replaced by the service or
by qualied personnel.
•In case of long periods not using the appliance,
turn the appliance off with the ON/OFF button
and disconnect it from mains supply. Empty the
appliance, clean the interior and leave the door
ajar.
•For the protection of environment, please contact
local Borough or Council for authorised removal.
•Wrappings contain environmentally friendly
materials which can be recycled, recovered or
disposed without threat to the environment.
3
Before rst operation

142541
•To prevent any pollution be careful not to damage
the insulation or refrigeration tubes at the rear wall
during the installation, cleaning and disposal of
the appliance.
•Never let the children play with the appliance.
•Self closing door (certain models only) hinge pulls
the door to the cabinet just before closing, thereby
preventing the door to remain ajar. Equally it limits
the door opening angle and prevents damage to
adjacent elements.
•Rating plate with basic information is located in
the interior of the appliance. If the sticker plate is
not suitable for your language, replace it with the
attached one.
The symbol on the product or on its
packaging indicates that this product
may not be treated as household
waste. Instead it shall be handed over
to the applicable collection point for the
recycling of electrical and electronic
equipment. By ensuring this product
is disposed of correctly, you will help
prevent potential negative consequences
for the environment and human health,
which could otherwise be caused
by inappropriate waste handling of
thisproduct. For more detailed information
about recycling of this product, please
contact your local city ofce, your
household waste disposal service or the
shop where you purchased the product.
4

142541
1 Control panel
2 Interior light
3 Freezing compartment
4 Fast freeze for small quantities
of food*
5 Large storage compartment
- BIG’N’FREEZE DRAWER*
6 Storage compartment
7 Defrost drain outlet groove
8 Legs
9 Wheels*
• Interior accessories of the appliance may vary according to the model.
• Drawers are protected against accidental extraction. To extract the drawer from the appliance,
open it and lift front part upwards, then pull it out. Certain models are tted with pull-out slide
guides which facilitate opening. Pull-out guide drawers are extracted by lifting the rear end and
pulling out inclined under the 45° angle. Reinsert in opposite sequence.
* Certain models only.
TRADITIONAL FREEZER
5
Description of the appliance

142541
1 Control unit
2 NO FROST freezing unit
(cooler, fan ...)*
3 Interior illumination
4 Freezing and storage area
5 Large space - BIG’N’FREEZE
drawer*
6 Leg
7 Wheel*
NO FROST FREEZER
• Interior accessories of the appliance may vary according to the model.
• Drawers are protected against accidental extraction. To extract the drawer from the appliance,
open it and lift front part upwards, then pull it out. Certain models are tted with pull-out slide
guides which facilitate opening. Pull-out guide drawers are extracted by lifting the rear end and
pulling out inclined under the 45° angle. Reinsert in opposite sequence.
• Fan (hid within the freezer unit) provides better distribution of temperature. It is off when the
freezer door is open, or during idle compressor periods.
* Certain models only.
6

142541
•Place the appliance in dry and well aired room.
The appliance operates best at temperature
ranges indicated in the chart below. See relevant
class of the appliance indicated on the rating
plate.
Class Ambient temperature
SN (subnormal) from +10°C to +32°C
N (normal) from +16°C to +32°C
ST (subtropical) from +18°C to +38°C
T (tropical) from +18°C to +43°C
Positioning the appliance requires two people in
order to avoid possible damage.
• Place the appliance rmly on a at and solid base.
The appliance is tted with adjustable feet on
the front side, used to level the appliance. Rear
side of the appliance is tted with wheels (certain
models only) facilitating the positioning of the
appliance at the preselected place.
•The element above the appliance must be at
least 5 cm away to allow sufcient cooling of the
condenser.
• Avoid exposing the appliance to direct sunlight
or heat sources. If this is not possible, place
insulation between the appliance and adjacent
heat source.
• Bottom front corners of the appliance is tted with
handles to facilitate moving of the appliance may
stand independently or adjacent to a furniture
element or wall. Be sure to leave enough space
for the opening of the door, to avoid damage to
the appliance or injury to people.
7
Installation and connection
Selecting the location
Positioning the
appliance

142541
•Use the power cord to connect the appliance to
the mains power. Wall outlet must be tted with
ground terminal (safety socket). Nominal voltage
and frequency are indicated on the relevant label
or rating plate of the appliance.
•Mains power connection and grounding must be
made in accordance to standard regulations and
requirements.
The appliance is able to accommodate minor
temporary voltage uctuations, which do not exceed
-10% to +6%.
8
Connecting to power
supply

142541
Required tools; socket spanner nr. 8,
screwdriver, torx 25
Caution! After unscrewing of before xing hinges,
hold the door to prevent it from falling and
damaging.
1. Remove upper hinge cover (keep it for eventual
later use), together with cover on the opposite
side of the upper hinge cover (on the opposite
side you will insert the attached cover during the
assembly), and remove the cover on the opposite
side of the upper part of the door.
2. Unscrew upper hinge screws and remove the
door from the bottom hinge.
3. On the bottom side of the door unscrew the swing
stopper screws and remove the stopper (A).
Keep this for later use. Fix the attached stopper
with its bearing on the opposite side of the door.
4. Unscrew the forced door closure system (B)
and x it to the opposite side of the door (certain
models only).
5. Tilt the appliance backward (max. 35°) to lean
to the rear side of the cabinet. Unscrew the leg
support screws (C) - left and right, and remove
the leg support cover (D). Unscrew and remove,
then reciprocally replace the position of end
switch (E) and decorative peg (F) (for models
with forced door closing system). Place this on
the opposite side. Unscrew three screws xing
the bottom hinge (keep this for possible later
use), and x the attached bottom hinge on the
opposite side.
6. Proceed with the assembly procedure in opposite
sequence.
Note:
In appliances with the handle along the entire height
of the door, the reverse door swing is not possible.
9
Reverse door swing

142541
The description refers to the appliance with all
available accessories, so that it could contain
certain settings our model may not have.
A Temperature selector and ON/OFF button
B Green LED: illuminated when the appliance is in operation
C Freezer alarm off button*
D Red LED: ashing with freezer alarm
E Fast freezing button*
F Orange LED: on during fast freezing procedure
G Digital freezer temperature display indicates actual freezer temperature
inside the appliance from -16°C to -24°C*
* Certain models only.
MODEL WITH KNOBS
MODEL WITHOUT KNOBS
10
Control unit
Control panel
This manual suits for next models
1
Table of contents
Other Smeg Freezer manuals