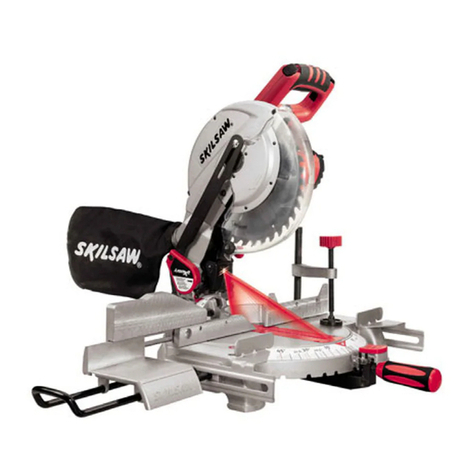
Skil MS6305-00 User manual

WARNING: To reduce the risk of injury, the user must read and understand the
Owner’s Manual before using this product. Save these instructions for future reference.
AVERTISSEMENT : Afin de réduire les risques de blessure, l’utilisateur doit lire et
comprendre le guide d’utilisation avant d’utiliser cet article. Conservez le présent guide
afin de pouvoir le consulter ultérieurement.
ADVERTENCIA : Para reducir el riesgo de lesiones, el usuario debe leer y comprender
el Manual del operador antes de utilizar este producto. Guarde estas instrucciones para
consultarlas en caso sea necesario.
Owner’s Manual
Guide d’utilisation
Manual del propietario
15 Amp 10’’ Sliding Miter Saw
Scie à onglets coulissante de 15 A, 25.4 cm / 10 po
Sierra ingletadora deslizante de 10 pulgadas de 15 A
For Customer Service
Pour le service à la clientèle
Servicio al cliente 1-877-SKIL-999 OR www.skil.com
Model/ Modelo/ Modèle: MS6305-00

2
TABLE OF CONTENTS
General Power Tool Safety Warnings .............................3-4
Miter Saw Safety Warnings......................................4-6
Additional Safety Rules ........................................6-7
Symbols ....................................................8-11
Operator’s Glossary Of Terms ....................................12
Get to Know Your Sliding Miter Saw ............................13-15
Specications .................................................16
Assembly ..................................................17-22
Mounting and Transporting ...................................23-24
Adjustments................................................25-32
Saw Operations .............................................33-41
Maintenance................................................42-43
Troubleshooting ............................................44-45
Limited Warranty Of SKIL Consumer Bench Top Power Tools .........46
WARNING
• Some dust created by power sanding, sawing, grinding, drilling and other construction
activities contains chemicals known to the State of California to cause cancer, birth defects
or other reproductive harm. Some examples of these chemicals are:
– Lead from lead-based paints.
– Crystalline silica from bricks, cement, and other masonry products.
– Arsenic and chromium from chemically-treated lumber.
• Your risk from these exposures varies, depending upon how often you do this type of work.
To reduce your exposure to these chemicals:
– Work in a well-ventilated area.
– Work with approved safety equipment, such as dust masks that are specially designed to
lter out microscopic particles.
– Avoid prolonged contact with dust from power sanding, sawing, grinding, drilling, and
other construction activities. Wear protective clothing and wash exposed areas with soap
and water. Allowing dust to get into your mouth or eyes or to lie on the skin may promote
absorption of harmful chemicals.

3
GENERAL POWER TOOL SAFETY WARNINGS
WARNING Read all safety warnings, instructions, illustrations and specications
provided with this power tool. Failure to follow all instructions listed
below may result in electric shock, re and/or serious injury.
SAVE ALL WARNINGS AND INSTRUCTIONS FOR FUTURE
REFERENCE.
The term “power tool” in the warnings refers to your mains-operated (corded) power tool or
battery-operated (cordless) power tool.
Work area safety
Keep work area clean and well lit. Cluttered or dark areas invite accidents.
Do not operate power tools in explosive atmospheres, such as in the presence of
ammable liquids, gases or dust. Power tools create sparks which may ignite the dust or
fumes.
Keep children and bystanders away while operating a power tool. Distractions can cause
you to lose control.
Electrical safety
Power tool plugs must match the outlet. Never modify the plug in any way. Do not use
any adapter plugs with earthed (grounded) power tools. Unmodied plugs and matching
outlets will reduce risk of electric shock.
Avoid body contact with earthed or grounded surfaces, such as pipes, radiators,
ranges and refrigerators. There is an increased risk of electric shock if your body is earthed
or grounded.
Do not expose power tools to rain or wet conditions. Water entering a power tool will
increase the risk of electric shock.
Do not abuse the cord. Never use the cord for carrying, pulling or unplugging the power
tool. Keep cord away from heat, oil, sharp edges or moving parts. Damaged or entangled
cords increase the risk of electric shock.
When operating a power tool outdoors, use an extension cord suitable for
outdoor use. Use of a cord suitable for outdoor use reduces the risk of electric shock.
If operating a power tool in a damp location is unavoidable, use a ground fault circuit
interrupter (GFCI) protected supply. Use of an GFCI reduces the risk of electric shock.
Personal safety
Stay alert, watch what you are doing and use common sense when operating a power
tool. Do not use a power tool while you are tired or under the inuence of drugs,
alcohol or medication. A moment of inattention while operating power tools may result in
serious personal injury.
Use personal protective equipment. Always wear eye protection. Protective equipment
such as a dust mask, non-skid safety shoes, hard hat or hearing protection used for
appropriate conditions will reduce personal injuries.
Prevent unintentional starting. Ensure the switch is in the off-position before
connecting to power source and/or battery pack, picking up or carrying the tool.
Carrying power tools with your nger on the switch or energizing power tools that have the
switch on invites accidents.
Remove any adjusting key or wrench before turning the power tool on. A wrench or a
key left attached to a rotating part of the power tool may result in personal injury.

4
Do not overreach. Keep proper footing and balance at all times. This enables better
control of the power tool in unexpected situations.
Dress properly. Do not wear loose clothing or jewelry. Keep your hair and clothing away
from moving parts. Loose clothes, jewelry or long hair can be caught in moving parts.
If devices are provided for the connection of dust extraction and collection facilities,
ensure these are connected and properly used. Use of dust collection can reduce dust-
related hazards.
Do not let familiarity gained from frequent use of tools allow you to become complacent
and ignore tool safety principles. A careless action can cause severe injury within a fraction
of a second.
Power tool use and care
Do not force the power tool. Use the correct power tool for your application. The correct
power tool will do the job better and safer at the rate for which it was designed.
Do not use the power tool if the switch does not turn it on and off. Any power tool that
cannot be controlled with the switch is dangerous and must be repaired.
Disconnect the plug from the power source and/or remove the battery pack, if
detachable, from the power tool before making any adjustments, changing accessories,
or storing power tools. Such preventive safety measures reduce the risk of starting the
power tool accidentally.
Store idle power tools out of the reach of children and do not allow persons unfamiliar
with the power tool or these instructions to operate the power tool. Power tools are
dangerous in the hands of untrained users.
Maintain power tools and accessories. Check for misalignment or binding of moving
parts, breakage of parts and any other condition that may affect the power tool’s
operation. If damaged, have the power tool repaired before use. Many accidents are
caused by poorly maintained power tools.
Keep cutting tools sharp and clean. Properly maintained cutting tools with sharp cutting
edges are less likely to bind and are easier to control.
Use the power tool, accessories and tool bits etc. in accordance with these instructions,
taking into account the working conditions and the work to be performed. Use of the
power tool for operations different from those intended could result in a hazardous situation.
Keep handles and grasping surfaces dry, clean and free from oil and grease.
Slippery handles and grasping surfaces do not allow for safe handling and control of the tool
in unexpected situations.
Service
Have your power tool serviced by a qualied repair person using only identical
replacement parts. This will ensure that the safety of the power tool is maintained.
MITER SAW SAFETY WARNINGS
Miter saws are intended to cut wood or wood-like products, they cannot be used with
abrasive cut-off wheels for cutting ferrous materials such as bars, rods, studs, etc.
Abrasive dust causes moving parts such as lower guard to jam. Sparks from abrasive cutting
will burn the lower guard, the kerf insert and other plastic parts.
Use clamps to support workpiece whenever possible. If supporting the workpiece by
hand, you must always keep hand at least 100 mm from either side of the saw blade.
Do not use this saw to cut pieces that are too small to be securely clamped or held by
hand. If your hand is placed too close to the saw blade, there is an increased risk of injury
from blade contact.

5
The workpiece must be stationary and clamped or held against both the fence and
the table. Do not feed the workpiece into the blade or cut “freehand” in any way.
Unrestrained or moving workpieces could be thrown at high speeds, causing injury.
Push the saw through the workpiece. Do not pull the saw through the workpiece. To
make a cut, raise the saw head and pull it out over the workpiece without cutting, start
the motor, press the saw head down and push the saw through the workpiece. Cutting
on the pull stroke is likely to cause the saw blade to climb on top of the workpiece and violently
throw the blade assembly towards the operator.
Never cross your hand over the intended line of cutting either in front or behind the
saw blade. Supporting the workpiece “cross handed” i.e. holding the workpiece to the right of
the saw blade with your left hand or vice versa is very dangerous.
Do not reach behind the fence with either hand closer than 100 mm from either side
of the saw blade, to remove wood scraps, or for any other reason while the blade is
spinning. The proximity of the spinning saw blade to your hand may not be obvious and you
may be seriously injured.
Inspect your workpiece before cutting. If the workpiece is bowed or warped, clamp it
with the outside bowed face toward the fence. Always make certain that there is no
gap between the workpiece, fence and table along the line of the cut. Bent or warped
workpieces can twist or shift and may cause binding on the spinning saw blade while cutting.
There should be no nails or foreign objects in the workpiece.
Do not use the saw until the table is clear of all tools, wood scraps, etc., except for the
workpiece. Small debris or loose pieces of wood or other objects that contact the revolving
blade can be thrown with high speed.
Cut only one workpiece at a time. Stacked multiple workpieces cannot be adequately
clamped or braced and may bind on the blade or shift during cutting.
Ensure the mitre saw is mounted or placed on a level, rm work surface before use. A
level and rm work surface reduces the risk of the mitre saw becoming unstable.
Plan your work. Every time you change the bevel or mitre angle setting, make sure the
adjustable fence is set correctly to support the workpiece and will not interfere with
the blade or the guarding system. Without turning the tool “ON” and with no workpiece on
the table, move the saw blade through a complete simulated cut to assure there will be no
interference or danger of cutting the fence.
Provide adequate support such as table extensions, saw horses, etc. for a workpiece
that is wider or longer than the table top. Workpieces longer or wider than the mitre saw
table can tip if not securely supported. If the cut-off piece or workpiece tips, it can lift the lower
guard or be thrown by the spinning blade.
Do not use another person as a substitute for a table extension or as additional
support. Unstable support for the workpiece can cause the blade to bind or the workpiece to
shift during the cutting operation pulling you and the helper into the spinning blade.
The cut-off piece must not be jammed or pressed by any means against the spinning
saw blade. If conned, i.e. using length stops, the cut-off piece could get wedged against the
blade and thrown violently.
Always use a clamp or a xture designed to properly support round material such as
rods or tubing. Rods have a tendency to roll while being cut, causing the blade to “bite” and
pull the work with your hand into the blade.
Let the blade reach full speed before contacting the workpiece. This will reduce the risk
of the workpiece being thrown.
If the workpiece or blade becomes jammed, turn the mitre saw off. Wait for all moving
parts to stop and disconnect the plug from the power source and/or remove the battery
pack. Then work to free the jammed material. Continued sawing with a jammed workpiece
could cause loss of control or damage to the mitre saw.

6
After nishing the cut, release the switch, hold the saw head down and wait for the
blade to stop before removing the cut-off piece. Reaching with your hand near the
coasting blade is dangerous.
Hold the handle rmly when making an incomplete cut or when releasing the switch
before the saw head is completely in the down position. The braking action of the saw
may cause the saw head to be suddenly pulled downward, causing a risk of injury.
ADDITIONAL SAFETY RULES
MAKE WORKSHOP CHILDPROOF WITH PAD LOCK, MASTER SWITCHES or by removing
starter keys.
To reduce risk of injury, use saw blade rated 4800/min (RPM) or greater.
Do not use the power tool for purpose not intended - for example, do not use the miter
saw for slicing meats.
Before plugging in the tool, be certain the outlet voltage supplied is compatible with
the voltage marked on the nameplate within 10%. An outlet voltage incompatible with that
specied on the nameplate can result in serious hazards and damage to the tool.
Do not stand on tool or its stand. Serious injury may occur if the tool is tipped or if the
cutting tool is accidentally contacted. Do not store materials on or near the tool such that it is
necessary to stand on the tool or its stand to reach them.
Do not leave tool running unattended; turn power off. Do not leave tool until it comes to a
complete stop.
If blade does not stop within ten (10) seconds, unplug the saw and follow the
instructions in the Troubleshooting section.
Use clamps or other practical way to secure and support the workpiece to a stable
platform. Holding the workpiece by hand or against your body is unstable. It allows for
workpiece to shift, causes binding of the tool and loss of control.
When cutting irregularly shaped workpieces, plan your work so it will not slip and pinch
the blade and be torn from your hand. A piece of molding, for example, must lie at or be
held by a xture or jig that will not let it twist, rock or slip while being cut.
For chop-action cutting, move the head assembly to the rear as far as it will go and
engage the mechanism lock. Failure to lock the mechanism can cause the blade to suddenly
climb up on the top of the workpiece and force itself toward you.
Do not operate the saw in certain of the miter and bevel combinations which may result
in interference between the sliding and stationary parts of the saw or between the sliding parts
and the workpiece – to make cut remove sliding fence, sliding fence lock knob and work clamp
knob as required.
Always disconnect the power cord from the power source before transporting the
miter saw. Unplug power cord, lower head assembly and lock into position by engaging the
lock pin, use the carry handle included on the top of the head assembly and one of the hand
indentations in the saw base.
Think Safety! Safety Is A Combination of Operator’s Common Sense, knowledge of the
Safety and Operating Instructions and alertness at all times when the Miter Saw is being used.
There are additional safety instructions for particular operations of the saw in the Saw
Operations section. Read the rest of the manual for safe operation.
Before each use, review all warnings located on the mitre saw.

7
Double Insulated Tools
Double insulation is a design concept used in electric power tools which eliminates the
need for the three wire grounded power cord and grounded power supply system. It is a
recognized and approved system by Underwriter’s Laboratories, CSA and Federal OSHA
authorities.
WARNING Servicing of a tool with double insulation requires care and knowledge of
the system and should be performed only by a qualied service technician.
WARNING WHEN SERVICING, USE ONLY IDENTICAL REPLACEMENT PARTS.
WARNING POLARIZED PLUGS. To reduce the risk of electrical shock, your tool is
equipped with a polarized plug (one blade is wider than the other), this
plug will t in a polarized outlet only one way. If the plug does not t fully in the outlet, reverse
the plug. If it still does not t, contact a qualied electrician to install the proper outlet. To
reduce the risk of electrical shock, do not change the plug in any way.
Extension Cords
WARNING Replace damaged cords immediately. Use of damaged cords can shock,
burn or electrocute.
WARNING If an extension cord is necessary, a cord with adequate size conductors
should be used to prevent excessive voltage drop, loss of power or
overheating. The table shows the correct size to use, depending on cord length and nameplate
amperage rating of the tool. If in doubt, use the next heavier gauge. Always use U.L. and CSA
listed extension cords.
RECOMMENDED SIZES OF EXTENSION CORDS
120 VOLT ALTERNATING CURRENT TOOLS
Tool's
Ampere
Rating
Cord Size in A.W.G. Wire Sizes in mm2
Cord Length in Feet Cord Length in Meters
25 50 100 150 15 30 60 120
3-6 18 16 16 14 0.75 0.75 1.5 2.5
6-8 18 16 14 12 0.75 1.0 2.5 4.0
8-10 18 16 14 12 0.75 1.0 2.5 4.0
10-12 16 16 14 12 1.0 2.5 4.0 —
12-16 14 12 — — — — — —
NOTICE: The smaller the gauge number, the heavier the cord.

8
SYMBOLS
Safety Symbols
The purpose of safety symbols is to attract your attention to possible dangers. The safety
symbols and the explanations with them deserve your careful attention and understanding.
The symbol warnings do not, by themselves, eliminate any danger. The instructions and
warnings they give are no substitutes for proper accident prevention measures.
WARNING Be sure to read and understand all safety instructions in this Operator’s
Manual, including all safety alert symbols such as “DANGER,”
“WARNING,” and “CAUTION” before using this tool. Failure to following all instructions listed
below may result in electric shock, re, and/or serious personal injury.
The denitions below describe the level of severity for each signal word. Please read the manual
and pay attention to these symbols.
This is the safety alert symbol. It is used to alert you to potential
personal injury hazards. Obey all safety messages that follow this
symbol to avoid possible injury or death.
DANGER DANGER indicates a hazardous situation which, if not avoided, will
result in death or serious injury.
WARNING WARNING indicates a hazardous situation which, if not avoided, could
result in death or serious injury.
CAUTION CAUTION, used with the safety alert symbol, indicates a hazardous
situation which, if not avoided, will result in minor or moderate injury.
Damage Prevention and Information Messages
These inform the user of important information and/or instructions that could lead to equipment
or other property damage if they are not followed. Each message is preceded by the word
“NOTICE”, as in the example below:
NOTICE: Equipment and/or property damage may result if these instructions are not followed.
WARNING The operation of any power tools can result in foreign
objects being thrown into your eyes, which can result
in severe eye damage. Before beginning power tool operation, always
wear safety goggles or safety glasses with side shields and a full face
shield when needed. We recommend a Wide Vision Safety Mask for use
over eyeglasses or standard safety glasses with side shields. Always use
eye protection which is marked to comply with ANSI Z87.1.

9
SYMBOLS (CONTINUED)
IMPORTANT: Some of the following symbols may be used on your tool. Please study them
and learn their meaning. Proper interpretation of these symbols will allow you to operate the
tool better and safer.
Symbol Name Designation/Explanation
V Volts Voltage (potential)
AAmperes Current
Hz Hertz Frequency (cycles per second)
WWatt Power
kg Kilograms Weight
min Minutes Time
s Seconds Time
Wh Watt-hours Battery capacity
Ah Ampere-Hours Battery capacity
ØDiameter Size of drill bits, grinding wheels, etc.
n0No load speed Rotational speed, at no load
nRated speed Maximum attainable speed
…/min Revolutions or reciprocation
per minute Revolutions, strokes, surface speed,
orbits, etc. per minute
0Off position Zero speed, zero torque...
1,2,3,…
I,II,III, Selector settings Speed, torque or position settings. Higher
number means greater speed
Innitely variable selector
with off Speed is increasing from 0 setting
Arrow Action in the direction of arrow
Alternating current Type or a characteristic of current
Direct current Type or a characteristic of current
Alternating or direct current Type or a characteristic of current
Class II tool Designates Double Insulated Construction
tools.
Earthing terminal Grounding terminal
Li-ion RBRC seal Designates Li-ion battery recycling
program

10
Symbol Name Designation/Explanation
Ni-Cad RBRC seal Designates Ni-Cad battery recycling
program
Read manual symbol Alerts user to read manual
Wear eye protection symbol Alerts user to wear eye protection
No-Hands Zone
The area between the marked lines on
the left and right side of the base. This
zone is identied by the No-Hands Zone
symbols inside the lines marked on the
base.
Other manuals for MS6305-00
1
Table of contents
Languages:
Other Skil Saw manuals