shredder 282 User manual

Model 282
Operating Manual 28-OM131-1
English (Original)

Contents
Safety Information 3
Description and Purpose of Machine 4
Specication and Installation 5
Machine Controls 6
Pre-start Checks 7
Instructions for Use 8
Maintenance 9
Troubleshooting 10
Spare Parts List 11
Wiring Diagram 12-13
Declaration of Conformity 14

Safety Information
It is important that this machine is installed, maintained and used correctly to avoid the risk of
injury.
This machine contains dangerous voltages and rotating mechanical parts.
• Use the machine only for the purposes described in the Operating Manual
• This machine is to be used only by trained personnel
• Do not operate without the guards properly in place
• The machine is to be serviced or repaired only by suitably trained or qualied personnel.
Always switch o the machine from the mains supply before freeing card jams or removing any
covers.
The machine can be stopped in an emergency by pressing down the red mushroom button
(with a yellow disc) located on the top of the machine.
The machine can be stopped at any time by pressing the red (0) switch.
A red neon indicator on the control panel is illuminated to warn when electrical power is
connected.
It is recommended that metal staples are removed prior to shredding, as staples cut during the
shredding process will leave sharp pieces in the shredded material, which could cause injury
during handling.
• The machine uses a 230V(±10%), 50Hz, single-phase AC supply
• To protect against electrical shock, do not immerse the plug or mains cable in water or
spray with liquids
• Unplug from the electrical supply when not in use
• Do not operate this machine with a damaged mains cable or plug
• To disconnect from electrical supply, grip the plug - do not pull on the mains cable
THIS MACHINE MUST BE EARTHED
The wires in the mains cable are coloured as such:
Green/Yellow Earth
Blue Neutral
Brown Live
3
Description and Purpose of Machine
The Easypack Shredder converts surplus corrugated cardboard boxes into protective void ll
material for transit packing.
The resulting lattice structure allows exibility for packing a variety of shapes and sizes. It is tough
enough to prevent damage to heavy items.
There is no need to pre-cut the boxes, as the machine cuts the surplus card o.
The machine is of rugged design and construction.
The machine is designed to meet EC safety standards and requires connection only to a suitable
electrical supply.
The noise level does not exceed 70 dB(A) whilst shredding.
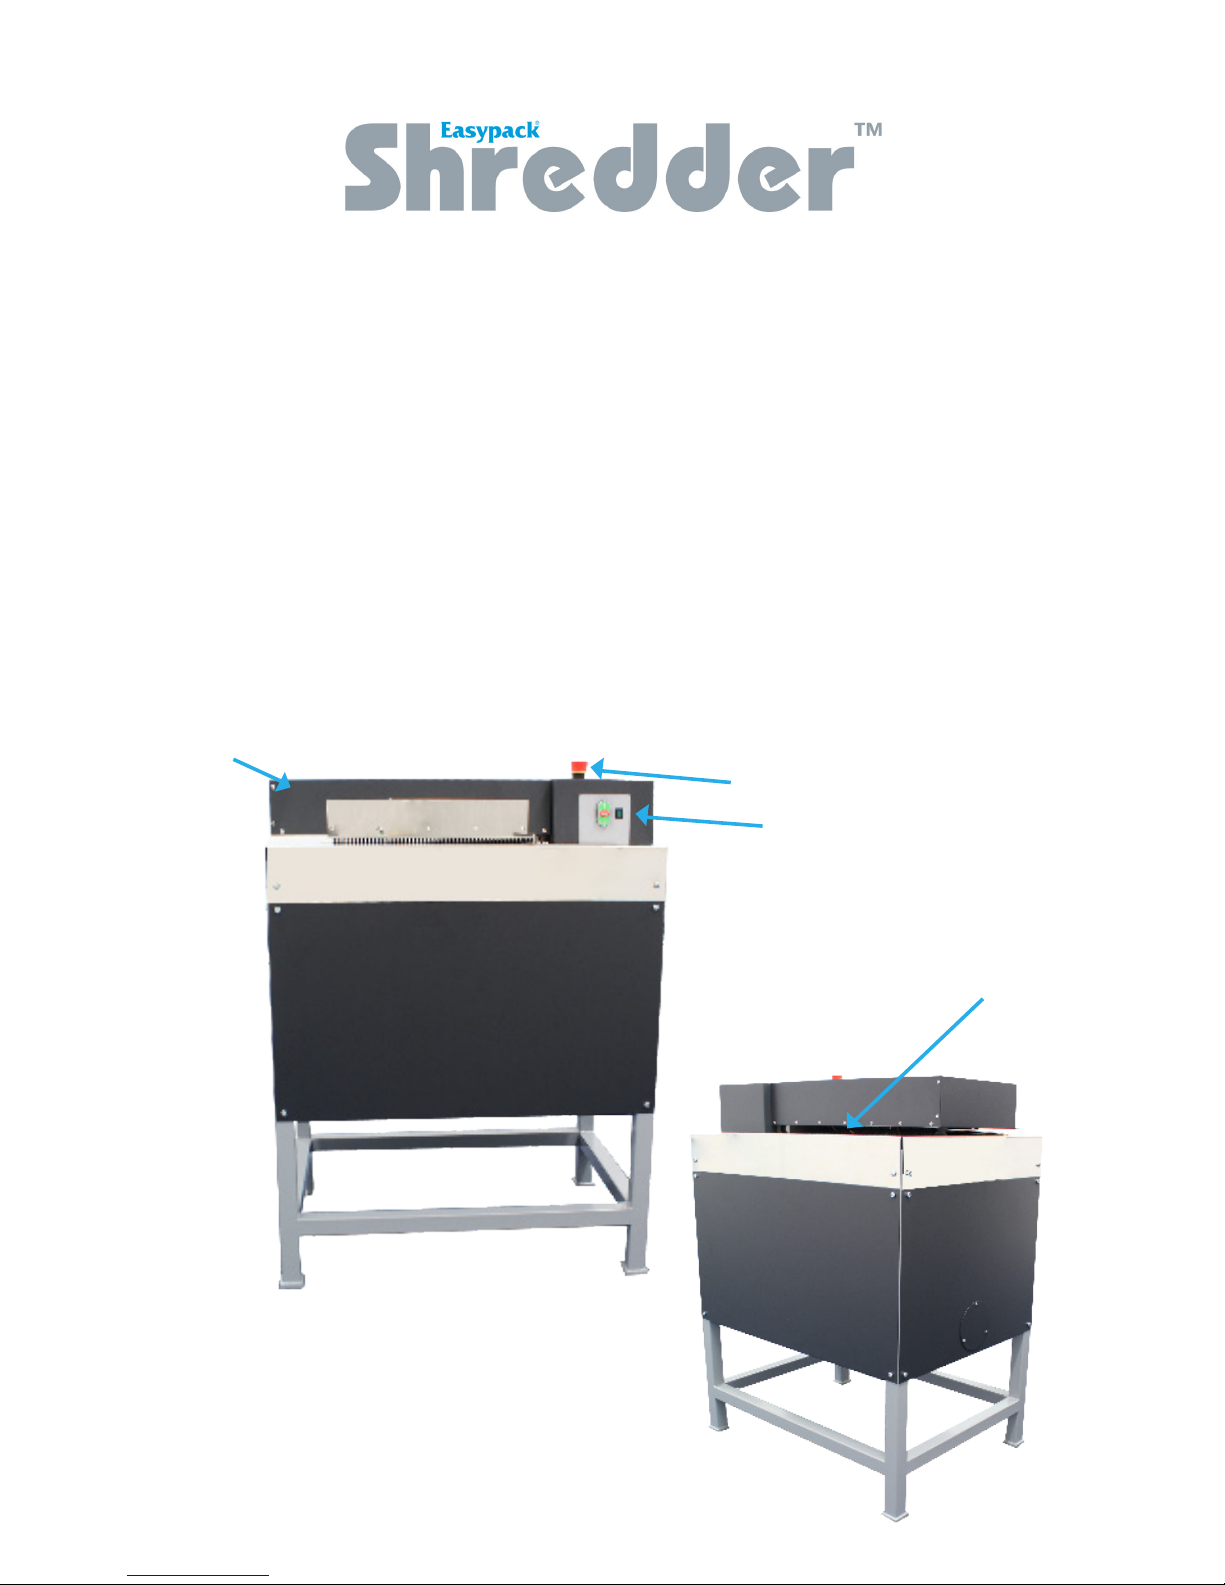
Top Cover
Outfeed Slot
Emergency
Stop
Control Panel
4

Specication and Installation
Specication
Dimensions 110mm (H) x 812 (W) x 612 (D)
Weight 170kg
Voltage 230V (±10%), 50Hz
Max Power 1.5kW
Cardboard Thickness 5-12.5mm thick
Max cutting width 400mm wide
Installation
The Machine must only be installed and operated in an area that is suitable for its use, with ample
space for feeding at boxes, and collection of the shredded lattice.
The machine MUST NOT be used in a wet environment.
Temperature Min 5ºC, Max 40ºC
Humidity 10 to 90% RH
Vibration Do not install the Machine in an area where it is likely to be subject to
constant vibration.
Shock Do not drop the Machine
Atmospheric Pollution Do not install the Machine in an area that is subject to water hazards,
condensation, excessive dust or other atmospheric contaminants.
Location It is important that the supporting oor is at and level.
Lifting / Transporting Instructions
When using a forklift truck to lift or transport the machine, the forks should be positioned beneath the
lower frame, between the legs.
Lifting from the sides of the machine, or the use of lifting slings, is not recommended.
CAUTION - THE MACHINE IS TOP HEAVY
Connections
The machine must be connected to a 230V, 50Hz, 1-phase electrical supply via a 13A Fuse. The
machine must be earthed. No other services are required.
Maximum power consumption is 1.5kW.
5

Emergency
Stop Button
‘Reverse’ Button Red ‘Stop’ Button
Green ‘Start’
Button
Power Indicator
6
Machine Controls
Emergency Stop Button
A red mushroom push button is mounted on top of the machine. When pressed it locks
down and stops the machine. Turn clockwise to reset.
Power Indicator
A green neon indicator on the control panel illuminates when there is electrical power to the
machine.
Green ‘Start’ Button
Switches the machine motor on ready to shred card.
Red ‘Stop’ Button
Stops the machine motor. This button should not be pressed during shredding.

The machine is connected to the mains
supply, switched on and the neon
indicator is illuminated
The Emergency Stop button is released
(turn clockwise)
The Outfeed Slot is clear of
restriction to allow the shredded
cardboard to exit
7
1)
Pre-Start Checks
2)
3)

Instructions for Use
Press the green ‘Start’ button to switch
the Shredder motor on. The shredding
wheels will rotate ready for the
cardboard to be fed in.
Feed the cardboard into the Entry Slot.
Once the cardboard is gripped by the
shredding wheels it can be released.
The maximum cardboard thickness is
12.5mm - do not force cardboard into
the Shredder.
Any width cardboard can be fed into the
shredder as it will cut o extra width.
To stop the Shredder press the red
‘Stop’ button.
Do not stop the Shredder whilst
shredding cardboard unless it jams.
If the cardboard jams in the Shredder,
stop the shredder using the red ‘Stop’
button or the Emergency Stop button.
Clear as much cardboard out as
possible from the Outfeed Slot.
1)
2)
3)
4)
8
5)
Press the stop button and then press
and hold the ‘Reverse’ button to clear
the partially shredded cardboard from
the Infeed Slot.

Maintenance
Always disconnect the shredder from the power supply before
removing any covers.
The machine is to be serviced or repaired only by suitably trained or
qualied personnel.
Every week lubricate the
shredding wheels via the
outfeed slot with a
lubricating spray e.g. WD40
Every month remove the top
cover and clear any cardboard
debris from above the
shredding wheels.
1)
2)
3) Every 6 months apply a
lithium based grease (e.g.
Castrol LM) to the drive
gears.
9
4)
For access to the mains fuse
open this drawer
Fuseholder containing
5x20mm 10A fuse and spare

Troubleshooting
10
Fault Check
Power indicator not lit Machine is connected to the mains supply
Mains supply is switched on
Internal fuse in Shredder is okay
Fuse in mains plug is okay
Shredder will not start or reverse Power indicator is lit
Emergency stop button is released
Cardboard is not jammed in shredding wheels
Inverter has not tripped out due to overload (switch
machine o for 20 seconds to reset)
Cardboard will not feed into shredder Shredding wheels are rotating
Cardboard path is clear of obstructions
Cardboard is not more than 12.5mm thick
If the above information does not clear the fault, contact Easypack for further
assistance on 0845 838 0168. Please have the serial number of the Shredder available.
Table of contents
Popular Paper Shredder manuals by other brands

Swingline
Swingline STACK-AND-SHRED200X&200XL 60X Start here

GBC
GBC ShredMaster CC055 instruction manual

UNITED OFFICE
UNITED OFFICE UAV 190 A1 operating instructions

UNITED OFFICE
UNITED OFFICE UAV 190 A1 operating instructions

Rexel
Rexel Optimum AutoFeed+ 45X instruction manual

Martin Yale
Martin Yale 227284S1 instruction manual