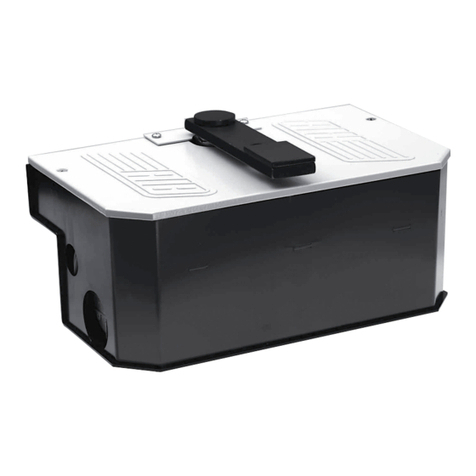
ShotLock Solo-Vault 200 Series User manual


SHOTLOCK™OWNER’S MANUAL
Thank you for purchasing a ShotLock Solo-Vault™.
Now, you can enjoy peace-of-mind knowing your personal
defense shotgun or handgun is always close, secure and
ready. When the first-responder is YOU, there may be no
time to fumble with trigger locks or open your gun safe.
With ShotLock your home defense firearm is at-the-ready
in seconds. This Owner’s Manual will guide you in the as-
sembly and installation of your Solo-Vault on a wall or in
a vehicle* putting the security you need, right where you
need it, when you need it.
* Before using this product to transport any fi rearm or mount in any type of
vehicle, make sure you are conforming to all applicable local, state and federal
laws.
* Note: Never store a fi rearm loaded.
IMMEDIATELY REGISTER YOUR VAULT
at www.shotlock.com/register
PLEASE CAREFULLY REVIEW YOUR WARRANTY:
Your ShotLock Solo-Vault is covered by a 2 Year Limited
Warranty, which will be honored from the date of purchase by
the original owner provided the ShotLock is registered within
30 days of purchase.
Now, you can enjoy peace-of-mind knowing your personal
defense shotgun or handgun is always close, secure and
Now, you can enjoy peace-of-mind knowing your personal

TABLE OF CONTENTS
Section I - ShotLock for Shotguns
Page 4 - Shotgun Solo-Vault Features
Page 5-6 - Shotgun Solo-Assembly
Page 7 - Shotgun Solo-Vault Parts List
Page 7 - Mounting Your Shotgun Solo-Vault
Section II - ShotLock for Handguns
Page 8 - Handgun Solo-Vault Features
Page 9 - Handgun Solo-Vault Parts List
Page 9 - Mounting Your Handgun Solo-Vault
Section III - Locks and Lock Operation
Page 10-13 - M-Series Lock (Mechanical)
Page 14-17 - E-Series Lock (Electrical)
Section IV - Warranty/Contact Information
Page 18 - Warranty Information
Page 19 - Notes
Back Cover - Contact Information

SHOTGUN SOLO-VAULT TM
FEATURES
• Accommodates left and right
handed shotguns.
• Secures most pump, semi-auto,
double barrel, side by side and
over/under shotguns.
• Will fit some pistol grip
(pump) shotguns.
• Flanged, no pry lid with dual
internal locking hooks.
• Military grade 14 gauge
steel construction.
• Exterior Dimensions:
7.5” x 5.75” x 2.25”
• Interior Dimensions:
7.25” x 3.875” x 2”
SEE PAGES 10-13
for the M-Series Lock.
(Mechanical)
SEE PAGES 14-17
for the E-Series Lock.
(Electrical)
4

ASSEMBLY FOR SEMI-AUTO AND
OVER/UNDER SHOTGUNS
ASSEMBLY FOR SEMI-AUTO AND
ASSEMBLY FOR SEMI-AUTO AND
ASSEMBLY FOR SEMI-AUTO AND
ASSEMBLY FOR SEMI-AUTO AND
OVER/UNDER SHOTGUNS
OVER/UNDER SHOTGUNS
OVER/UNDER SHOTGUNS
OVER/UNDER SHOTGUNS
OVER/UNDER SHOTGUNS
OVER/UNDER SHOTGUNS
OVER/UNDER SHOTGUNS
OVER/UNDER SHOTGUNS
OVER/UNDER SHOTGUNS
OVER/UNDER SHOTGUNS
1. Lay vault down either left or right opening, as preferred.
2. Lay shotgun down inside vault with bolt, handle pointing up and
position Trigger Guard Blocks snugly around trigger assembly.
3. When action is closed, bolt handle should extend outside the vault
through the door opening, and as close as possible to the top of
the door.
4. When action is open, handle will protrude through the hole in
the door.
5. Trace the positions of the Trigger Guard Blocks onto the Foam,
then cut Foam Bed Liners to fi t around Trigger Guard Blocks.
6. Using M5x14mm screws attach Trigger Guard Blocks to securely
confi ne trigger assembly inside vault.
7. Insert Foam Bed Liner.
3
2
4
5
6
5
* The second piece of foam is a backup.

ASSEMBLY FOR
PUMP SHOTGUNS
1. Lay vault down either left or right opening, as preferred.
2. For right-handed shotguns, Pump Ejection Port Hanger
will be mounted top right. For left-handed shotguns, Pump
Ejection Port Hanger will be mounted top left.
3. Trace the position of the Pump Ejection Port Hanger onto
the Foam Bed Liner, then cut Foam Bed Liner to fi t around
Hanger.
4. Using M5x14mm screws attach Pump Ejection Port Hanger
to inside of vault.
5. Insert Foam Bed Liner.
6. With action open, place ejection port over Pump Ejection
Port Hanger.
Pump Ejection
Port Hanger
6
PUMP SHOTGUNSPUMP SHOTGUNS
1.
2.
3.
4.
5.
6.
6
3
4
2
* The second piece of foam is a backup.

SHOTGUN
SOLO-VAULT
PARTS
1
2
34
56
8
7
7
Shotgun Solo-Vault Body
Foam Bed Liners (2)
Adjustable Trigger
Guard Blocks (2)
Pump Ejection
Port Hanger (1)
M5x14mm Trigger
Block Mounting
Screws (4)
#14 Flat Head Phillips
Vault Mounting Screws (4)
Override Key (3)
E-SERIES ONLY:
-Emergency
Battery Backup
Kit (1)
-Allen Wrench (1)
-AA Batteries (4)
MOUNTING YOUR SHOTGUN SOLO-VAULT
1. Securely attach vault in conve-
nient location with the provided
Vault Mounting Screws. *
2. Pump Ejection Port Hanger may
also be mounted on opposite side
to reverse the direction the
door opens.
Don’t forget, adhere logo sticker to front.
Don’t forget, adhere logo sticker to front.
Don’t forget, adhere logo sticker to front.
Don’t forget, adhere logo sticker to front.
* PLEASE NOTE : In order to be compliant with California DOJ standards, the
Shotgun Solo-Vault must be mounted to a surface using the Mounting Screws, and the
fi rearm must be secured using the Ejection Port Hanger or Trigger Blocks. The exposed
screws on the back should not be accessible once the device is mounted and locked.
* Owner’s Manual
* ShotLock Sticker

HANDGUN SOLO-VAULT TM
SEE PAGES 10-13
For the M-Series Lock.
(Mechanical)
SEE PAGES 14-17
For the E-Series Lock.
(Electrical)
FEATURES
• Secures up to a 1911 sized full
framed handgun.
• Mounts on a wall, flat surface or
in a vehicle.
• Carrying handle and cable holes
for ultra portability. (Cable not
included).
• Military grade 14 gauge
steel construction.
• Flanged, no pry lid with dual
locking hooks.
• Exterior Dimensions:
7.5” x 5.75” x 2.25”
• Interior Dimensions:
7.25” x 3.875” x 2”
8

MOUNTING YOUR HANDGUN
SOLO-VAULT
1. Securely attach Handgun Solo-Vault in
convenient location using 4 mounting
screws.
2. You may also secure your Handgun
Solo-Vault by threading a heavy 5/16”
locking cable through the provided
port holes.
• Be sure to adhere the ShotLock logo to the
front side of your Handgun Solo-Vault.
Your Handgun
Solo-Vault can
mount virtually
anywhere.
9
#14 Flat Head Phillips
Vault Mounting Screws (4)
Override Key (3)
2
4
3
1
E-SERIES ONLY:
-Emergency
Battery Backup
Kit (1)
-Allen Wrench (1)
-AA Batteries (4)

M-SERIES LOCK (mechanical)
FEATURES
• All mechanical operation, no
batteries or wires.
• Over 1500 customizable push
button combinations.
• Easily change your combination.
• Tamper proof lock clutch. Knob
will spin when an incorrect
combination is entered.
• Built in Key Override for backup
access. (3 extra keys)
• 2 year limited warranty.
Easily change your combination.
RECORD YOUR NEW
COMBINATION AND KEEP
IT IN A SAFE PLACE
* Pick any 4 numbers (no duplicates)
If you lose your combination and all three override
keys, contact customer service at 800.852.0400
10
Table of contents