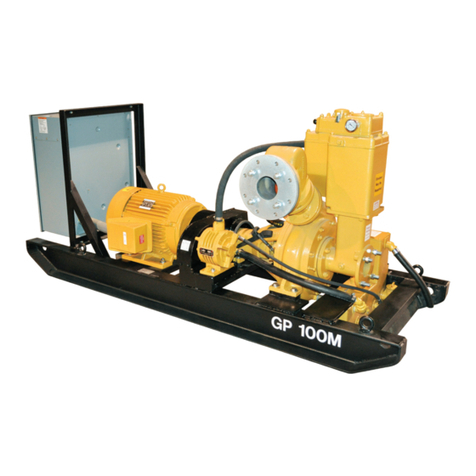
Selwood Seltorque S150 Manual
10
7. After com leting Instructions 5 and 6 of this
Section, check that the eel valve rubber is
ca able of closing all of the air holes in ort late
(B03) when o erating rod (B13) is square to the
late and fully lifted.
8. Check condition of bush (B07) in u er diffuser
B06) and re lace, together with cli (B08) and
nitrile washer (B37), if significantly worn.
NOTE: The o erating rod (B13) is normally a slack fit
in the bush.
9. Position ort late sub-assembly on u er diffuser
(B06), fit washers (B05) after checking that they
will seal efficiently and fully tighten screws (B04).
Reassemble nut (B12) and screw float (B11) on to
o erating rod and tighten securely in accordance
with Section 5.2.1 Float (B11) Instruction 5.
10. Recheck o eration of eel valve rubber (B21) to
ensure that it fully covers air orts in late (B03)
when the float is located in the u er diffuser
cone. In this osition there should be a ga of
3.5 mm between the heads of the centre clam
bar screws (B16) and the o erating late (B15). If
the dimension is incorrect, adjust osition of float
on o erating rod.
11. Examine condition of gasket (B02) and renew, if
necessary, before installing between ort late
(B03) and se arator ca (B01). Fit s ring
washers (A12) and screws (A11) each of which
should be sequentially turned a small amount until
fully tightened. Gasket (B02) must be evenly
com ressed.
12. Re lace se arator ca sub-assembly in
accordance with Section 5.2.1 Float (B11)
Instruction 6.
5.2.3 Deposits o Solids†‡
When handling liquids containing solids ca able of
adhering to roduct wetted surfaces, it is advisable
eriodically to check the valve system in the se arator.
To ins ect and service, roceed as follows:
1. Remove se arator ca sub-assembly in
accordance with Section 5.2.1 Float (B11)
Instructions 1 and 2, allowing se arator body
(B22) together with lower diffuser (B24), to be
lifted off the suction tube (B27).
2. Remove any de osits of scale from lower diffuser
(B24) and check condition of welds securing its
circular bottom to the erforated cylinder.
Remove any solids that may have accumulated in
the suction tube (B27), renew gasket (B25) and
re osition se arator body/lower diffuser assembly
on suction tube.
3. Remove de osited materials from surfaces of
u er diffuser (B06) and note, in articular,
condition of welds securing cone and disc to
erforated diffuser body. Also examine diffuser
† Use lower Diffuser (Part No. 00-15-038100) for sludge
handling duties. This is recognised by holes in the base as
well as around the side.
‡ Use lower Diffuser (Part No. 00-15-038000) for other
a lications where no solids are resent which can adhere to
the internal surfaces.
bush (B07) and o erating rod (B13), and re lace if
significantly worn in accordance with Section 5.2.2
Peel Valve (B21) Instructions 3 to 11. Remove all
de osited solids that would interfere with the free
movement of the mechanism, obstruct the
assage of air across the ort late holes, or
inhibit the flow of water (through the holes in the
u er diffuser, for exam le).
4. Once it is established that all com onents are in a
satisfactory condition and are free from scale,
re lace se arator ca sub-assembly in
accordance with Section 5.2.1 Float (B11)
Instruction 6. Any re-assembly work carried out
on the eel valve assembly should be in
accordance with Section 5.2.2 Peel Valve (B21)
commencing Instruction 1.
The fabricated se arator chamber (B35) (Part No.
0015105100 is normally utilized when the um is
fitted with Twin Prime where the larger volume allows
better se aration of air from the um ed liquid.
The two to fixings attaching the se arator chamber
(B35) to the um body (C09) are located inside the
chamber necessitating (B36) M12 dome nuts and
s acer washers to rotect the stud threads.
5.3 Impeller, Mechanical Seal and
Delivery Valve Maintenance
5.3.1 Impeller (C04)
Generally s eaking, it is only necessary to remove the
im eller if the existing com onent has become
severely abraded, or if access to other rotating arts is
required.
To remove and re lace, roceed as follows:
1. Remove air hose item (A01), twin rime item
(A39) and (A40) from se arator ca (B01), after
loosening relevant hose cli (A02).
2. Remove nuts (A11) and washers (A12), and lift off
se arator ca (B01) com lete with eel
valve/u er diffuser assembly, (B01) to (B21)
inclusively.
3. Lift se arator body (B22) com lete with lower
diffuser (B24) off suction tube (B27) or (B35)
allowing (dome) nuts (B36) or (B29) and s ring
washers (B39) or (B30) to be released.
4. Withdraw suction tube (B27) or (B35) and gasket
(B28) after removing nuts (B29) and associated
s ring washers (B30).
5. Drain oil from flushing chamber by removing filler
ca assembly (D08) and drain lug (D34). The
condition of the oil will indicate whether or not the
mechanical seal has been functioning correctly. If
contamination is evident, the mechanical seal
must be re laced in accordance with Section 5.3.2
Mechanical Seal (C08).
6. Remove im eller screw (C01) and washers (C02)
and (C03), and withdraw im eller (C04) from drive
shaft (D17). To remove the screw, it will be
necessary to lock the im eller by means of a
wooden block wedged between the im eller
blades and um body (C09).