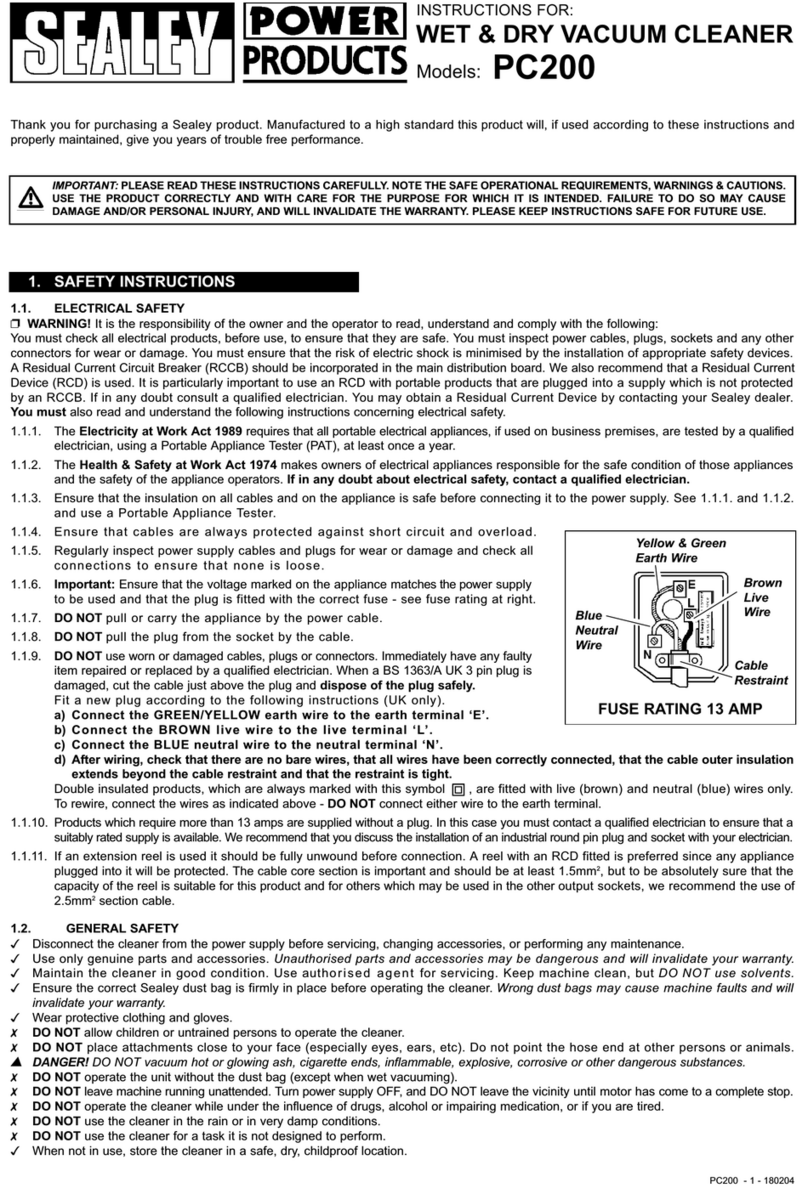
Sealey PC200SDAUTO.V2 User manual

1. SAFETY INSTRUCTIONS
2. INTRODUCTION & SPECIFICATION
PC200SDAUTO.V2 & PC300SDAUTO.V2 - 1 - 14/12/05
1.1 ELECTRICAL SAFETY
p WARNING! It is the responsibility of the owner and the operator to read, understand and comply with the following: You must check all
electrical products, before use, to ensure that they are safe. You must inspect power cables, plugs, sockets and any other connectors for wear
or damage. You must ensure that the risk of electric shock is minimised by the installation of appropriate safety devices. A Residual Current
Circuit Breaker (RCCB) should be incorporated in the main distribution board. We also recommend that a Residual Current Device (RCD) is
used. It is particularly important to use an RCD with portable products that are plugged into a supply which is not protected by an RCCB. If in
any doubt consult a qualified electrician. You may obtain a Residual Current Device by contacting your Sealey dealer.
You must also read and understand the following instructions concerning electrical safety.
1.1.1 The Electricity at Work Act 1989 requires that all portable electrical appliances, if used on business premises, are tested by a
qualified electrician, using a Portable Appliance Tester (PAT), at least once a year.
1.1.2 The Health & Safety at Work Act 1974 makes owners of electrical appliances responsible for the safe condition of those appliances
and the safety of the appliance operators. If in any doubt about electrical safety, contact a qualified electrician.
1.1.3 Ensure that the insulation on all cables and on the appliance is safe before connecting it to the power supply. See 1.1.1. and 1.1.2.
and use a Portable Appliance Tester.
1.1.4 Ensure that cables are always protected against short circuit and overload.
1.1.5 Regularly inspect power supply cables and plugs for wear or damage and check all
connections to ensure that none is loose.
1.1.6 Important: Ensure that the voltage marked on the appliance matches the power supply
to be used and that the plug is fitted with the correct fuse - see fuse rating at right.
1.1.7 DO NOT pull or carry the appliance by the power cable.
1.1.8 DO NOT pull the plug from the socket by the cable.
1.1.9 DO NOT use worn or damaged cables, plugs or connectors. Immediately have any faulty
item repaired or replaced by a qualified electrician. When a BS 1363/A UK 3 pin plug is
damaged, cut the cable just above the plug and dispose of the plug safely.
Fit a new plug according to the following instructions (UK only).
a)Connect the GREEN/YELLOW earth wire to the earth terminal E.
b)Connect the BROWN live wire to the live terminal L.
c)Connect the BLUE neutral wire to the neutral terminal N.
d)After wiring, check that there are no bare wires, that all wires have been correctly connected, that the cable outer
insulation extends beyond the cable restraint and that the restraint is tight.
Double insulated products, which are always marked with this symbol , are fitted with live (brown) and neutral (blue) wires only.
To rewire, connect the wires as indicated above - DO NOT connect either wire to the earth terminal.
1.1.10 Products which require more than 13 amps are supplied without a plug. In this case you must contact a qualified electrician to ensure
that a suitably rated supply is available. We recommend that you discuss the installation of an industrial round pin plug and
socket with your electrician.
1.1.11 If an extension reel is used it should be fully unwound before connection. A reel with an RCD fitted is preferred since any appliance
plugged into it will be protected. The cable core section is important and should be at least 1.5mm2, but to be absolutely sure that the
capacity of the reel is suitable for this product and for others which may be used in the other output sockets, we recommend the use
of 2.5mm2 section cable.
1.2 GENERAL SAFETY
3Disconnect the cleaner from the power supply before servicing, changing accessories, or performing any maintenance.
3Use only genuine parts and accessories. Unauthorised parts and accessories may be dangerous and will invalidate your warranty.
3
Maintain the cleaner in good condition. Use an authorised agent for servicing. Keep machine clean, but DO NOT use solvents.
7DO NOT operate the unit without the cartridge filter in place (except when wet vacuuming). Using the cleaner without a cartridge
filter will cause machine faults and will invalidate your warranty.
3Wear protective clothing and gloves.
7DO NOT allow children or untrained persons to operate the cleaner.
7DO NOT place attachments close to your face (especially eyes, ears, etc). Do not point the hose end at other persons or animals.
s
s
DANGER! DO NOT vacuum hot or glowing ash, cigarette ends, inflammable, explosive, corrosive or other dangerous substances.
7DO NOT operate the unit without the dust bag or optional cartridge filter (except when wet vacuuming).
7DO NOT leave machine running unattended. Turn power supply OFF, and DO NOT leave the vicinity until motor has come to a complete stop.
7DO NOT operate the cleaner while under the influence of drugs, alcohol or impairing medication, or if you are tired.
7DO NOT use the cleaner in the rain or in very damp conditions.
7DO NOT use the cleaner for a task it is not designed to perform.
FUSE RATING 13 AMP
Blue
Neutral
Wire
Yellow & Green
Earth Wire
Cable
Restraint
Brown
Live
Wire
Thank you for purchasing a Sealey product. Manufactured to a high standard this product will, if used according to these instructions and
properly maintained, give you years of trouble free performance.
IMPORTANT: PLEASE READ THESE INSTRUCTIONS CAREFULLY. NOTE THE SAFE OPERATIONAL REQUIREMENTS, WARNINGS, AND
CAUTIONS. USE THIS PRODUCT CORRECTLY, AND WITH CARE FOR THE PURPOSE FOR WHICH IT IS INTENDED. FAILURE TO DO SO
MA
Y CAUSE DAMAGE AND/OR PERSONAL INJURY AND WILL INVALIDATE THE WARRANTY.
INDUSTRIAL VACUUM CLEANERS
WITH AUTO START/STOP
INSTRUCTION MANUAL FOR MODELS:
PC200SDAUTO.V2 & PC300SDAUTO.V2
Introduction: Powerful 1400Watt motor head gives incredible suction. May also be used as a
blower. Integral three-pin BS socket provides power supply for dust-free tools up to 1400W.
When used in conjunction with a power tool the cleaner auto-starts when the tool is started and
auto-stops 10 seconds after the tool is switched off - to ensure tool and hose are left free of dust.
Includes stainless steel drum & stainless steel telescopic rigid extension tube as well as tools
for wet and dry operations. Tool stowage points on head. Supplied with cartridge filter and wet-
use foam filter.
Specification
Motor:. . . . . . . . . . . . . . . . . . . . 230V 1400W
Container - PC200SDAUTO.V2:. . . . . . . 20ltr
Container - PC300SDAUTO.V2:. . . . . . . 30ltr
Weight - PC200SDAUTO.V2: . . . . . . . . . 8kg
Weight - PC300SDAUTO.V2: . . . . . . . . . 9kg
Vac AccessoriesØ: . . . . . . . . . . . . . . . 35mm

3. CONTENTS AND SPECIFICATION
6. WET VACUUM CLEANING
p
p
WARNING! Ensure you read, understand and apply Section 1 Safety Instructions. Reminder: Remove plug from power supply
before opening unit. DO NOT vacuum solvents, explosives, inflammable and/or hazardous liquids such as petrol, oil, spirits, paint,
thinners, acids etc. p
p
WARNING! Not designed for liquid storage. Always empty liquids after use and before storing.
6.1 Ensure the machine is unplugged from the power supply. Make sure the tank is clean and free from dust and dirt.
6.2 Remove the cartridge filter and fit a foam filter over the filter basket. Replace the top section onto the container.
6.3 To the same flexible hose as used in dry cleaning fit the desired nozzle.
6.4 Ensure the switch is Off (position 0) before plugging into the power supply.
6.5 Press the switch to On (position I).
Note: To vacuum large quantities of liquid, from a sink or tank etc, do not immerse the nozzle completely in the liquid, leave a gap at the top of
the nozzle opening to allow an air inflow. The machine is fitted with a float valve which stops the suction action when the tank has reached its
maximum capacity. The user will notice an increase in motor speed. When this happens, turn off the machine, disconnect from power supply,
remove the head from the container and empty the liquid into a suitable receptacle or drain. T
o continue vacuuming, refit the head and proceed.
After wet vacuuming, turn the machine off and unplug from power supply. Empty the container and clean and dry the inside and outside before
storage. Remember! After wet vacuuming the foam filter must be removed and a cartridge filter must be fitted before dry vacuuming again.
3.1 Carton content
3.1.1 Carefully unpack the carton.
3.1.2 Locate the two side clasps (fig. 1.6) which hold the top section
(fig.1.3) in place.
3.1.3 Undo the clasps, remove the top section and take out the items in
the container.
3.1.4 Check and identify each component as listed below. If anything is
missing or damaged please contact your supplier immediately.
Item Description
1 Handle
2 ON/OFF switch
3 Top section
4 Filter basket
5 Safety float valve
6 Clasp
7 Container, (Stainless Steel)
8 Vacuum hose connection
9 Castors
10 Flexible vacuum hose
Item Description
11 Telescopic suction tube
12 Blow connection
13 Combination nozzle
15 Foamed plastic filter
16 Crevice nozzle
17 Dust free tool ON/OFF
18 3 pin socket for tool
19 Cartridge filter (fitted as standard)
20 Dust free tool adaptor DFS/AK10
fig 1
p
p
WARNING! Ensure you read, understand and apply Section 1 Safety Instructions.
Reminder: DO NOT vacuum hazardous substances. Use of an incorrect cartridge filter will invalidate your warranty.
5.1 Ensure the machine is unplugged from the power supply.
5.2 Remove the top section and fit the cartridge filter down over the
filter basket and push fully home.
5.3 Reposition the head onto the drum body, and clip in place.
5.4 Insert the larger end of the flexible hose into the front inlet on the
container and lock in place. Push the required attachment onto
the free end of the hose.
5.5 Plug in the power supply.
5.6 Switch to the On (position I).
5.7 When you have completed vacuuming, press the switch to Off (position O)
and unplug from power supply.
Regularly check the dust bag and dispose of safely when it is 2/3 full. The
bag is manufactured so that only air, not dust, will pass through the paper and as such the dust bag must not be re-used. If you wish to
use the machine for a wet application and the dust bag is less than 2/3 full, carefully remove the bag, store for future use, and wipe the
tank clean.
7DO NOT use the dust bag for wet or sharp materials.
5. DRY VACUUM CLEANING
4. ASSEMBLY
4.1 Ensure the mains plug is disconnected.
4.2 Undo clasps.
4.3 Lift off the top section assembly.
4.4 Remove contents from inside the container.
4.5 Turn the container upside down and insert the castors ensuring
they are pushed all the way in.
4.6a For wet vacuum cleaning fit the supplied foamed plastic filter.
4.6b For dry vacuum cleaning use the cartridge filter supplied.
NOTE: Do not operate the cleaner without a cartridge filter fitted as
this will damage the machine and invalidate your warranty.
4.7 Replace the top section onto the container.
4.8 Align up the top section with the clasps and snap into place,
by applying pressure at the mid point of the clasps.
4.9 Insert the large end of the hose into the front inlet of the container
and lock in place by turning clockwise a quarter turn.
4.10 Choose the desired nozzle and push it onto the telescopic suction tube.
PC200SDAUTO.V2 & PC300SDAUTO.V2 - 1 - 14/12/05

7. BLOWING
8. USING DUST FREE TOOLS
7.1 Push the large end of the flexible hose into the blow
connection in the top section.
7.2 Ensure the power switch is turned off and plug in the
power supply.
7.3 Switch on the power (position I).
7.4 The unit will now blow through the vacuum hose and can be used to clear obstructions within the pipe.
p
p
WARNING! If after a few seconds the hose is still blocked turn of the unit and clear the hose manually.
Cleaner will not operate.
Dust comes from the motor cover.
Reduced efficiency and increased
motor speed/vibration.
No power supply.
Faulty power cable, switch or motor.
Container full of liquid.
Dust free tool switch in ON position
Cartridge filter missing or damaged.
Container full / filter clogged
Nozzle, hose or container inlet blocked.
Check supply.
Check and repair or replace faulty item.
Empty container.
Switch dust free tool switch OFF
Fit or replace cartridge filter.
Empty container / clean or replace filter.
Check nozzle, hose and container inlet for blockage.
9. CONSUMABLES
MODEL . . . . . . . . . . . . . . . . . . . . . . . . . . . . . . . . . . . . . . .PC200SDAUTO.V2 . . . . . . . . . . . . . . . . . . . . . . . . PC300SDAUTO.V2
Cartridge Filter (Must be used for dry vacuuming) . . . . . . .Part No. PC200CF . . . . . . . . . . . . . . . . . . . . . . . . . Part No. PC200CF
Foam Filter . . . . . . . . . . . . . . . . . . . . . . . . . . . . . . . . . . . .Part No. PC200FF10 . . . . . . . . . . . . . . . . . . . . . . . Part No. PC200FF10
Dust Bags (Optional) . . . . . . . . . . . . . . . . . . . . . . . . . . . .Part No. PC200PB5 . . . . . . . . . . . . . . . . . . . . . . . . Part No. PC300PB5
IMPORTANT! IF THE MACHINE IS USED WITHOUT A CARTRIDGE FILTER FITTED THE MOTOR WILL BURN OUT EVENTUALLY AND
YOUR GUARANTEE WILL BE INVALIDATED. ALWAYS KEEP A SPARE CARTRIDGE FILTER HANDY.
Declaration of Conformity We, the sole importer into the UK, declare that the products listed here are
in conformity with the following standards and directives.
The construction files for these products are held by the Manufacturer and may be inspected,
by a national authority, upon request to Jack Sealey Ltd. For Jack Sealey Ltd.
Sole importer into the UK
of Sealey Power Products
Signed by Mark Sweetman 14th December 2005
INDUSTRIAL VACUUM CLEANERS WITH
AUTO START/STOP
Models: PC200SDAUTO.V2 & PC300SDAUTO.V2
98/37/EC Machinery Directive
73/23/EEC Low Voltage Directive
89/336/EEC EMC Directive
93/68/EEC CE Marking Directive
01284 757500
01284 703534 sales@sealey.co.uk
Sole UK Distributor
Sealey Group,
Bury St. Edmunds, Suffolk.
www.sealey.co.uk
Web
email
NOTE: It is our policy to continually improve products and as such we reserve the right to alter data, specifications and component parts without prior notice.
IMPORTANT: No liability is accepted for incorrect use of this product.
WARRANTY: Guarantee is 12 months from purchase date, proof of which will be required for any claim.
INFORMATION: For a copy of our catalogue and latest promotions call us on 01284 757525 and leave your full name, address and postcode.
8.1 Ensure that the cleaner switch (A) and the dust free tool
switch (B) on the vacuum cleaner are both in the OFF position.
8.2 Connect the flexible hose to the front inlet on the cleaner.
8.3 Connect the other end of the hose to the dust outlet on the dust free tool using the rubber
adaptor supplied. Part no. DFS/AK10 (See above), the tapered end of which can be cut back to
suit the tool outlet diameter.
8.4 Ensure that the switch on the dust free tool is in the OFF position, then plug the tool into
the power outlet (C) on the vacuum cleaner.
8.5 Keep the dust free tool in the OFF position whilst you move both switches (A) & (B) on the cleaner into the ON position.
8.6 The cleaner will start automatically when you operate the switch on the dust free tool.
8.7 When you switch the dust free tool OFF the cleaner will continue to run for ten seconds then shut down automatically.
8.8 When you have finished using the tool, move both switches (A) & (B) on the cleaner to the OFF position before unplugging the tool.
NOTE: If no tool is plugged in, but the tool switch (B) on the cleaner is in the ON position the cleaner will not start. Move the tool switch to
the OFF position and operate the cleaner as normal using the cleaner ON/OFF switch (A).
9. MAINTENANCE
9.1.1 GENERAL MAINTENANCE.
9.1.2 Ensure the machine is unplugged from the power supply.
9.1.3 Disconnect the hose from the container.
9.1.4 Undo the clasps and remove motor head from the container.
9.1.5 Clear out any dirt or debris from the container and hose.
9.1.6 Clean the foam filter by washing it in a mild soapy solution.
9.1.7 Check that the telescopic suction tube operates smoothly, and check the power cable to make sure it has not received any damage.
9.2.1 CARTRIDGE FILTER MAINTENANCE. (Handle the filter carefully when cleaning or installing.)
9.2.2 Carefully remove the optional cartridge filter (A) and inspect it for damage. Afilter that has small holes or tears in it will not perform
efficiently and should be replaced.
9.2.3 To clean a dry filter, tap it inside a waste bin. (B)
9.2.4 Do not use the filter if it becomes wet as the filter will clog quickly and be very difficult to clean. (The cartridge filter is designed for dry
vacuuming only.) Should the filter be inadvertently wetted it should be rinsed from the inside (B) and allowed to air dry for 24 hours.
9.2.5 To fit a new/cleaned filter slide it over the filter basket (C) and push it fully home (D)
10. TROUBLESHOOTING
PC200SDAUTO.V2 & PC300SDAUTO.V2 - 1 - 14/12/05
This manual suits for next models
1
Table of contents
Other Sealey Vacuum Cleaner manuals

Sealey
Sealey PC102 User manual

Sealey
Sealey PC195SD.V2 User manual

Sealey
Sealey PC150A User manual

Sealey
Sealey PC300SDAUTO.V3 User manual

Sealey
Sealey PC320.V2 User manual

Sealey
Sealey SM47.V3 User manual

Sealey
Sealey PC20LN User manual

Sealey
Sealey PC195SD User manual

Sealey
Sealey PC460.V2 User manual

Sealey
Sealey SM48.V3 User manual

Sealey
Sealey CP20VAV User manual

Sealey
Sealey CPV72 User manual

Sealey
Sealey SM47.V3 User manual

Sealey
Sealey POWER PRODUCTS PC200.V2 User manual

Sealey
Sealey pc310 User manual

Sealey
Sealey PC477 User manual

Sealey
Sealey PC220 User manual

Sealey
Sealey PC200SDAUTO.V3 User manual

Sealey
Sealey SA317.V2 User manual

Sealey
Sealey PC460 User manual