Sealey SCT125 User manual

INSTRUCTIONS FOR:
CUT-OFF SAW TWIN BLADE Ø125mm -
950W 230V
MODEL NO: SCT125
IMPORTANT: PLEASE READ THESE INSTRUCTIONS CAREFULLY. NOTE THE SAFE OPERATIONAL REQUIREMENTS, WARNINGS & CAUTIONS. USE THE PRODUCT
CORRECTLY AND WITH CARE FOR THE PURPOSE FOR WHICH IT IS INTENDED. FAILURE TO DO SO MAY CAUSE DAMAGE AND/OR PERSONAL INJURY AND WILL
INVALIDATE THE WARRANTY. KEEP THESE INSTRUCTIONS SAFE FOR FUTURE USE.
Thank you for purchasing a Sealey product. Manufactured to a high standard, this product will, if used according to these instructions
and properly maintained, give you years of trouble free performance.
1. SAFETY
REFER TO
INSTRUCTIONS
WEAR EAR
PROTECTION
WEAR EYE
PROTECTION
1.1. ELECTRICAL SAFETY
WARNING! It is the responsibility of the owner and the operator to read, understand and comply with the following:
You must check all electrical products, before use, to ensure that they are safe. You must inspect power cables, plugs, sockets and
any other connectors for wear or damage. You must ensure that the risk of electric shock is minimised by the installation of
appropriate safety devices. A Residual Current Circuit Breaker (RCCB) should be incorporated in the main distribution board. We
also recommend that a Residual Current Device (RCD) is used. It is particularly important to use an RCD with portable products that
are plugged into a supply which is not protected by an RCCB. If in any doubt consult a qualified electrician. You may obtain a
Residual Current Device by contacting your Sealey dealer. You must also read and understand the following instructions concerning
electrical safety.
1.1.1. The Electricity at Work Act 1989 requires that all portable electrical appliances, if used on business premises, are tested by a
qualified electrician, using a Portable Appliance Tester (PAT), at least once a year.
1.1.2. The Health & Safety at Work Act 1974 makes owners of electrical appliances responsible for the safe condition of those appliances
and the safety of the appliance operators. If in any doubt about electrical safety, contact a qualified electrician.
1.1.3. Ensure that the insulation on all cables and on the appliance is safe before connecting it to the
power supply. See 1.1.1 and 1.1.2 and use a Portable Appliance Tester.
1.1.4. Ensure that cables are always protected against short circuit and overload.
1.1.5. Regularly inspect power supply cables and plugs for wear or damage and check all connections
to ensure that none is loose.
1.1.6. IMPORTANT: Ensure that the voltage marked on the appliance matches the power supply to be
used and that the plug is fitted with the correct fuse - see fuse rating at right.
1.1.7. DO NOT pull or carry the appliance by the power cable.
1.1.8. DO NOT pull the plug from the socket by the cable.
1.1.9. DO NOT use worn or damaged cables, plugs or connectors. Immediately have any faulty item
repaired or replaced by a qualified electrician. When a BS 1363/A UK 3 pin plug is damaged,
cut the cable just above the plug and dispose of the plug safely.
Fit a new plug according to the following instructions (UK only).
a)Connect the GREEN/YELLOW earth wire to the earth terminal ‘E’.
b)Connect the BROWN live wire to the live terminal ‘L’.
c)Connect the BLUE neutral wire to the neutral terminal ‘N’.
d)After wiring, check that there are no bare wires, that all wires have been correctly connected,
that the cable outer insulation extends beyond the cable restraint and that the restraint is tight. Double insulated products, which are
always marked with this symbol , are fitted with live (brown) and neutral (blue) wires only. To rewire, connect the wires as indicated
above - DO NOT connect either wire to the earth terminal.
1.1.10. Products which require more than 13 amps are supplied without a plug. In this case you must contact a qualified electrician to ensure
that a suitably rated supply is available. We recommend that you discuss the installation of an industrial round pin plug and socket with
your electrician.
1.1.11. If an extension reel is used it should be fully unwound before connection. A reel with an RCD fitted is preferred since any appliance
plugged into it will be protected. The cable core section is important and should be at least 1.5mm², but to be absolutely sure that the
capacity of the reel is suitable for this product and for others which may be used in the other output sockets, we recommend the use of
2.5mm² section cable.
1.2. GENERAL SAFETY
Disconnect the saw from the mains power before changing accessories, servicing or performing any maintenance.
Maintain saw and blades in good condition. Check moving parts and alignment. If necessary use an authorised service agent.
Replace or repair damaged parts. Use recommended parts only. Unauthorised parts may be dangerous and will invalidate the warranty.
Keep the saw clean for best and safest performance.
WARNING! Always work with the saw safety guard in place.
Wear approved safety goggles, ear defenders, appropriate dust mask if saw generates dust and safety gloves.
Remove ill fitting clothing. Remove ties, watches, rings and other loose jewellery and contain long hair.
Use saw in a suitable work area. Keep area clean, tidy and free from unrelated materials and ensure that there is adequate lighting.
Maintain correct balance and footing. DO NOT over-reach and ensure that the floor is not slippery. Wear non-slip shoes.
Use only approved cutting blades.
Recommended Fuse Rating:
13A
WEAR PROTECTIVE
GLOVES
WEAR RESPIRATORY
PROTECTION
SCT125 Issue:1 - 13/11/14
Original Language Version
© Jack Sealey Limited

Check the blades to ensure that they are not split, cracked or damaged in any way. If in doubt do not use the blade.
Saw blades must be securely attached before use, but not overtightened.
Secure unstable workpiece with a clamp, vice or other adequate holding device and ensure that the saw is gripped with both hands.
Keep children and unauthorised persons away from the work area.
DO NOT operate the saw if any parts are missing or damaged.
DO NOT use the saw for a task it is not designed to perform.
DO NOT operate the saw where there are flammable liquids or gases.
WARNING! DO NOT use on materials containing asbestos.
DO NOT get the saw wet or use in damp or wet locations.
DO NOT switch the saw on whilst the blade is in contact with the workpiece.
DO NOT cover the saw air vents. To do so will overheat the machine.
DO NOT touch the workpiece immediately after cutting as it will be very hot.
DO NOT hold unsecured work in your hand and DO NOT touch the saw blade whilst operating, or whilst plugged into the mains power.
DO NOT leave the saw running unattended and DO NOT lay it down whilst it is running.
DO NOT operate the saw when you are tired or under the influence of alcohol, drugs or intoxicating medication.
When not in use, switch off, remove plug from power supply and store in safe, dry, childproof area.
1.3. SPECIAL PRECAUTIONS
DANGER: Keep hands away from cutting area and the blade.
Do not reach underneath the workpiece. The guard cannot protect you from the blade below the workpiece.
Adjust the cutting depth to the thickness of the workpiece. Less than a full tooth of the blade teeth should be visible below the
workpiece.
Never hold the workpiece being cut in your hands or across your leg. Secure the workpiece to a stable platform. It is important
to support the work properly to minimize body exposure, blade binding, or loss of control.
Hold the power tool only by the insulated gripping surfaces when performing an operation where the cutting tool may contact
hidden wiring or its own cord. Contact with a “live” wire will also make exposed metal parts of the power tool “live” and shock the
operator.
When ripping always use a rip fence or straight edge guide. This improves the accuracy of cut and reduces the chance of blade
binding.
Always use blades with correct size and shape (diamond versus round) of arbour holes. Blades that do not match the mounting
hardware of the saw will run eccentrically, causing loss of control.
Never use damaged or incorrect blade washers or bolt. The blade washers and bolt were specially designed for your saw, for
optimum performance and safety of operation.
●Causes and operator prevention of kickback:
– Kickback is a sudden reaction to a pinched, bound or misaligned saw blade,causing an uncontrolled saw to lift up and out of the
workpiece toward the operator.
– When the blade is pinched or bound tightly by the kerf closing down, the blade stalls and the motor reaction drives the unit back
rapidly toward the operator.
– If the blade becomes twisted or misaligned in the cut, the teeth at the back edge of the blade can dig into the top surface of the wood
causing the blade to climb out of the kerf and jump back toward the operator.
Kickback is the result of saw misuse and/or incorrect operating procedures or conditions and can be avoided by taking proper
precautions as given below.
Maintain a rm grip on the saw and position your arms to resist kickback forces. Position your body to either side of the blade,
but not in line with the blade. Kickback could cause the saw to jump backwards, but kickback forces can be controlled by the operator,
if proper precautions are taken.
When blade is binding, or when interrupting a cut for any reason, release the trigger and hold the saw motionless in the
material until the blade comes to a complete stop. Never attempt to remove the saw from the work or pull the saw backward
while the blade is in motion or kickback may occur. Investigate and take corrective actions to eliminate the cause of blade binding.
When restarting a saw in the workpiece, centre the saw blade in the kerf and check that saw teeth are not engaged into the
material. If saw blade is binding, it may walk up or kickback from the workpiece as the saw is restarted.
Support large panels to minimise the risk of blade pinching and kickback. Large panels tend to sag under their own weight.
Supports must be placed under the panel on both sides,near the line of cut and near the edge of the panel.
Do not use dull or damaged blades. Unsharpened or improperly set blades produce narrow kerf causing excessive friction, blade
binding and kickback.
Blade depth and bevel adjusting locking levers must be tight and secure before making cut. If blade adjustment shifts while
cutting,it may cause binding and kickback.
Use extra caution when making a “plunge cut” into existing walls or other blind areas. The protruding blade may cut objects that
can cause kickback.
Check lower guard for proper closing before each use. DO NOT operate the saw if lower guard does not move freely and close
instantly. Never clamp or tie the lower guard into the open position. If saw is accidentally dropped, lower guard may be bent.
Raise the lower guard with the retracting handle and make sure it moves freely and does not touch the blade or any other part, in all
angles and depths of cut.
Check the operation of the lower guard spring. If the guard and the spring are not operating properly, they must be serviced
before use. Lower guard may operate sluggishly due to damaged parts, gummy deposits, or a build-up of debris.
Lower guard should be retracted manually only for special cuts such as “plunge cuts” and “compound cuts”. Raise lower
guard by retracting handle and as soon as blade enters the material, the lower guard must be released. For all other sawing, the
lower guard should operate automatically.
Always observe that the lower guard is covering the blade before placing saw down on bench or oor. An unprotected,
coasting blade will cause the saw to walk backwards,cutting whatever is in its path. Be aware of the time it takes for the blade to
stop after switch is released.
DO NOT work overhead with the saw. In this position you do not have sufcient control of the power tool.
Use suitable detectors to determine if utility lines are hidden in the work area or call the local utility company for assistance.
Contact with electric lines can lead to re and electric shock. Damaging a gas line can lead to explosion. Penetrating a water
line causes property damage or may cause an electric shock.
SCT125 Issue:1 - 13/11/14
Original Language Version
© Jack Sealey Limited

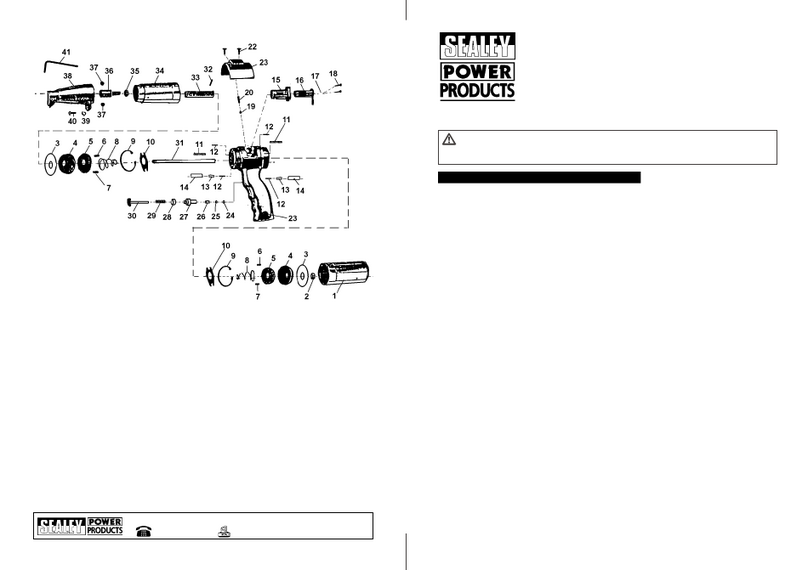
g.1
KEY
1. Spindle lock
2. On/Off switch
3. Safety button
4. Twin blades
5. Rear handle
6. Locking button for rear handle
7. Auxiliary handle
8. Safety guard
9. Lever for safety guard
10.Wax stick
11.Feeding knob for wax stick
12.Wrench
13.Feed Aperture
2. INTRODUCTION
3. SPECIFICATION
4. OPERATION
Designed for cutting metals, plastics, woods and aluminium materials. Twin blades rotate in opposite directions creating a fast, burr-free, clean
cut whilst minimising kick-back and sparks for a safer operation. Features a controlled lubricating feed direct into blades for maintaining cutting
efciency and cooling blades. Three position rotating handle with soft grip for added comfort. Die-cast aluminium safety guard. Supplied in
storage case with ten lubricating sticks. Additional lubricating sticks and replacement blade sets available separately - order Model No’s SMT125L
& SMT125B.
Model No: .........................................................................SCT125
BladeSize: ........................................................................Ø125mm
Maximum Cutting Depth:................................................................30mm
Motor Power: .........................................................................920W
Supply:.............................................................................. 230V
No Load Speed:.....................................................................4500rpm
Weight:.............................................................................3.25kg
Vibration: . . . . . . . . . . . . . . . . . . . . . . . . . . . . . . . . . . . . . . . . . . . . . . . . . . . . . . . . . . . . . . . . . . . . . . . . . .4.96m/s²
Uncertainty: ........................................................................2.48m/s²
Noise Power: ......................................................................101dB(A)
Noise Pressure: .....................................................................90dB(A)
Afx the auxilliary handle (g1.7) Select the required rear handle position by pressing the handle locking button (g.1.6) and turning the
handle appropriately.
4.1. SAWING
WARNING: Ensure that the power ex is always laid well clear of the saw blades.
4.1.1. Secure the work to a stable support before attempting to cut .
4.1.2. Ensure that the workpiece is supported close to the cut and that the cut is closest to you.
4.1.3. Switch on by depressing the safety button (g.1.6) and then the on/off switch (g.1.2)
4.1.4. Run the saw up to full speed before offering the blades to the work. Failure to do so could result in the blades snatching, leading to a
poor cut and the risk of injury.
4.1.5. Employ a steady pressure when guiding the saw. Excessive pressure will result in an uneven cut and will reduce the service life of the
blades.
4.1.6. Always cut in a straight line; any sideways pressure will result in the blades binding. This will cause overheating and premature wear.
4.1.7. Feed the saw into the work at a steady rate; if the motor slows appreciably, reduce the feed rate. Too slow a feed rate can cause
premature wear.
SCT125 Issue:1 - 13/11/14
Original Language Version
© Jack Sealey Limited
4.2. BLADE LUBRICATION
4.2.1. Lubrication will be required when cutting materials such as:
aluminium, copper, steel and iron which produce swarf likely to adhere to the blades.
4.2.2. Lubrication is achieved by inserting a wax stick (gs.1.10 & 2.10) into the feed aperture
(gs.1.13 & 2.13) and winding in with the feed knob (gs1.11 & 2.11) until the tip of the
wax stick touches the blades.
4.2.3. Wind more wax in periodically by means of the feed knob to replenish the supply of
lubricant.
5.1. CHANGING BLADES
WARNING: Use only the blades specified for this machine. Other blades may not have the
correct clearances resulting in damage to the machine and injury.
WARNING: Isolate from the power supply and allow to cool before carrying out any
maintenance.
Wear protective gloves before touching blades.
To remove blades:
5.1.1. Press the spindle lock (g.1.1).
5.1.2. Undo the clamping screw by turning it anticlockwise using the wrench supplied
(g.1.12 & Fig.3).
5.1.3. Push back the blade guard.
5.1.4. Remove the clamping screw and the spacer.
5.1.5. Lift the outer saw blade and remove.
5.1.6. Lift the inner saw blade from its locating pins and remove.
To ret blades:
5.1.7. Fit the inner blade. Locate holes with locating pins (the blade will only t facing the correct
way). Ensure that the blade is sitting correctly on the centre boss.
See (g.4)
5.1.8. Place the outer blade on the boss MAKING SURE THAT THE TEETH FACE THE TEETH
ON THE INNER BLADE (g.5).
5.1.9. Ret the spacer and clamping screw.
5.1.10. Finger tighten the clamping screw, ensuring that the spacer is located centrally.
5.1.11. Engage the spindle lock and tighten fully using the wrench.
5.2. BLADE GUARD
5.2.1. DO NOT make any adjustments or modications to the blade guard.
5.2.2. Before each use of the saw, ensure that the blade guard has full and free movement.
5.2.3. If any fault is found with the blade guard, DO NOT use the machine; have it checked and
repaired by a competent person.
5.2.4. If the saw is dropped, check the blade guard for damage before further use.
5.3. CARBON BRUSH REPLACEMENT
5.3.1. If excessive sparking is noticed from within the machine, check the condition of the carbon
brushes. These will wear down with use and are a consumable item.
WARNING: Ensure that the saw is disconnected from the power supply.
5.3.2. To check the brushes: Unscrew the brush holder caps (g.6, on either side of the machine).
5.3.3. Removing the caps will reveal the carbon brush assemblies (g.7.)
5.3.4. Gently pull on the spring caps to withdraw the brushes.
5.3.5. If the brushes are worn down, obtain replacements from your Sealey dealer. Always
replace both brushes at the same time.
5.3.6. Replacement is the reverse of 5.2.3 and 5.2.4.
g.2
5. MAINTENANCE
g.3
g.4
g.5
g.6
g.7
01284 757500
01284 703534
sales@sealey.co.uk
Sole UK Distributor, Sealey Group,
Kempson Way, Suffolk Business Park,
Bury St. Edmunds, Suffolk,
IP32 7AR
www.sealey.co.uk
NOTE: It is our policy to continually improve products and as such we reserve the right to alter data, specifications and component parts without prior notice.
IMPORTANT: No liability is accepted for incorrect use of this product.
WARRANTY: Guarantee is 12 months from purchase date, proof of which will be required for any claim.
Parts support is available for this product. To obtain a parts listing and/or diagram,
please log on to www.sealey.co.uk, email sales@sealey.co.uk or telephone 01284 757500.
Environmental Protection
Recycle unwanted materials instead of disposing of them as waste. All tools, accessories and packaging should be sorted,
taken to a recycling centre and disposed of in a manner which is compatible with the environment.
When the product becomes completely unserviceable and requires disposal, drain off any fluids (if applicable)
into approved containers and dispose of the product and the fluids according to local regulations.
WEEE Regulations
Dispose of this product at the end of its working life in compliance with the EU Directive on
Waste Electrical and Electronic Equipment (WEEE). When the product is no longer required, it must be disposed
of in an environmentally protective way. Contact your local solid waste authority for recycling information.
SCT125 Issue:1 - 13/11/14
Original Language Version
© Jack Sealey Limited

WARNING! – Risk of Hand Arm Vibration Injury.
This tool may cause Hand Arm Vibration Syndrome if its use is not managed adequately.
This tool is subject to the vibration testing section of the Machinery Directive 2006/42/EC.
This tool is to be operated in accordance with these instructions.
Measured vibration emission value (a): ..........4.96 m/s²
Uncertainty value (k):..........................2.48 m/s²
Please note that the application of the tool to a sole specialist task may produce a different average vibration emission. We recommend that a
specific evaluation of the vibration emission is conducted prior to commencing with a specialist task.
A health and safety assessment by the user (or employer) will need to be carried out to determine the suitable duration of use for each tool.
NB: Stated Vibration Emission values are type-test values and are intended to be typical.
Whilst in use, the actual value will vary considerably from and depend on many factors.
Such factors include; the operator, the task and the inserted tool or consumable.
NB: ensure that the length of leader hoses is sufficient to allow unrestricted use, as this also helps to reduce vibration.
The state of maintenance of the tool itself is also an important factor, a poorly maintained tool will also increase the risk of Hand Arm Vibration
Syndrome.
Health surveillance.
We recommend a programme of health surveillance to detect early symptoms of vibration injury so that management procedures can be modified
accordingly.
Personal protective equipment.
We are not aware of any personal protective equipment (PPE) that provides protection against vibration injury that may result from the
uncontrolled use of this tool. We recommend a sufficient supply of clothing (including gloves) to enable the operator to remain warm and dry and
maintain good blood circulation in fingers etc. Please note that the most effective protection is prevention, please refer to the Correct Use and
Maintenance section in these instructions. Guidance relating to the management of hand arm vibration can be found on the HSC website
www.hse.gov.uk - Hand-Arm Vibration at Work.
Table of contents
Other Sealey Saw manuals

Sealey
Sealey SM1305 User manual

Sealey
Sealey SM355D User manual

Sealey
Sealey MS150 User manual

Sealey
Sealey SM353CE.V2 User manual

Sealey
Sealey CPS1418V User manual

Sealey
Sealey SM35CE.V4 User manual

Sealey
Sealey GSA345 User manual

Sealey
Sealey SCS1400 User manual

Sealey
Sealey SM354CE User manual

Sealey
Sealey MG214/230V User manual

Sealey
Sealey SM658 User manual

Sealey
Sealey TS10CZ User manual

Sealey
Sealey SMS8 User manual

Sealey
Sealey HTS8 User manual

Sealey
Sealey SM62 User manual

Sealey
Sealey SA34.V2 User manual

Sealey
Sealey SM6582 User manual

Sealey
Sealey SM353CE.V2 User manual

Sealey
Sealey Quality machinery SM43.V3 User manual

Sealey
Sealey MG214/230V.V2 User manual