REYHEE Superlite User manual

1
User manual: Superlite
Before using your new REYHEE Superlite foldable electric wheelchair,
please read and comprehend ALL warnings, safety instructions, and
operational instructions as labeled on the product packaging box, on the
product itself, and in this user manual.
SKU number: XW-LY001-A
FDA-Cleared Class II Medical Device
www.reyhee.com

2
Table of contents
Table of contents............................................................................................................. 2
Introduction...................................................................................................................... 3
Packaging contents……………………………………………………………………………. 4
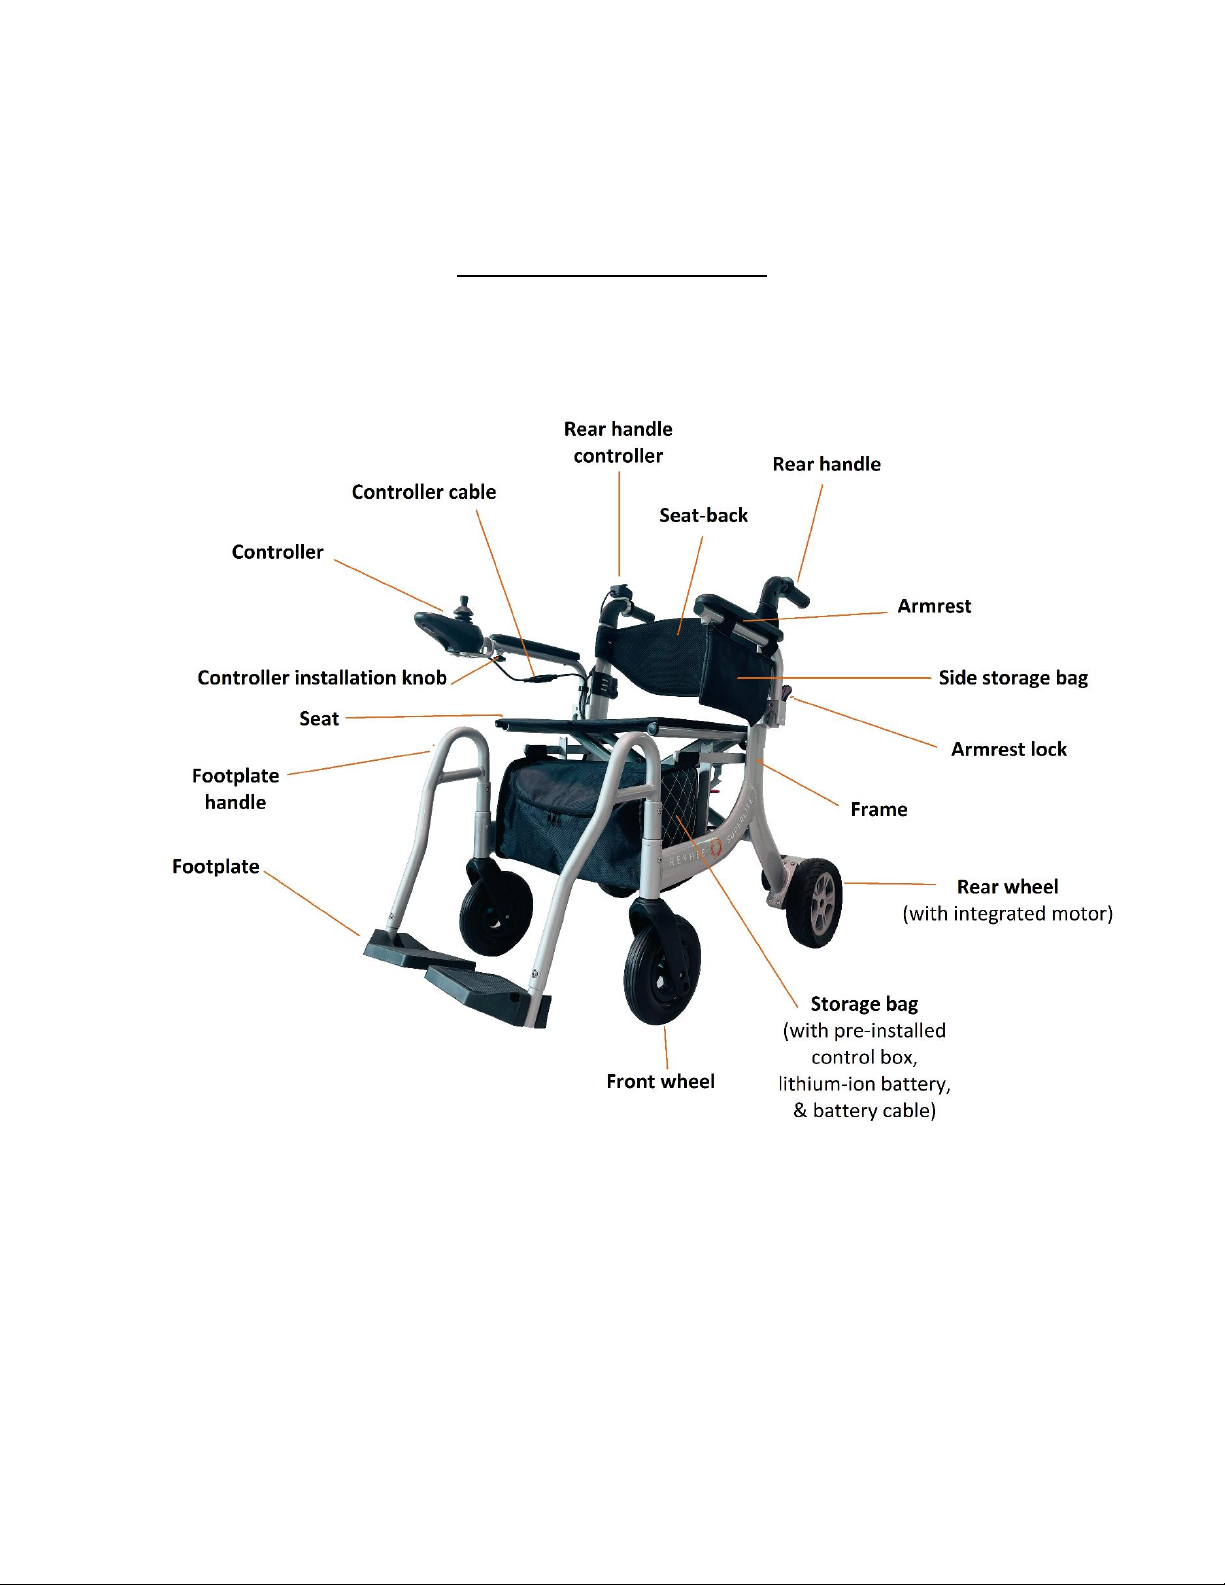
Getting to know your Superlite................................................................................... 5 - 6
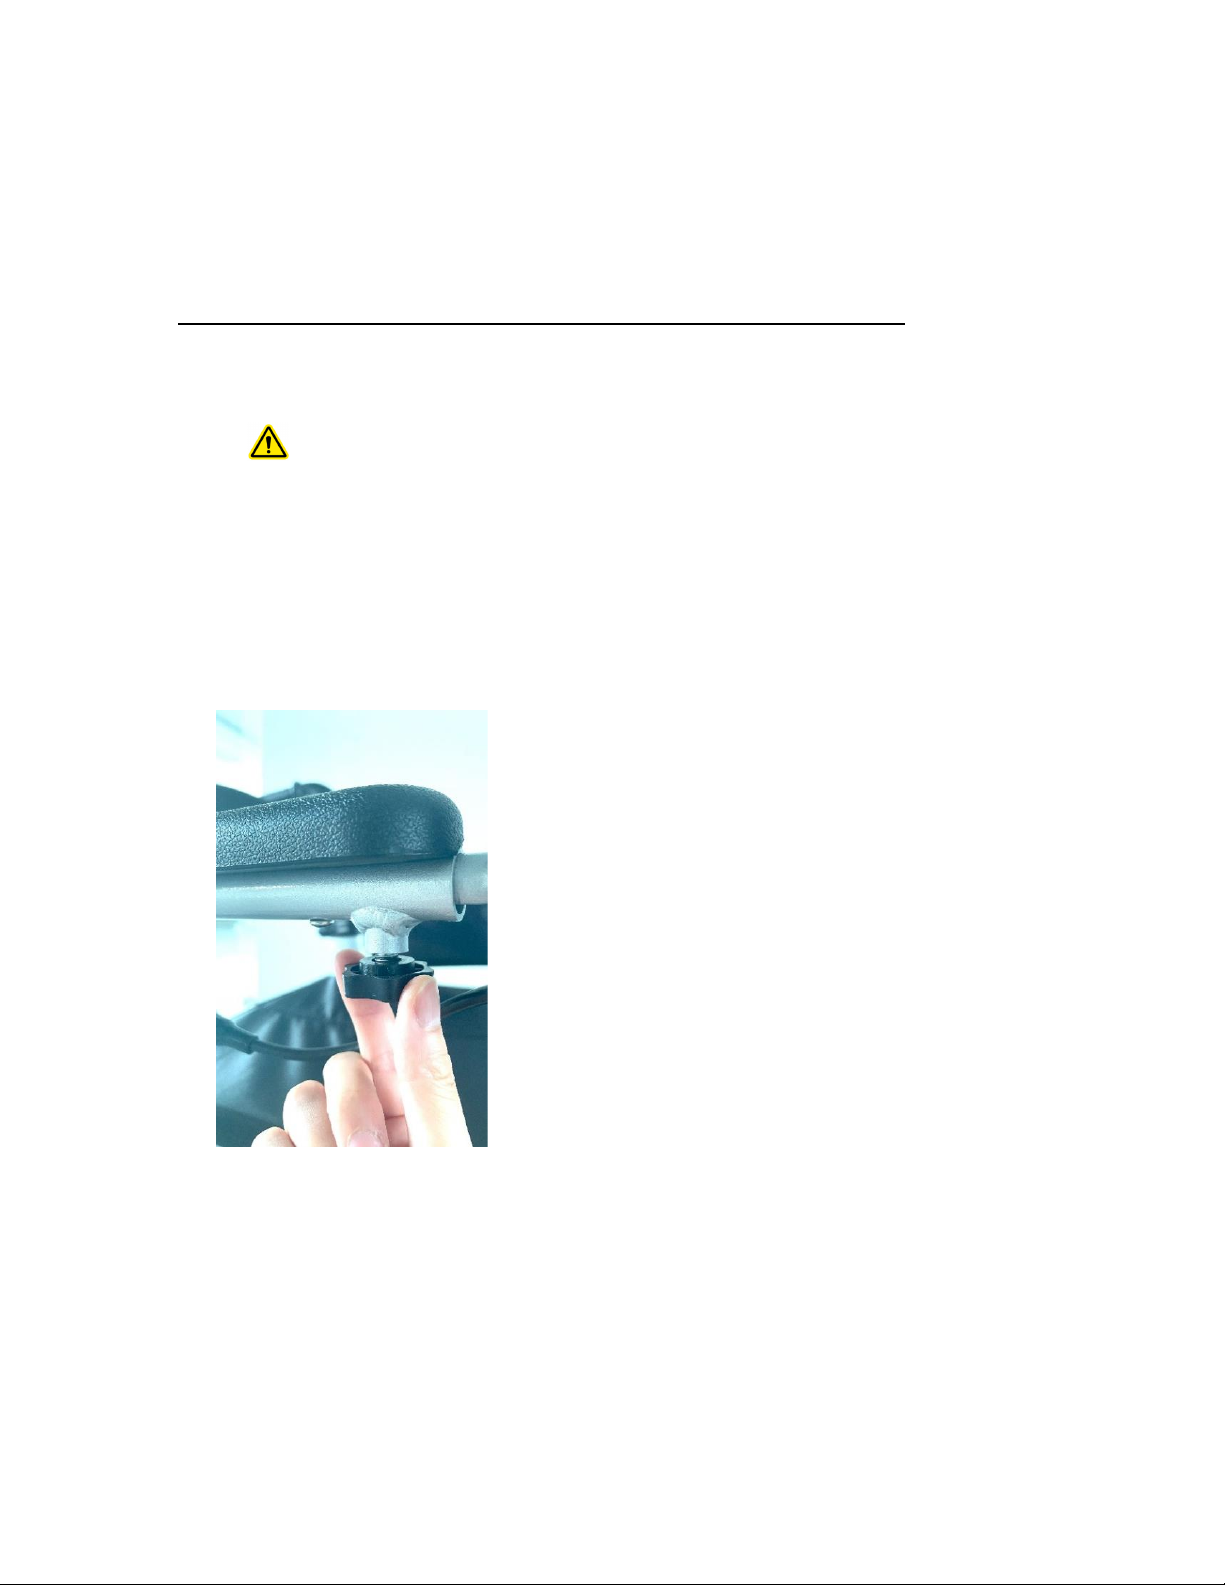
Assembly.................................................................................................................. 7 - 19
Important battery/charger warnings and charging instructions............................... 19 - 23
Important warnings and safety instructions............................................................ 24 - 29
How to operate your Superlite................................................................................ 29 - 55
▪Pre-ride checklist……………………………………………………………..………. 29
▪How to unfold the Superlite………………………………………………..…… 30 - 33
▪How to lift and lower the armrests…………………………………………….. 34 - 35
▪How to use the dual rear levers……………………………………………….. 36 - 37
▪How to use the main controller…..………………………………………..…... 37 - 42
▪How to adjust the height of the rear handles………………………………… 42 - 43
▪How to use the rear handle controller………………………………………… 44 - 47
▪Getting in and sitting in the Superlite…………………………………………. 47 - 48
▪Standing up and getting out of the Superlite…………………………………. 48 - 49
▪How to fold the Superlite………………………………………………..……… 49 - 53
▪How to transport the Superlite……………………………………………..….. 53 - 55
Maintenance........................................................................................................... 56 - 57
Technical specifications………………………………………………………………… 58 - 59
Troubleshooting………………………………………………………………………………. 59
Warranty…………………………………………………………………………………. 60 - 61
Recycling and disposal…………………………………………………………………….…62
Customer support…………………………………………………………………………….. 62
DISCLAIMERS:
1) This product is NOT intended to be ridden or operated by children, pets, or persons with limited physical
and/or mental faculties.
2) All images and diagrams in the manual are for illustrative purposes only. They may not reflect the actual
appearance of the product or its components.
3) The appearance, specifications, and procedures of the product and any related accessories are subject to
change without notice. (The availability of related accessories is also subject to change without notice.)
Have an issue? Please don’t return this product. Our friendly customer support staff can help.
Call +1-888-817-6585, or email support@reyhee.com

3
Introduction
Reyhee offers mobility solutions that improve lives.
We’re not here to remind people that they’re dependent on a medical mobility device;
rather, we’re here to help people remember what it’s like to be mobile, be self-sufficient,
and most importantly, be independent.
Together, with Reyhee, people can continue to visit the places they hold fondly, remain
connected to the people they love, keep on doing that which they enjoy, and continue to
live—really live.
People need products from a brand they can trust, so we commit our decades of
experience and expertise to the development and manufacturing of safe, reliable, and
FDA approved mobility solutions that can be used with confidence.
Because life happens, and sometimes events and changes create challenges for us to
overcome, Reyhee prides itself on being able to offer that bit of help we sometimes
need so that we may get back to doing those activities we cherish.
And along the way make the life we knew, the life we know.

4
Packaging contents
When opening the packaging box, turn the box on its side and gradually pull out
the contents. (If you anticipate having difficulty with this step, please DO NOT
ATTEMPT to unpack - to prevent potential injury to yourself & potential damage to the
product - and seek assistance.)
The Superlite comes with the following items in the packaging box.
Please identify and locate all of the following prior to assembly:
1) Superlite foldable electric wheelchair
a) Pre-assembled frame, seat, and wheels (motors integrated in rear wheels)
b) Pre-installed power cables (x 2)
c) Pre-installed storage bag beneath the seat, with the following components inside:
•Pre-installed control box
•Pre-installed lithium-ion battery pack
•Pre-installed battery cable (must be connected by user –see assembly
instructions)
d) Pre-installed side storage bag (non-removable)
2) Charger with charging cable
3) Main controller (must be installed by user)
a) Integrated joystick and control buttons
b) Integrated charging port, USB port, and headlight (all located underneath)
c) Integrated controller cable
4) Rear handle controller (must be installed by user)
a) Integrated thumb joystick, power button, and controller cable
b) Screwdriver for installation (see assembly instructions)
5) User manual
Superlite wheelchair Charger with charging cable Main controller Rear handle controller

5
Getting to know your Superlite
Parts diagram: Side view

6
Getting to know your Superlite (cont.)
Parts diagram: Back view

7
Assembly
IMPORTANT: Your Superlite comes folded and mostly pre-assembled. Please read,
comprehend, and follow ALL warnings and instructions below PRIOR to operating your
Superlite.
WARNINGS:
1) If you observe damage to any part of the product upon unpacking, please DO
NOT ATTEMPT to assemble it and contact customer support for further
instructions.
2) Assembly MUST be conducted by an adult, who is able to demonstrate the
physical and mental faculties required to understand the instructions and execute
proper assembly.
3) DO NOT ALLOW children or persons with limited physical and/or mental faculties
to conduct assembly, as there may be small parts, sharp edges / sharp points,
and packaging material that can present as hazardous.
4) Ensure proper disposal (and/or recycling, per local laws) of all interior packaging
material, so that they are OUT OF REACH from children, pets, and any persons
with limited physical/mental faculties.
5) It is recommended that you KEEP the original packaging box, in the event that
the product needs to be stored away.
If you are not certain that you are capable of fully understanding and safely executing
the assembly steps below, please do not attempt assembly and seek assistance.

8
Assembly (cont.)
1) Step one: Unfolding the Superlite
a) Ensure the Superlite is upright and resting on all four wheels on a flat, even, and
dry indoor floor surface.
The dual rear levers (on the rear wheels) should both be in “D” (“Drive”)
position, to prevent accidental movement during unfolding.
Also ensure there is ample room for unfolding the Superlite.
b) On the back of the Superlite, there is a folding latch. To enable the Superlite to
unfold, lift the folding latch until it is fully unlocked.
Ensure your fingers and other body parts are safely out of the way of any
parts that may be moving as the folding latch is being unlocked.

9
Assembly (cont.)
Step one: Unfolding the Superlite (cont.)
c) Grasp one of the armrests firmly with one hand.
d) At the same time, use the other hand to push down on the opposite edge of the
seat cushion.
Ensure your hands and feet are safely out of the way of any parts that
may be moving as the Superlite is being unfolded.
e) Ensure the Superlite seat is fully unfolded, before proceeding to step two of
assembly.

10
Assembly (cont.)
2) Step two: Installing the main controller
Instructions for installing the main controller in the right-side armrest:
a) Follow these instructions if you intend to operate the Superlite with your RIGHT
hand.
Do NOT press the power button on the main controller, to prevent turning
on the product and potentially causing accidental product movement
during assembly.
b) Identify the installation point (open hole) in front of the right-side armrest.
c) Ensure the controller installation knob (located beneath the armrest) is partially
loosened. (Turn left to loosen, if needed.)
This manual suits for next models
1
Table of contents
Other REYHEE Wheelchair manuals


