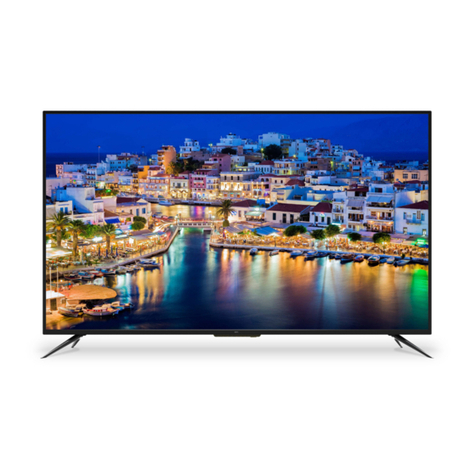
Prosonic LDD-2262T2C User manual

Instruction Manual
Model NO.: LDD-2262T2C
22” LED TV WITH DVB-T2/DVB-C & CI+ & DVD


Contents
Caution
Safety Information
Accessories
Technical Specification
Product Introduction
Front View
OSD Menu
1. CHANNEL menu
2. PICTURE menu
3. SOUND menu
4. TIME menu
6. SETUP menu
DVD Operation
1
2
3
3
4
5
4
9-16
9-10
11
12
13
16
23-30
Connections
6-7
Remote Control
8
Basic Operation
Multimedia Operation 17-19
5. LOCK menu 14-15
Recording Operation 20-21
EPG menu 22

Caution
Correct disposal of this Product
(Waste Electrical & Electronic Equipment (WEEE)
Your product is designed and manufactured with high quality materials and
components which can be recycled and reused.
This symbol means that electrical and electronic equipment, at their end-
of-life should be disposed of separately from your household waste.
Please dispose of this equipment at your local community waste collection/
recycling center.
In the USA there are separate collection systems for used electrical and
electronic products. Please help us to conserve the environment we live in!
1
The exclamation point within an equilateral triangle is intend to alert the
user to the presence of important operating and maintenance (servicing)
instructions in the literature accompanying the appliance.
The lightning flash with arrowhead symbol, within an equilateral triangle
is intended to alert the user to the presence of un-insulated “dangerous
voltage” within the products enclosure that may be of sufficient magnitude
to constitute a risk of electric shock to the persons.
directives.

Safety Information
To ensure reliable and safe operation of this equipment, please read carefully all the
instructions in this user guide, especially the safety information below.
Electrical safety
Physical safety
but ensure at least 5cm (2") clearance all around the unit.
care of the remote control, do not drop it or allow it to come into contact with liquids.
stubborn stains, you may use a damp soft cloth with diluted detergent.
2
To prevent overload, don't share the same mains supply socket with too many other
items of equipment.
-Do not place any connecting wires where they may be stepped on or tripped over.
-Do not place heavy items on the leads, which may damage them.
-Hold the Mains plug, not the wires, when removing from a socket.
fi(laireaehttcennocsid,sdoirepgnolrofVTehtgnivaelelihwromrotsrednuhtagniruD-
outdoor) and the power supply.
-Do not allow water or moisture to enter the TV . Do NOT use in wet or moist areas such
as Bathrooms, steamy kitchens or near swimming pools.
3XOOWKHSOXJRXWLPPHGLDWHOy, and seek professional help if:
-the mains plug or cable is damaged
-liquid is spilt onto the set, or if it is accidentally exposed to water or moisture
-anything accidentally penetrates the ventilation slots
-the set does not work normally.
-Do NOT remove the safety covers. There are no user serviceable parts inside.
You may invalidate the warranty4XDOL¿HGSHUVRQQHORQO\DUHSHUPLWWHGWRVHUYLFHWKLV
apparatus.
-To avoid battery leakage, remove exhausted batteries from the remote control
handset, or when not using for along period.
-Do NOTEUHDNRSHQRUWKURZH[KDXVWHGEDWWHULHVRQD¿UH

Accessories
3
Technical Specification
User’s Manual Remote control
* Note: The configuration of the components may look different from the following illustration
- TV System
- Screen Size
- Resolution
- Aerial input
Remote Control
Type
Control distance
Control angle
Batteries
PAL BG/DK/I SECAM BG/DK L/L’
21.6 inch(diagonal)
1920x1080
0
infrared
5m
30 (horizontal)
2 x 1.5V, size AAA
- Audio output power
- Power Consumption
2x3W
12V 3A 28W
Batteries
for Remote
Control
Converter cable for
AV and YPbPr video Mains adapter
POWER MUTE
DISPLAY
MENU
TV/TXT CANCEL REVEAL NICAM/A2
INDEX HOLD SIZE SUBPAGE
REC REC.LIST
EXIT
VOL CH
1234
5678
90
INPUTTV/RADIO
PICTURE SOUND ASPECT SLEEP
SUBTITLE CH.LIST EPG FAV
OK
D.SET D.SUB D.LAN
D.MENU

Product Introduction
Introduction
Front View
POWER to turn on and off.
off Null
Led Indicator&Remote Control window
(Keep clear)
4
MENU CH+ CH- VOL+ VOL- POWER
INPUT PLAY EJECT
MENU CH+ CH- VOL+ VOL- POWER
INPUT PLAY EJECT
INPUT:
MENU:
CH+/-: Press to scan through channels.
VOL+/-:
POWER:
PLAY: Play/Pause DVD program.
EJECT: Load/eject DVD disc.

5
Connections
Common Interface: CI slot.
RF: Connect antenna or cable 75 Ohm coaxial to receive TV signal.
MINI YPbPr: Connect it to the YPbPr video output terminal of DVD with the Converter cable.
POWER: Connect to the mains adaptor.
USB: USB jack for update, media and PVR.
HDMI1/2: Connect it to the HDMI of DVD or other equipment.
VGA: For PC display.Connect it to the D-Sub 15 pins analog output connector of the PC.
PC-IN: Connect it to the audio output terminal of PC.
SCART: Connect them to the SCART video output terminal of DVD.(used in component source)
Headphone: Connect it to your headphone or other audio equipment.
Coax: Digital coaxial output.
SCARTPOWER HDMI1 VGA PC-IN RF COAX
MINI AVMINI YPbPr
USB
MINI AV: Connect it to the audio & video output terminals of DVD with the Converter cable.
(Audio terminals are shared with YPbPr)
HDMI2
Common Interface
Headphone

Remote Control
6
POWER: Turn the TV on/standby.
MUTE: Press to mute the sound, press again or press
VOL+ to unmute.
SUBTITLE: Turn on/off the subtitle display in DTV mode.
PICTURE: Select the picture mode.
ASPECT: Change the screen display mode.
SOUND: Select the sound mode.
SLEEP: Standby timer.
CH.LIST: Display the channel list.
EPG: To show the Electronic Program Guide during no-menu
state only in DTV mode.
FAV: Display the favorite program list.
TV/RADIO: Switch to TV/RADIO.
INPUT: Press to display the input source menu.
MENU: System setup menu.
EXIT: Exit the OSD menu.
Allows you to navigate the on-screen menus and adjust the
system settings to your preference.
CURSOR KEYS OK
NUMBER BUTTONS
Press 0-9 to select a TV channel directly when you
are watching TV.
Return to the previous channel viewed.
DISPLAY: Press to display the current mode’s information.
POWER MUTE
DISPLAY
MENU
TV/TXT CANCEL REVEAL NICAM/A2
INDEX HOLD SIZE SUBPAGE
REC REC.LIST
EXIT
VOL CH
1234
5678
90
INPUTTV/RADIO
PICTURE SOUND ASPECT SLEEP
SUBTITLE CH.LIST EPG FAV
OK
D.SET D.SUB D.LAN
D.MENU
: Load/eject DVD disc.

Remote Control
7
CH / : Scan through channels.
VOL+/-: Adjust the volume.
:Stop program.
:Play/Pause program.
Colour buttons: Short cuts-follow the coloured links in the text
NICAM/A2: TV Nicam/A2 select.
TV/TXT: Turn off/on the Teletext display.
CANCEL: Cancel the Teletext display.
REVEAL: Reveal any hidden text.
HOLD: Hold or carry on the current subpage.
SIZE: Press to see top half of page double size,
Press again to see the bottom
half of page double size. Press again for normal size.
SUBPAGE: Press to enter subpages, pressagain to cancel.
D.SET: DVD system setup.
D.MENU: DVD play list/Disc menu.
D.SUB: Turn on/off the subtitle display in DVD mode.
D.LAN: Select DVD disc language.
INDEX: Go to index.
:Previous chapter.
:Next chapter.
:Fast reverse.
:Fast forward.
POWER MUTE
DISPLAY
MENU
TV/TXT CANCEL REVEAL NICAM/A2
INDEX HOLD SIZE SUBPAGE
REC REC.LIST
EXIT
VOL CH
1234
5678
90
INPUTTV/RADIO
PICTURE SOUND ASPECT SLEEP
SUBTITLE CH.LIST EPG FAV
OK
D.SET D.SUB D.LAN
D.MENU
REC : Press to start record the program in DVB mode.
REC . LIST: Record List.
Table of contents
Other Prosonic LED TV manuals