Power Wheels PW200 User manual

Power Wheels
PW200
IMPORTANT
READ ENTIRE MANUAL BEFORE
INSTALLING AND OPERATING YOUR
POWER WHEELS

Introduction
Congratulation on your purchase of Power Wheels! Please read this manual thoroughly to
become familiar with safe maintenance and operation of this unit. If you have any questions
regarding your Power Wheels please do not hesitate to contact our customer service at
6 Month Limited Warranty
Powered Hand Truck Solutions products have a six (6) month warranty from the date of
purchase against defects in material and workmanship. Any component or part returned to the
factory or service center, freight prepaid by the owner, will be examined to determine if
defective parts are from improper workmanship. If parts are defective for workmanship or
factory Powered Hand Truck Solutions will repair or replace without charge and returned to
the owner freight prepaid by Powered Hand Truck Solutions.
All warranty claims should be called in to (800) 920-8066. You can also e-mail:
Any modifications or alterations made to Power Wheels by the user void all warranties.
Any alterations of Powered Hand Truck Solutions products will void liability or warranty on the
part of Powered Hand Truck Solutions.
Warranty exclusions are:
- Damage due to abuse
- Damage resulting for over loading.
- Normal wear and tear on parts
- Modifications to Power Wheels.

Warnings
- Read and understand this manual before using Power Wheels
- Do not transport unstable or loosely stacked loads.
- Do not ride on or transport passengers.
- Avoid high speeds and making turns while traveling on slopes.
- Do not stand, sit or climb on hand truck, or use hand truck to move personnel.
- Do not exceed the load capacity of your hand truck.
- Always make sure the Power Wheels path is clear of persons and hazards during use.
- Always operate Power Wheels at safe speeds depending on operating conditions.
- Always load and unload with Power Wheels on a level surface.
- Never operate Power Wheels in water over 1/2" in depth or submerse the electronics in
water or other liquids.
- Do not use unauthorized Power Wheels replacement parts.
- Moving the Freewheel Lever to the "free" position will also disengage the
electromechanical park brake and allow the hand truck to roll.
- Power Wheels is equipped with a fail-safe electromechanical parking brake. Any
interruption in the power supply will cause the brake to immediately engage and stop the
hand truck. An unanticipated stop could pitch an ill-positioned load forward and off the cart.
- Do not connect accessories to the battery.
- Batteries contain sulfuric acid, which can burn eyes, skin, clothes, etc. Always wear gloves
when working with batteries. If contact occurs, flush immediately with water and get medical
attention.
- Always use battery chargers supplied by Powered Hand Truck Solutions. Other battery
chargers could damage your batteries.
- Only authorized technicians should service your Power Wheels.
IMPORTANT!
Power Wheels may be used in the upright (2 wheel) or platform (4 wheel) position. It is
recommended that Power Wheels is used in the platform position because it doesn't
require the user to balance the load while controlling the speed. Power Wheels is not
designed to climb stairs. Attempting to climb stairs can result in serious injury.
It is strongly recommended that the user gets familiarized with the operation of
Power Wheels without a load in a safe area. When the throttle lever is pushed power
is applied to the wheels. Power Wheels will begin to slowly accelerate until it reaches the
speed matching the throttle lever position. The speed will very depending of the position
of the throttle.
Do not use extension cords to plug in your charger. Plug the charger directly into a properly
grounded standard wall outlet. Do not remove the grounding prong or it could result in
personal injury or property damage.
Installation
Power Wheels is designed to be installed on your existing convertible hand truck. Please follow
these instructions to properly install your Power Wheels drive unit.
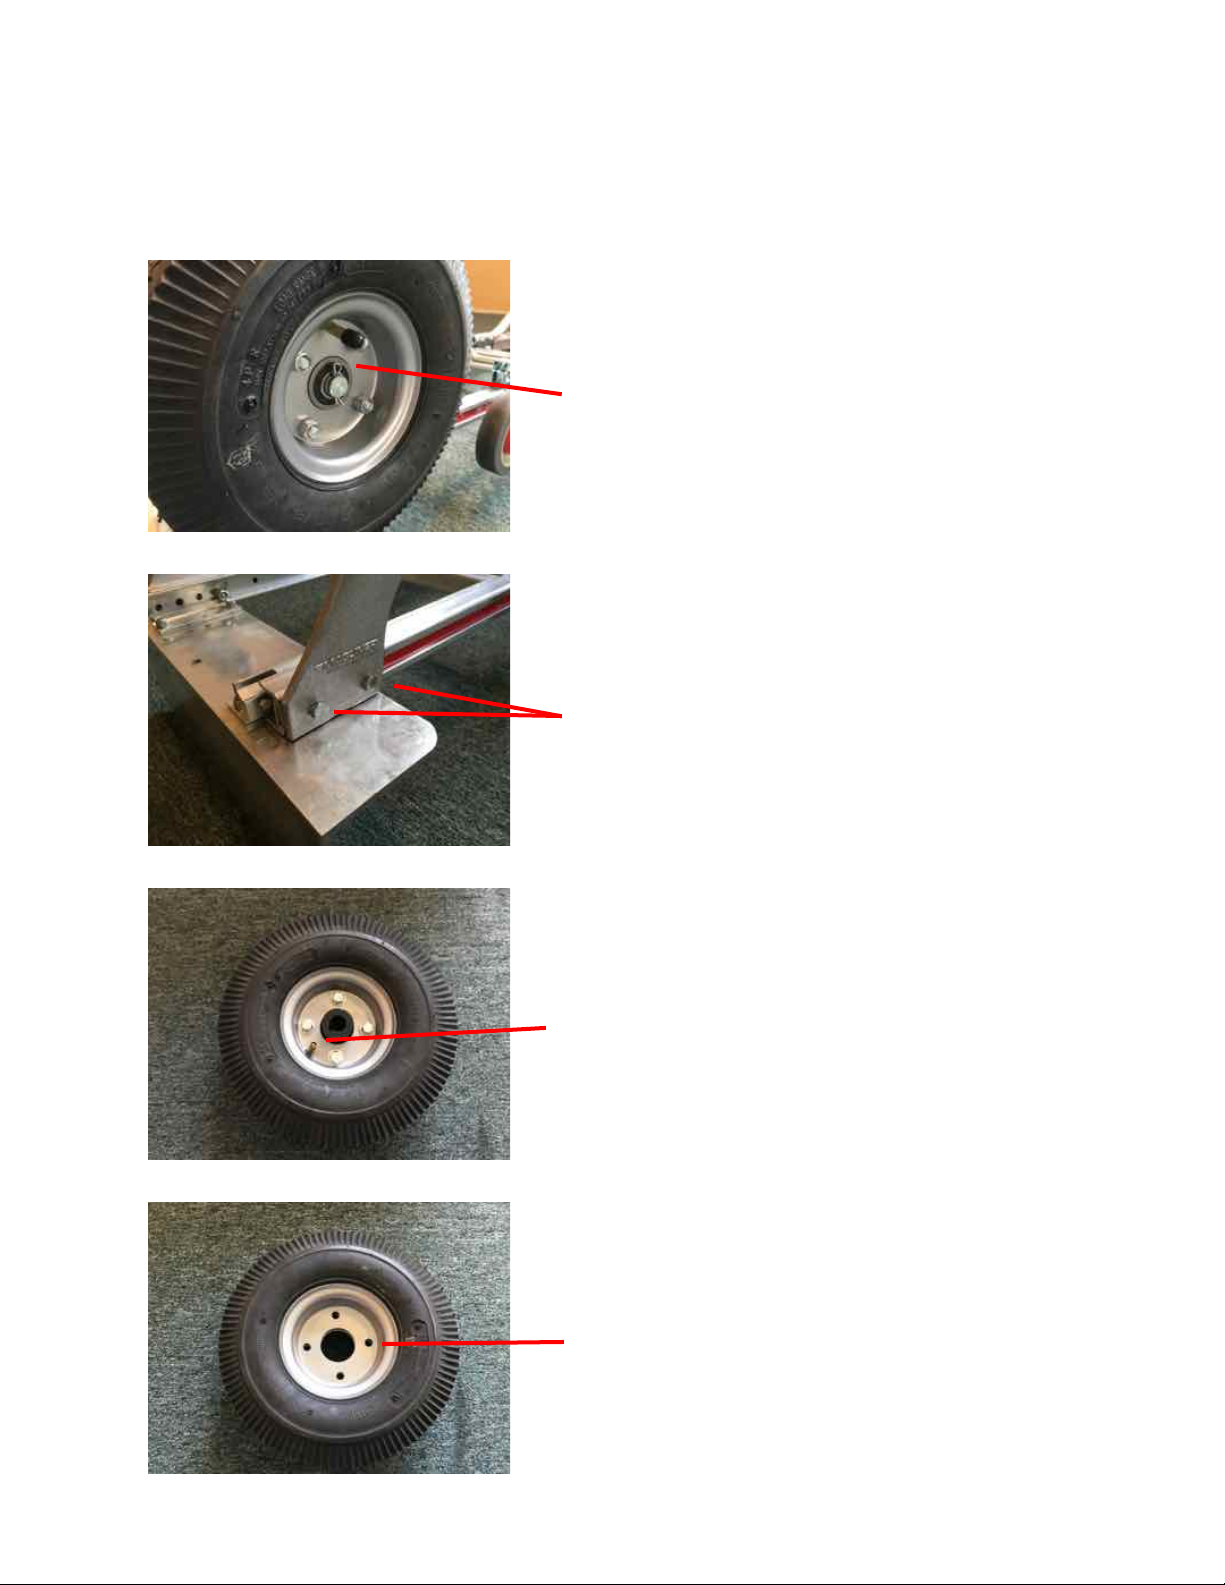
1. Place your hand truck horizontally on a flat surface
and remove the two cotter keys. This will allow you
to remove the tires and bearing from the hand truck
axle.
2. Remove the (4) 5/16" axle bolts.
3. Release the air for the tire.
4. Remove the 4 nuts and bearing from the rim.
∂

5. Place the tire on a flat surface with the valve stem
pointing down and insert the transaxle hub in the
center of the wheel hub.
6. Attach the transaxle hub to the wheel hub using
(4) 1/4-20" x 3/4" bolts, washers and nuts.
7. Inflate tires to indicated rating on side of tire.
Generally this is 50 U.S. pounds on quality tires,
40 pounds on lower grade tires.

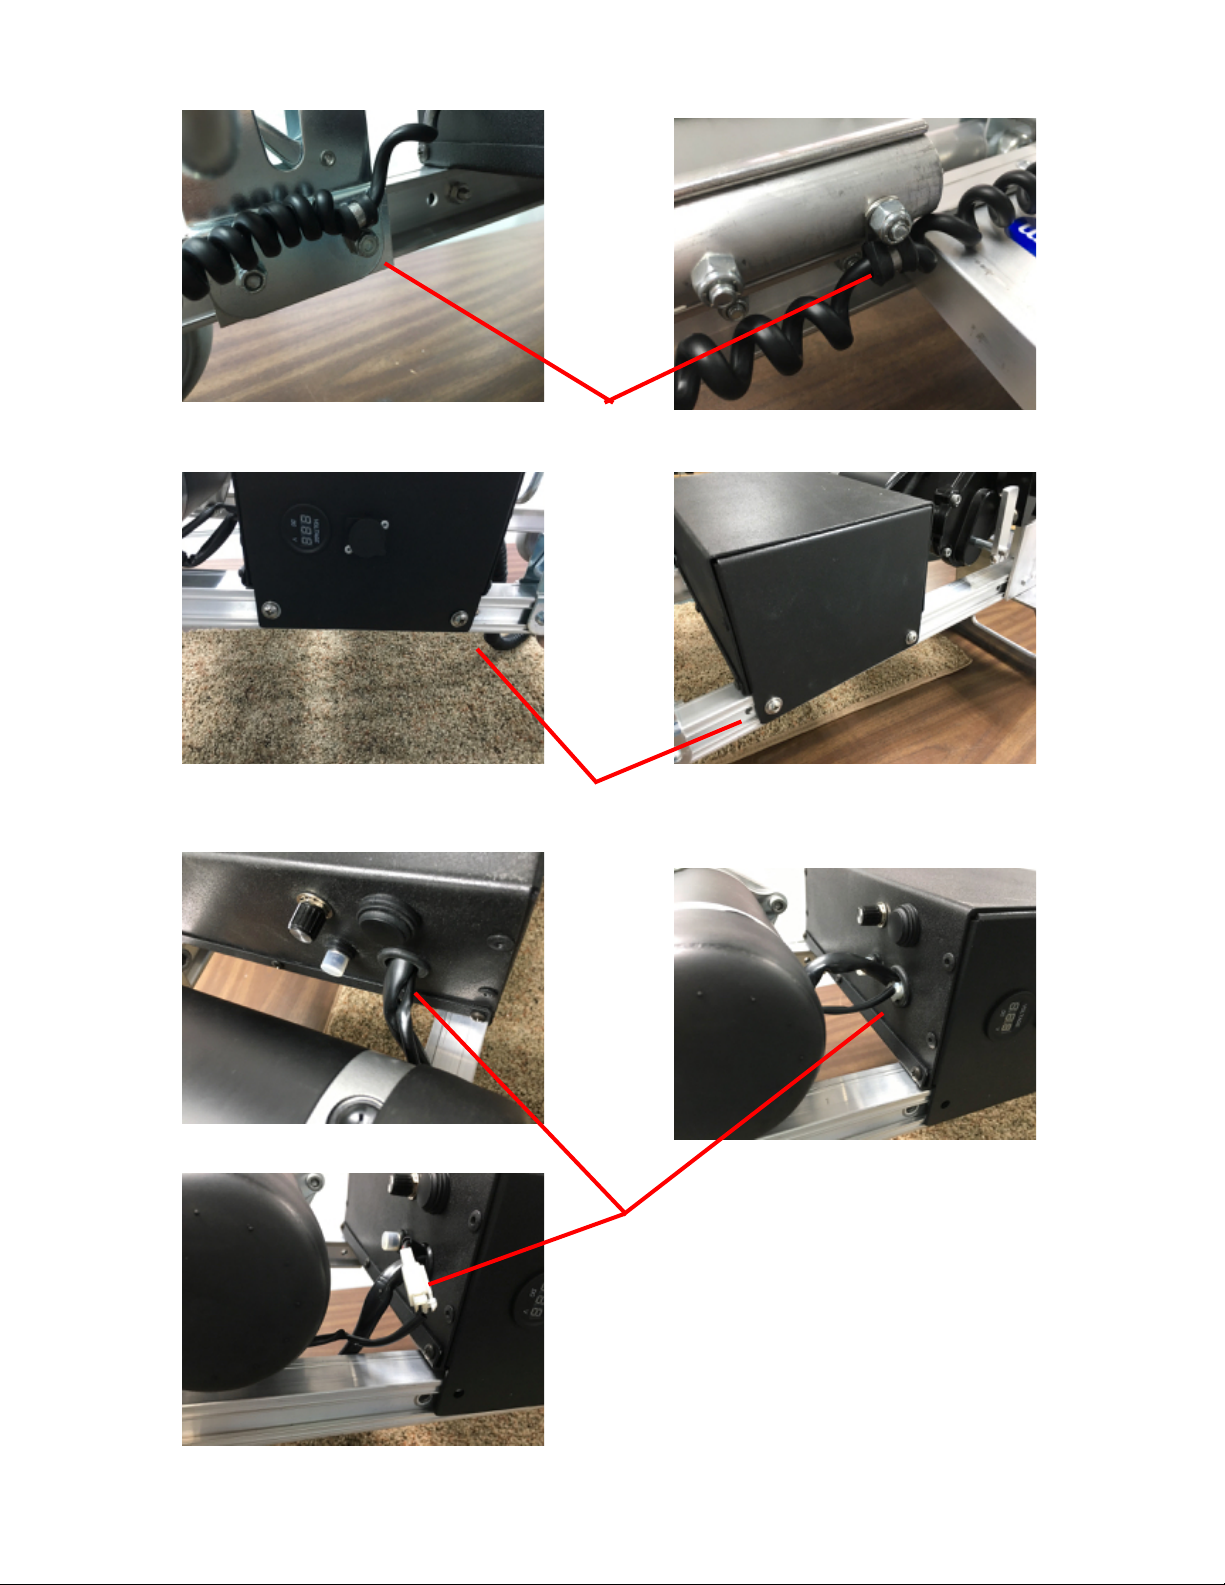
8. Place the transaxle / motor on the frame
and insert the (4) 5/16" x 2" bolts. Install the lock nuts
and tighten.
9. Unlatch the latch bar and push forward to make
clearance for battery box installation.
10. Place the battery box on the frame and align the
mounting hole to the holes located on hand truck
frame.
11. Insert two 1/4-20" x 1 1/4" bolts in the battery
box mounting holes closest to the transaxle /
motor. Insert two 1/4-20" x 1" bolts in the top
battery box holes. Attach the locking nuts to the
bolts and tighten.

12. Attach the wheels to the transaxle.
13. Insert the keyway into each hub.
14. Insert the hub bolt and tighten using a 6 mm
allen wrench.

15. Place the top controller with to of the hand
truck. Make to to go under the locking bar.
16. Remove nut on the locking bar and connect the controller wire clamp.
17. Remove nut on the handle bar and connect the controller wire clamp.
18. Attach the controller wire to the upper frame using
the self-tapper screw.

19. Remove the 2 screws holding the top controller
together.
20. Feed the controller box through the cross
support bar.
21. Drill 2 (1/4-20) holes on top of handle.
Holes should be drilled 2 1/4" apart.
22. Attach and alien top controller.
Change Batteries
1. Remove the two controller wiring clamps.
2. Remove the 4 battery box mounting bolts.
3. Slide the battery box forward. Gently pull on the
smaller electric brake wire to remove it from the
battery box. Pull about 6 inches of motor and
brake wire from the battery box. This will give you
enough wire length to remove the battery box.
Table of contents


 Operator's manual")

