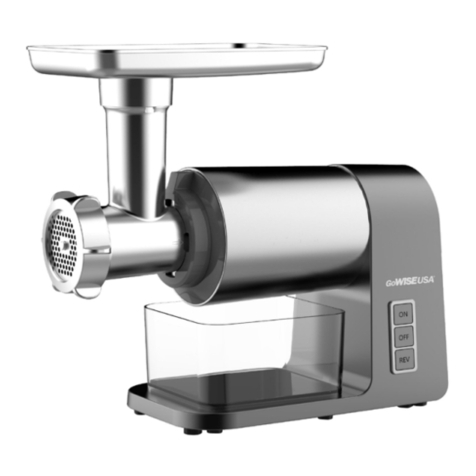
point POMG39160 User manual


2
GB
Thank you for purchasing your new POINT Series Power
Mincer. We recommend that you spend some time reading this
instruction manual in order to fully understand all the operational
and keep this instruction manual for future reference.
SE
Tack för att du har köpt en ny POINT Series köttkvarn.Vi
rekommenderar att du tar dig tid att läsa igenom denna bruksan
visning för att till fullo förstå alla driftsfunktioner som den erbjuder.
Läs igenom alla säkerhetsinstruktioner noga före användning och behåll
sedan den här bruksanvisningen för framtida bruk.
DK
Tak for købet din nye kødhakker fra POINT Series.Vi anbefaler at du
læser denne brugsanvisning, så du får en fuld forståelse af hvordan
alle betjeningsfunktionerne virker.Læs alle sikkerhedsinstruktioner
nøje før brug, og behold denne brugsanvisning til senere reference.
NO
Takk for at du kjøpte denne nye kjøttkvernen av merket POINT
Series.Vi anbefaler at du tar deg tid til å lese gjennom hele
bruksanvisningen for å bli fortrolig med alle funksjonene som
tilbys.Les alle sikkerhetsanvisningene nøye før bruk, og oppbevar
bruksanvisningen for fremtidig referanse.
FI
Kiitos, kun valitsit uuden POINT-lihamyllyn. Suosittelemme, että käytät
hetken tämän käyttöoppaan lukemiseen, jotta ymmärrät täysin, mitä
toimintoja tuotteessa on. Lue kaikki turvallisuusohjeet huolellisesti
ennen laitteen käyttöä ja säilytä käyttöopas myöhempää tarvetta
varten

3
GBNOFIDKSE
Instruction Manual– English
Bruksanvisning – Norsk
Bruksanvisning – Svenska
Brugsanvisning – Dansk
Käyttöohjeet – Suomi
page 4 - 12
sida 13 - 21
side 22 - 30
side 31 - 39
sivu 40 - 48

Safety warnings
1.
2.
3.
4.
5.
6.
7.
8.
9.
with moving parts.
10.
it
11.
12.
4
at rated power.

GB
5
13. If the mains cable is damaged it must be replaced by the
manufacturer, its service agent, or similarly qualified persons in order
to avoid a hazard.
14.This appliance can be used by children 8 years and older and persons
with reduced physical, sensory or mental capabilities or lack of
experience and knowledge if they
safe use of the appliance and understand the hazards involved.
Children are not to play with the appliance. Cleaning and user
maintenance is not be carried out by children without supervision.
15. WARNING: AFTER DETACHING THE ACCESSORY, DOT NOT TOUCH
THE MOVING SHAFT.
16. Be careful when handling the sharp cutting blades, emptying
the bowl and during cleaning.
17. Be careful if hot liquid is poured into the food processor as it can
be ejected out of the appliance due to sudden steaming.
18.This appliance is for household use only. Do not use it for
professionalcatering. Do not use the appliance for any purpose
not expressly specified in this manual.
19. The appliance should be cooled down to the room temperature
after each process.
20. Never use the appliance to process frozen food!

6
Product Overview
5
4
3
8
9
14
10
11
7
6
2
1
13
12
15
1. Pusher
2. Tray
3. Cutter housing
4. Reversal button (REV)
6. Fine grinding disc
7. Medium grinding disc
9. Cutter blade
10. Coarse grinding dis
11. Screw ring
12. Sausage horn
13. Cone
14. Former
15. Locker
5. Start/Stop button
8. Screw shaft

7
How to use the attachment:
Mincer
1. Insert the screw shaft into the
cutter housing. lace the cutter unit onto
disc
ring in
the direction of the arrow on the cutter
.
2. Unclock the locker. Attach the cutter housing
to the motor unit and lock it.
3. Place the tray on the upright part of the
cutter housing. Cut the meat into
10cm-long, 2cm-thick strips. Remove all
bones gristle and sinew as
. (Never use frozen meat!)
4. Put the meat in the tra
Disassembling
Unlock the locker and move the cutter housing as below.
y. Use the pusher
to gently push the meat into the cutter
housing. (For steak tartare, mince the meat
with the medium grinding disc twice.)
1
2
3
4
GB

8
Making sausages
1. Before making sausages, mince the meat
following the "Mincing meat" section.
Insert the screw shaft into the cutter
housing.Place the sausage horn on the
cutter housing and screw the ring on the
cutter housing.
2. Attach thecutter housing tothe motor unit.
3. Place the tray on the upright part ofthe
cutter housing.
4. Put the mince meat into the tray. Use the
pusher to gently push the mince meat into
the cutter housing.
1
2
3
4

9
Making kibbeh
Insert the screw shaft into the cutter
screw the ring on the cutter housing.
Attach the cutter housing to the motor
unit.
Place the tray on the upright part of the
cutter housing.
Feed the prepared k mixture through
the kebab maker. Use the pusher to help.
Cut the extruded mixture from the cone
to the desired length. Fill the centre with
your filling.
1
2
3
4
1.
2.
GB

10
Tips
◆If the cutter housing is blocked, please press the REV button for a
moment, so the appliance can return to its usual condition. Caution: The
Reverse button can only be used for the mincing function.
Cleaning
Meat left behind in the cutter housing may be removed by passing a slice of
bread through the cutter housing.
plug from the mains socket.
2. Unscrew the screw ring and remove all the parts from the cutter housing.
Do not clean the parts in the dishwasher.
3. Wash all parts that have come into contact with meat in hot soapy water.
CLEAN THEM IMMEDIATELY AFTER USE.
4. Rinse them with clear hot water and dry them IMMEDIATELY.
5. We advise that you lubricate the cutter unit and the grinding discs with
some vegetable oil.
Table of contents
Languages: