
PhaseOne P 65+ User manual

User Guide P 65+Digital Full-Frame back

2
On rights
©2008 Phase One A/S. All rights reserved. Made in Denmark.
Ver. 0.9
Colorspace images created in CROMiX ColorThink.
Photos by:
Kevin Raber
Text By:
The dedicated staff of Phase One
Learn more about Capture One 4 on www.phaseone.com/4
On liability
The information in this user guide is provided “as is”.
Under no circumstances, including negligence, shall Phase One be liable for any incidental, special, direct,
indirect or consequential damages arising out of or relating to use of the information provided in this guide with
or without the software and/or hardware described in the guide.
Trademarks & acknowledgements
Capture One and Phase One are either registered trademarks or trademarks of Phase One A/S in the European
Union and/or other countries.
All other trademarks are the property of their respective owners.
This product includes DNG technology under license by Adobe Systems Incorporated.
This Userguide is Version 0.9 shortly after the release of P65+ the new Userguide will be available on
http://www.phaseone.com/Content/p1digitalbacks/P65plus/Introduction.aspx
http://www.phaseone.com/Global/documentation/Documentation/Documentation_DB.aspx

3

4
Contents
1.0 Introduction 6
2.0 Unpacking the P65+ 7
2.1 Charging the batteries 8
2.2 Classic vs. Value Added 9
2.2 Classic vs. Value Added warranty 10
3.0 Introduction to the P65+ 11
3.1 Tethered or untethered operations 12
3.2 General Hardware Setup 13
4.0 Sensor+ in detail 16
5.0 Quick Start 17
5.1 Setting up time and date 18
6.0 CF Card Usage 19
6.1 Formatting your Memory card 21
6.2 Mounting/dismounting on Win XP and Win Vista 23
6.3 Formatting on a Mac OS X computer 24
6.4 Formatting on a Windows computer 24
6.5 Disabling iPhoto Autostart (Mac OS X) 24
7.0 Navigating the menu system 25
7.1 Menu buttons 26
7.2 Shortcuts 27
7.3 indicators 28
Power indicator 29
8.0 Play mode 30
View modes 31
8.1 Zoom 32
8.2 Rating 33
8.3 Delete 33
8.4 Exit the Play mode 33
9. Menu mode 34
9.1 Capture Setup 34
9.2 PLAY SETUP 40
9.3 Conguration 43
10.0 P 65+ on Phase One 645AF &Mamiya 645 AFD 50
10.1 Mounting P 65+51
10.2 About Viewnder Masks 52
10.3 Phase One 645AF & Mamiya 645 series more details 53
11.0 P+ back for Mamiya RZ 55
11.1 About Viewnder masking 55
11.2 Mamiya RZ other details 55
11.3 Mamiya RZ67 PRO IID 57
11.5 Studio ash sync on the RZ lens shutter 58
12.0 P 65+ back for Hasselblad V 59
12.1 Mounting the viewnder mask on Hasselblad V 59
12.2 Mounting the P+ back on Hasselblad V 60
12.3 Camera body specics 61
12.4 Hasselblad 555 ELD 62
12.5 Hasselblad 553 ELX 63
12.6 Hasselblad 501 CM and 503 CW without winder 64
12.7 Hasselblad 503 CW with Winder CW 65
12.8 Cables shipping with P+ back for Hasselblad V 66

5
13.0 P 65+ back for CONTAX 645 67
13.1 Mounting P 65+ back to the CONTAX 645 70
13.2 Flash photography on Contax 645 71
14. H 101 - P 65+ back for Hasselblad H1/H2 72
14.1 Camera LCD display 73
Viewnder information 73
Auto exposure 74
Double exposure protection 74
14.2 Image orientation detection 75
IR lter on the CCD 75
About viewnder mask on H1/H2 75
14.3 Mounting on the Hasselblad H 1 76
15.0 View camera and studio photography 77
15.1 1-shot release 78
16 Live Preview 80
16.1 General Live Preview information 81
16.2 Live Preview Camera support 82
17.0 Lens Cast calibration 85
17.1 What is Lens Cast? 85
17.2 How do I get rid of it? 85
17.3 4 Simple steps to calibrate (Mac) 86
18 Maintenance 87
19. Secure Storage System 88
19.1 Secure Storage system “3S” (How does it work?) 88
19.2 Disk Check summary 88
20.0 Service and Technical Specifications 89
20.1 Updating the P 65+ 89
20.2 Support and recommendations 90
20.3 Recommendations 91
20.3 Technical specications 92

6
1.0 Introduction
Thank you for choosing Phase One P65+ digital camera back solution.
The Phase One P+ Series, provides you with the advantage of having
the most powerful digital camera solution whether you are working
portable in the eld or tethered in a studio.
When shooting portrait, landscape, fashion, wedding, product or
architectural photography you will always be able to nd a Phase One
digital back that ts your needs.
The Phase One P+ Series system gives you the absolute best solution
when it comes to image quality and workow.
Capture One is the P+ Series RAW le processing software, and is
available for either Mac OS X or Windows. The Capture One online user
guide is the general manual for this software.
The P 65 + is a genuine revolution, for the rst time in history a medium
format full frame CCD has been released; proving Phase One to be the
leading developer of digital photographic equipment.
For the rst time you actually get 2 backs in one – no cheap sales trick,
the P 65+ is a FULL-FRAME 60.5 megapixel AND a FULL-FRAME 15
megapixel digital back of world class quality.
This manual “P65 + Users guide” covers the specic P65+ features and
functionality.
The P+ Series is ready to be used right out of the box.
At Phase One we are always committed to provide you with the best
solution for the professional photographer.
We sincerely hope you will enjoy working with this new innovative product.

7
2.0 Unpacking the P65+
The suitcase contains all the necessary parts; Compact Flash card (CF
card), CCD Cleaning Kit, digital back, batteries and charger. Suitcase
and system contents may vary depending on purchase: Classic (basic
components) or Value added (everything needed).
The Software package, this manual and the LCC calibration kit are
included in the Phase One Leather binder and functions as a lid over
the utility compartment.
In the utility compartment you will nd the CF card reader, cables and
international power adaptors. In daily usage the utility compartment can
be expanded by pulling out the inside square-to-circle foam, making
the space ideal for use as camera body compartment.
Configuring the system suitcase to fit your needs
With the “Value Added” suitcase it is possible to pull out the entire foam
insert and use the supplied dividers and double sided Velcro tape to
congure your own system suitcase.
The Velcro tape can be cut out and bent around the edges of the
dividers. This makes it easy to xate these inside the suitcase.
4 dividers are supplied, use a large scissor or tool knife to cut out one
of them into three or four smaller pieces, and use these for splitting the
compartments into smaller sections.

8
2.1 Charging the batteries
When the system is unpacked the rst thing to do, is to charge the
batteries fully.
The Value Added Suitcase is delivered with two 7.2 volt Lithium-Ion
batteries and a duo-charger.
Only one battery is used in the P+ back at a time, but it is recommended
to charge both batteries fully before you start. While charging the
batteries, you can still use the camera back if you connect it to the
IEEE1394/FireWire port on your computer.
The battery charger can adapt to voltages within a range of 110 to 250
volts.
It comes with an international set of power adaptors (placed in the
suitcase utility compartment), please select one that ts your outlet,
and mount it by sliding it in from the top.
Connect the unit to the outlet and charge the batteries (approximately
2.5 to 3 hours).
After the rst initial charge, the batteries can be charged one at a time.
Purchasing extra batteries
The Phase One P+ back comes with two 2500mAh batteries. If you
need to purchase extra batteries
Phase One recommends Canon BP 915 (1500 to 2500 mAh).
Due to difference in the tolerances of some third party batteries, these
may not t into the digital back’s battery compartment. Do not try to
force a battery into the compartment. When pressing the battery release
button it should slide in without problems.
Warning!
• Only use the Charger to charge the specied batteries
• Do not allow charger to get wet or get exposed to moisture
• Keep the Charger out of reach of children
• Once charging is completed, unplug the charger from power source
• Only use the original mains adaptor 12V DC or car lead
• Never apply excessive force when connecting or disconnecting a battery or contact plate.
• Keep all contacts clean.
• Do not force down any of the contacts.
• Do not short-circuit the contacts.
• Never store the battery connected to the charger for an extensive period of time.
• Do not expose to excessive heat or naked ame.
• Do not dismantle or carry out any alteration to the product
• Do not attempt to eat or swallow the battery

9
Classic Value Added
P 65+ Full-Frame digital back P 65+ Full-Frame digital back
Kinetic Hard Case Amabilia Hard Case
1 year warranty 3 year warranty
Dual Battery Charger Dual Battery Charger
1 Battery 2 Battery
Viewnder Masks? Viewnder Masks?
4.5 m FireWire cable 4.5 m FireWire cable
Multiconnector>minijack adapt. cable
Multiconnector sync cable
Sandisk USBII reader
Sandisk 1GB CFIII card
Capture One DB software CD Capture One PRO software
Leather binder protecting:
PDF on SW CD LCC Calibration kit
5 pcs QP grey card
Microber cloth
2.2 Classic vs. Value Added
All parts of the value added kit is available as spare parts; should you
need extra equipment, please consult your local dealer on different
Phase One or third party solutions.
Most important for the professional photographer are securing the
uptime of the camera and back, to be as safe as possible consult your
dealer to get information on the best solution; most uptime solutions
provided by Phase One can be purchased after acquiring the back or
camera.

10
Service Classic Value Added
Warranty period 1 years 3 years
Free repair of manufacturing
defects
Yes Yes
Shutter actuations covered Unlimited Unlimited
Product defect within rst
month
Repair New Product
Free loan unit during repair No Yes
Free camera platform exhange No Yes
24/7 online support forum and
access to knowledge base
articles
Yes Yes
Guaranteed upgrade program Yes Yes
2.2 Classic vs. Value Added warranty
Before shipping, all Phase One digital backs undergo a thorough
manual inspection and control procedure, our skilled technicians are
checking:
•Sensor focus adjustment
• Luma/Chroma calibration & verification
• Illumination invariance verification
• Physical surface inspection
• Usability testing & capturing of images
• Visual inspection of images
•Final test cycle & more...
besides this thorough and spesialized test you have 2 different service
choices.
Ask your local dealer or consult www.phaseone.com on extra campaigns
and possibilities regarding securing your workow and your daily
assignments now and in the future.
Other manuals for P 65+
1
Table of contents
Other PhaseOne Digital Camera manuals

PhaseOne
PhaseOne iXH User manual

PhaseOne
PhaseOne 645DF User manual

PhaseOne
PhaseOne XF User manual

PhaseOne
PhaseOne XF IQ4 User manual

PhaseOne
PhaseOne iXR User manual

PhaseOne
PhaseOne iXG User manual

PhaseOne
PhaseOne iXU-RS User manual

PhaseOne
PhaseOne 645DF User manual

PhaseOne
PhaseOne XT User manual

PhaseOne
PhaseOne XF User manual

PhaseOne
PhaseOne H 10 C645 User manual

PhaseOne
PhaseOne 645 AF User manual

PhaseOne
PhaseOne P 65+ User manual

PhaseOne
PhaseOne iXG Manual

PhaseOne
PhaseOne Studiokit User manual

PhaseOne
PhaseOne 645 User manual

PhaseOne
PhaseOne P 25 User manual

PhaseOne
PhaseOne XF User manual

PhaseOne
PhaseOne 645DF User manual
PhaseOne
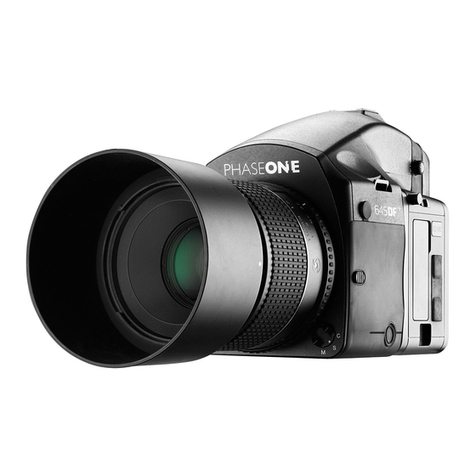
PhaseOne 645DF User manual


