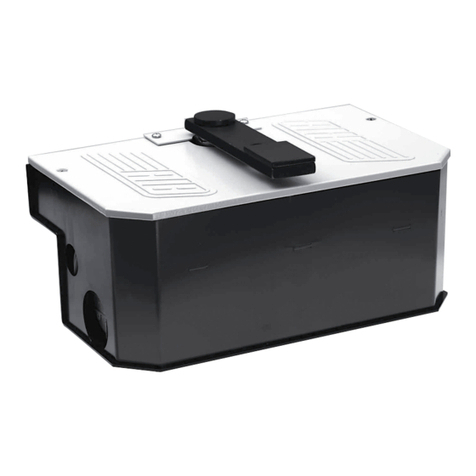
Passtech PT200 User manual

Version 1.0 - 1 -
USER GUIDE
RF&KEYPAD INTEGRATED
LOCKER LOCK
(model :PT200)

Version 1.0 - 2 -
Table of Contents
1. Understanding PT200 Locker Lock ......................................... 3
1.1 What is PT200 Locker Locks?............................................................3
1.2 Card Types and Functions..................................................................3
2. Types of Lock Operating Scenario......................................... 4
2.1 Free Selection (Day Use)...................................................................4
2.2 Assigned Mode (Pre-Assigned Mode)................................................ 4
3. Lock Operation......................................................................... 5
3.1 Pass code & RF tag uses...................................................................5
3.2 Assigned Mode................................................................................... 6
3.3 Free Selection Mode .......................................................................... 7
3.4 Open in Emergency............................................................................7
4. Card Operation......................................................................... 8
4.1 Owner Card........................................................................................8
4.2 Master Card........................................................................................ 8
4.2.1 Functions of the Master Card ................................................................... 8
4.2.2 Replacing old Master cards with New Master cards ............................... 9
4.2.3 Functions of the Master Cards ................................................................. 9
4.2.4 How do I add new Master card? ............................................................. 10
4.3 User Card.........................................................................................10
4.3.1 Free Selection ......................................................................................... 10
4.3.2 Assigned Mode (Pre-Assigned Mode) ................................................... 11
4.3.3 Replacing old User card with New User card ........................................ 11
4.4 Low Battery warning and battery change .........................................12
4.5 Audit Trail ......................................................................................... 13
4.6 Lock Info........................................................................................... 13
5. Indication Instruction.............................................................. 14
ANNEX A Beep & LED Table.......................................................15
ANNEX B Trouble Shooting.........................................................16

Version 1.0 - 3 -
1. Understanding PT200 Locker Lock
1.1 What is PT200 Locker Locks?
-PT200 locker locks are the locker lock operated by either13,56 MHz RF keys
or Digital touch keypads.
-PT200 can work as both offline (stand alone) or online mode.
-To set PT200 as online system, additional peripherals such as Access point,
Server and client software are necessary. Refer Esmart Ultra user manual
for online lock system setup.
1.2 Card Types and Functions
Key Card : Input Key value to locks.
Setup Card : Program lock with various options.
Owner Card : Delete Master card registration in the lock
Master Card I : Open all locks. Alarm Off, User card delete & registration,
and Lock open.
Master Card II : Open or close all locks, Alarm Off and Locker open and
close only.
User Card : Lock open and close
Audit Trail Card : Collect the latest 18 event data from the lock, and
download to the data to PC through LOS program.
Maintenance card : Time Setting & New Master Card registration.
Lock Info Card : Collect various lock information. One Lock info car can
collect information of up to 120 locks
* For detail information about all system cards, check LMS or LOS manual.

Version 1.0 - 4 -
2. Types of Lock Operating Scenario
PT200 locker locks are designed to work for the various operation requirements by
simple set up process. Following operation modes can be programmed before or after
lock installation.
2.1 Free Selection (Day Use)
- User can select any empty locker.
- LED lamp is blinked to represent locker is in use.
- Programmable to use multiple locks with
one User card.
- Programmable for Time based operation
2.2 Assigned Mode (Pre-Assigned Mode)
- Locker assigned to each User card in advance.
- Programmable to use multiple assigned lockers
with one card
(max. 5 lockers in current program).
- Programmable for multiple user mode
per a locker (max. 8 users in a locker).

Version 1.0 - 5 -
3. Lock Operation
3.1 Pass code & RF tag uses
① PT200 can be set three different credential acceptance modes.
② Pass code & RF tag mode accepts both pass code and RF tag
③ RF tag only mode accepts only RF tag ( no pass code available )
④ Pass code only mode accepts only pass code and does not read any RF tag.
⑤ These modes can be set from Set up card.
Passcode&RFtag RFtagonly Passcodeonly

Version 1.0 - 6 -
3.2 Assigned Mode
- Open & Close by Pass Code
① Default Pass Code :1234
② Open:“Start” button + “4 digit pass code”+ “Start” button
③ Close:Automatic close after several seconds
④ Change Pass Code:
“Start” button + old pass code + “Start” button + new
pass code + “Start” button + new pass code + “Start”
button
Note: Pass code can be changed only when the lock is under
unlocked situation.
- Open & Close by RF card key
① RF card key can be used together with Digital Pass Code anytime.
A. “Start” Button + Put User Card on the Lock.
② When user uses the RF card key, default Pass Code 1234 will be
erased from the lock. However, User Pass Code except default pass
Code is not deleted.
③ When user wants to set new Pass Code, the process is same as in
“Change Pass Code” while lock is in unlock position. Default Pass
Code 1234 cannot be used as User Pass Code.

Version 1.0 - 7 -
3.3 Free Selection Mode
- Open & Close by Pass Code
① Close:“Start” button + self-selected 4 digit code + “Start” button
②Open:“Start” button + User’s 4 digit code + “Start” button.
Bolt stays open
- Open & Close by RF card key
“Start” Button + Put User card on the lock.
Note: After it is unlocked, any 4 digit password can be used to lock it.
User Pass Code will be deleted each time lock is opened.
3.4 Open in Emergency
① In case User forgets his(her) password or lost card, Operator can
open the lock by Master Card I or Master code.
② If Master code is set, “Start” button + Master code + “Start” button to
open any locks. Master card can be set by Set up Card.
③ Once Master card I is used to open the lock, the lock reverts to
default position
(i.e. lock will stay open for Free Selection, and default code of 1234
for Assigned mode.).
④ User Card ID will be erased from the lock if Master Card I has the
function to delete the User ID.
⑤ When the lock stops working due to low battery, lock can be opened
by external emergency battery pack.

Version 1.0 - 8 -
4. Card Operation
4.1 Owner Card
The role of the Owner card is to delete the Master card registration. Therefore, Owner
card will be used to delete current master card registration in the lock, and make the
lock to be ready to register new Master Card.
It is simple to delete the Master card registration and to register new master card in
the lock :
① Put the Owner card to the lock until lock sounds beep (one time) and red lamp
lights.
② Now, all Master card registration is deleted from the lock.
③ After Owner card scanned, put new master cards to register to the lock
4.2 Master Card
4.2.1 Functions of the Master Card
① Customer can select the function of the Master card from the following two
options. Master card setting will be done by supplier.
Master card I : Alarm Off, User card delete and Locker open.
Master Card II : Alarm Off and Locker open and close (User remained)
② Maximum five Master cards can be registered in a lock.

Version 1.0 - 9 -
4.2.2 Replacing old Master cards with New Master cards
There are two ways to delete the lost Master card and register new Master card in
the lock.
- Using Time/Master Change Card
① Read the master cards (all Master cards to be used in a lock) to register
in each lock at Time/master change menu in LOS program (or LIS
program).
② Put the Time/Master change card to the reader, and download the master
card chip numbers to the Card.
③ Put the Time/Master change card to the locks, then, new Master cards will
be registered to the lock, and lost master card will be blocked.
- Using Owner Card
① Delete the old master card registrations in the lock (refer to the 3.1) with
Owner Card.
② Put new master cards to each lock so as to register new master cards.
Then, old master card you lost will not be used.
☞All existing Master cards needs to be registered again together with new
Master card because all master card registrations were deleted if Owner card
or Clear card is used.
4.2.3 Functions of the Master Cards
The function of the Master card can be selected when Master card is issued by :LKS
(Locker Key Management System).
① Door Open & User deletion : Turn off the alarms, open the lock and delete old
User card registration in the lock.
② Door Open and close : Turn off the alarms and open the lock, and close the
lock. User information in the lock is remained.

Version 1.0 - 10 -
4.2.4 How do I add new Master card?
The procedure to add new Master card is same as 3.2.1.All master cards that will
be used in locks must be registered to the locks because all Master card registration is
deleted from the locks when Owner card is used.
Alternatively, Time/Master change card can be used. It is recommended to register
new master cards at many locks. Please refer to the LOS program manual for Master
card registration.
4.3 User Card
4.3.1 Free Selection
The initial status of the lock in Free Selection mode is open (Latch is inside).
- Initial Use -
① Select the empty locker.
② Put your belongings in the locker.
③ Press “Touch” button on the front body of the lock to wake up the lock, and
place your card (or any form of user key) to the front body of the lock.
④ Wait until the Green LED lights and Beep sounds once.
⑤ Bolt will move out, and lock is closed.
⑥ Close the door, and the lock will be remained at locking state.
- Open the lock -
① Press “Touch” button on the front body of the lock.
② Put close your card to the front body of the lock.
③ Lock will check the lock ID and key of the user card (or any form of user key).
④ Lock will emit Green LED and beep sound once it is right user card .
⑤ Bolt will be moved and locker will open.
⑥ User information will be erased from the lock so that new user can use the
empty lock.
☞
In free selection mode, lock and card needs to read and write the each
other’s information. So please do not sway the card until the latch is moved.
Table of contents
Other Passtech Lock manuals