Ozone Exon V30 User manual


EXO N
V3 0
INDEX
System Requirements
01.Operating System:
Windows 7 / Windows 8 / Windows 8.1 / Windows 10
02.Free USB 1.1/ 2.0 port.
03.50 MB free hard disk space.
SOFTWARE INSTALLATION
01.Plug EXON V30 USB connector to a USB port of your PC.
02.Download the driver from www.ozonegaming.com
03.Double click “Setup.exe” to start the installation program. Click “Next” to continue.
04.Select the folder to save the driver and click “Next” to continue.
05.Installation runs automatically. Click “Finish” to complete the installation.
System requirements
Software installation
Buttons layout
Default button assignment
Software overview
Software basics
Sensor settings
Button settings
Color settings
Legal Notice
Warranty
EXO N
V3 0
INDEX
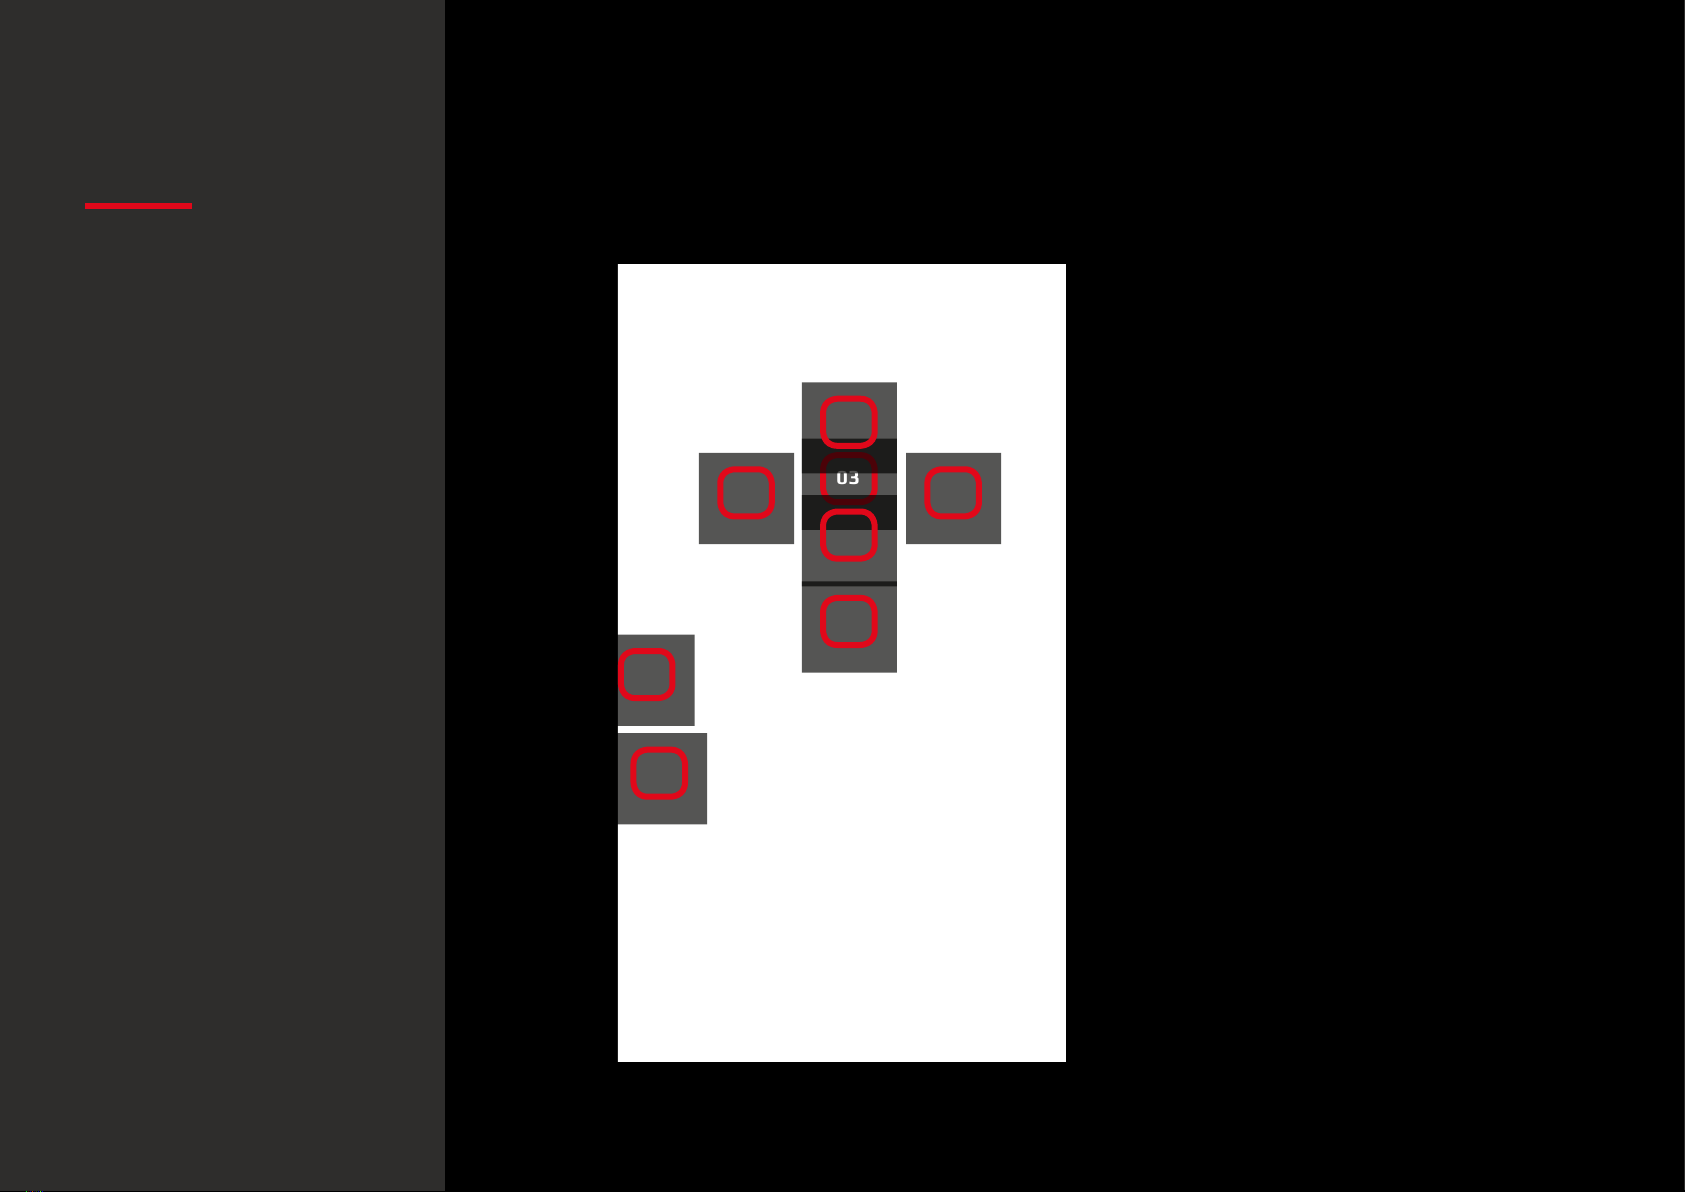
BUTTONS LAYOUT DEFAULT
BUTTON
ASSIGNMENT
01 02
03
07
08
04
05
06
01.Click
02.Menu
03.Wheel Click
04.CPI Cycle
05.Browser Forward
06.Browser Backward
07.Scroll Up
08.Scroll Down
Buttons layout
Default button assignment
System requirements
Software installation
Software overview
Software basics
Sensor settings
Button settings
Color settings
Legal Notice
Warranty

EXO N
V3 0
INDEX
SOFTWARE overview
Pressing any title takes you to its thread
3 2
1
4
Software overview
02. SENSOR SETTINGS
System requirements
Software installation
Buttons layout
Default button assignment
Software basics
Sensor settings
Button settings
Color settings
Legal Notice
Warranty
01. SOFTWARE BASICS
03. BUTTONS SETTINGS
04. COLOR SETTINGS

EXO N
V3 0
INDEX
01. SOFTWARE BASICS
1. Reset to default configuration
Hit Save to store any settings customization you make.
Hit Reset to discard every settings customization
you previously made and saved, thus restoring your Exon
V30 to its default conguration.
2. Preview Mode
Hit the switcher to change preview mode from OFF to ON.
Preview On allows seeing live any changes applied
in the mouse (though you must press Save to store
them).
Preview Off allows changes to be automatically saved
without clicking on Save.
Software basics
· Preview mode
· Reset to default
configuration
System requirements
Software installation
Buttons layout
Default button assignment
Software overview
·Top/Side mouse diagram
·Profiles
Sensor settings
Button settings
Color settings
Legal Notice
Warranty

EXO N
V3 0
INDEX
01. SOFTWARE BASICS
3. Top / side mouse diagram
Hit SIDE button for a mouse’s side and side buttons
diagram.
Hit TOP button for a mouse’s top and main buttons
diagram. In both views you can change the button
configuration.
4. Profiles
Before you start configurating your mouse, select
which Profile you want to store all settings. You can
save up to 5 profiles.
Software basics
· Top/Side mouse diagram
· Profiles
System requirements
Software installation
Buttons layout
Default button assignment
Software overview
· Preview mode
Sensor settings
Button settings
Color settings
Legal Notice
Warranty
· Reset to default
configuration

EXO N
V3 0
INDEX
02. SENSOR SETTINGS
1. DPI Settings
You have two DPI profiles (DPI 1 and DPI 2)where
to set and store DPI levels through graphic or input
means. You can enable / disable the sound warning
FX by hitting Enable Sound FX.
2. Polling rate settings
Move the slider to select your preferred Polling Rate
frequency.
3. Line snapping settings
Move the slider to select which movement accuracy
do you need. Line snapping On forces the sensor to
correct your movements into perfect lines.
Line snapping O makes the sensor applying no corrections
to your movements: it reproduces the very trace you leave.
Sensor settings
· DPI settings
· Polling rate settings
· Line snapping settings
System requirements
Software installation
Buttons layout
Default button assignment
Software overview
Software basics
Button settings
Color settings
Legal Notice
Warranty

EXO N
V3 0
INDEX
03. BUTTON SETTINGS
1. Button Configuration: ovierview
Click on any button to pop up a sub-menu and change the
button configuration or behaviour assignment.
The button configuration sub-menu features the following
categories:
∆Mouse Event
∆Shortcut
∆Deactivate
∆Profile Shift
∆Media
∆Macro
∆Application
∆Keyboard Event
∆DPI Event
∆Report Rate Event
· Button configuration:
overview
Button settings
System requirements
Software installation
Buttons layout
Default button assignment
Software overview
Software basics
Sensor settings
· Macro Lab
Color settings
Legal Notice
Warranty
· Button configuration:
sub-menu categories

EXO N
V3 0
INDEX
03. BUTTON SETTINGS
You can set any button conguration
to play once, play N times, toggle
auto-repeat or repeat while pressed.
Setting up the cycles, the duration
and the action on key are also possible.
Mouse Event: you can select a button to duplicate
its assignment in another one, having thus the same
effect in two or more buttons, avoiding miss-clicking
and being able to perform the action you want.
Shortcuts: assign shortcuts to any button.
Deactivate: deactivate any unnecessary button.
Profile Shift: shift among profiles through a button.
Media Buttons: select and apply a media function to
any button.
Macro: assign macros to any mouse button.
Application: run an application through a button.
Keyboard buttons: assign a keyboard single key or a
combination of keystrokes to a mouse button.
DPI event: assign a DPI function to control the DPI
cycle or step up and down your current DPI level.
Rate report event: assign a Report Rate function to
change the report rate value.
· Button configuration:
sub-menu categories
Button settings
System requirements
Software installation
Buttons layout
Default button assignment
Software overview
Software basics
Sensor settings
· Macro Lab
Color settings
Legal Notice
Warranty
· Button configuration:
overview

EXO N
V3 0
INDEX
03. BUTTON SETTINGS
Hit Add Macro and enter the macro name
1. ADD MACRO 2. START RECORDING
3. OPTIONS
4. SAVING / SKIPPING
Hit Start Rec and perform the keys combination
to store in the macro.
Hit again to stop the
macro recording.
Macros creation allows
also the addition of Up
or Down keystrokes and
Special Mouse Events,
along with the deletion
or further modification
of macros already
saved.
Hit Save to store your macro.
Hit Cancel to dismiss the record made and
exit the Macro Lab.
1 2
3
4
2. Macro Lab
You can create and save macros to enhance both your gaming performance or workow, just
by following this simple 4 steps process:
Button settings
· Macro Lab
System requirements
Software installation
Buttons layout
Default button assignment
Software overview
Software basics
Sensor settings
Color settings
Legal Notice
Warranty
· Button configuration:
overview
· Button configuration:
sub-menu categories
Table of contents
Other Ozone Mouse manuals

Ozone
Ozone Neon X40 User manual

Ozone
Ozone Neon User manual

Ozone
Ozone radon 3K User manual

Ozone
Ozone neon 3K User manual

Ozone
Ozone Exon X90 User manual

Ozone
Ozone Exon F60 Origen User manual

Ozone
Ozone neon3k User manual

Ozone
Ozone Neon X40 User manual

Ozone
Ozone NEON M10 User manual

Ozone
Ozone Argon User manual


