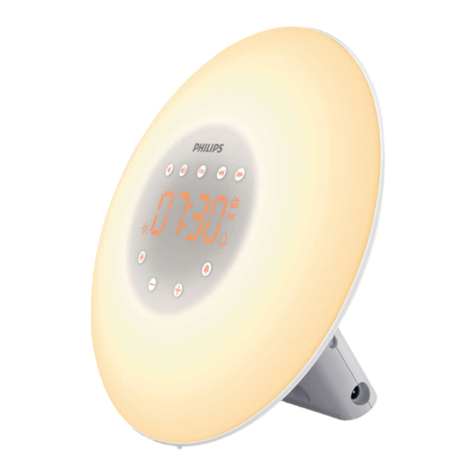
OWIM 288616 User manual

WAKE-UP LIGHT ALARM CLOCK
LICHTWECKER
Bedienungs- und Sicherheitshinweise
WAKE-UP LIGHT ALARM CLOCK
Operation and Safety Notes
ÉBRESZTŐÓRA FÉNNYEL
Kezelési és biztonsági utalások
SVĚTELNÝ BUDÍK
Pokyny pro obsluhu a bezpečnostní pokyny
BUDÍK SO SVETLOM
Pokyny pre obsluhu a bezpečnostné pokyny
IAN 288616

GB Operation and Safety Notes Page 5
HU Kezelési és biztonsági utalások Oldal 18
CZ Pokyny pro obsluhu a bezpečnostní pokyny Strana 31
SK Pokyny pre obsluhu a bezpečnostné pokyny Strana 44
DE/AT / CH Bedienungs- und Sicherheitshinweise Seite 57

B
10
11
4
5
6
7
8
9
A
1
22
3
C12
13
15 141719 16182021
22

D
E
2526
23 24
27
28
29
30

5GB
List of pictograms used.......................................................................................................Page 6
Introduction..................................................................................................................................Page 6
Intended use .......................................................................................................................................Page 6
Parts description..................................................................................................................................Page 6
Scope of delivery................................................................................................................................Page 7
Technical Data....................................................................................................................................Page 7
General safety instructions ............................................................................................Page 7
Safety instructions for batteries/rechargeable batteries.................................................................Page 8
Before use......................................................................................................................................Page 9
Setting the display backlight..............................................................................................................Page 10
Adjusting the time ...............................................................................................................................Page 10
Alarm functions...................................................................................................................................Page 11
Setting the alarm.................................................................................................................................Page 11
Switching off the alarm ......................................................................................................................Page 12
Set radio..........................................................................................................................................Page 13
Station scan.........................................................................................................................................Page 13
Save station.........................................................................................................................................Page 13
Rapid Test.......................................................................................................................................Page 13
Lighting.............................................................................................................................................Page 14
Mood light .....................................................................................................................................Page 14
Battery operation ...................................................................................................................Page 14
Replacing Batteries................................................................................................................Page 14
Cleaning and Care..................................................................................................................Page 15
Troubleshooting........................................................................................................................Page 15
Simplified EU declaration of conformity.............................................................Page 15
Disposal............................................................................................................................................Page 15
Warranty........................................................................................................................................Page 16

6 GB
List of pictograms used
Efficiency level Fuse
Wake-up light alarm clock
Introduction
We congratulate you on the purchase of your
new product. You have chosen a high quality
product. The instructions for use are part of
the product. They contain important informa-
tion concerning safety, use and disposal.
Before using the product, please familiarise
yourself with all of the safety information and
instructions for use. Only use the product as
described and for the specified applications.
If you pass the product on to anyone else,
please ensure that you also pass on all the
documentation with it.
Intended use
The product displays the time, date and day
of the week and features visual and acoustic
alarm functions as well as an electronic alarm
signal and radio reception.
This product is intended for
private use in dry rooms. The
product is not intended for com-
mercial use or for use in other applications.
Not suitable for household
room illumination.
Parts description
1Illuminated panel
2Control panel
3LC-display
4Slide switch
5RESET button
6Battery compartment
7USB charging socket
8Low voltage jack
9Cable aerial
10 Speaker
11 Battery compartment cover
12 SNOOZE button
13 VOL+ button
14 VOL– button
15 CLOCK button

7GB
16 RADIO button
17 ALARM button
18 TEST button
19 + button
20 – button
21 LIGHT– button
22 LIGHT+ button
23 Alarm time display
24 Alarm mode display
25 Day of the week display
26 Frequency display
27 Clock display
28 Light display
29 Mains supply
30 Low voltage plug
Scope of delivery
1 Wake-up light alarm clock
1 Mains supply
3 Batteries LR6 (type AA) (preinstalled)
1 Set of instructions for use
Technical Data
Light alarm clock:
Mains supply: 5V (direct current),
2.0A
Protection class:
Batteries: 3 batteries LR6 (type AA,
1.5V) (preinstalled)
Model no.: HG02934
Chromaticity
coordinate: x < 0.270 or x > 0.530
y < -2.3172 x2+ 2.3653
x – 0.2199 or y >
-2.3172 x2 + 2.3653 x
– 0.1595
USB output: 5V (direct current)
1.0A (for charging other
devices use only)
Frequency band: 87.5MHz to 108MHz
Mains adapter:
Input: 100–240V∼ (alternating
current) 50/ 60 Hz,
max. 0.6A
Output : 5V (direct current),
2.0A, low voltage plug
Ø 5.5mm
Protection class:
Model no.: 8823-EU
General safety
instructions
Before using the product, please familiarise
yourself with all of the safety information and
instructions for use! When passing this

8 GB
product on to others, please also include all
the documents! The light alarm clock is only
suited for use with the included mains supply
(model no. 8823-EU).
DANGER
TO LIFE AND RISK OF AC-
CIDENTS FOR INFANTS
AND CHILDREN! Never leave children
unattended with the packaging material.
The packaging material represents a
danger of suffocation. Children frequently
underestimate the dangers.
This product may be used by children
age 8 years and up, as well as by per-
sons with reduced physical, sensory or
mental capacities, or lacking experience
and/or knowledge, so long as they are
supervised or instructed in the safe use of
the product and understand the associ-
ated risks. Do not allow children to play
with the product. Cleaning and user
maintenance should not be performed by
children without supervision.
Before using the product, verify the avail-
able mains voltage corresponds with the
operating voltage required for the mains
supply (100–240V∼ 50/60Hz)!
Before using the product, verify the light
alarm clock and the mains supply and the
cable connection aren‘t damaged! Never
operate a damaged product!
The product must be plugged into an eas-
ily accessible socket so it can easily be
unplugged in the event of an emergency.
This product does not contain any parts
that can be serviced by the user. The
bulbs cannot be replaced.
Do not place open fire (e.g. candle) on
the product.
The product is only suited for use with the
included mains adapter (8823-EU).
Please note that the power adapter contin-
ues to draw a small amount of power even
if the product is turned off as long as the
power adapter is plugged into a power
outlet. To switch the product off completely,
unplug the power adapter from the socket.
Safety instructions for
batteries/rechargea-
ble batteries
DANGER TO LIFE! Keep batteries/
rechargeable batteries out of reach of
children. If accidentally swallowed seek
immediate medical attention.
DANGER OF EXPLO-
SION! Never recharge non-
rechargeable batteries. Do not

9GB
short-circuit batteries/rechargeable bat-
teries and/or open them. Overheating,
fire or bursting can be the result.
Never throw batteries/rechargeable
batteries into fire or water.
Do not exert mechanical loads to
batteries/rechargeable batteries.
Risk of leakage of batteries/
rechargeable batteries
Avoid extreme environmental conditions
and temperatures, which could affect
batteries/rechargeable batteries, e.g.
radiators/direct sunlight.
If batteries/ rechargeable batteries have
leaked, avoid contact with skin, eyes and
mucous membranes with the chemicals!
Flush immediately the affected areas with
fresh water and seek medical attention!
WEAR PROTECTIVE
GLOVES! Leaked or dam-
aged batteries/rechargeable
batteries can cause burns on contact with
the skin. Wear suitable protective gloves
at all times if such an event occurs.
In the event of a leakage of batteries/
rechargeable batteries, immediately re-
move them from the product to prevent
damage.
Only use the same type of batteries /
rechargeable batteries. Do not mix used
and new batteries/rechargeable batteries.
Remove batteries/rechargeable batteries
if the product will not be used for a
longer period.
Risk of damage of the product
Only use the specified type of battery/
rechargeable battery!
Insert batteries/rechargeable batteries
according to polarity marks (+) and (-) on
the battery/ rechargeable battery and
the product.
Clean the contacts on the battery /
rechargeable battery and in the battery
compartment before inserting!
Remove exhausted batteries/ rechargea-
ble batteries from the product immediately.
Before use
Note: Remove all packing materials before use.
Note: Remove protection foil on LC-display
before use.
Note: Unplugged from the mains the light
alarm clock only has two emergency func-
tions (clock and electronic alarm signal). An
electric connection is therefore required prior
to use.

10 GB
First remove the protective film from the
LC-display 3of the light alarm clock.
A plastic strip protrudes from the battery
compartment cover 11 on the underside
of the light alarm clock. Remove this plas-
tic strip to utilise the inserted batteries.
Plug the low voltage plug 30 of the mains
supply 29 into the low voltage jack 8of
the light alarm clock. Then plug the mains
supply into an easy to access socket.
Your light alarm clock is now in clock mode.
The clock starts at 00:00.
Setting the display
backlight
Use the slide switch 4to adjust the
backlight intensity on the LC-display 3.
Choose from the settings OFF, LO, ME
and HI.
Adjusting the time
In clock mode, press the CLOCK button 15
for approx. 3 seconds to enter setup
mode.
Press the + button 19 or the − button 20
to change the respective flashing value.
TIP: Holding the + button or the − button
will rapidly scan forward or backward
through the numbers. When no button is
pressed for 30 seconds, the light alarm
clock with automatically return to clock
mode.
Briefly press the CLOCK button to confirm
the setting. This will take you to the next
clock settings option.
This allows you to successively adjust the
following values:
· Year
· Month
· Day
· Hour
· Minute
· 24/12 hour display - in 12 hour
mode the time from 12 to 23:59 will
show PM next to the time.
· Language for displaying the
day of the week - Abbreviations for
languages: GE for German, EN for Eng-
lish, FR for French, DU for Dutch, SP for
Spanish, IT for Italian.
Set the desired language by pressing the
CLOCK button. The light alarm clock will
then return to clock mode.
Table of contents
Languages:
Other OWIM Alarm Clock manuals