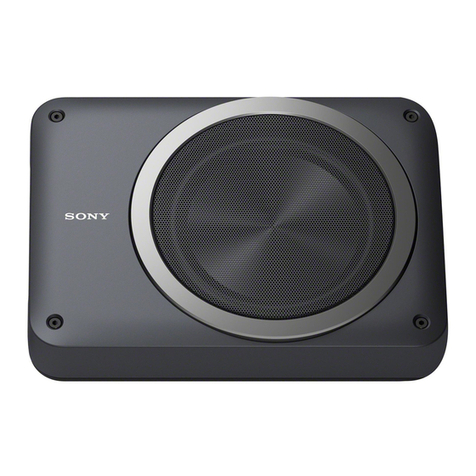
Orion XTR102 User manual

Subwoofer MODEL
XTR102
XTR104
XTR122
XTR124
XTR152
XTR154
OWNER'S MANUAL

© 2008 directed electronics—all rights reserved 1
TABLE OF CONTENTS
English . . . . . . . . . . . . . . . . . . . . . . . . . . . . . . . . . . . . . . . . . . . . . . . . . . . . . . . . . . . . . . . 1
Français . . . . . . . . . . . . . . . . . . . . . . . . . . . . . . . . . . . . . . . . . . . . . . . . . . . . . . . . . . . . . 25
Español. . . . . . . . . . . . . . . . . . . . . . . . . . . . . . . . . . . . . . . . . . . . . . . . . . . . . . . . . . . . . . 35
Deutsch . . . . . . . . . . . . . . . . . . . . . . . . . . . . . . . . . . . . . . . . . . . . . . . . . . . . . . . . . . . . . 45
Italiano. . . . . . . . . . . . . . . . . . . . . . . . . . . . . . . . . . . . . . . . . . . . . . . . . . . . . . . . . . . . . . 55
Português . . . . . . . . . . . . . . . . . . . . . . . . . . . . . . . . . . . . . . . . . . . . . . . . . . . . . . . . . . . 65
Introduction . . . . . . . . . . . . . . . . . . . . . . . . . . . . . . . . . . . . . . . . . . . . . . . . . . . . . . . 1
Practice Safe Sound™ . . . . . . . . . . . . . . . . . . . . . . . . . . . . . . . . . . . . . . . . . . . . . . . . 1
What's in the box . . . . . . . . . . . . . . . . . . . . . . . . . . . . . . . . . . . . . . . . . . . . . . . . . . . .2
Tools of the Trade . . . . . . . . . . . . . . . . . . . . . . . . . . . . . . . . . . . . . . . . . . . . . . . . . . . 2
Installation . . . . . . . . . . . . . . . . . . . . . . . . . . . . . . . . . . . . . . . . . . . . . . . . . . . . . . . . . 2
Finding Speaker Mounting Locations . . . . . . . . . . . . . . . . .. . . . . . . . . . . . . . . . . . . . 2
Features . . . . . . . . . . . . . . . . . . . . . . . . . . . . . . . . . . . . . . . . . . . . . . . . . . . . . . . . . . 3
Wiring Configurations . . . . . . . . . . . . . . . . . . . . . . . . . . . . . . . . . . . . . . . . . . . . . . . . .4
Specifications . . . . . . . . . . . . . . . . . . . . . . . . . . . . . . . . . . . . . . . . . . . . . . . . . . . . . . 14
Enclosure Recommendations . . . . . . . . . . . . . . . . . . . . . . . . . . . . . . . . . . . . . . . . . . .18
Warranty . . . . . . . . . . . . . . . . . . . . . . . . . . . . . . . . . . . . . . . . . . . . . . . . . . Back cover
INTRODUCTION
Thank you for your purchase of the Orion XTR Subwoofers. These woofers represent
a combination of incredible performance and value. We at Orion strive to give you
the latest up to date information about this product. What we can’t give you with
the manual is personal installation or technical experience. If you have questions
concerning the use or application of this product please refer to the nearest Orion
dealer for assistance, visit www.orioncaraudio.com, or call the technical support
hotline at 1-800-876-0800. As we are always finding new ways to improve our product,
the features and specifications are subject to change without notice.
PRACTICE SAFE SOUND™
Continuous exposure to sound pressure levels over 100dB may cause permanent
hearing loss. High powered automotive sound systems can generate sound pressure
levels in excess of 130dB. When playing your system at high levels, please use hearing
protection and prevent long term exposure.
Model Number: _______________
Serial Number: _______________
Date of Purchase: _______________

2 © 2008 directed electronics—all rights reserved
WHAT’S IN THE BOX
Included in this box are all the necessary mounting hardware and cables for your basic
installation. Listed below is a detailed list of the components included in this system
package.
Quantity Description
1 Owner's Manual
1 Orion XTR woofer
1 Mounting template
1 Trim ring
TOOLS OF THE TRADE
Listed are the majority of the tools required to perform the installation. Having the
proper tools will make the installation much easier. It is very difficult when you get
half way through the installation and discover that you require a specific tool to
get yourself through a particular part of the installation. Some of these tools are
necessities. Some make the job much easier.
• Marking Pen • Electric Drill and assorted Bits
• Phillips Screwdriver • Wire Strippers
• Allen Wrenches • Volt/Ohm Meter (Optional)
• Table Saw • Jig Saw
• Wire Cutters • Wire Crimpers
INSTALLATION
The performance of these XTR subwoofers is directly proportional to the quality of
the installation. Care taken with the installation process will be rewarded by years
of satisfying performance. If you are unsure of your installation abilities, please
refer to your local authorized ORION dealer for assistance. Orion dealers are trained
professionals dedicated to extracting the maximum performance out of your Orion
system. If you decide to install this speaker system yourself, please read the entire
section on sealed and vented enclosures before starting the installation.
FINDING SPEAKER MOUNTING LOCATIONS
Choosing the correct speaker locations will have the greatest effect on the sound
quality of the system. Different considerations are needed when choosing the
locations that best suit your needs. The locations must be large enough for the
speakers to fit. Care is needed to ensure that the location you have chosen will not
affect any of the mechanical or electrical operations of the vehicle.
Determining the best location for the speakers will depend on your cosmetic needs
and your vehicle’s interior. Usually the woofers are installed in the trunk, rear seat, or
rear of the vehicle..

© 2008 directed electronics—all rights reserved 3
FEATURES
123
5
6
7
4
8910
11
12
13
14
15
Figure 1
Figura 1
Abbildung 1
1 Polypropylene dust cap - moisture and UV resistant.
2 Oversized NBR (Nitrile-butadiene Rubber) surround for linear controlled
long excursion.
3 Paper cone - moisture and UV resistant.
4 Custom stamped steel frame.
5 Vented Aluminum voice coil former (2.5" voice coil former).
6 8mm steel front plate.
7 Large 2 stack ceramic magnets. (Large single magnet on 10" models)
8 8mm steel back plate/pole piece T yoke assembly.
9 1.125" vent. Part of the enhanced voice coil cooling system (forced
convection).
10 PVC magnet protector.
11 High temperature Copper dual 2 ohm or dual 4 ohm voice coil.
12 Venting in voice coil former. Part of the enhanced voice coil cooling system
(forced convection).
13 Interlaced Conex spider with stitched and looped tinsel leads attached.
14 Spring loaded push terminals.
15 ABS Trim Ring.

4 © 2008 directed electronics—all rights reserved
WIRING CONFIGURATIONS
Series - One Speaker (dual 2 ohm voice coils)
One dual 2 ohm voice coil woofer with voice coils in connected in series results in a 4
ohm load to the amplifier.
2 ohm
2 ohm
++
+
Figure 2
Figura 2
Abbildung 2
__
_
1. Connect the woofer in series by connecting the negative (-) of one terminal to the
positive (+) terminal of the other coil.
2. Wire the positive (+) terminal of the first coil to the positive (+) terminal on the
amplifier. Wire the negative (-) terminal of the second coil to the negative (-)
terminal on the amplifier.
Parallel—One Speaker (dual 2 ohm voice coils)
One dual 2 ohm voice coil woofer with voice coils in parallel results in a 1 ohm load
to the amplifier.
2 ohm
2 ohm
++
+
Figure 3
Figura 3
Abbildung 3
__
_
1. Connect the speaker in parallel by connecting the two positive (+) terminals
together and the two negative (-) terminals together.
2. Wire the positive (+) terminals of the woofer to the positive (+) terminal on
the amplifier. Wire the negative (-) terminals of the woofer to the negative (-)
terminal on the amp.

© 2008 directed electronics—all rights reserved 5
Parallel — One Speaker (dual 4 ohm voice coils)
One dual 4 ohm voice coil woofer with voice coils in parallel results in a 2 ohm load
to the amplifier.
4 ohm
4 ohm
++
+
Figure 4
Figura 4
Abbildung 4
__
_
1. Connect the speaker in parallel by connecting the two positive (+) terminals
together and the two negative (-) terminals together.
2. Wire both positive (+) terminals of the woofer to the positive (+) terminal on
the amplifier. Wire both negative (-) terminals of the woofer to the negative (-)
terminal on the amplifier.

6 © 2008 directed electronics—all rights reserved
Parallel - Two Speaker (dual 4 ohm voice coils)
Two dual 4 ohm voice coil woofers with voice coils in parallel and the two woofers in
parallel results in a 1 ohm load to the amplifier.
4 ohm
4 ohm
++
--
4 ohm
4 ohm
++
--
+
-
Figure 5
Figura 5
Abbildung 5
1. Connect the speaker in parallel by connecting the four positive (+) terminals
together and the four negative (-) terminals together.
2. Wire the positive (+) terminals of the woofers to the positive (+) terminal on
the amplifier. Wire the negative (-) terminals of the woofers to the negative (-)
terminal on the amplifier.

© 2008 directed electronics—all rights reserved 7
Series/Parallel - Two Speakers (dual 2 ohm voice coils)
Note: Verify and ensure that the woofer wiring is connected as shown with
the negative connection from the first woofer coil connected to the positive
connection of the second woofer coil.
Two dual 2 ohm voice coil woofers with voice coils in series and then parallel the two
series woofers results in a 2 ohm load to the amplifier.
2 ohm
2 ohm
++
--
2 ohm
2 ohm
++
--
+
-
Figure 6
Figura 6
Abbildung 6
1. Connect each woofer in series by connecting the negative (-) of the first coil to the
positive (+) terminal of the second coil.
2. Wire the positive (+) terminal of the first coil on each woofer to the positive (+)
terminal on the amplifier. Wire the negative (-) terminal of the second coil on
each woofer to the negative (-) terminal on the amplifier.

8 © 2008 directed electronics—all rights reserved
Series/Parallel - Three Speakers (dual 4 ohm voice coils)
Note: Verify and ensure that the woofer wiring is connected as shown with
the negative connection from the first woofer coil connected to the positive
connection of the second woofer coil.
Three dual 4 ohm voice coil woofer with voice coils of each woofer wired in series and
then parallel the three woofers for a resulting 2.67 ohm load to the amplifier.
4 ohm
4 ohm
++
--
4 ohm
4 ohm
++
--
4 ohm
4 ohm
++
--
+
-
Figure 7
Figura 7
Abbildung 7
1. Connect each woofer in series by connecting the negative (-) of the first coil to the
positive (+) terminal of the second coil.
2. Wire the positive (+) terminal of each woofer’s first coil to the positive (+) terminal
on the amplifier. Wire the negative (-) terminal of each woofer’s second coil to the
negative (-) terminal on the amplifier.

© 2008 directed electronics—all rights reserved 9
Series/Parallel - Three Speakers (dual 2 ohm voice coils)
Note: Verify and ensure that the woofer wiring is connected as shown with
the negative connection from the first woofer coil connected to the positive
connection of the second woofer coil.
Three dual 2 ohm voice coil woofer with voice coils of each woofer wired in series and
then parallel the three woofers for a resulting 1.33 ohm load to the amplifier.
2 ohm
2 ohm
++
--
2 ohm
2 ohm
++
--
2 ohm
2 ohm
++
--
+
-
Figure 8
Figura 8
Abbildung 8
1. Connect each woofer in series by connecting the negative (-) of the first coil to the
positive (+) terminal of the second coil.
2. Wire the positive (+) terminal of each woofer’s first coil to the positive (+) terminal
on the amplifier. Wire the negative (-) terminal of each woofer’s second coil to the
negative (-) terminal on the amplifier.
This manual suits for next models
6
Table of contents
Other Orion Subwoofer manuals

Orion
Orion XTRPRO102 User manual

Orion
Orion Cobalt CO104S User manual

Orion
Orion XTRPRO102 User manual

Orion
Orion HP10D2 User manual

Orion
Orion HCCA102 User manual

Orion
Orion BP-HP10D2 User manual

Orion
Orion BLACK COIL HCCA Series User manual

Orion
Orion HPD2 User manual

Orion
Orion HCCA 12.4 User manual

Orion
Orion C2 122 User manual

Orion
Orion XTR102D User manual

Orion
Orion ORION MaxxBass User manual

Orion
Orion Cobalt CO104DBX User manual

Orion
Orion ORION C1002 User manual

Orion
Orion HCCA102 User manual

Orion
Orion HCCA 10.2 User manual

Orion
Orion XTRPRO102D User manual

Orion
Orion C2 102 User manual

Orion
Orion Cobalt CO104S User manual

Orion
Orion ORION H2 10.2 User manual