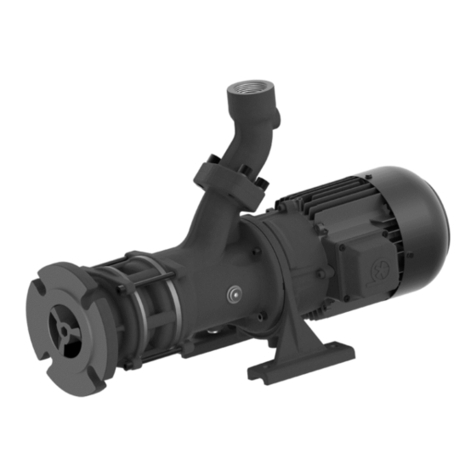
Oasis Ace MAX Series User manual

1
INSTRUCTION
MANUAL
MAX SERIES
HYDRAULIC MOTOR DRIVEN
CENTRIFUGAL PUMPS
WetSeal Technology
O
ASIS
T M

2

3
TABLE OF CONTENTS
Pump performance data, dimensions, and part listings are on individual pump specication
sheets. These specication sheets may be downloaded from the Product Literature page at
www.AcePumps.com or call 800-843-2293 to request a copy. Solid models are available at
www.3DContentCentral.com.
Warnings 3
Plumbing Diagram 4
Pump Mounting 4
Plumbing Suggestions 5
Hydraulic Motor Features 6
Hydraulic System Connections 6
Hydraulic Motor Seals 6
Regulating Hydraulic Flow 7
Oasis™ WetSeal Technology 8
Pump Maintenance 8
Oasis™ WetSeal Maintenance 9
Winterizing and Storage 9
FMC-650-HYD Repair Instructions 10
FMCWS-650-HYD Repair Instructions 12
FMC-750F-HYD Repair Instructions 14
FMC-855F-HYD Repair Instructions 16
Hydraulic Motor Seal Kits 18
Motor Shaft Seal Replacement 18
Motor Disassembly and Reassembly 19
Warranty 20
WARNINGS
AVOID HIGH PRESSURE FLUIDS
Escaping uid under pressure may penetrate the skin causing serious
injury. Avoid the hazard by relieving pressure before disconnecting
hydraulic lines. Tighten all connections before applying pressure and
inspect hoses regularly for wear or damage. If an accident occurs, seek
medical attention immediately. Any uid injected into the skin must be
surgically removed within a few hours or gangrene may result.
HANDLE CHEMICAL PRODUCTS SAFELY
Direct exposure to hazardous chemicals may cause serious injury. Potentially hazardous
chemicals used with Ace Pumps are hydraulic uid, fertilizer, and chemicals. A Safety Data
Sheet (SDS) provides specic details on chemical products: physical and health hazards,
safety procedures, and emergency response techniques. Check the SDS before starting any
job using a hazardous chemical.

4
Anti-Vortex Tank Fitting
Tank Valve
Pressure Gauge
Shut-off Valve
Line Strainer
Agitation Valve
Agitation
Pressure Gauge
Jet Agitator
Control Valve
Flow Meter
Boom Valves
A = 10 x hose diameter
A
Pressure Spike
Valve
PLUMBING DIAGRAM
PUMP MOUNTING
Ace centrifugal pumps are straight centrifugals and must be primed prior to operation. The word
“primed” means the pump must be completely full of water and any trapped air vented before the
pump is operated. Following the pump mounting guidelines will insure proper priming of the pump
and avoid premature seal failure.
The following are basic guidelines for proper pump mounting:
¾The pump should be mounted below the tank(s) allowing gravity to naturally ll the pump with
liquid.
¾The volute should be oriented with the discharge port pointing up (A) or across the top (B) of
the pump which allows air to rise out of the pump.
If the volute must be oriented at the
bottom (C) or across the bottom (D):
1. A vent line is required to continually
bleed air from the pump housing.
It should be installed from the
highest pipe plug hole to the top
of the sprayer tank.
2. A petcock valve can also be installed in the highest pipe plug hole to bleed the air manually
each time the tanks are lled.
¾If the pump must be located above the liquid level, a foot valve should be installed to maintain
the pump’s prime.
A B C D

5
PLUMBING SUGGESTIONS
The primary goal when plumbing a sprayer pump is to route liquid with minimum restriction. Minimizing
restrictions is necessary for achieving the pump’s maximum rated capacity. The following are
recommended practices to maximize pump performance and efciency:
¾Hoses should be at least the same size as the pump’s suction and discharge port. Pump
performance may be increased up to 20% by using one size larger suction hose.
A straight run of 10 times the suction hose diameter is recommended prior to the pump inlet.
Example: 1.5” (38.1 mm) hose diameter = 15” (38.1 cm) of straight hose
The straight section provides laminar water ow to the pump.
¾A minimum number of elbows, ttings, and valves should be used to reduce pressure losses.
These should also be sized properly to prevent ow restrictions.
¾An anti-vortex tting should be installed on the suction port inside the tank. This tting prevents
a vortex from forming when the tank liquid level is low. A vortex will allow the pump to pull air in
causing irregular performance or loss of prime.
¾Install a pressure gauge and valve on the discharge side of the pump for the purpose of measuring
the SHUT-OFF pressure. The SHUT-OFF pressure is needed for the setup of HYD series
pumps.
¾An agitation ow rate of 5% of the tank capacity is recommended for most chemicals. A higher
rate of 10% is suggested for wettable powders and materials difcult to keep in suspension. See
the chart below for common tank sizes.
Tank Capacity 5% 10%
500 gallons 25 gpm 50 gpm
750 gallons 37 gpm 75 gpm
1000 gallons 50 gpm 100 gpm
1500 gallons 75 gpm 150 gpm
Jet agitators are the most efcient way to agitate a large tank. They operate on an entrainment
principle where ow through an orice is multiplied by capturing surrounding uid. The ow rate
is based on the pressure of the uid passing through. A pressure gauge installed on the agitation
line gives the operator an indication of total agitation ow. This is especially important for high
application rates where more ow is needed for the boom.
¾A line strainer should be installed on the discharge side of the pump to protect the nozzles from
clogging. If a strainer must be used in front of the pump, a large mesh screen should be used to
lter debris too large to pass through the impeller vanes.
¾The electronic spray control valve and ow-meter should be sized for the desired maximum boom
ow based on the application rate and ground speed.
¾A pressure spike valve is recommended for use with Ace MAX series models. These models operate
at pressures up to 160 psi (11 bar). A pressure spike is generated when the boom is turned off.
The spike valve will relieve the pressure back to tank and prevent damage to system components.
Tank Capacity 5% 10%
3000 liter 150 lpm 300 lpm
4000 liter 200 lpm 400 lpm
5000 liter 250 lpm 500 lpm
8000 liter 400 lpm 800 lpm

6
HYDRAULIC SYSTEM CONNECTIONS
The following hydraulic connection recommendations are important for optimum pump efciency and
motor seal life.
1. Hydraulic hoses should be sized to insure proper oil supply to the motor and minimize return line
pressure. Recommended hose sizes are 5/8”(15.9 mm) for M16/M22 motors and 3/4”(19 mm)
for M25/M30 motors. The hoses should be sized larger if individual hose lengths exceed 15 feet
(4.5 m).
2. The return line should be connected to a low pressure return port if available. The low pressure
return port routes oil directly to the reservoir minimizing return line pressure. Low return line
pressure extends the motor seal life and increases operating efciency.
3. Connect the hydraulic hoses to the tractor hydraulic couplers so the pump operates with the control
lever in the “Lower/Retract” position. The pump can then be turned off in the forward “Float”
position. Turning the pump off in “Float” instead of “Neutral” allows the hydraulic system pressure
to equalize and prevents the occurrence of damaging pressure spikes.
M SERIES HYDRAULIC MOTOR FEATURES
Coasting Check - This internal feature is standard on all Ace hydraulic motors. It protects the
motor seal from pressure spikes created by the ywheel effect of the impeller when the pump is
turned off.
External Motor Fittings
Standard Fittings:
Inlet - Adapter/Restrictor Body (BAC-80-10SAE)............................1/2” NPT Female
Outlet - Reverse Check Valve (BAC-78-10SAE).............................1/2” NPT Female
Optional Fittings (special order):
Inlet - Adapter/Restrictor Body (BAC-80-10X10SAE).......#10 SAE Female
Outlet - Reverse Check Valve (BAC-78-10X10SAE)........#10 SAE Female
Adapter/Restrictor Body - This tting serves as an adapter for hose connection on all systems
and a housing for the restrictor orice for 650 models on PC Closed hydraulic systems.
Reverse Check Valve - The external check valve prevents damage by not allowing the pump
to run backwards. The valve may be removed when used on engineered systems with a single
ow direction.
Motor Ports
M16, M22, and M25
Inlet & Outlet......#10 SAE female
M30
Inlet & Outlet......#10 SAE female
Case Drain.........#6 SAE female Inlet
(marked “I”)
Outlet
Case Drain
(M30 only)
HYDRAULIC MOTOR SEALS
Hydraulic seal failures are typically caused by high continuous pressure or pressure spikes in the
return line. The motor seal is rated for 250 PSI(17.2 bar). Maintaining return line pressures below
100 PSI(6.9 bar) will extend motor seal life. Minimize back pressures in the return line by plumbing
an unobstructed return back to the hydraulic reservoir or motor return port. Avoid returning the oil
through remote valves, couplers, and long undersized hoses. Consult your tractor dealer for low
pressure return options.
Do not install any hydraulic components in series on the return line of the motor.
I

7
REGULATING HYDRAULIC FLOW TO MOTOR
Warning: Failure to regulate oil ow may damage hydraulic motor.
There are three types of hydraulic systems: 1) Load Sensing (LS) also called Pressure-Flow
Compensating Closed Center, 2) Pressure Compensating Closed Center (PC), and 3) Open Center
(OPEN). Consult the Tractor Hydraulic System Pump Selection Guide(HSG), Internet Hydraulic
Selection Guide (IHSG) at www.AcePumps.com, or your tractor dealer to determine the type hydraulic
system on your tractor and the method of regulation.
PRESSURE COMPENSATING CLOSED CENTER SYSTEM
LOAD SENSING CLOSED CENTER SYSTEM
Regulate oil ow with tractor’s FLOW CONTROL. (Do not use restrictor orice.)
Setup Instructions:
1. Shut off sprayer boom and agitation valves.
2. Adjust tractor ow control to minimum ow setting (turtle).
3. Move hydraulic lever to “Lower/Retract” position to start pump.
4. Adjust tractor ow control until sprayer shut-off pressure is 4 psi(0.3 bar) for 650
models or 20 psi(1.4 bar) for 750/855 models above desired spraying pressure.
Do not exceed maximum shown in SHUT-OFF PRESSURE section below.
5. Open the sprayer agitation valve to set desired spraying pressure.
Flow Control
Regulate oil ow by using a RESTRICTOR ORIFICE.
Setup Instructions:
1. Install restrictor orice for all 650 models. Insert the orice with O-ring
inside the adapter/restrictor body in the motor inlet port.
Note: Do not use restrictor for 750 and 855 pump models.
2. Set “Rabbit/Turtle” ow control to “Turtle”.
3. Move hydraulic lever to the “Lower/Retract” position to start pump.
4. Adjust “Rabbit /Turtle” ow control and sprayer agitation valve to set
desired spraying pressure.
Insert Restrictor
Orice
OPEN CENTER SYSTEM
The M Series motors are not equipped with a needle valve to bypass excess oil ow. The tractor
hydraulic ow must fall within the motor’s recommended ow range or an external bypass circuit
may be added. The tractor’s hydraulic system may limit pump performance if the oil ow is less
than the motor’s rated capacity.
Select motor size closest to tractor’s hydraulic system capacity.
Consult factory for application of pumps on these systems.
SHUT-OFF PRESSURE
Shut-off pressure is the sprayer system pressure with all liquid ow turned off. This means closing
the boom, agitation, and any by-pass valves. It is the highest pressure a centrifugal pump will
achieve for a given RPM and relates directly to the ow of hydraulic oil. A pressure gauge must
be located between the pump discharge and the shut off valves.
Pump Model Maximum Shutoff Pump Model Maximum Shutoff
FMC-650-HYD 160 psi (11 bar) FMC-750F-HYD 150 psi (10.3 bar)
FMC-650F-HYD 160 psi (11 bar) FMC-855F-HYD 150 psi (10.3 bar)
FMCWS-650F-HYD 160 psi (11 bar)

8
WetSeal Technology
O
ASIS
T M
Ace Oasis™ Wet Seal Technology
prevents the pumped liquid from
contacting the shaft seals. The seals
operate in a reservoir lled with a
specially formulated barrier uid for seal
face lubrication and heat dissipation.
Additionally, air pressure is introduced
to prevent pump uid from contaminating the seal reservoir. This isolation of the seals
prevents abrasive wear of the seal faces and run dry seal failures.
The Oasis WetSeal is standard on the FMCWS-650, FMC-750F, and FMC-855F pump
models.
All pumps equipped with the Oasis™ WetSeal have a two year warranty.
PUMP MAINTENANCE
1. MAX series pumps are equipped with lubricated and sealed bearings. No additional bearing
lubrication or maintenance is required.
2. Neutralize chemicals and ush pump after each use to prevent corrosion.
3. If a danger of freezing exists, drain all water from the pump casing by removing the lowest
volute pipe plug. This will prevent casting breakage due to frozen liquid inside the pump.
Note: Do not drain the barrier uid from the seal reservoir on Oasis™ WetSeal models.
Fill Plug
Site Gauge
Air Valve
Drain Plug
Pressure Gauge
Seal Reservoir

9
The seal reservoir uid level and pressure must be monitored and maintained to ensure proper
operation of the WetSeal feature.
How to check seal reservoir uid level:
View the site gauge window on the side of the seal reservoir. A oat is included to easily see uid
level.
If the uid is not visible, add uid by following these steps:
• Relieve reservoir air pressure by removing air valve cap and pressing stem.
• Remove ll plug on top of seal reservoir.
• Add barrier uid (Ace Part #55032 - available in quarts) until level is at top edge of site window.
Caution: Do not overll.
• Replace ll plug and recharge air pressure per instructions below.
How to check seal reservoir pressure:
The reservoir pressure gauge gives a direct pressure reading. Pressure should remain within the
green zone during operation. The recommended cold reservoir pressure is 25 to 30 psi.
Note: Pressure will increase during operation as the uid is heated.
Steps to pressurize seal reservoir:
• Verify that ll and drain plugs are installed and tight.
• Remove air valve cap.
• Add air until gauge reads 25 to 30 psi. An air supply or tank regulated to 30 psi(2 bar) is best.
Caution: Do not over pressurize. Relieve excess air pressure if necessary.
• Replace air valve cap.
Maintenance Intervals:
Initial Startup: Verify correct reservoir uid level and pressure prior to startup.
Daily: Check reservoir pressure.
If air must be added regularly, spray soapy water around plugs, seams, and ttings
of seal plate to check for leakage. Reseal as needed. If no external leak is found,
installation of a seal kit should be scheduled for next machine downtime.
Weekly: Check barrier uid level. A small amount of barrier uid will be consumed under normal
operating conditions.
If the barrier uid appears cloudy or discolored in site gauge, drain until uid runs
clear, rell with clean uid, and recharge pressure. Check again in one week. If uid
is cloudy or discolored again, this is an indication of inboard seal leakage. A seal kit
installation should be scheduled for next machine downtime.
Season End: Remove drain plug and drain barrier uid from the reservoir into a clean bucket.
1) If the uid is clear: reinstall plug, rell with barrier uid, and recharge air pressure.
2) If the uid is cloudy, discolored, or contains water: This could be the indication that
a seal leak is developing. Installation of a seal kit is recommended to ensure trouble
free operation for the next season.
WINTERIZING AND STORAGE
1. Flush pump thoroughly and neutralize chemicals to prevent corrosion.
2. Fill pump with recreational vehicle antifreeze to protect from corrosion and freezing.
3. If equipped with Oasis™ WetSeal, see Season End maintenance above.
4. If removing hydraulic hoses, insert plugs in motor ports to retain uid and prevent contamination.
OASIS™WETSEAL MAINTENANCE

10
1. Remove (2) socket head motor screws and washers with 5/16” hex wrench.
2. Remove hydraulic motor.
Note: Tap with a non-marring hammer if necessary.
Alternate method: a) rotate motor slightly positioning ange ears in front of bolt holes b) install
(2) motor screws in motor mount holes from opposite direction and tighten by hand until snug c)
tighten screws with wrench using an alternating pattern of one turn each until separated.
3. Remove snap ring from behind rear pump bearing.
4. Remove (8) volute cap screws with 9/16” wrench.
5. Remove volute and O-ring.
6. Remove stainless impeller cap screw with 9/16” socket and discard sealing washer.
Note: Turn counterclockwise to remove
7. Remove impeller and key from shaft.
8. Slide rotating seal assembly with spring off of shaft and discard.
Note: Observe seal orientation for installation of new seal.
9. Install impeller cap screw in shaft end to protect threaded hole.
10. Press or tap (non-marring hammer) shaft/bearing assembly from impeller end until clear of
stationary seal face in mounting frame.
11. Use a screw driver to pry stationary seal face from seal bore.
Note: If replacing shaft seal only - skip to Assembly Instructions step 5.
12. Press or tap shaft/bearing assembly out of frame.
13. Remove slinger and impeller cap screw from shaft.
14. Use a press to remove bearings from shaft.
Press bearings off each end of shaft.
Frame
Shaft/BearingAssy.
Motor
Volute Cap Screw (8)
Volute Impeller
O-ring
DISASSEMBLY INSTRUCTIONS
FMC-650-HYD REPAIR
Ace pump repair kits include all shaft seals and O-rings required to
repair the pump.
Pump Model Standard Seal Severe Duty Seal
FMC-650(F)(FS)-HYD Series RK-FMC-650 RK-FMCSC-650
Shaft Seal Only EDP# Recommended For
BAC-7-650 40145 water and general ag chemicals
BAC-7SC-650 40146 abrasive chemicals and fertilizers
BAC-7-650B 40144 water and aqua ammonia
REPAIR KITS & SEALS
Pad
O-ring
Liner (FS Model)
Liner O-ring
This manual suits for next models
8
Table of contents
Popular Water Pump manuals by other brands

Sykes AmeriPumps
Sykes AmeriPumps GP100M Operation and maintenance instructions

DUROMAX
DUROMAX XP WX Series user manual

BRINKMANN PUMPS
BRINKMANN PUMPS SBF550 operating instructions

Franklin Electric
Franklin Electric IPS Installation & operation manual

Xylem
Xylem e-1532 Series instruction manual

Milton Roy
Milton Roy PRIMEROYAL instruction manual