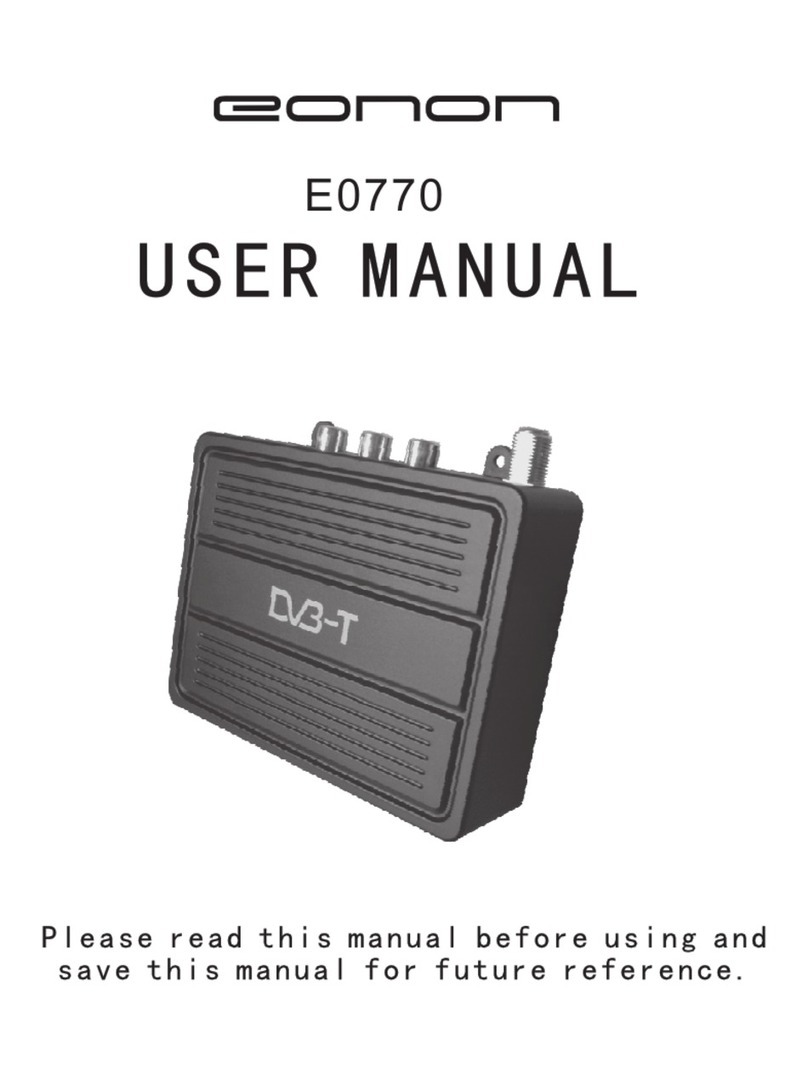
New Digital T2 01 User manual

This symbol on the product means that your equipment is suitable only for indoor use.
1. Read and follow these instructions.
2. Do not use this apparatus near water, heat sources, do not expose to direct sunlight and the
temperatures higher than in a normal household. For Indoor use only!
3. Clean only with a dry cloth, protect from moisture and dirt, do not cover the ventilation grid.
4. Operate this product only from the type of power source indicated on the label. Protect the
Device and the power cord from the moisture, physical damage.
5. Unplug this apparatus during lightning storms or when unused for a longer period.
6. Do not disassemble the unit or try to insert any extraneous items into it.
7. Refer all servicing to qualified service personnel only. Servicing is required when the apparatus
has been damaged in any way, including damage to the mains cord or plug, if the unit was
exposed to liquids or moisture, has been dropped, or not operating correctly.
IMPORTANT SAFETY INSTRUCTIONS
CAUTION
Risk of electric shock!
DO NOT OPEN!
ATTENTION
Risque de choc electrique!
NE PAS OUVRIR!
This symbol indicates that dangerous voltages constituting a risk of electric shock are
present within this unit.
This symbol on the product or in the instructions means that your electrical and
electronic equipment should be disposed at the end of life separately from your
household waste. There are separate collection systems for recycling.
For more information, please contact the local authority or your retailer where you
purchased the product.
This symbol indicates that this product incorporates double insulation between
hazardous mains voltage and user - accessible parts. When servicing use only identical
replacement parts.
This symbol indicates that there are important operating and maintenance
instructions in the literature accompanying this unit.
* NOTE: this Tuner is supporting the reception of Free To Air
programs only
FRONT AND REAR PANELS AND CONNECTIONS DIAGRAM
Front panel and controls
Rear panel
and connection diagrams:
1 POWER – Switches between working and Standby mode
2 CH- switches TV program up the list
3 CH+ switches TV program down the list
4 IR (Infrared remote control) window
5 USB -- connector for an external USB memory device (USB 2.0 support) located on the right
side
1 2 3 4
5
1 RF IN: This socket connects to your external Aerial.
2 HDMI: High definition audio and video output used to connect to the TV HDMI socket
3 TV SCART – analog Audio/video output for connection to TV set
1 2 3
HIGH DEFINITION DIGITAL TERRESTRIAL
DVB-T2/T TUNER WITH H264 SUPPORT
CONTENTS OF THE PACKAGE
Tuner Unit, Remote Control Unit, 2 pcs AAA type Batteries,
User Manual
OR
HDMI cable
SCART
cable
EN

1. POWER: Turns the receiver On/Standby.
2. REC: Record button.
3. ASPECT: Change aspect ratio 4:3/16:9.
4. SUB: Display subtitle options (availability depends on the channel).
5. AUDIO: Change the Audio Language Track in Audio Menu.
6. MENU: Opens the main menu, in the menu you will get one step back.
7. Press to move the cursor when the menu window is on. When menu window
is off - use arrow buttons Up/Down for switching the channels; Left/Right buttons
to control the Volume.
8. BACK: Go back to the previously viewed channel.
9. STOP: Stop playback.
10. VOL+/ VOL-: Adjust the volume +/-.
11. TTX: Switch on Teletext, if the current channel has this option, and use EXIT key
to quit Teletext. REW: Fast backward.
12. MUTE: Mutes audio output of the receiver.
13. TIMER: Access to the timer.
14. V-FORMAT: Switch the HDMI 720P and 1080i.
15. USB: Direct access to Media files when an external USB memory device is connected.
16. PRGM: PROGRAM Shows program timetable.
17. INFO: Shows the current channel information. Press twice for program
and technical information.
18. OK: Confirmation of Menu Items. Menu Off: Displays the current channel list
Confirmation of Menu Items.
19. EXIT: Exits from the menu or sub-menu.
20. CH+/CH-: Menu off: Change Channel +/-. Menu on: Move the up/down menu cursor.
21. PLAY/PAUSE: Start playback from the selected file.
TIMESHIFT: If the unit has an attached an USB device, goes to Timeshift mode.
Requires external USB memory device
22. TV/RADIO: Switch between Digital Radio and TV modes.
Dubbed function FF: Fast forward in Media player mode
1. MUTE: Mutes audio output of the receiver.
2. FAV: Displays your favorite channels list.
3. SUBTITLE: Display subtitle options (availability depends on the channel).
4. <0>-<9>: Numeric keys.
5. MENU: Display the main menu on the TV screen, and press again to close the menu.
6. OK: To confirm the current setting, or display all programs in no-menu mode.
7. EPG: Shows the Electronic Program Guide.
8. Pg Dn/Pg Up (PAGE+/PAGE -): To browse pages inside the program list.
9. VOL- /VOL+: To decrease/increase volume.
10. REV/FWD: Fast backward/Fast forward.
11. PREV/NEXT: Skip backward/Fast forward.
12. PLAY
13. PAUSE
14. REC: Record button. Requires external USB memory device.
15. TIMESHIFT: If the USB memory device is connected to the receiver,
goes to Timeshift mode.
16. ZOOM: Increases the size of the image.
17. ASPECT: Change aspect ratio 4:3/16:9.
18. POWER: Switch the receiver in and out of Standby mode.
19. TTX: Switch on Teletext, if the current channel has this option, and use EXIT key to quit Teletext.
20. INFO: Display information about the current channel.
21. RECALL: Go back to the previously viewed channel.
22. LIST: List of channels.
23. EXIT: Use this key to quit the current menu.
24. Press to move the cursor when the menu window is on. When the menu window
is off - use arrow Up/Down buttons for switching the channels; Left/Right buttons
to control the Volume.
25. GOTO: Select time in Media player mode.
26. CH-/CH+: Program changing keys.
27. LANG: Change the Audio Language Track in Audio Menu
(availability depends on the channel).
28. STOP
29. REPEAT: Repeat play.
30. TV/RADIO: Switch between Digital Radio and DVB-T modes.
31. TIMER: Access to the timer.
32. V-FORMAT: Switch the HDMI 720p and 1080i.
DESCRIPTION OF THE REMOTE CONTROL UNIT (RCU)
Remote control unit Version 1
DESCRIPTION OF THE REMOTE CONTROL UNIT (RCU)
Remote control unit Version 2
EN

Please insert the batteries into the Remote control unit, arrange the necessary connections
and plug in the unit to mains. The installed TV Antenna should guarantee the minimum signal
strength not less than 60% and the signal quality not less than 80% according to the device
indicator. Please check the Manual search section below. If you are using the unit for the first
time or after restoring the factory settings, the installation guide will appear on the TV screen
if the device is connected properly.
Follow these steps using the Remote Control Unit:
Select the language, select the country of residence, further select OK for channel search.
The unit will start searching for available TV programs and will save the list in the memory,
once found. Please use Password 000000 for restoring the factory settings.
FIRST TIME INSTALLATION
How to use the Remote Control Unit keys when browsing the Welcome Menu:
1. Press [Up/Down] key to move the highlight.
2. Press [Left/Right] key to select region, language.
3. Move the highlight to [Channel Search] item and press [OK] key to begin the auto scan.
4. Press [Exit] key to exit the welcome page and enter into the main menu.
Please use the same principles when browsing, selecting, and exiting the other Menu Sections.
MAIN OSD (ON-SCREEN DISPLAY) MENU
Press the [Menu] key to enter the main menu list, it includes the list:
1. Program settings
2. Picture settings
3. Search settings
4. Time settings
5. Options settings
6. System settings
7. USB Media Menu
To access the menu, press the MENU button and select [Menu Item]. using the RIGHT/
LEFT keys to navigate through the menu. Use Up/Down keys to navigate into the Submenus.
Program Management Settings
The menu provides options for the Program Management Settings. Select an option
and press OK or RIGHT to adjust that setting. Press the EXIT button to exit the menu.
(a) Program edit Menu.
(b) Program Guide Menu.
(c) Sort (program sort) options: by Original Network ID; Service ID or LCN
(recommended default setting).
(d) LCN (Logical channel numbering) enabling/disabling LCN according to
country requirements.
To Edit TV Program list:
Enter program Edit Menu (use PIN code 000000 to access)
The edit functions are listed in the lower part of the Edit Menu.
Use Color buttons or Back/Fav buttons to perform Move, Skip, Lock, Delete,
Rename the programs.
Select the TV program you would like to edit
Select one of the Edit functions (Lock; Skip; Move; Delete, Rename) by pressing
the edit buttons accordingly.
Perform editing, press the Edit button a second time to disable function after editing is finished.
NOTE: the edited program lists are deleted automatically when using
Automatic Program Search, or Factory Reset functions.
NOTE: some Tuners may not have the FAV button available on the RCU,
therefore the FAV function is not available to use.
Program Guide Menu (can be accessed directly using PRGM button)
The program guide window allows to viewing the TV program schedule (main window) and see
the Program description on the right side window. The TV programs can be selected
by using Left / Right arrow buttons. The pages on the program description are chosen
using color buttons (page UP/page DOWN).
The Book function allows programming the Tuner to turn ON / OFF at selected times
(Schedule the Timer function).
Confirm
EXIT OK
EXIT
EN

Picture Setting Menu
To access the menu, press MENU then select [Picture] using the RIGHT/LEFT key.
The menu provides options to adjust the video settings. Press UP/DOWN to
select an option and press RIGHT/LEFT to adjust that setting. Press EXIT to exit
the menu.
(a) Aspect Ratio– allows choosing the 16:9 or 4:3 aspect ratios to fit the
picture into the TV screens accordingly.
(b) Resolution (HDMI output resolution) – allows choosing the best picture
quality for the TV screen.
(c) TV Format – allows choosing TV Color system, PAL is set by default and
recommended to use.
NOTE: When using the Tuner with 16:9 LCD/LED TV sets it is recommended to
use Video resolutions of 1080i or 1080p to achieve the best picture quality via
HDMI port. The AUTO Aspect Mode is recommended to use.
When using the Tuner with 4:3 TV (old CRT) sets it is recommended to use AUTO
Aspect mode or 4:3 Letterbox aspect mode to achieve the best picture fitting
for the 4:3 screen.
(a) Auto Search - allows searching for TV channels automatically on all
frequency ranges. Select this mode and press OK to launch.
When launched – Automatic search deletes all listed earlier programs and
creates a new list from the programs found.
The Channel search window will appear with the list of Channels found.
Before launching the automatic search it is recommended to check the signal
level using Manual Search Menu, in order to ensure the received signal level
and quality are enough to find and watch the broadcasted TV programs. When
search is launched - the program Channel search window will appear with the
list of Channels found. The new programs will be saved in ALL program List.
Channel Search
To access the menu, press MENU and select [Search Channel] using the
RIGHT/LEFT keys.
This menu provides options to adjust the search channel settings.
Press UP/DOWN to select an option and press RIGHT/LEFT to adjust the setting.
Press EXIT to exit the menu.
(a) Auto search – launches Automatic search.
(b) Manual search- Manual search Menu allows setting program search on
selected frequency.
(c) Country – selection of the country of Residence is strongly recommended
before launching the search.
(d) Antenna power – allows enabling/disabling of the +5V power on RF IN for
active antenna.
(b) Manual search:
Select the channel Number of the Broadcasted TV Package
Check the Signal Strength and Quality is high enough to receive the broadcasted
program Package.
NOTE: to ensure good reception conditions it is highly recommended to install the
Antenna to ensure Signal strength (level) is not less than 80% and Signal quality not less
than 80%. The levels must be stable during all times. Lower signal Intensity and quality
levels may result in poor Video/Audio quality of received programs.
To select Search- press OK for channel search.
The program Channel search window will appear with the list of Channels found.
The new programs will be saved in ALL program List.
NOTE: selection of the country of Residence is strongly recommended before
launching the search, as it will impact the Program Numbering.
For the Countries with LCN on requirement – the programs found will be listed according
to their LCN number. For the countries without LCN on – the programs
found will be listed according to Frequency, from lower to higher.
(c) Antenna power ON option can be used in case of connecting the active antenna
with standard 5V powering. The use of an additional Antenna power adapter is not
necessary in this case.
NOTE: the maximum supported current on this port is 50mA
EN

Time Settings Menu
(a) Time offset – allows setting time offset Automatically (recommended) and
Manually (in case the Automatic time setting does not match the local time).
(b) Time Zone – allows setting time zone (used in Manual Time offset mode).
(c) Sleep - allows setting the Tuner to energy-saving mode with automatic turn off
after a certain viewing time (selectable from 1 to 12 Hours).
(d) Power On/Off – ON-OFF timer function – allows setting a timer for automatic
powering ON or powering OFF.
Option settings Menu
To access the menu, press MENU, select [Option] using the RIGHT/LEFT keys.
The menu provides options to adjust the OSD Language. Subtitle Language and Audio
Language. Audio coaxial output options are also available.
Select an option and press RIGHT/LEFT to adjust the setting.
Press EXIT to exit the menu.
(a) OSD (On-Screen Display) Language – allows selecting the Language for Main and
additional menu items
(b) Subtitle Language –allows selecting the preferred language for subtitling services
(c) Audio Language - allows selecting the preferred language for Audio tracks
(d) Digital Audio – allows selecting the Digital Audio Modes for the
Coaxial Digital Audio (SPDIF) and HDMI Outputs or turn it off.
System Settings Menu
To access the menu, press MENU and select [System] using the RIGHT/LEFT keys.
The menu provides options to adjust the system settings.
Press the UP/DOWN key to select an option and press RIGHT/LEFT to adjust the
setting.
Press EXIT to exit the menu.
(a) Parental Guidance (PG) – allows setting PG age rating to block the viewing of certain
programs (upon availability from Broadcaster)
(b) Set Password – allows changing the default password (000000). The master password
in case the new password is forgotten
is 888888.
(c) Restore Factory Default – allows setting the Tuner to Manufacturers Default settings
(Initial installation). Requires PIN code to
proceed, clears all saved programs and program lists.
(d) Information – allows viewing System information of the tuner, the HW/SW versions.
(e) Software update – allows updating system SW via external USB port. Requires special
dedicated SW file available only from Manufacturer.
This function is used exclusively in cases recommended by Manufacturer and following the
instructions provided by the Manufacturer.
(f) Recall list – allows to turn on/off the Recall function for the list of last viewed programs.
When enabled – works together with “Back” button.
USB
To access the menu, press the MENU button and select [USB] using the RIGHT/LEFT
keys. The menu provides options to playback Multimedia files.
*NOTE: The unit will only support USB devices with FAT32 | NTFS file system.
The supported file formats are:
.mp3 – for music files
.jpeg – for picture
.avi; .mkv; .ts – for video files
Some files of these formats may be unsupported due to different
compression methods and codecs used.
(a) Multimedia – allows to entering Media player Menu
(this Menu is accessible directly via USB button).
Multimedia Menu allows to choosing the Multimedia file format
(music, picture, video) to be reproduced.
(b) Photo configure – allows configuring the Picture viewing format and Slide show
(c) Movie configure – allows setting Subtitle size and mode.
*NOTE: Not all subtitle formats and language fonts may be supported.
(d) PVR configure – allows to enter settings for Personal Video recording configuration.
EN

RECORD (PVR) function
(works only with external USB memory device connected)
*NOTE: To achieve the quality recording the USB memory device must support at least CAT10
writing/reading speed.
Press REC button during TV viewing mode, the Record mode will be activated and the
program will be recorded.
The Recording process is marked with the yellow dot in the left upper side of the screen:
To stop recording press Stop button, the OSD pop-up will appear asking if you want to stop
recording, press OK to stop.
Or choose cancel to continue recording.
The records can be found in PVR Menu of the Multimedia player, they are stored in HBPVR
folder on USB device.
Timeshift mode
(works only with external USB memory device connected)
To enter Timeshift mode press “Pause” button on the RCU.
The picture will freeze and the Pause sign will appear on the screen. Further Timeshift mode can
be managed using Play, FF, and REW buttons.
After pressing Play button the Video will play and the Timeshift line will appear on the screen,
showing the played part (red) and recorded part ( blue)
To stop the Timeshift mode press STOP button, the device will return to normal TV viewing
mode.
*NOTE: The Timeshift mode records are not saved.
EN

Other useful functions
Program Information bar:
Current/next event and signal quality information:
Press INFO control button two times to display the Current/next event description and
Signal Quality Information of the viewed program.
Now/next event and signal quality information:
Press INFO control button two times to display Current/next event description and
Signal Quality Information of the viewed program:
Audio language Menu (Accessible via Audio button).
Language availability depends on Broadcaster.
Subtitle language Menu (Accessible via Subtitle button)
Language availability depends on Broadcaster.
Teletext Function:
Press TTX button on the Remote control Unit to activate TTX service window
(if available from Broadcaster)
*NOTE: when browsing Teletext services allow some time, up to 20-30 s for the
requested page to be loaded
EN

THE MANUFACTURER RESERVES THE RIGHT TO CHANGE THE CONFIGURATION,
TECHNICAL OR ANY OTHER PARAMETERS WITHOUT PRIOR NOTICE
TUNER&CHANNEL
DECODER
TRANSPORT STREAM
PROFILE LEVEL
VIDEO PROFILE
AND LEVEL
INPUT RATE
VIDEO FORMATS
AUDIO FORMAT
VIDEO OUTPUT
MEDIA PLAYER
CONNECTION
MAIN POWER CABLE
TUNER
POWER SUPPLY
HDMI x 1; SCART x 1
USB 2.0 FULL SPEED x 1
ANTENNA INPUT x l
FIXED TYPE
MP3/JPEG/BMP
SCART, HDMI
MPEG Layer l & ll, Dolby Digital Plus (E-AC3)
4:3/16:9 SWITCH ABLE
Max. 80Mbit/S @ MPEG2
MPEG-4 AVC/H.264
MPEG-1 MPEG-2 MP@ML
MPEG-2 ISO/IEC 13818-1
SIGNAL LEVEL: - 10 - 70 dbm
(UHF)
174MHz 230MHz(VHF) 470MHz-862MHz
FREQUENCY RANGE
RF INPUT CONNECTOR xl
USB
HDMI; SCART
INPUT VOLTAGE
STANDBY CONSUMPTION
POWER CONSUMPTION MAX. 6W (USB Max Load: DC 5V, 300mA)
MAX. 0.5W
220 -240v 50/60HZ
PROBLEM Potential reasons What to do
No picture
Screen shows
No Signal
No sound from
speaker
Only sound, no
image on the screen
Remote Control
is not responding
Picture is breaking up
Power isn’t connected
The power switch is not on
Aerial cable is faulty
No or incorrect connection with audio cable
Sound on mute
No or incorrect connection with AV cable
The program is a radio program
The battery is exhausted
Remote Control is not facing or close enough
to the Set Top Box
The signal is too weak
Connect the power.
Switch on the power
Check aerial cable and connections
Connect the audio cable correctly
Turn off mute function
Make sure cables are connected correctly
Press <TV/RADIO> key to shift into TV mode
Change battery
Adjust the position of the Remote Control
and move closer to the unit
Check aerial cable and
connections
TROUBLESHOOTING
www.newdigital.lt
EN

Este símbolo no produto significa que o seu equipamento se destina apenas
a ser usado em espaços interiores.
INSTRUÇÕES IMPORTANTES DE SEGURANÇA
CAUTION
Risk of electric shock!
DO NOT OPEN!
ATTENTION
Risque de choc electrique!
NE PAS OUVRIR!
Este símbolo indica que estão presentes nesta unidade voltagens perigosas,
que representam risco de choque elétrico
Este símbolo no produto ou nas instruções significa que o seu equipamento
elétrico e eletrónico deverá ser descartado quando chegar ao fim da sua vida útil,
separando-o do restante lixo doméstico. Existem sistemas de recolha seletiva para
reciclagem. Para mais informações, contacte as autoridades locais ou o revendedor
onde comprou o produto
Este símbolo indica que este produto incorpora isolamento duplo entre a alta tensão
e as peças que estão ao alcance do utilizador. Ao fazer a manutenção, use apenas
peças de reposição idênticas
Este símbolo indica que existem instruções importantes de utilização e manutenção na
literatura que acompanha esta unidade.
*NOTA: este sintonizador capta apenas programas
de acesso livre
PAINÉIS DIANTEIRO E TRASEIRO E DIAGRAMA DE LIGAÇÕES
Painel frontal e controlos
Painel traseiro e diagramas
de ligação:
1 POWER – Alterna entre os modos de funcionamento e suspensão
2 CH- – Muda para um programa de TV acima na lista
3 CH+ – Muda para um programa de TV abaixo na lista
4 IR – Janela de controlo remoto por infravermelhos
5 USB - Conetor para um dispositivo USB de memória externo (USB 2.0),
localizado do lado direito
1 2 3 4
5
1 RF IN: esta entrada serve para ligar a sua antena externa
2 HDMI: saída de áudio e vídeo de alta definição, utilizada para ligar a tomada HDMI
3 TV SCART – saída analógica de áudio/vídeo para ligar o aparelho de TV
1 2 3
SINTONIZADOR DIGITAL TERRESTRE DE ALTA
DEFINIÇÃO DVB-T2/T COM H264
CONTEÚDO DA EMBALAGEM
Unidade do sintonizador, unidade de controlo remoto,
2 pilhas de tipo AAA, manual do utilizador
OR
HDMI cable
SCART
cable
1. Leia e siga estas instruções.
2. Não use este aparelho perto de água, fontes de calor, não o exponha à luz solar direta
nem a temperaturas superiores às de uma casa normal. Deve ser usado apenas
em espaços interiores!
3. Limpe-o com um pano seco, proteja-o da humidade e da sujidade, não tape
a grelha de ventilação.
4. Utilize este produto apenas com o tipo de fonte de alimentação indicado no rótulo.
Proteja o dispositivo e o cabo de alimentação da humidade e de danos físicos.
5. Desligue-o da tomada durante trovoadas elétricas ou quando não for utilizado
durante um longo período de tempo.
6. Não desmonte a unidade nem tente inserir-lhe peças que não lhe pertençam.
7. A manutenção deve ser feita apenas por técnicos qualificados. Terá de reparar
o aparelho se ele sofrer algum tipo de danos, incluindo danos ao cabo de alimentação
ou ficha, se a unidade tiver sido exposta a líquidos ou à humidade, se tiver caído ou se não
estiver a funcionar corretamente.
PT

DESCRIÇÃO DA UNIDADE DE CONTROLO REMOTO (UCR)
Unidade de controlo remoto Versão 1
DESCRIÇÃO DA UNIDADE DE CONTROLO REMOTO (UCR)
Unidade de controlo remoto Versão 2
1. MUTE: silencia a saída de áudio do recetor.
2. FAV: apresenta a sua lista de canais preferidos.
3. SUBTITLE: oferece opções de legenda (a disponibilidade depende do canal).
4. <0>-<9>: teclas numéricas.
5. MENU: exibe o menu principal no ecrã de TV; prima de novo para fechar o menu.
6. OK: para confirmar as definições escolhidas ou para exibir todos os programas
no modo sem menu.
7. EPG: mostra o guia eletrónico de programação.
8. Pg Dn/Pg Up (PAGE+/PAGE -): para percorrer as páginas da lista de programas.
9. VOL- /VOL+: para aumentar/diminuir o volume.
10. REV/FWD: recuo/avanço rápido.
11. PREV/NEXT: retroceder/avançar.
12. PLAY
13. PAUSE
14. REC: botão de gravação. Requer um dispositivo de memória USB externo.
15. TIMESHIFT: se o dispositivo de memória USB estiver ligado ao recetor,
ele vai para o modo “Timeshift”.
16. ZOOM: aumenta o tamanho da imagem.
17. ASPECT: muda a proporção entre 4:3 e 16:9.
18. POWER: liga e desliga o modo de suspensão.
19. TTX: liga o teletexto, se o canal tiver essa opção; prima a tecla EXIT
para sair do teletexto.
20. INFO: apresenta informações sobre o canal que está a ver.
21. RECALL: volta ao canal que viu anteriormente.
22. LIST: apresenta uma lista de canais.
23. EXIT: use esta tecla para sair do menu atual.
24. Prima para mover o cursor quando a janela do menu estiver aberta. Quando
a janela estiver fechada, use os botões com as setas para cima/baixo para mudar de canal;
os botões para a esquerda/direita permitem- lhe controlar o volume.
25. GOTO: selecione a hora no modo de reprodutor multimédia.
26. CH-/CH+: teclas para mudar de programa.
27. LANG: muda a faixa de idioma de áudio no menu de áudio
(a disponibilidade depende do canal).
28. STOP
29. REPEAT: repete a reprodução.
30. TV/RADIO: alterna entre os modos de rádio digital e DVB-T.
31. TIMER: acesso ao temporizador.
32. V-FORMAT: alterna entre o formato HDMI 720p e 1080i.
1. POWER: liga o recetor ou põe-no em suspensão.
2. REC: botão de gravação.
3. ASPECT: alterna entre as proporções 4:3/16:9.
4. SUB: apresenta opções de legendas (a disponibilidade depende do canal).
5. AUDIO: muda a faixa do idioma de áudio no menu de áudio.
6. MENU: abre o menu principal; no menu, recuará um passo.
7. Prima para mover o cursor quando a janela do menu estiver aberta.
Quando estiver fechada, use os botões com as setas para cima/baixo para
mudar de canal; os botões para a esquerda/direita permitem-lhe controlar o volume.
8. BACK: volte ao canal que viu anteriormente.
9. STOP: interrompe a reprodução.
10. VOL+/ VOL-: ajusta o volume +/-.
11. TTX: liga o teletexto, se o canal tiver essa opção; prima a tecla EXIT para sair
do teletexto. REW: recuo rápido.
12. MUTE: silencia a saída de áudio do recetor.
13. TIMER: dá acesso ao temporizador.
14. V-FORMAT: alterna entre os formatos HDMI 720P e 1080i.
15. USB: dá acesso direto aos ficheiros multimédia ao ligar um dispositivo
de memória USB externo.
16. PRGM: mostra o horário do programa.
17. INFO: mostra informações sobre o canal. Prima duas vezes para
ver informações sobre o programa e as informações técnicas.
18. OK: confirmação de itens do menu. Menu Off: apresenta a lista atual de canais.
19. EXIT: sai do menu ou do submenu.
20. CH+/CH-: Menu off: muda de canal +/-. Menu on: move o cursor
para cima/baixo no menu.
21. PLAY/PAUSE: começa a reproduzir o ficheiro selecionado.
TIMESHIFT: se a unidade tiver um dispositivo USB ligado, assume o modo “Timeshift”.
É necessário um dispositivo de memória USB externo.
22. TV/RADIO: alterna entre os modos de rádio digital e TV.
Função FF: avanço rápido no modo de reprodutor multimédia.
PT
Table of contents
Languages:
Other New Digital TV Tuner manuals