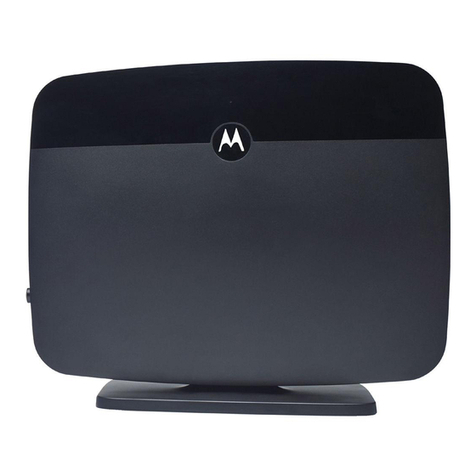
NetComm Telus Smart Hub User manual

TELUS Smart Hub
TELUS Smart Hub
HSPA WiFi Router with Voice
User Manual

3G8WV-TS
2 www.netcommlimited.com
1 Introduction
The TELUS Smart Hub creates a secure WiFi network, providing Internet access for up to 15 users and
simultaneous phone service using the TELUS 3G+ network. With quick and easy setup the TELUS Smart Hub
provides a landline experience without the need for xed line connections. Simply plug the Smart Hub into a power
outlet then insert an active TELUS SIM card into the slot on the rear panel to access a 3G+ Internet connection
within minutes.
The TELUS Smart Hub incorporates a WLAN 802.11b/g/n access point, two Ethernet 10/100Mbps ports and
two phone ports for making and receiving telephone calls. It features the latest security options such as WPA and
WPA2 data encryption, SPI (Stateful Packet Inspection) Firewall and VPN pass through.
1.1 Package contents
Smart Hub – HSPA WiFi Router with Voice
12VDC~1.5A Power Adapter
RJ45 LAN Cable
RJ11 Phone Cable
Quick Start Guide
Wireless Security Card
CD (Quick Start Guide and User Manual in PDF format)
1.2 Key features
1. Up to 7.2Mbps down / 5.76Mbps up1
2. 2 x Voice ports (circuit-switched)
3. 1 x 10/100 LAN Ethernet port
4. 802.11n/300Mbps Wireless2(Backward compatible with 802.11b/g)
5. WAN Ethernet port for optional alternate Internet connectivity (ADSL/Cable/Satellite)
6. Supports auto Internet fallback to 3G+
7. 2 x Internal WiFi antennas
8. WiFi Protected Setup (WPS) for wireless connectivity
9. Browser based interface for conguration and management
10. Wireless security options- WEP, WPA, WPA2
1 Speeds are dependent on network coverage. See TELUS coverage maps for more details. The total number of WiFi users can also affect data speeds.
2 Maximum wireless signal rate and coverage values are derived from IEEE Standard 802.11g and 802.11n specications. Actual wireless speed
and coverage are dependent on network and environmental conditions included but not limited to volume of network trafc, building materials and
construction/layout.

3G8WV-TS
www.netcommlimited.com 3
TELUS Smart Hub
2 Basic Setup
2.1 A note about your SIM
Your Smart Hub will lock itself to a SIM card once it has been inserted. Once your Smart Hub has been locked to
a particular SIM card, two things will happen.
1. You won’t be able to use the SIM card in any other device (including other Smart Hubs).
2. You won’t be able to use other SIM cards in your Smart Hub (including other TELUS SIM cards).
Please note that a rmware upgrade or factory reset will not affect the SIM lock to the Smart Hub.
For additional support please contact TELUS Client care at 1-866-558-2273
2.2 Network and system requirements
Before continuing with the installation of your Smart Hub, please conrm that you comply with the minimum system
requirements below.
An activated TELUS SIM card.
Computer with Windows, Macintosh, or Linux-based operating systems with a working Ethernet adapter
with TCP/IP Protocol installed.
A Web browser such as Internet Explorer, Netscape Navigator, Mozilla Firefox, Opera, Safari etc.
Wireless device system requirements
Computer or device with a working 802.11b, 802.11g or 802.11n wireless adapter.
2.3 Placement of your Smart Hub
Just like your mobile phone, the Smart Hub’s location will affect its signal strength from the TELUS Mobile Base
Station (Cell Tower). The data speed achievable from the Smart Hub is relative to this signal strength, which is
affected by many environmental factors. When choosing a location to place your Smart Hub, please keep in mind
that the Smart Hub will need adequate 3G+ signal strength in order to provide Internet connectivity.
Similarly, the wireless connection between your Smart Hub and your WiFi devices will be stronger the closer
your connected devices are to your Smart Hub. Your wireless connection and performance will degrade as the
distance between your Smart Hub and connected devices increases. This may or may not be directly noticeable,
and is greatly affected by the individual installation environment.
If you have concerns about your network’s performance that might be related to range or obstruction factors, try
moving the computer or WiFi device to a position between three to ve meters from the Smart Hub in order to see
if distance is the problem.
Note: While some of the items listed below can affect network performance, they will not prohibit your wireless
network from functioning; if you are concerned that your network is not operating at its maximum effectiveness,
this checklist may help.
Please ensure that your Smart Hub’s 3G external antenna is positioned vertically (toward the ceiling).
If you experience difculties connecting wirelessly between your WiFi devices and your Smart Hub, please try the
following steps:
In multi-storey ofces or homes, place the Smart Hub on a oor that is as close to the centre of the
location as possible. This may mean placing the Smart Hub on an upper oor.
Try not to place the Smart Hub near a cordless telephone that operates at the same radio frequency as
the Smart Hub (2.4GHz).

3G8WV-TS
4 www.netcommlimited.com
2.4 Avoid obstacles and interference
Avoid placing your Smart Hub near devices that may emit radio “noise”, such as microwave ovens. Dense objects
that can inhibit wireless communication include:
Refrigerators
Washers and/or dryers
Metal cabinets
Large aquariums
Metallic-based, UV-tinted windows
If your wireless signal seems weak in some spots, make sure that objects such as these are not blocking the
signal’s path (between your devices and the Smart Hub).
2.5 Cordless phones
If the performance of your wireless network is impaired after considering the above issues, and you have a
cordless phone:
Try moving cordless phones away from your Smart Hub and your wireless-enabled computers.
Unplug and remove the battery from any cordless phone that operates on the 2.4GHz band (check
manufacturer’s information). If this xes the problem, your phone may be interfering with the Smart Hub.
If your phone supports channel selection, change the channel on the phone to the farthest channel
from your wireless network. For example, change the phone to channel 1 and move your Smart Hub to
channel 11 please see section 5.3.1 to change the Smart Hub wireless channel and see your phones
user manual for changing the cordless phone’s wireless channel.
If necessary, consider switching to a 900MHz or 5GHz cordless phone.
2.6 Choose the “quietest” channel for your Wireless Network
In locations where homes or ofces are close together, such as apartment buildings or ofce complexes, there
may be wireless networks nearby that can conict with your wireless network.
Use the Site Survey capabilities found in your Wireless client (laptop, computer, etc) to locate any other wireless
networks that are available (see your wireless adapter’s user manual for instructions). Switch your Smart Hub to a
wireless channel not used or least used by surrounding wireless networks. Please see section 5.3.1 for assistance
changing the wireless channel on your Smart Hub.
Experiment with more than one of the available channels, in order to nd the clearest connection and avoid
interference from neighboring cordless phones or other wireless devices. Please see the section above for
changing your channel.
2.7 Connecting and conguring your Smart Hub
The Smart Hub has been designed to be placed on a desktop. All of the cables exit from the rear for better
organization. The LED indicator display is visible on the front of the Smart Hub to provide you with information
about network activity and device status. See below for an explanation of each of the indication lights.
Front Panel Icon Description
Wireless Solid blue light when WLAN is enabled. Blinks on trafc (data transfer)
WAN Solid blue light when the Smart Hub is connected via the WAN Ethernet Port
LAN Solid blue light when LAN connection is established. Blinks on LAN port trafc
3G Solid blue light when the Smart Hub is connected via 3G, blinks on trafc
Line 1 Solid blue light when the handset connected to Line 1 is off hook, blinks on incoming call.
Line 2 Solid blue light when the handset connected to Line 2 is off hook, blinks on incoming call.
Power Solid amber light when device is powered on. Blinking during device start up.
Please note that all lights will ash simultaneously if a rmware upgrade takes place.

3G8WV-TS
www.netcommlimited.com 5
TELUS Smart Hub
Rear Ports
SIM Slot Insert your SIM card here (until you hear a click). Please be careful to insert the SIM in the
correct orientation by viewing the printed icon beside the slot.
3G Antenna Attach in the 3G Antenna here in a clockwise direction.
WAN Optional WAN Ethernet port for Fixed Line (ADSL/Cable/Satellite) connection
LAN LAN Port for wired Ethernet clients (Computers, Laptops, etc)
Line 1 Phone Port for Handset(s)
Line 2 Phone Port for Handset(s)
Reset/WPS Hold this button down for over 10 seconds to reset to factory defaults.
Hold and release this button for less than 10 seconds to enable the WPS push-button-
connect function.
Power Power connector, connects to a DC 12V 1.5A Power Adapter
2.8 Hardware installation
1. Attach the supplied antenna to the port marked 3G Antenna. [This should be attached in a clockwise
direction.]
2. Insert your SIM card (until you hear a click) into the SIM slot.
Please note – SIM cards are assigned specic rate plans for the TELUS Smart Hub. Once activated in your Smart Hub, these plans and SIM card
will not work in other TELUS devices
3. For voice functionality, connect a standard Analog telephone to the port labeled Line 1 using the RJ-11
Cable provided.
4. If required, to activate jacks in your home or ofce connect an RJ-11 cable from the port labeled Line 2 to
any wall jack.
5. Connect the power adapter to the Power socket on the back of the Smart Hub.
6. Plug the power adapter into the wall socket and switch on the power.
7. Wait approximately 60 seconds for the Smart Hub to power up.
2.9 Connecting via a cable
1. Connect the yellow Ethernet cable provided to the port marked LAN at the back of the Smart Hub.
2. Connect the other end of the yellow Ethernet cable to your computer.
3. Wait approximately 30 seconds for the connection to establish.
4. Open your Web browser, type 192.168.20.1 into the address bar and press enter.
5. Follow the steps to set up your TELUS Smart Hub.
6. After the setup process is completed you will be connected to the Internet
2.10 Connecting wirelessly
1. Ensure WiFi is enabled on your device (computer/laptop/Smartphone).
2. Scan for wireless networks in your area and connect to the network name that matches the Wireless
Network Name found on the Wireless Security Card (included in the box).
3. When prompted for your wireless security settings, enter the Wireless Security Key listed on your Wireless
Security Card.
4. Wait approximately 30 seconds for the connection to establish.
5. Open your Web browser, type 192.168.20.1 into the address bar and press enter.
6. Follow the steps to set up your TELUS Smart Hub.
7. After the setup process is completed you will be connected to the Internet.
8. To connect additional devices via WiFi, repeat steps 1 through 4.
Wireless Network Name (SSID):
Nom du réseau sans l (SSID):
xxxxxxxxxxxxxxxxxxxxxx
Wireless Security Key (WPA):
Clé de sécurité sans l (WPA):
xxxxxxxxxxxxxxxxxxxxxx
®/MD

3G8WV-TS
6 www.netcommlimited.com
2.11 Smart Hub Default Settings
LAN (Management)
Static IP Address: 192.168.20.1
Subnet Mask: 255.255.255.0
Default Gateway: 192.168.20.1
WAN (Internet)
WAN mode: DHCP
Wireless
SSID: TELUS_Smart_Hub_xx*
Security: WPA-PSK
Security Key: Refer to your Wireless Security Card or label on the bottom of your Smart Hub
* For security purpose, each Smart Hub comes with a unique SSID that varies by a 2 digit number at the end eg. SSID: “TELUS_Smart_
Hub_25.”
Smart Hub Web Interface Access
Username: admin
Password: admin
APN for 3G Connection
APN: isp.TELUS.com
2.12 First time simple conguration wizard
When you log in to your Smart Hub for the rst time, you will be presented with the TELUS Smart Hub “Set-up
Wizard” as shown in the screenshot below. This wizard can be skipped by clicking on the link shown on the
screenshot below. You can re-run the Setup Wizard again anytime after rst use by selecting the “Startup Wizard”
option under the “Administration” tab in the Advanced View of the management console.
Select your Language Preference and Time Zone then click “Next”;

3G8WV-TS
www.netcommlimited.com 7
TELUS Smart Hub
This page allows you to customize the username and password required to administer your Smart Hub. It is
recommended that you choose a unique password for added security. Please enter a user name and password
that you wish to use, or leave these elds unchanged to use the default (admin/admin). Click “Next” to continue.
The next page “Smart Hub Security” allows you to congure basic WiFi settings.
Wireless (WiFi): “On” by default. Changing this option to “Off” will turn off the wireless feature. Your Smart
Hub will no longer broadcast a WiFi network and you will not be able to connect to your
Smart Hub via WiFi devices.
SSID Broadcast
Name (Max 32
Characters):
The SSID (Service Set Identier) is the name of the wireless network broadcast by your
Smart Hub. Use a unique name to identify your wireless network so that you can easily
connect from your wireless clients. This eld is case sensitive and can be up to 32
characters. You should change the default SSID for added security.
SSID Broadcast: Select ‘Disable’ to hide the SSID of your Smart Hub. If disabled, other people will not be
able scan and detect your Smart Hub’s SSID. Your Smart Hub will continue to broadcast
the wireless network and you or other users who you have provided the SSID to will be
able to connect to the Smart Hub
Congure your Wireless settings in this page then click “Next”;

3G8WV-TS
8 www.netcommlimited.com
This page allows you to congure WiFi security settings for your Smart Hub. Setting up a high wireless
security level can prevent unauthorized access to your wireless network. WPA2-PSK with the AES algorithm
is recommended for maximum security, followed by WPA-PSK with TKIP for strong security with maximized
compatibility for older devices. Click “Next” to continue after choosing your security settings.
Review your settings then click “Finish” to save conguration. Click “Back” if you want to make changes.

3G8WV-TS
www.netcommlimited.com 9
TELUS Smart Hub
After clicking Finish, the Smart Hub will save your conguration and reboot itself. Please wait as this process takes
approximately 2 minutes. You will be guided back to the Management Console once the process is complete.

3G8WV-TS
10 www.netcommlimited.com
2.13 Management Console login procedure
After the rst time setup wizard has been run, the management console will be password protected to prevent
unauthorized access to the conguration settings of your Smart Hub.
To log in to the Management Console and view the status and make changes to your Smart Hub, please follow
the steps below:
1. Open your web browser (e.g. Internet Explorer/Firefox/Safari) and navigate to http://192.168.20.1
2. Enter the username and password congured during the rst time setup wizard and click submit. The
default username and password is admin if the details haven’t been customized. Click Login to continue.
Please Note – If you forget the username and password you selected during the Smart Hub set-up process, holding the reset button for over 10
seconds will restart the unit with the original settings (username: admin / password: admin).
Table of contents
Other NetComm Network Router manuals

NetComm
NetComm NB9WMAXX User manual

NetComm
NetComm NF13ACV User manual

NetComm
NetComm NB4 User manual

NetComm
NetComm Freshtel NB9 User manual

NetComm
NetComm NB750 User manual

NetComm
NetComm N3G007W User manual

NetComm
NetComm NTC-6200 User manual

NetComm
NetComm NB14 User manual

NetComm
NetComm Poe01 User manual

NetComm
NetComm NP5410 User manual

NetComm
NetComm Vodafone MachineLink 3G User manual

NetComm
NetComm N3G007W User manual

NetComm
NetComm NB6Plus4 User manual

NetComm
NetComm NF5 User manual

NetComm
NetComm NF20 User manual

NetComm
NetComm NTC-220 Quick start guide

NetComm
NetComm NTC-400 Series User manual

NetComm
NetComm NB6 User manual

NetComm
NetComm NF5 User manual

NetComm
NetComm 4GM3W User manual