Neostar Electronics SCA1 User manual

- 1 -
USER MANUAL
SCA1
Digital Terrestrial Receiver
and Recorder

- 2 -
1. Connections
After connecting the SCART to your TV please be
sure to select from your TV remote control the
key that allows you to select SCART source (could
be "AV" or "source" or "INPUT" or "SCART")

- 3 -
Remote Control
Key Function Key Function
POWER TV ON/OFF MUTE Audio Mute
0-9 Enter channel number or TV
setting into menu
TV/RADIO Switch between TV and Radio
EPG Electronic program guide AUDIO Select audio mode
←
PR Switch to previous program PAL/NTSC Switch between TV standard
INFO Info about current program MENU Show main menu
EXIT Exit from menu Freeze Picture / Pause when
used with Recording function
RECORD Start Recording STOP Stop Recording
UP/Down in item lists FAV Display favourite program list
CH+/CH- Change program or move
Up/Down in the Main menu
VOL+/VOL- Adjust the volume or move
LEFT/RIGHT in the Main menu
OK/LIST Confirm the selection inside
menu
SUB Subtitle
Channel preview (9 windows) TXT Function not available
Switching functions in Main Menu
– red button services not
supported
AV/VGA AV output and VGA output
mode conversion

- 4 -
MAIN MENU
1. TV : View television and create a channel viewing list
2. RADIO : Listen to radio and create a listening list
3. MULTIMEDIA : Listen and watch video/audio/photos from your
external HD or USB memory using SD card slot or mini USB port,
or record to external memory devices (SD card, memory stick or hard drive)
4. GAME : Play games
5. SETUP : Scan available programmes, access recording options, user interface
and update the firmware
3. SETTING DVB-T FREEVIEW RECEPTION
3.1 Quick scan channels
Step1: Please press button, then press button,
Select “SETUP: Installation” press button.
Step2: OSD Language Setting
Step3: Country Setting
Step4: Then press and button to search for channels.

- 5 -
4.2. Full Installation
****** SEE PAGE 2 FOR HOW TO INSERT MEMORY CARD/USB
STICK, ANTENNA AND REMOTE CONTROL SENSOR ******
4.21.Setting Language
Users can select a preferred language among various languages in the Installation page.
(1) Press <menu> button to enter Main Menu.
(2) Press <VOL-/VOL+> button to select SETUP option.
(3) Press <CH+/CH-> button to select Installation option.
(4) Press <OK> button to enter Installation page.
(5) Press < CH+/CH- > button to select OSD Language option.
(6) Press < VOL-/VOL+ > button to select a language.
See Figure 1: If there is no channel database (from scan result) you may start at step 5
above.
Figure1. Main Menu, SETUP

- 6 -
Figure 2. Installation Page
4.22. How to receive TV programs?
Scan the broadcast frequencies and bandwidth to receive all programs.
(1) Press <menu> button to enter Main Menu.
(2) Press <VOL-/VOL+> button to select SETUP option.
(3) Press <CH+/CH-> button to select Installation option.
(4) Press <OK> button to enter Installation page.
(5) Press <CH+/CH-> button to select Country Setting option.
(6) Press <VOL-/VOL+> button to set Country Setting.
(7) Press <RED/GREEN> button to Auto Scan or Manual Scan.
See Figure 1 above: If there is no channel database (from scan result) you may start at
step 5 above.
4.23. Auto Scan
Auto Scan will first erase the entire existing channel list, and then scan default frequency
and bandwidth by Country Setting. After following steps at section 4.21:

- 7 -
(1) Press <RED> button to confirm to clear the database.
(2) Press <OK> button to confirm the database will be cleared and start Auto Scan.
It takes some time to do Auto Scan, user can press <exit> to exit at anytime. See below.
Figure 3. Clear database message
Figure 4. Auto Scan Page

- 8 -
4.24. Manual Scan
Manual Scan adds the new scanning results into the existing channel list - it doesn’t erase
the channel list. However, the user must know the Frequency and Bandwidth for scanning.
If the user scans the same Frequency and Bandwidth more than once, the programs will
be duplicated. After following steps at section 4.21:
(1) Press <GREEN> button to enter Manual Scan Page.
(2) Press <CH+/CH-> button to select Frequency option.
(3) Press <0~9> button to input the Frequency value.
(4) Press <CH+/CH-> button to select Bandwidth option.
(5) Press <VOL-/VOL+> button to set Bandwidth value.
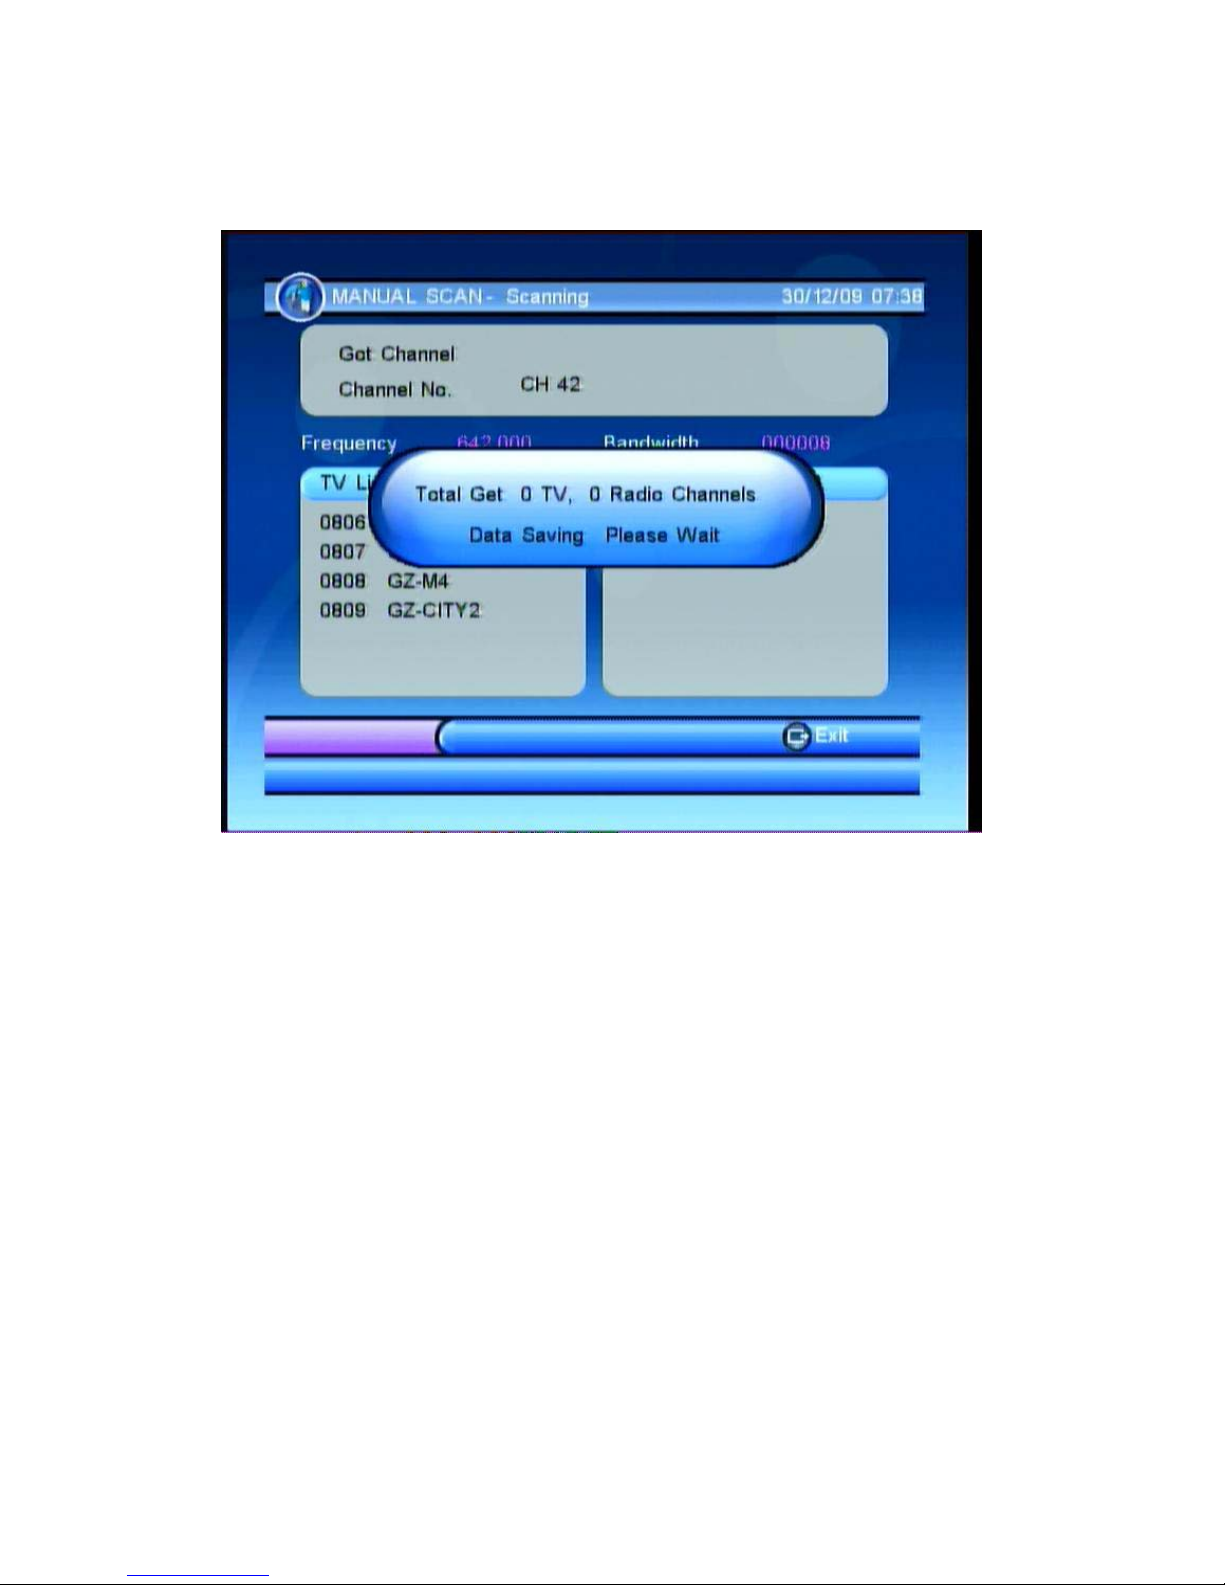
(6) Press <OK/exit> button to start scan or exit. See Figures 5 and 6 below.
Figure 5. Manual Scan Page
- 9 -
Figure 6. Manual Scan Result
4. MULTIMEDIA
The Multimedia setting requires an SD card or USB port memory device (see page 2).
Enter ‘My Album’ and ‘My Music’, the screen will display “Initializing” when you insert a
memory device or “Device is not ready!” if the memory device is not yet
inserted/attached. See Figures 7&8

- 10 -
Figure 7. Multimedia
Figure 8. Device is not ready – replace external media device
Table of contents