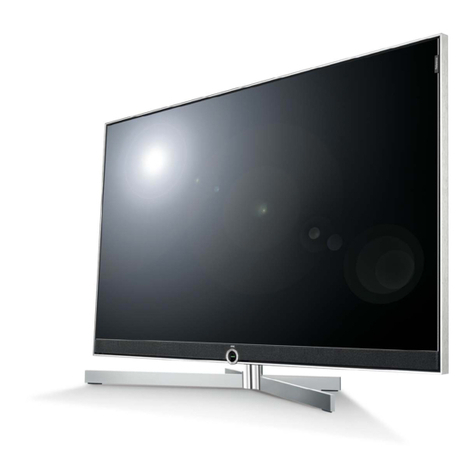
NEC NLT-40FHD100 User manual

Color Television
Owner’s Manual
NLT-40FHD100
NLT-46FHD100
Please read this manual carefully before operating your set.
Retain it for future reference.
ENGLISH

Contents
2
Contents 2-3
Safety Instructions 4
Installation 5-6
Remote control handset 7-9
Controls 7-9
Battery installation 9
Controls of 10-12
Front panel 10
Back panel 11-12
Connection to
External equipment 13-17
Basic operation
On and Off 18
Programme selection 18
Volume adjustment 18
On screen language selection 18
On screen menus Menu selection 19
Setting up TV stations 20-31
Auto programme tuning 20
Manual programme tuning 21-22
Programme edit 23-24
Calling the programme table 24
Manual programme tuning (In digital mode only) 25
Channel list (In digital mode only) 26
FAV. ADD/DEL (In digital mode only) 27
Favourite (In digital mode only) 27
Rating (In digital mode only) 28-29
New Password (In digital mode only) 30
EPG (In digital mode only) 31
Picture Menu 32-35
CSM (Colour Status Memory) 32
PSM (Picture Status Memory) 33
Manual Picture Control 33
DCR Control (Dynamic Contrast Ratio) 34
Picture format 35

Contents
3
Sound Menu 36-40
SSM (Sound Status Memory) 36
Balance 37
AVL (Auto Volume Leveler) 37
SRS TruSurround XT 38
TV Speaker 38
Audio Mode (In digital mode only) 39
Stereo/Dual/NICAM reception 40
Time Menu 41-44
Clock 41
On/Off time 42
Auto sleep 43
Time Zone (In digital mode only) 43
D.Saving (In digital mode only) 44
Sleep timer 44
Setup Menu 45-46
Child Lock 45
Front Light 45
Cinema Mode 46
Other Menu 47
Information (In digital mode only) 47
TV Guide (In digital mode only) 47
Connection of PC 48-49
PC Setup 48-49
WXGA or VGA (Only PC-RGB mode) 49
PIP (Picture-In-Picture) Feature 50-52
Teletext (option) 53-55
Displayable Monitor Specification 56
Troubleshooting 57
Product Spec. 58-59
Wall Mounting Information / Technical Drawing 60-61
NEC Service Centers 62

Safety Instructions
4
1. Read these instructions.
2. Keep these instructions.
3. Heed all warnings.
4. Follow all instructions.
5. Do not use this apparatus near water.
6. Clean only with dry cloth.
7. Do not block any ventilation openings. Install in accordance with the manufacturer's instructions.
8. Do not install near any heat sources such as radiators, heat registers, stoves, or other apparatus
(including amplifiers) that produce heat.
9. Do not defeat the safety purpose of the polarized or grounding-type plug.
Agrounding type plug has two blades and a third grounding prong.
The wide blade or the third prong are provided for your safety.
If the provided plug does not fit into your outlet, consult an electrician for replacement of the
obsolete outlet.
10. Protect the power cord from being walked on or pinched particularly at plugs, convenience
receptacles, and the point where they exit from the apparatus.
11. Only use attachments/accessories specified by the manufacturer.
12. Use only with the cart, stand, tripod, bracket, or table specified by the manufacturer, or sold with the
apparatus. When a cart is used, use caution when moving the cart/apparatus combination to avoid
injury from tip-over.
13. Unplug this apparatus during lightning storms or when unused for long periods of time.
14. Refer all servicing to qualified service personnel. Servicing is required when the apparatus has been
damaged in any way, such as power-supply cord or plug is damaged, liquid has been spilled or
objects have fallen into the apparatus, the apparatus has been exposed to rain or moisture, does
not operate normally, or has been dropped.
-The apparatus shall not be exposed to dripping or splashing and that no objects filled with liquids,
such as vases, shall be placed on the apparatus.
-Minimum distances(e.g. 10cm) around the apparatus for sufficient ventilation.
-The appliance is not intended for use by young children or infirm persons without supervision.
-Young children should be supervised, to ensure that they do not play with the appliance.
-Although LCD panel uses highly precise technology, it may display blank pixels, dark spot or lighting
pixels on the screen. This is normal and not an indication of a defect.
-Avoid displaying fixed pattern on the monitor for long period of time to avoid image persistence.
“WARNING - To reduce the risk of fire or electric shock, do not expose the apparatus to rain or moisture.”

PORTABLE CART WARNING

Installation
5
Power
This set operates on an AC mains supply, the voltage is as indicated on the label on the back cover.
Never apply DC power to the set.
In the event of thunderstorms or powercuts, please pull out the aerial and mains plugs.
Warning
To prevent fire or shock hazard, do not expose the set to rain or moisture.
Do not rub or strike the Active Matrix LCD with anything hard as this may scratch, mar, or damage the
Active Matrix LCD permanently.
Service
Never remove the back cover of the set as this can expose you to very high voltage and other
hazards.
If the set does not operate properly, unplug it and call your dealer.
Aerial
Connect the aerial cable to the socket marked +75 Ωon the back cover.
For the best reception an outdoor aerial should be used.
Location
Position your set so that no bright light or sunlight falls directly onto the screen. Care should be taken
not to expose the set to any unnecessary vibration, moisture, dust or heat.
Also ensure that the set is placed in a position to allow a free flow of air.
Do not cover the ventilation openings on the back cover.
Cleaning
Unplug the set before cleaning the face of the LCD Screen.
Dust the set by wiping the screen and the cabinet with a soft, clean cloth.
If the screen requires additional cleaning, use a clean, damp cloth.
Do not use liquid cleaners or aerosol cleaners.
Wall Mount: Horizontal Installation
When mounting the product on wall or ceiling, be sure to install the product using the designated
mounting tool according to the method recommended by the manufacturer.

Installation
6
To preserve the Environment,
do not rubbish.
FOR LCD TV
Some minute dot defects may be visible on the screen, appearing as tiny red, green, or blue spots.
However, they have no adverse effect on the LCD TV's performance.
Avoid touching the LCD screen or holding your finger(s) against it for long periods of time.
Doing so may produce some temporary distortion effects on the screen.
On Disposal
a. The fluorescent lamp used in this product contains a small amount of mercury.
b. Do not dispose of this product with general household waste.
c. Disposal of this product must be carried out in accordance to the regulations of your local
authority.
Warning
-Image Persistence
Avoid displaying fixed pattern in the monitor for long period of time to avoid image persistence.
"The marking or retained image on the LCD panel resulting from fixed image use is not an
operating defect and as such is not covered by warranty. This product is not designed to
fixed image patterns for extended periods of time."
-The appliance is not intended for use by young children or infirm persons without supervision.
-Young children should be supervised to ensure that do not play with the appliance.

Remote control handset
7
Controls
-All the functions can be controlled with the remote control handset.
-Some functions can also be adjusted with the buttons on the front panel of the set.
-Before you use the remote control handset, please install the batteries.
1. POWER
Select the set On or Off.
2. MUTE
Switches the sound On or Off.
3. NUMBER BUTTONS
4. TV/DTV
Select Analog TV, Digital TV mode.
5. SSM (Sound Status Memory)
Recalls your preferred sound setting.
6. PSM (Picture Status Memory)
Recalls your preferred picture setting.
7. ARC
Select your desired picture format.
8. I/II
Selects the language during dual language broadcast.
Selects the sound output.
9. MENU
Selects a menu.
10. INPUT
Select DTV, TV,AV 1 ,AV 2 , AV 3 , S-Video,
Component,PC-RGB,HDMI1,HDMI2,HDMI3
mode.
Switches the set on from standby.
11. TELETEXT BUTTONS (option)
These buttons are used for teletext.
For further details, see the ‘Teletext’ section.
12. Navigation button DEF G
OK
Accepts your selection or displays the current mode.
12
3
45
6
9
8
10
7
12
11

8
Controls
13. (Programme Up/Down)
Selects a programme or a menu item.
Switches the set on from standby.
(Volume Up/Down)
Adjusts the volume.
Adjusts menu settings.
14. LIST
Displays the programme table.
15. Q.VIEW
Returns to the previously viewed programme.
16. CC (In digital mode only)
Select a closed caption : Off and On.
17. EXIT
Exits from each mode.
18. PIP
Switches the sub picture On or Off.
A.SWAP
PIP mode - main and sub picture audio select.
PIP PR +/-
Selects a programme for the sub picture.
SWAP
Alternates between main and sub picture.
PIP INPUT
Selects the input mode for the sub picture.
PIP POSITION
Relocates the sub picture in clockwise direction.
19. STILL
Freezes motion of the picture.
20. SCAN
Switches on the programme scan mode through 9 sub
pictures.
21. SLEEP
Sets the sleep timer.
22. FAV. ADD/DEL (In digital mode only)
Selects a favourite programme add and delete.
23. FAVOURITE (In digital mode only)
Switches the favourite programme On or Off.
14
18
16
17
20
21
19
18
22
23
15
Remote control handset
13

9
Remote control handset
Battery installation
-Your remote control handset is powered by two AAA type batteries.
1. To insert batteries, turn the remote control handset over and remove the battery cover.
2. Put the two batteries into the compartment observing battery polarity.
3. Replace the cover.
To avoid damage from possible battery leakage, remove the batteries if you do not plan to use the
remote control handset for an extended period time. Do not use batteries of differing age or type.
Always discard of batteries safely.
1) 2) 3)
24. Info (In digital mode only)
Displays information on top of the screen during watch-
ing TV.
Select the DTV information or Guide.
25. EPG (In digital mode only)
Shows a program schedule.
- COLORED BUTTONS
These buttons are used for teletext (only TELETEXT
models) or programme edit.
24
25

10
Front panel
-Shown is a simplified representation of the set.
-Here shown may be somewhat different from your set.
1. D / E (Channel Up/Down)
Selects a Channel or a menu item
Switches the set on from standby.
2. F / G (Volume Up/Down)
Adjusts the volume.
Adjusts menu settings.
3. MENU
Selects a menu.
4. INPUT
Select input source: DTV, TV, AV1, AV2, AV3,
S-Video, Component, PC-RGB, HDMI1,
HDMI2, HDMI3.
Switches the set on from standby.
Select on-screen menu setting.
5. POWER (rr)
Switches the set on from standby or to stand-
by from on.
6. POWER/STANDBY INDICATOR (rr)
Glows red in standby mode.
Glows green when the set is switched on.
7. REMOTE CONTROL SENSOR
Switches the set on from standby.
8. Front Light LED & POWER (rr)
9.
MAIN POWER (rr) (NLT-46FHD100 model only)
Switches the set on or off.
6
8
9
7
5
4
3
2
1
*NLT-46FHD100
model only
Controls of
This manual suits for next models
1
Table of contents
Other NEC TV manuals

NEC
NEC VT770 Series User manual

NEC
NEC DTE-29U1TH User manual

NEC
NEC NLT-40HDEM2 User manual

NEC
NEC AccuSync LCD22WMGX, AccuSync LCD24WMCX User manual

NEC
NEC N-3481 User manual

NEC
NEC NLT-19HDB3 User manual

NEC
NEC FS-8002 User manual

NEC
NEC NLT-32HDB3 User manual

NEC
NEC FS-5170 User manual

NEC
NEC PF51T31 User manual