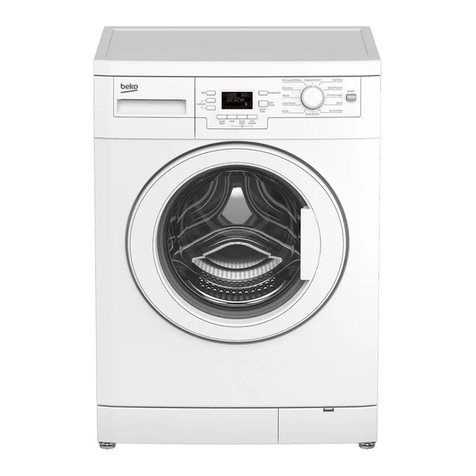
Miele W 1113 Specification sheet

Operating and Installation
Instructions
Washer
W 1113
To prevent accidents and
machine damage,
read these instructions
before installation or use. M.-Nr. 05 874 941
en - US, CA

IMPORTANT SAFETY INSTRUCTIONS. . . . . . . . . . . . . . . . . . . . . . . . . . . . . . . . . 4
Guide to the washer. . . . . . . . . . . . . . . . . . . . . . . . . . . . . . . . . . . . . . . . . . . . . . . . 5
Control panel ......................................................5
Before using for the first time. . . . . . . . . . . . . . . . . . . . . . . . . . . . . . . . . . . . . . . . 6
Using the washer . . . . . . . . . . . . . . . . . . . . . . . . . . . . . . . . . . . . . . . . . . . . . . . . . . 7
1. Prepare and sort the laundry ........................................7
2. Load the laundry .................................................8
3. Select a program .................................................8
Program guide .....................................................9
4. Select wash options (if needed) ....................................11
5. Select the temperature and spin speed ..............................12
6. Add detergent ..................................................14
Detergent . . . . . . . . . . . . . . . . . . . . . . . . . . . . . . . . . . . . . . . . . . . . . . . . . . . . . . . 15
Water softener ....................................................16
Fabric softener....................................................17
Starch...........................................................18
Fabric dye .......................................................18
Using the washer . . . . . . . . . . . . . . . . . . . . . . . . . . . . . . . . . . . . . . . . . . . . . . . . . 19
7. Select Delay Start (if needed) ......................................19
8. Start the program................................................19
9. Activate the program lock (if necessary)..............................19
10. Remove the laundry.............................................20
Canceling a program...............................................21
Interrupting a program..............................................21
Making changes to the program ......................................21
Adding / removing laundry during a wash program .......................22
Locking the washer . . . . . . . . . . . . . . . . . . . . . . . . . . . . . . . . . . . . . . . . . . . . . . . 23
Electronic program lock.............................................23
Child Safety Lock..................................................23
Cleaning and Care . . . . . . . . . . . . . . . . . . . . . . . . . . . . . . . . . . . . . . . . . . . . . . . . 24
Cleaning the washer ...............................................24
Cleaning the drum .................................................24
Cleaning the detergent drawer .......................................25
Cleaning the drain pump and lint trap..................................26
Quick Guide . . . . . . . . . . . . . . . . . . . . . . . . . . . . . . . . . . . . . . . . . . . . . . . . . . . . . 27
Contents
2

Cleaning the water inlet filters ........................................28
Cleaning the inlet hose filter .........................................28
Cleaning the filter in the inlet valve ....................................28
Changing the light bulb .............................................29
Frequently asked questions . . . . . . . . . . . . . . . . . . . . . . . . . . . . . . . . . . . . . . . . 30
A wash program cannot be started ....................................30
The program was interrupted and a fault message appears. ................31
General issues with the washer .......................................32
Poor wash results..................................................33
The door will not open when the "Door" button is pressed. ..................34
Opening the drum door during a power failure ..........................35
After sales service . . . . . . . . . . . . . . . . . . . . . . . . . . . . . . . . . . . . . . . . . . . . . . . . 36
Installation instructions . . . . . . . . . . . . . . . . . . . . . . . . . . . . . . . . . . . . . . . . . . . 37
Help protect our environment. . . . . . . . . . . . . . . . . . . . . . . . . . . . . . . . . . . . . . . 38
Installation . . . . . . . . . . . . . . . . . . . . . . . . . . . . . . . . . . . . . . . . . . . . . . . . . . . . . . 39
Front view........................................................39
Back view........................................................40
Installation site ....................................................41
Installation .......................................................41
Removing the shipping struts ........................................41
Installing the shipping struts .........................................43
Level the washer ..................................................44
Installation beneath a counter ........................................45
Washer stand with drawer ...........................................45
Washer / Dryer Stack ...............................................46
Plumbing. . . . . . . . . . . . . . . . . . . . . . . . . . . . . . . . . . . . . . . . . . . . . . . . . . . . . . . . 47
Water connection..................................................48
Drainage ........................................................49
Electrical connection. . . . . . . . . . . . . . . . . . . . . . . . . . . . . . . . . . . . . . . . . . . . . . 50
Contents
3

,WARNING - To reduce the risk of
fire, electric shock or injury to
persons while using your appliance
follow basic safety precautions,
including the following:
~Read all instructions before using
the appliance.
~GROUNDING INSTRUCTIONS
This appliance must be grounded. In
the event of malfunction or breakdown,
grounding will reduce the risk of
electric shock by providing a path of
least resistance for electric current. This
appliance is equipped with a cord
having an equipment-grounding
conductor and a grounding plug. The
plug must be plugged into an
appropriate outlet that is properly
installed and grounded in accordance
with all local codes and ordinances.
~WARNING - Improper connection of
the equipment-grounding conductor
may result in a risk of electric shock.
Check with a qualified electrician if you
are in doubt as to whether the
appliance is properly grounded.
~Do not modify the plug provided
with the appliance - if it will not fit the
outlet, have a proper outlet installed by
a qualified electrician.
~Do not allow children to play on or in
the appliance. Close supervision is
necessary when the appliance is used
near children.
~Do not wash articles that have been
previously cleaned, washed, soaked or
spotted with gasoline, dry-cleaning
solvents or other flammable
substances. These articles give off
vapors that could ignite or explode. Do
not add these items to the wash load.
~Under certain conditions, hydrogen
gas may be produced in a hot water
system that has not been used for 2
weeks or more. HYDROGEN GAS IS
EXPLOSIVE. If the hot water system has
not been used for such a period, turn
on all hot water faucets and let the
water flow from each for several
minutes before using the washing
machine. This will release any built-up
hydrogen gas. Do not smoke or use an
open flame during this time, the gas is
flammable.
~Before the appliance is removed for
service or discarded, remove the door.
~Do not reach into the appliance if
the drum is moving.
~Do not install or store this appliance
where it will be exposed to the weather.
~Do not tamper with
the controls.
~Do not repair or replace any part of
the appliance or attempt any servicing
unless specifically recommended in
these operating instructions.
SAVE THESE INSTRUCTIONS
IMPORTANT SAFETY INSTRUCTIONS
4

Control panel
aProgram selection buttons e-
For selecting a program.
bWash options
Special features to enhance a wash
program.
cTemperature button
For selecting the desired wash
temperature.
dSpin speed button
For selecting the desired spin speed.
ePC Indicator
Allows a service technician to check
and update the wash programs.
fProgram status display
Shows the current cycle of the wash
program.
g"Buzzer" button
hFault indicators
i"Delay Start" button
For delaying the start of a program.
j"Start / Stop" button
Begins the wash program or
interrupts a program.
k"On / Off" button
Turns the machine on and off.
l"Door" button
Opens the drum door.
mDisplay (hr / min)
Shows the delayed start time and the
countdown to the end of the
program.
Guide to the washer
5

The appliance must be correctly
installed and connected before the
first use. Please see the "Installation
instructions".
This washing machine has
undergone thorough functional
testing in the factory, there may be
some residual water in the drum
from this process.
For safety reasons, it is not possible to
run a spin cycle before the first use. A
program must be run without laundry
and detergent to flush out any residual
water from the factory testing process,
as well as to activate the spin cycle.
^Turn on the water valve.
^Press the "On / Off" button.
^Select the "Extra White" program with
the program buttons.
^Press the "Start / Stop" button.
Once the program ends, the washer
can be used for laundry.
Before using for the first time
6

1. Prepare and sort the laundry
^Empty all pockets.
,Foreign objects left in pockets
(e.g. nails, coins, paper clips, etc.)
can cause damage to clothes and
the machine.
^Sort the laundry.
Only wash items in the machine that are
labeled machine washable by the
manufacturer. Most garments have a
fabric care label in the collar or side
seam. Sort the laundry by care label
and color.
^Pretreat stains.
Tough stains (e.g. blood, egg, coffee,
tea, etc.) or badly soiled areas (e.g.
collars and cuffs) should be penetrated
with a stain remover or a paste made
from powdered detergent and warm
water.
,Do not use chemical solvents in
the machine.
General tips
– Dark fabrics often bleed the first few
times they are washed. They should
be washed separately several times
before being included in a mixed
load.
– Remove any lead weights or strips
from curtains before washing.
– Loose underwires should be
removed or sewn in place before
washing.
– Woolens and knitted garments
should be turned inside out.
– Close zippers and hooks and eyes
before washing.
– Comforter covers and pillowcases
should be fastened in order to
prevent small items from rolling
inside of them.
Do not machine wash items if it is not
recommended on the fabric care label.
Using the washer
7

2. Load the laundry
^Turn on the washer using the
"On / Off" button.
^Open the drum door using the "Door"
button.
^Load the laundry into the drum. For
best results, wash mixed loads of
small and large items. This will
improve washing effectiveness and
help distribute the load evenly.
Note: Overloading the washer will
cause poor wash results and wrinkling.
^Close the drum door.
To prevent damage to the door seal
and clothing, make sure that there is
nothing caught between the drum
door and the seal.
3. Select a program
^Press the "PROGRAMS" button eor
-until the desired program indicator
lights.
Using the washer
8

Program guide
Temperatures Fabric
care
symbol
Spin
speed
Laundry
Normal Options: Extended, Heavy Soil, Soak, Sensitive
Hot DMax For a rapid wash of colorfast items and
mixed loads made from cottons and
linen, e.g. jeans, t-shirts, underwear,
socks.
Very Warm CHigh
Warm B
Cold A
No Heat e
Wrinkle-free Options: Extended, Heavy Soil, Soak, Sensitive
Hot DMed For cotton blends, polyester blends
and synthetics, e.g. acrylic, nylon,
ramie. Fabric softener can be
dispensed in the final rinse of these
programs to reduce static cling.
Very Warm C
Warm B
Cold A
No Heat e
Sanitize Options: Extended, Heavy Soil, Soak, Sensitive
Sanitize FMax For white items with special hygienic
demands, e.g. baby clothing,
underwear, towels.
Very Hot EHigh
Extra White Options: Extended, Heavy Soil, Soak
Sanitize FMax For white items without special
hygienic demands.
Very Hot EHigh
Hot D
Delicates Options: Extended, Heavy Soil, Soak
Warm BLow For delicate machine washable
clothing, e.g. satin, hosiery, lingerie,
lace or crocheted (non-wool) items.
Cold A
No Heat e
Using the washer
9

Temperatures Fabric
care
symbol
Spin
speed
Laundry
Woolens /Options: Sensitive
Warm BHigh For hand and machine washable wool
and wool blends.
Cold AMed
No Heat e
Silk Options: Sensitive
Cold ASlow For hand and machine washable silks
and other non-wool hand washable
garments.
No Heat e
Handwash /Options: Extended, Heavy soil, Sensitive
Warm BMed For hand washable items with no wool
or silk content.
Cold A
No Heat e
Sturdy Options: None
Warm BMed For a mixed load of colorfast or perma
press items, or for cotton blends.
Cold ALow
No Heat e
Custom Options: Extended, Heavy Soil, Soak, Sensitive
Sanitize FMax All options can be selected individually
for colorfast or white items.
Very Hot EHigh
Hot DMed
Very Warm CLow
Warm BSlow
Cold AHold
No Heat eNo
Spin
Using the washer
10
Other manuals for W 1113
4
Table of contents
Other Miele Washer manuals

Miele
Miele PG 8536 User manual

Miele
Miele W 4840 Guide

Miele
Miele 11653560 User manual

Miele
Miele PWM 912 SD User manual

Miele
Miele W1070 - User manual

Miele
Miele W 3831 WPS User manual

Miele
Miele wda 201 User manual

Miele
Miele W 1119I WASHING MACHINE User manual

Miele
Miele PG 8591 User manual

Miele
Miele PG8582 CD User manual
Popular Washer manuals by other brands

Tricity Bendix
Tricity Bendix AW 1000 W Operating & installation instructions

Panasonic
Panasonic NA-F60L5WRB operating instructions

GE
GE WSLP1500 Dimensions and installation information

Electrolux
Electrolux EWF1284EDW Service manual

Bosch
Bosch WAN2829BSN User manual and installation instructions

LG
LG TV2516DV3B owner's manual