Metawatch Teardown User manual

MetaWatch Teardown and Arduino Hookup a
learn.sparkfun.com tutorial
Available online at: http://sfe.io/t113
Contents
Introduction
Use Tips
Teardown
Connecting Arduino (Hardware)
Connecting Arduino (Firmware)
Resources and Going Further
Introduction
The MetaWatch is a new open-source entry into the latest "Smart Watch" craze. It's a digital watch
with a microprocessor and Bluetooth controller built in. It can interface with your smartphone to
display stuff like weather forecasts, emails alerts, meeting notifications, or what music is playing
(oh, and the time and date too).
SparkFun has a Developer's Kit of the MetaWatch in black and white, which includes the watch, a
programmer/charging clip, and a license to use TI's Code Composer Studio.
Page 1 of 17

The MetaWatch's standard use case is certainly very cool. Having notifications, weather, and music
updates visible on your wrist is another step towards the future! But what else can we do with this
hackable little device? In this tutorial, we'll go over some basics of the MetaWatch. Then we'll tear it
down, and look at its guts! Then we'll put it back together and try to control it with...what else...an
Arduino.
Required Materials
The Arduino portion of this tutorial will combine an Arduino board with a Bluetooth module.
The Arduino Board can be any Arduino-compatible board -- RedBoard, Uno, Pro Mini etc.
The BlueSMiRF Silver is used to serve as a bluetooth interface between Arduino and
MetaWatch.
Page 2 of 17

You'll also need to solder wires or headers to the BlueSMiRF in order to get it connected to
the Arduino.
Of course, you'll also need a MetaWatch in the style/color of your preference (White FRAME or
Black FRAME).
Suggested Reading
If you're only interested in checking out the MetaWatch use tips, or teardown, please go right
ahead. If you want to control it with an Arduino/BlueSMiRF combo, consider reading some of these
tutorials before proceeding:
What is an Arduino?
Serial Communication
BlueSMiRF Hookup Guide
How to Solder
Use Tips
Before tearing your watch down, or connecting an Arduino to it, we'd recommend you check out
what it can do when interfaced to your phone. There are apps available for both Android and iOS
phones.
Play with it. Get a feel for how it functions. Notice how there are four "Idle mode" pages you can
cycle through. Check it all out!
Playing with the watch might spawn a new project idea. Whether you want to write your own phone
app, customize the watch's firmware, or connect a different Bluetooth device to it, we'd encourage
everyone to discover a new, cool way to interact with the watch.
Charging, Connecting the Developer Clip
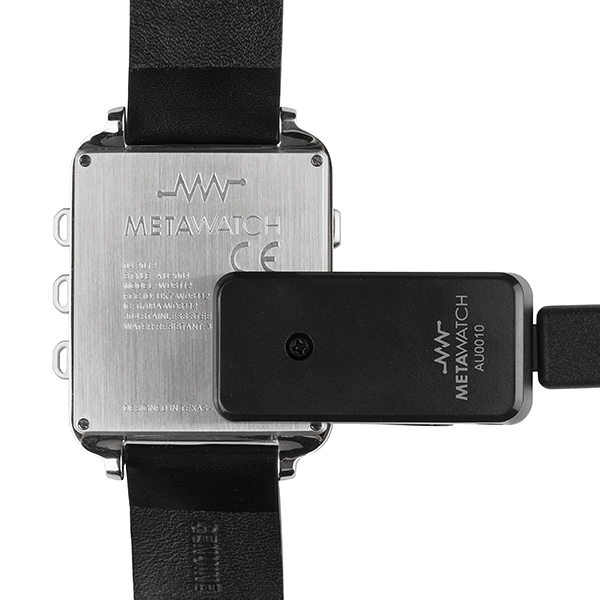
The Developer Clip is included to serve two purposes: charging and reprogramming. It takes a bit of
aiming, but the clip is easy to attach to the watch.
Page 3 of 17

The clip uses a Spy-Bi-Wire JTAG interface to communicate with the watch's MSP430
microcontroller. If you get really into the embedded firmware development side of the MetaWatch,
this'll be what you use to upload and debug a program. For more more info on using the Developer
Clip as a JTAG interface, check out the JTAG Reflashing documentation.
Button Labels and Gestures
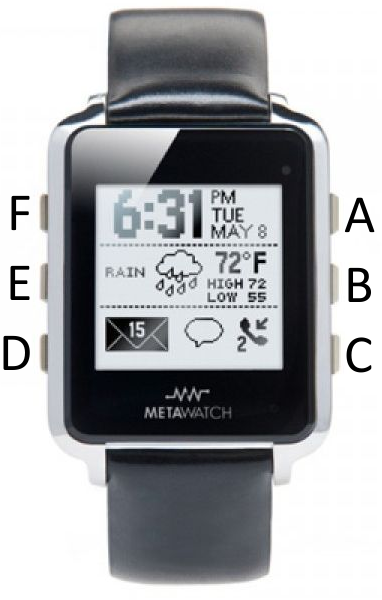
The watch has six buttons, labeled A-F. A is the top-right button (at two o'clock), and they increment
clockwise around the watch.
Page 4 of 17

The standard button uses are:
A: Press to close out of most views.
B: Cycle Idle mode pages
C: Call up settings view. Turn on/off bluetooth radio, backlight, seconds display, invert display,
etc.
D: Show info display. Shows charge level, firmware version, bluetooth address, and other
stats.
E: Music display (phone-dependant)
F: Backlight
On top of that, you can reset the watch by holding down the middle buttons (B and E) down for a
few seconds. Alternatively, holding F does the same thing.
Teardown
Page 5 of 17

The designers of the MetaWatch made it super-easy to open it up. All you'll need is a small 1.4mm
flat-head screwdriver, and an equally small #0-or-so Phillips-head. These screwdrivers should be
present in most screwdriver sets. The first set of screws -- flatheads -- are on the four corners of the
back of the watch.
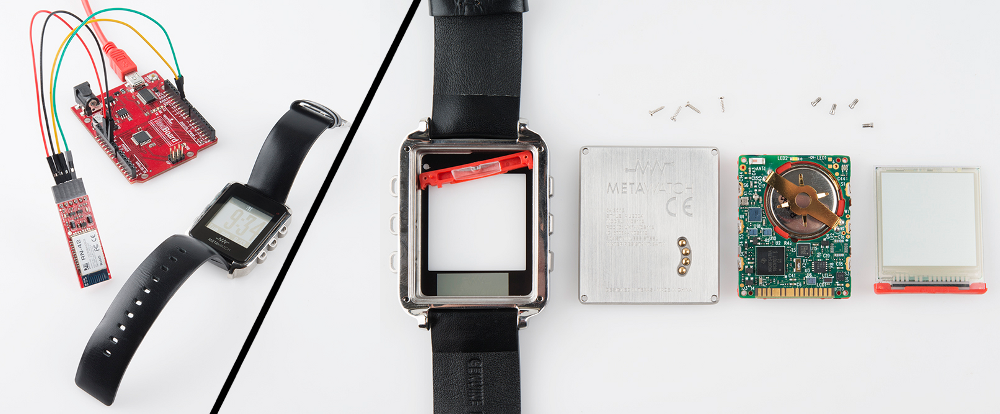
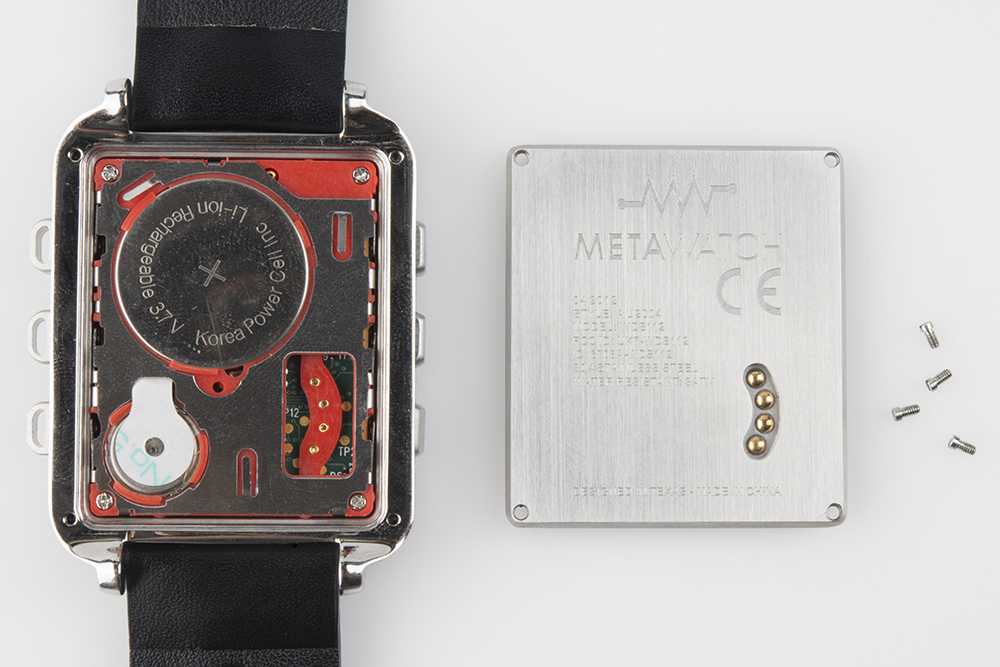
Loosening those screws, and removing the back reveals the watch's power source: a 20mm 3.7V
Li-Ion coin cell battery (a smaller version of this). The other big, visible, circular component is a
vibration motor. You can also see four spring connectors for the JTAG interface.
Page 6 of 17


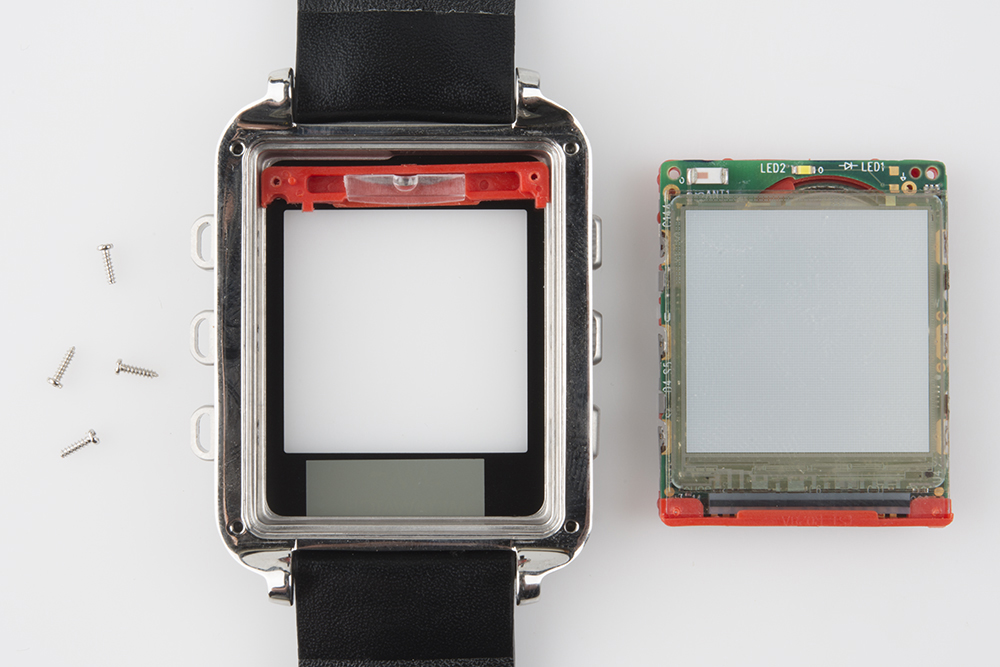
The MetaWatch's LCD is a 96x96 pixel, reflective, always-on display. We didn't get a picture of the
back, but the part number is printed there. It's a Sharp LS013B4DN01. Looks like it's got a simple
SPI-like interface. Neat!
You can gently lift the display off the main PCB. The display and PCB are connected together using
a zebra connector, so they just have to be lined up and pressed together to interface. The PCB is
very thin -- 0.6mm.
Page 8 of 17

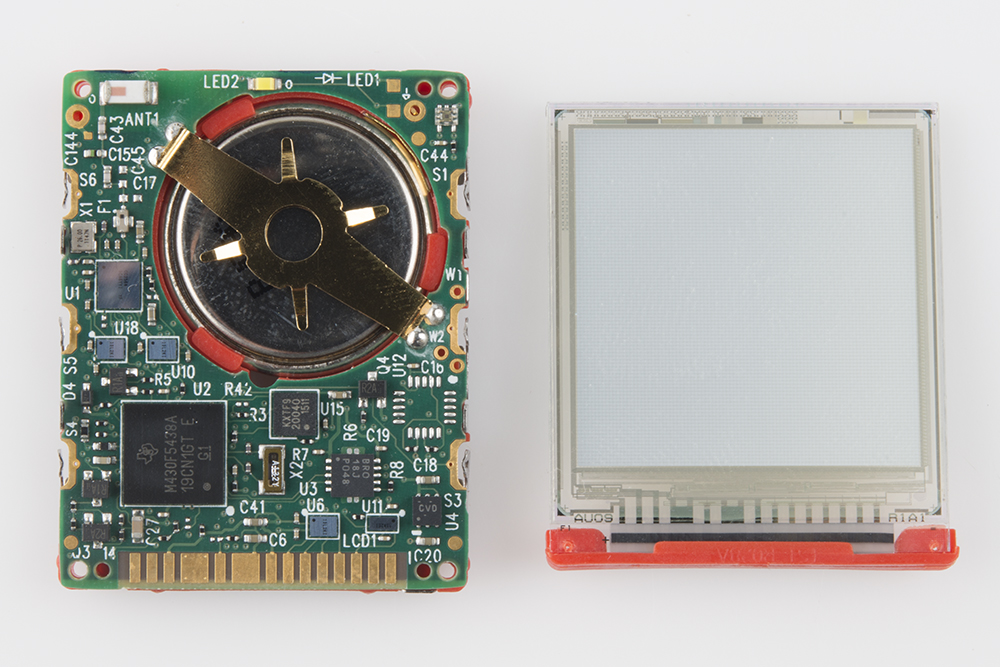
The main processor is the BGA-packaged version of the MSP430F5438A. Ultra-low power, 256KB
flash, 16KB RAM, 87 I/O. Sweet chip! Low power too. The small chip labeled KXTF9 to the right of
the MSP430 is a Kionix accelerometer. The blue-ish, reflective chip above the MSP430 is a
CC2560 Bluetooth controller. Those are the most heavy-lifting ICs on the watch. There's also a chip
antenna (top-left), backlight LED (top-middle), and light sensor (top-right). We also notice an
unpopulated IC package -- intriging.
Let's flip it over:
Page 9 of 17

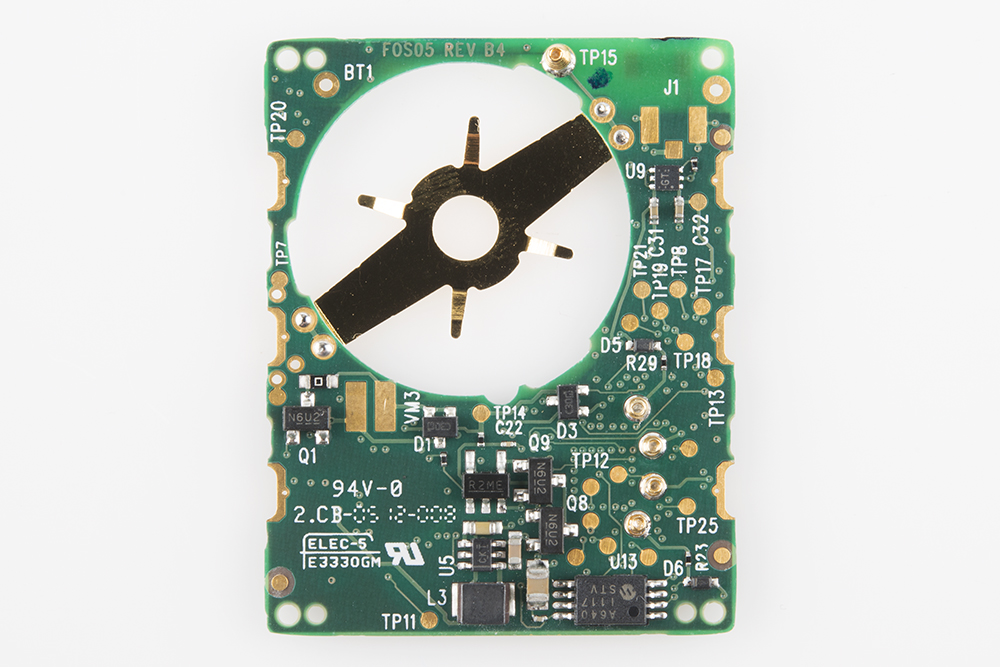
Looks like most of the interesting stuff was on the top side. On the back, there's what looks like a
Microchip Serial EEPROM, maybe some voltage regulator circuitry, and a wealth of test points.
Meh.
And that's about it. The watch is really easy to take apart, and put back together (and it still works!).
It seems very hackable, and it shows off a few chips which may be useful for other projects.
Page 10 of 17
This manual suits for next models
1
Table of contents
Other Metawatch Watch manuals