USING THE YOUR MINDER CLOCK:
DURING NORMAL DAILY OPERATION:
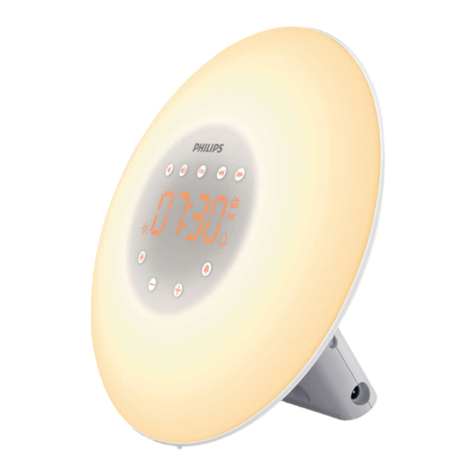
• For a reminder when the next active alarm is due, press the red “ALARM ACKNOWLEDGED” button.
•For an update of each alarm’s status, press the blue “ALARM CHECK” button.
• For a check of the current time, press the green “TALK” button.
• To turn on the LCD Light, press the yellow Light button. The light remains on for 6 seconds.
WHILE ALARM IS SOUNDING:
• Press the red “ALARM ACKNOWLEDGED” button to stop the alarm. The clock will now confirm the
alarm has been accepted and notify you when the next alarm will sound.
USING THE YOUR MINDER CLOCK AS PART OF THE COMPLETE MEDCENTER SYSTEM (optional):
Note: The MedCenter System is only to be used as an aid in Medication compliance. In case you are not capable of filling the MedCenter System or setting the Your
Minder Clock yourself, always have your Care Provider or Pharmacist assist you according to your Doctor or Health Care Provider’s prescribed Instructions each month.
Only tablets or capsules may be placed in the Pill Box. It is not suitable for storing liquids or suppositories.
• Setup the MedCenter Organizer according to the instructions and precautions provided with the Organizer.
•Set the alarms on the Your Minder Clock (see SETTING THE ALARMS) according to the guidelines provided by your Doctor or Health Care Provider.
• When the alarm sounds on the Your Minder Clock, note the time of the day, today’s date and
the medication dose to be taken.
• Visually confirm that today’s date is correct on both the Your Minder Clock and the Pill Box
located in the “Today’s Pills” cavity on the MedCenter Organizer.
The repetition of this date is what separates the MedCenter System from other Pill
Reminder Systems.
• Once you have confirmed the correct Pill Box is located in the “Today’s Pills” cavity, remove
the medication necessary for the current time of day and administer as requested by your Health
Care Provider or Doctor.
• Press the red “ALARM ACKNOWLEDGED” button on top of the clock. The Your Minder clock
will state when the next alarm is due to sound.
NOTE: When placing an empty Pill Box back into the MedCenter Stand, place it with the Red end up.
Red denotes the day is complete and the Box is empty while Green denotes a full Pill Box.
BATTERY AND AC ADAPTER INFORMATION
• We recommend using the included AA Batteries as a backup power source and
using the optional AC Adapter as the primary power source. In the event of a
loss of power, the installed AA Batteries will support the clock running normally
until power can be restored.
• In the event of a loss of power, you should not lose your recorded messages
because the recorded messages are stored in internal memory.
• Under normal operation, with daily alarms sounding for 1 minute every day,
the Your Minder clock can run up to 6 months on two AA Batteries.
• The AA Batteries also allow the Your Minder clock to operate as a Traveling
Alarm Clock.
NOTE: Excessive operation of the backlight, allowing the recorded alarms to run their full hour
duration, and frequent talking alarm or time checks will all affect the life expectancy of the installed
AA Batteries.
PRODUCT DISCLAIMERS & WARNINGS: Please Read Carefully
• The MedCenter System is to be used only as an organizational aid in taking your medications.
The responsibility for correct medication compliance is solely up to the consumer. The makers of
MedCenter Systems are not responsible for incorrect loading or unintended use of the pill box
system, for improper setting or battery life on the Your Minder Clock or its alarm functions, for
incorrect consumption of medication due to any use of the MedCenter System.
• Please take the time to carefully check prescribed instructions for each medication before organizing
your pills in the MedCenter System. If you are not capable of filling your MedCenter System yourself
as instructed, always have a care provider or pharmacist assist you.
REMINDERS:
• Keep the Your Minder Clock and MedCenter System out of reach of children.
• Store the Your Minder Clock and MedCenter System away from heat and water.
• In order to maintain proper operation, Batteries should replaced once every year.
• Only tablets or capsules may be placed in the MedCenter pill boxes. The boxes are not
suitable for storing liquids or suppositories.
WARRANTY INFORMATION: Please Read Carefully
The Your Minder Clock and MedCenter System are guaranteed for one year from the date of
purchase to be free of manufacturer defects.
The warranty is void if the Your Minder Clock is water damaged (it is not specified to be water
resistant). The warranty is void if the Your Minder Clock or MedCenter System is damaged,
tampered with, dropped or otherwise abused.
In the event of a defect, mail the Your Minder Clock and/or MedCenter System with a copy of your
sales receipt to the address listed below for an exchange or repair at the company’s discretion.
Please include a check or money order, payable to “MedCenter Systems” in the amount of $9.95
(outside the continental US $19.95) to cover handling and return shipping.
MedCenter Systems PURCHASE INFORMATION:
10179 Commerce Park Drive
Cincinnati, Ohio 45246 Store Location:
www.MedCenterSystems.com Date of Purchase:
RECORDING YOUR OWN ALARM MESSAGES:
Note: Personal message Max Recording Time is 10 seconds per alarm. When no personal message is recorded for a selected alarm, a Beeping alarm will be used as default.
• Slide “ALARM SELECTION” switch to the alarm you wish to set.
• Press and hold “RECORD” button when you are ready to record your message. A ‘Beep’ will notify you that the recording has begun.
Speak clearly into the “MIC” on the back of the Your Minder Clock. For the clearest recording, speak at a distance of 6” from the “MIC” .
• Release “RECORD” button once you have completed your message. A ‘Beep’ will notify the end of the recording.
• Press “PLAY” to listen to your recorded message. If unsatisfied with playback, repeat above steps as necessary.
DELETING A RECORDED ALARM MESSAGE:
• Slide “ALARM SELECTION” switch to the alarm you wish to delete. Press “PLAY” to confirm your selection.
• Press and hold “ERASE” button until you hear a ‘Beep’ to confirm the message has been deleted.
• Press “PLAY” button to confirm that the recorded message has been deleted.
•See “Recording Your Own Alarm Messages” above to record a new message for this alarm.
14 16
17
18
15
1 2 3 4