
McCulloch MC1385 User manual
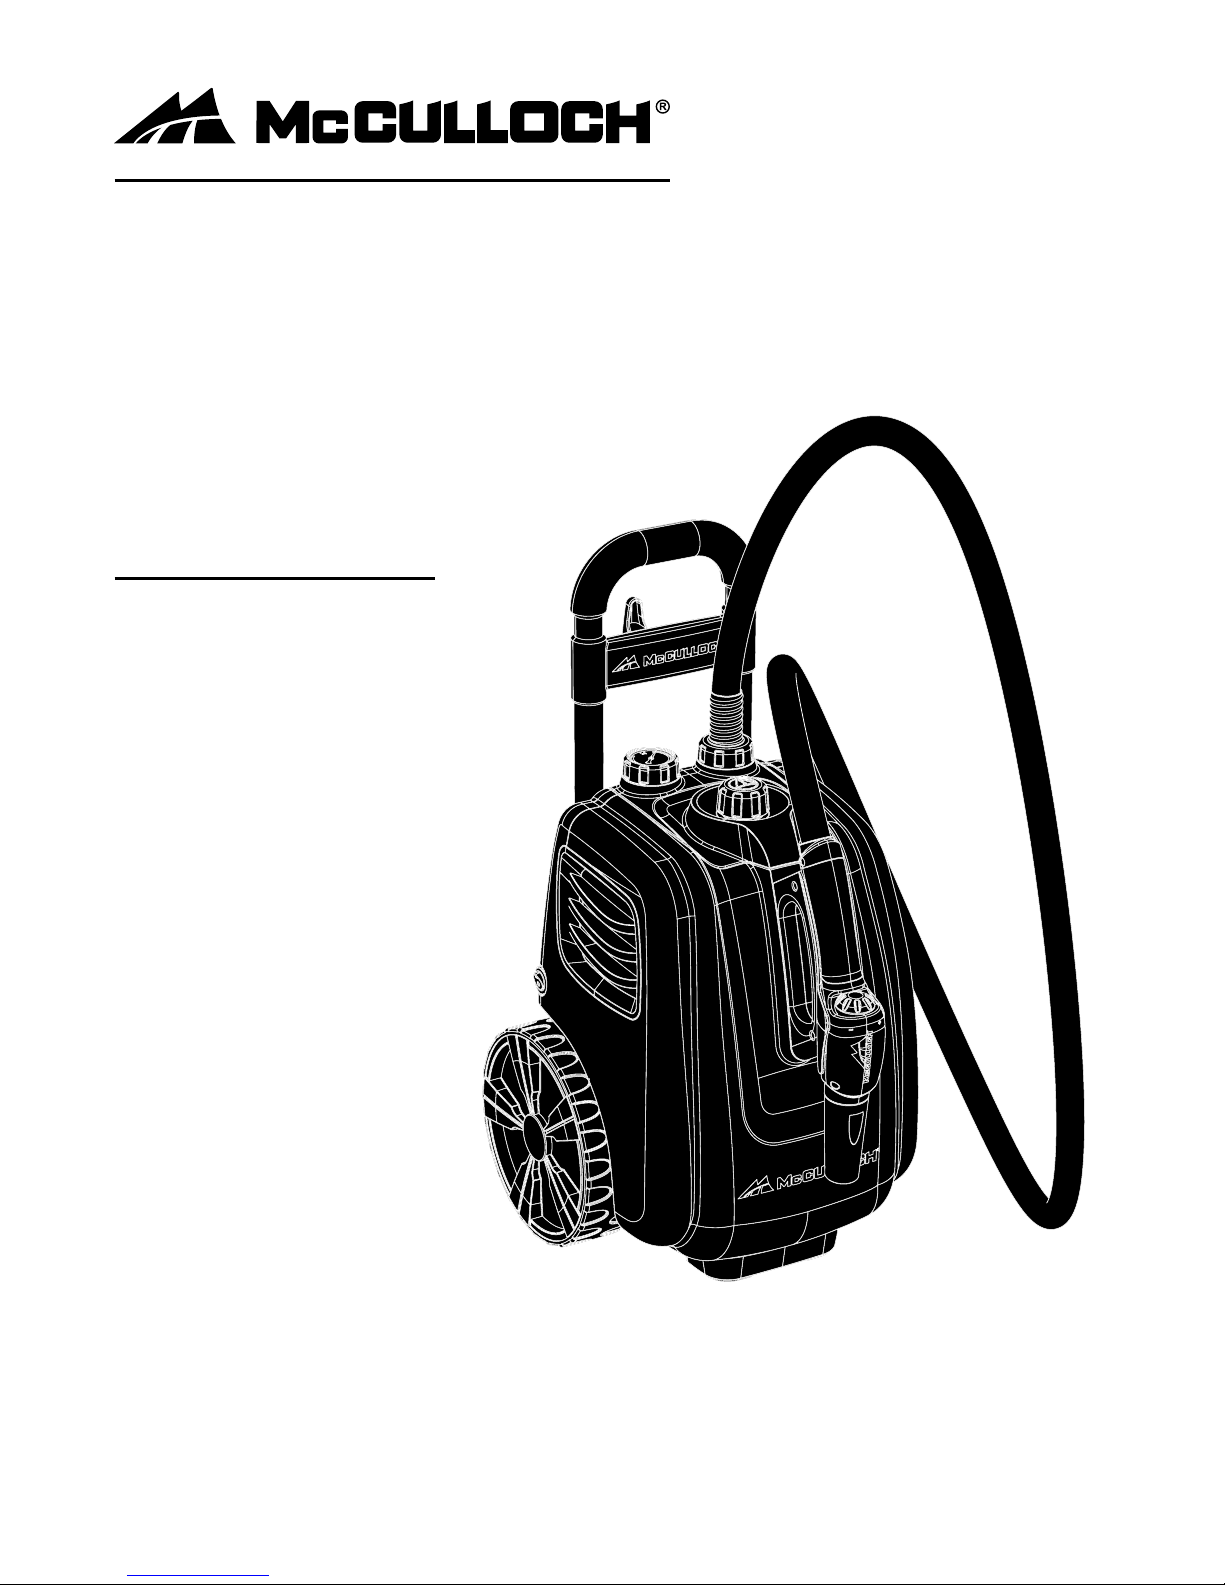
Deluxe Canister Steam System
Sistema A Vapor Con Depósito De Lujo
Nettoyeur-Chariot À Vapeur De Luxe
Owner’s Guide
Guía del Usuario
Mode D’emploi
Model MC1385
Modelo MC1385
Modéle MC1385
KEEP YOUR RECEIPT FOR WARRANTY PURPOSES
Please read all instructions before use.
GUARDE SU RECIBO A EFECTOS DE LA GARANTÍA
Lea todas las instrucciones antes de usarlo.
GARDEZ VOTRE REÇU AUX FINS DE LA GARANTIE
Veuillez lire toutes les instructions avant l’utilisation.
English p. 2
Español p. 22
Français p. 42

2 |ENGLISH
!
IMPORTANT SAFETY INSTRUCTIONS
1. The Deluxe Canister Steam System Boiler is designed to hold a maximum of 64 oz. (1,892
ml.) of water. Unplug electrical cord before lling with water.
2. DO NOT leave your Deluxe Canister Steam System unattended when plugged in or not in
use. Use only for its intended purpose as indicated in this manual.
3. This unit is not a toy. Close supervision is required when using unit near children, pets, and
plants. Steam produced by unit is hot and pressurized. Care must be taken to avoid burns or
other injuries. Never point nozzle at people or pets.
4. To reduce the risk of contact with hot water emitting from steam vents, hold appliance away
from body and check for signs of condensation or leakage.
5. DO NOT use this unit if electrical cord or outlet is damaged. DO NOT use unit if it is not work-
ing properly or has been dropped, damaged or left outdoors. If such damage occurs, DO NOT
disassemble or attempt repairs, take unit to a qualied service person for examination and
repair. Incorrect reassembly or repair could cause a risk of re, electrical shock, or injury to
persons when steam cleaner is used.
6. To reduce risk of electrical shock, DO NOT immerse in water or other liquids. DO NOT use
electrical cord as a handle. DO NOT allow cord to be crimped by closing it in doors. DO NOT
pull or stretch cord around sharp corners or edges.
7. Do not allow cord to touch hot surfaces. Let appliance cool completely before putting away.
Loop cord loosely around appliance when storing.
8. DO NOT use this unit with extension cords or electrical outlets that have inadequate current
capacity. A three-prong outlet or a properly grounded adapter is necessary when using Deluxe
Canister Steam System.
9. In order to unplug Deluxe Canister Steam System, grasp plug and pull smoothly and rmly
from outlet. DO NOT attempt to unplug unit by pulling or tugging on cord.
10. Use caution, as burns could occur from touching hot metal parts, hot water or steam.
WARNING: To reduce the risk of re, electrical shock, or injury, the following
basic safety precautions should always be followed when using an electrical
appliance.
READ ALL INSTRUCTIONS BEFORE USE

ENGLISH |3
!WARNING: To reduce the risk of electrical shock, this appliance has a three-
pronged plug. This plug will t in a polarized wall outlet only one way. If the plug
does not t fully in the outlet, contact a licensed electrician to install a proper
outlet. DO NOT attempt to modify the plug or defeat this safety feature.
Questions or comments?
• www.mccullochsteam.com
•1-800-711-6617
SAVE THESE INSTRUCTIONS
fOR HOUSEHOld USE ONly
11. The Deluxe Canister Steam System is only meant to be used with recommended Deluxe
Canister Steam System accessories. Other types of attachments are not to be used with the
Deluxe Canister Steam System. Doing so may cause injuries or damage to unit.
12. Attachments become hot during use. To avoid injuries, DO NOT touch attachments while us-
ing this appliance. DO NOT attempt to change attachments while unit is emitting steam.
13. When lling your Deluxe Canister Steam System, only water should be used in unit. Other
cleaning agents will damage unit and can cause injuries.
14. DO NOT operate unit if steam opening is blocked. Should this occur, immediately cease us-
age and unplug from electrical outlet.
15. Store your Deluxe Canister Steam System in a cool, dry place.
16. To avoid burns from escaping steam when removing Boiler Cap to rell unit:
• Always allow unit to cool for 20 minutes.
• Press and hold Steam Button to release ALL remaining steam.
IMPORTANT SAFETY INSTRUCTIONS

4 |ENGLISH
These features and accessories are included with your Deluxe Canister Steam System. To
obtain additional parts, refer to Product Support on Page 19 of this manual.
UNIT FEATURES
10' Steam Hose
Pressure Gauge
Integrated Handle
Boiler Cap
Steam Handle Cradle
Cord Wrap
Illuminated On/Off Switch
Steam Nozzle
Steam Trigger Lock
Steam Trigger
Steam Adjustment Knob
1
2
3
4
5
6
7
8
9
10
11
Product Information
11
1
2
3
4
5
6
7
8
10
9

ENGLISH |5
• The 10' Steam Hose (1) safely channels the ow of steam from the Boiler to the Steam
Nozzle.
• The Pressure Gauge (2) measures the pressure in the Boiler.
• The Integrated Handle (3) is engineered to stay cool while providing maximum grip and com-
fort.
• The Boiler Cap (4) is designed to safely contain steam inside the Boiler. The Boiler Cap must
be unscrewed and removed in order to ll the Boiler with water.
• The Steam Handle Cradle (5) functions as a convenient holder for the Steam Nozzle.
• The Cord Wrap (6) neatly stores the Power Cord.
• The Illuminated On/Off Switch (7) illuminates when the unit is powered On.
• The Steam Nozzle (8) emits a ow of hot, penetrating steam whenever the Steam Trigger is
pressed and held.
• The Steam Trigger Lock (9) locks Steam Trigger to "on" position for continuous steam.
• The Steam Trigger (10) is pressed and held in order to start the ow of steam from the Steam
Nozzle, then released when you wish to stop.
• The Steam Adjustment Knob (11) is conveniently located on the handle to adjust the intensity
of the steam at your ngertips.
Product Information
6 |ENGLISH
Product Information
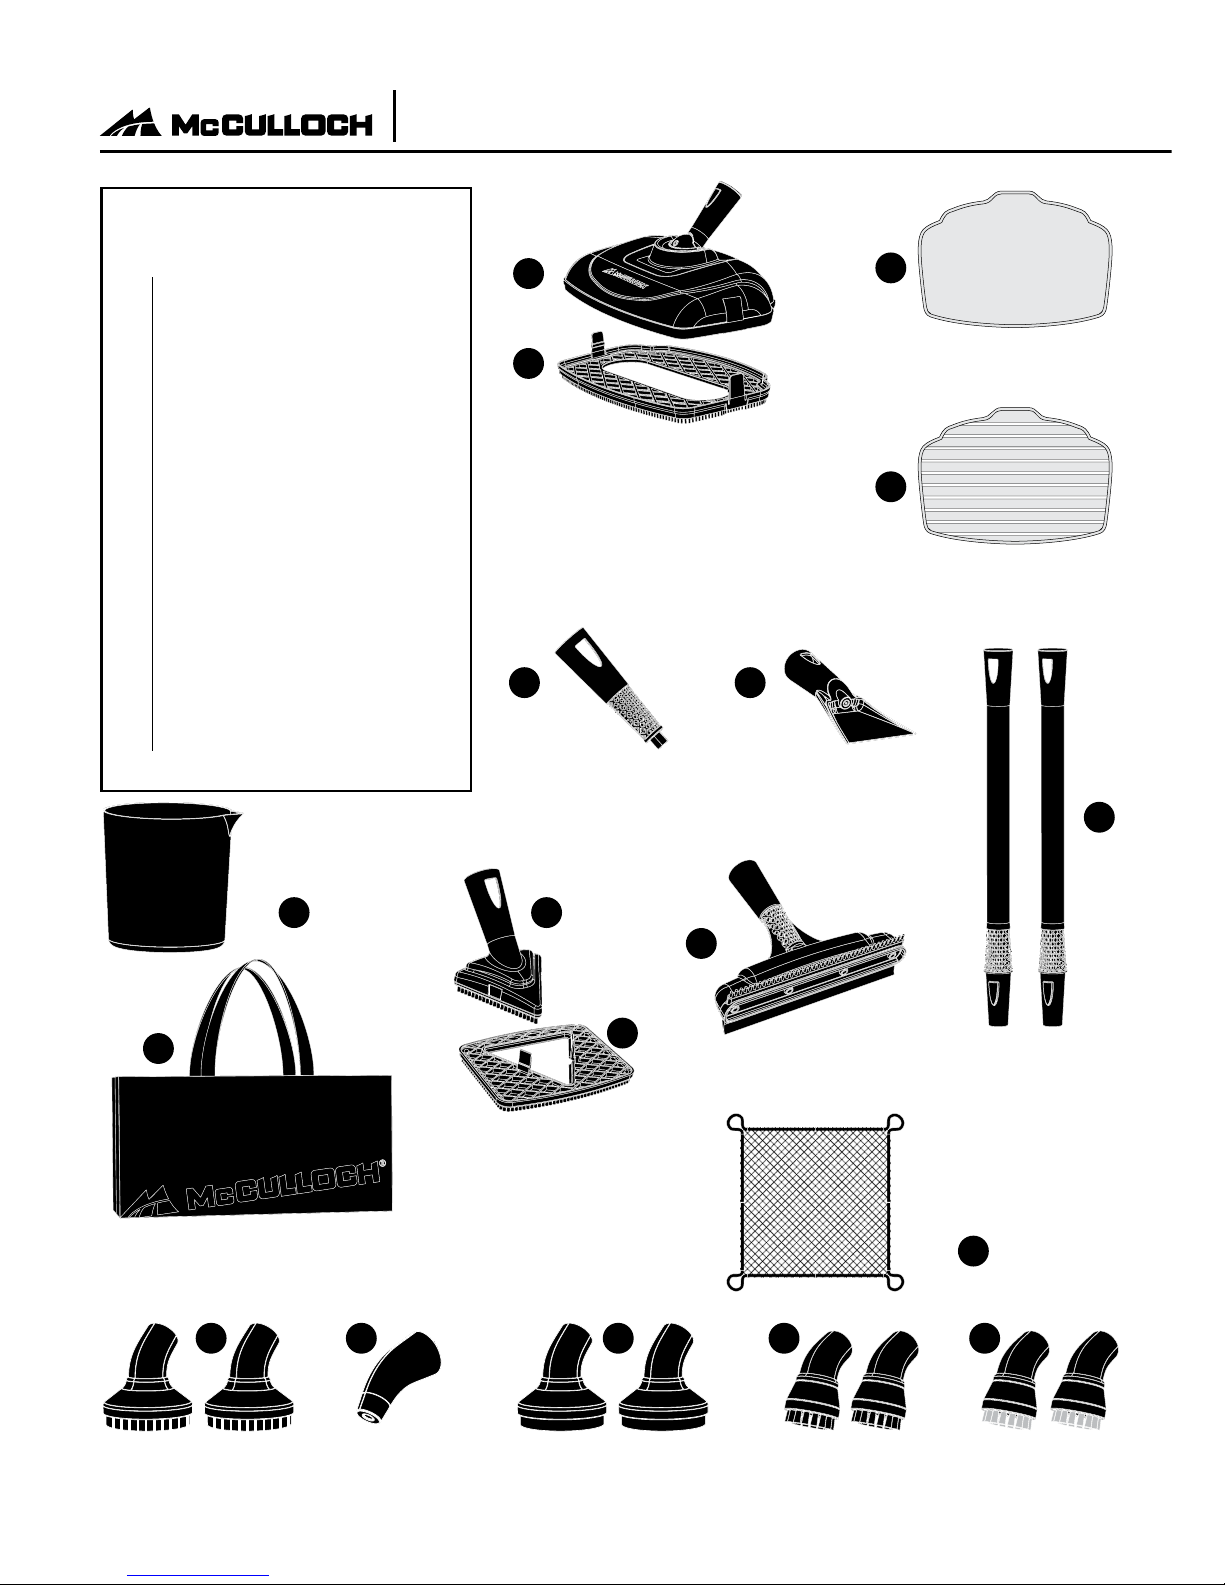
ACCESSORIES
2 - 16.5" Extension Wands
Microber Mop Pad
Scrubbing Mop Pad
5.5" Jet Nozzle
4" Triangle Brush
6" x 4.5" Large Brush
2 - 1.5" Nylon Utility Brush
2 - 1.5" Brass Utility Brush
Angled Nozzle
3" Scraper
9" Squeegee
13" x 8.5" Large Mop Head
Bristle Brush Attachment
Storage Bag
Fill Cup
Accessory Net
2 - 2.5" Round Brush
2 - 2.5" Round Scrub Pad
1
2
3
4
5
6
7
8
9
10
11
12
13
14
15
16
17
18
5.5" Jet Nozzle
A1230-001
4" Triangle Brush
A1230-002
6" x 4.5" Large
Brush
A1230-003
3" Scraper
A1230-009
Storage Bag
A1375-010
1.5" Nylon Utility
Brushes
A1230-005
1.5" Brass Utility
Brushes
A1230-006
2.5" Round Scrub Pads
A1230-007
9" Squeegee
A1350-002
Microber Mop Pad
A1375-100
Scrubbing Mop Pad
A1375-101
13" x 8.5" Large Mop Head
A1375-003-A
Bristle Brush Attachment
A1375-004
16.5" Extension Wands
A1375-002
Angled Nozzle
A1375-001
2.5" Round Brushes
A1350-001
Accessory Net
A1375-005
Fill Cup
A275-015
12 2
3
4 10
13
15
1
11
5
6
16
14
17 9 18 7 8

ENGLISH |7
• The 16.5" Extension Wand (1) connects to the Steam Nozzle. Used with mop attachment or
for high or hard-to-reach places.
• The Microber Mop Pad (2) attach to the Mop Head, and are designed for removing scuffs and
stains from hard oors. The Pads are reusable and machine washable.
• The Scrubbing Mop Pad (3) attach to the Mop Head, and are designed for removing scuffs
and stains from hard oors. The Pads are reusable and machine washable.
• The 5.5" Jet Nozzle (4) focuses the ow of steam from the Steam Nozzle, and serves as the
base to which the Utility Brushes and Scrub Pad connect.
• The Triangle Brush (5) connects to the Steam Nozzle or Extension Wands, and is designed for
cleaning corners and other difcult angles.
• The Large Brush (6) attaches to the Triangle Brush to cover large surfaces.
• The 1.5" Nylon Utility Brush (7) connects to the Jet Nozzle, providing extra scrubbing power for
removing exceptionally tough dirt and stains.
• The 1.5" Brass Utility Brush (8) connects to the Jet Nozzle and is designed for removing tough
stuck-on grease and grime from durable surfaces such as ovens and grills.
• The Angled Nozzle (9) is designed for reaching difcult angles and areas that the Jet Nozzle
may not completely reach.
• The 3" Scraper (10) attaches to the Steam Nozzle to scrape off stuck on grime.
• The 9" Squeegee (11) attaches to Steam Nozzle to remove bugs from windshield or windows
or soap scum from showers.
• The 13" x 8.5" Large Mop Head (12)attaches to Extension Wands to clean garage oors,
decks or any other extra large surface areas.
• The Bristle Brush Attachment (13) attaches to Large Mop Head to scrub away stubborn spots
on oors.
• The Storage Bag (14) stores all attachments neatly in one convenient bag.
• The Fill Cup (15) is used to ll Boiler without spills.
• The Accessory Net (16) stores brushes and other small accessories.
• The 2.5" Round Brush (17) connects to the Jet Nozzle to scrub especially tough stains. The
Round Brush functions similar to the Nylon Utility Brush, only designed to more efciently
scrub larger surface areas.
• The 2.5" Round Scrub Pad (18) connects to the Jet Nozzle and is designed to scrub tough dirt
and scuffs from surfaces.
Product Information

8 |ENGLISH
STEAM MOPPING ACCESSORIES
WARNING: Do not try to connect accessories while unit is emitting steam.
EXTENSION WANDS
1. Select one of the Extension Wands. Insert end (A) of Wand onto Steam Nozzle (B) with yellow
lock/release button slightly off center with hole. Fully insert and rotate wand slightly to allow
button to snap into hole.
2. Using the same instruction, attach remaining Extension Wand (C) to the rst Wand. Both
Extension Wands should now be connected to the Steam Nozzle.
MOP HEAD
1. Align Mop Head with open end of Extension Wand, so that hole in Mop Head aligns with yel-
low lock/release button on Wand.
2. Press down on yellow lock/release button. While continuing to hold button down, slide Mop
Head onto Extension Wand (See gure 1-A). Fully insert and rotate wand slightly until button
snaps through hole (See gure 1-B).
NOTE: Do not use excessive force when mopping or using Extension Wands as this
may cause the Wands to break.
BRISTLE BRUSH ATTACHMENT
1. Align Mop Head with Bristle Brush Attachment, so that the
release tabs (A) on the Bristle Brush align with the sides of the
Mop Head (B).
2. Firmly press the Bristle Brush Attachment onto Mop Head until it
securely snaps into place.
Note: Do not use Bristle Brush Attachment with Microber
or Scrubbing Mop Pad.
Assembling Your Deluxe Canister
Steam System
B
CA
FIGURE 1
AB
ENGLISH |9
MICROFIBER PADS
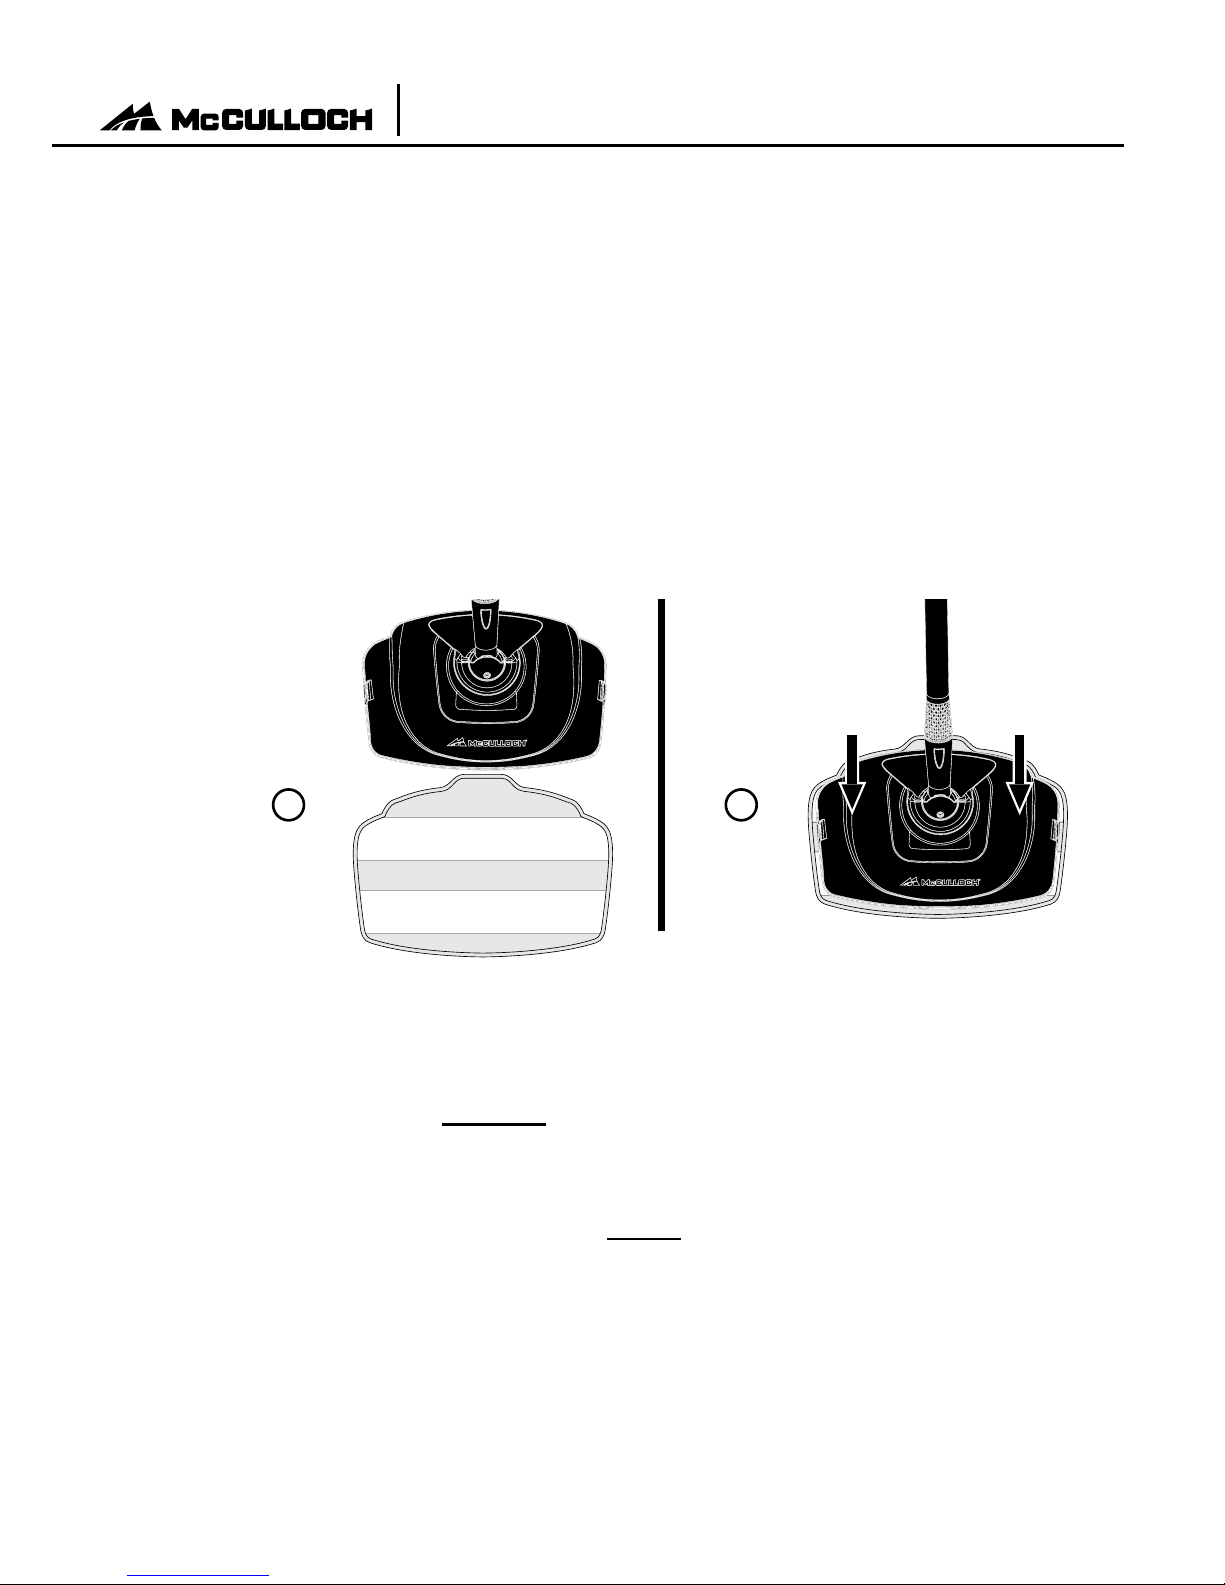
1. Lay one Microber Pad on at surface, with two fastener strips facing upward.
2. Align Mop Head with Microber Pad. Make sure Mop Head is oriented with Pad as shown,
and centered as best as possible (See gure 2-A).
3. Press Mop Head rmly down onto Microber Pad. Fastener strips will adhere to Pad Grips on
underside of Mop Head. Pad should now be attached and ready for use (See gure 2-B).
CAUTION: Use care when handling a recently used Microber Pad, as it may still be hot.
NOTE: Microber Pads are machine washable. To avoid picking up lint, washing sepa-
rately from other fabrics is recommended. Only use liquid detergent. Avoid using any
fabric softeners or bleach. Air drying is recommended; machine drying on a low heat
or air dry setting is acceptable as well.
The Mop Head and Microber Pads are perfect for use on these hard oor surfaces:
IMPORTANT: Do not use on unsealed hardwood or unglazed ceramic surfaces. Sur-
faces that are not properly sealed may be warped or damaged by exposure to heat and
moisture.
Care should also be taken when steaming sealed hardwood oors, as prolonged ex-
posure to steam in a single spot may cause damage and discoloration. To avoid this,
keep the Mop Head in constant motion on these surfaces.
Steam may remove the sheen from some oors that have been treated with wax.
Extremely rough textured oors may tear or damage Microber Pads.
Before steaming any ooring, it is recommended to consult the manufacturer’s guide-
lines. For ooring in question, always test on a small inconspicuous area before pro-
ceeding.
A B
FIGURE 2
•Sealed Laminate
•Linoleum •Glazed Ceramic
•Granite
•Sealed Hardwood
•Stained Concrete •Marble
•Vinyl •Tile
Assembling Your Deluxe Canister
Steam System

10 |ENGLISH
STEAM CLEANING ACCESSORIES
WARNING: Do not connect accessories while unit is emitting steam.
JET NOZZLE / SCRAPER / SQUEEGEE / TRIANGLE BRUSH
1. Select one of the three accessories (Jet Nozzle shown as example) and push onto the Steam
Nozzle (A).
2. Rotate accessory until the yellow lock/release button snaps into the accessory hole (B).
NOTE: The Jet Nozzle, Scraper, Squeegee and Triangle Brush can be connected to the
end of an Extension Wand for reaching high or difcult spots. Connect the Extension
Wand (or Wands) as outlined on Page 8, then connect your desired accessory to the
Wand in the same way as you would normally connect to the Steam Nozzle.
UTILITY BRUSHES / ANGLED NOZZLE / SCRUB PAD
NOTE: Accessories connect to the Jet Nozzle, not the Steam Nozzle.
1. Firmly press accessory onto tip of Jet Nozzle. Press it on as far as possible to prevent steam
leakage (See gure 3).
2. To remove accessory, simply grip it rmly and pull it off Jet Nozzle.
Assembling Your Deluxe Canister
Steam System
FIGURE 3
Steam Nozzle
B
A
Other manuals for MC1385
1
Table of contents
Other McCulloch Steam Cleaner manuals

McCulloch
McCulloch MC1375 User manual

McCulloch
McCulloch MC1270 User manual

McCulloch
McCulloch MC1230 User manual

McCulloch
McCulloch MC1235 User manual

McCulloch
McCulloch 8823 User manual

McCulloch
McCulloch MC1226 User manual

McCulloch
McCulloch MC1226 User manual

McCulloch
McCulloch MC1227 User manual

McCulloch
McCulloch MC1246 User manual

McCulloch
McCulloch MC1275 User manual


