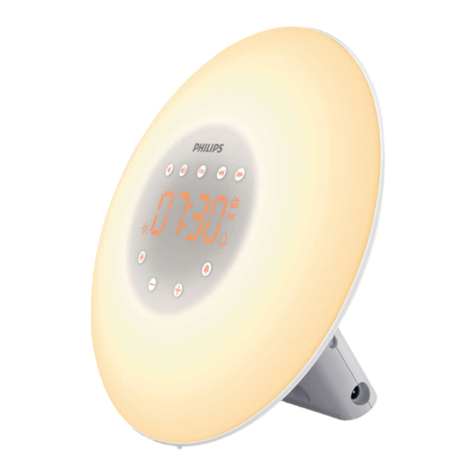
MAJORITY CB23-FM-WHT User manual

Majority Madingley Hall
Bedside FM Radio
CB23-FM-WHT/BLK
User Guide
Video step by step guidance also available online at www.majoritytech.co.uk

IMPORTANT
INDEX
1
1. Index
2. Controls and Functions
3. “What’s in the box?” and Basic Operation
4. FM Radio Mode
5. Set up of the FM Radio Preset Stations
6. Aux-In and Dual USB Ports
7. Clock Setting
8. Dual Alarm Setting
9. Alarm Sound and Snooze
10. Sleep Setting, Display Brightness, System Reset and Software Version Display
11. Technical Specifications
12. Important Safety Information

IMPORTANT
Controls and Functions
2
1.LCD Display
2.Aux in jack
3.DC 9v jack –wall plug
4.Power On/Off
5.USB Ports
6.Preset button
7.Mode
8.Dimmer
9.Alarm/Snooze/Sleep
10.Volume Up +
11.Volume Down -
12.Standby
13.Scan/Save
14.Previous/Back Button
15.Time
16.Next/Forward Button
17.Antenna
16
17
10
6
5
234
5
789
1
11
12 13 14 15

IMPORTANT
“What’s in the box?”/ Basic Operation
3
“What’s in the box?”
•Majority Madingley Hall Radio
Clock
Please note all (Ref.) refer to Page 2 Controls and Functions mapping guide.
Basic Operation
•Plug the connector into the back of the system labelled DC IN (Ref.3) and the power supply plug into the mains.
•Power Supply ON/OFF at back of system (Ref.4).
•Fully extend the antenna (Ref.17) so that it can rotate to get the best FM signal.
•Press the ‘Standby’ button to turn on the unit (Ref.12). The system should go straight to “TUNER”. The first time you do this
FM frequency “87.5 MHz.” will be displayed on the screen.
•Press the ‘Mode’ button (Ref:7)to switch to “AUX MODE” or again to switch back to “TUNER”.
Standby
•To change the music system back into standby, press the ‘Standby’ button (Ref.12). To turn off fully press the button on rear of the
unit (Ref.4) and switch off at the mains. The cord must be out of reach of children.
•UK Standard Plug DC 9v Power Supply •Instructions Guide

IMPORTANT
FM Radio Mode
4
FM Radio
•Press the ‘Standby’ button (Ref.12).
•Then press the ‘Mode’ button (Ref.7)to switch to FM “TUNER”. The first time you do this FM frequency “87.5 MHz” will be
displayed on the screen.
•Pull up the antenna (Ref.17).
•To auto scan press and hold (for a few seconds) the ‘Scan/Save’ button (Ref.13) and then release.
•The radio will automatically save all the stations with a strong signal up to 108 MHz.
•After searching has finished it will automatically play the first station stored.
To tune a specific frequency
•To listen to a specific frequency press and hold ‘Next’ (Ref.16) to search forward quickly and ‘Prev’ (Ref.14) to search back quickly.
It will stop searching when the button is released.
IMPORTANT NOTE PLEASE MAKE SURE YOU HAVE EXTENDED THE ANTENNA TO ITS FULL LENGTH
(Ref.17). THIS WILL THEN ENABLE YOU TO ROTATE IT TO GET THE BEST SIGNAL.

IMPORTANT
Set Up of the FM Radio Preset Stations
5
Preset a radio station –up to 20 preset stations can be set
To store a station that you are currently playing:
•Press ‘Scan/Save’ button (Ref.13).
•P”01” (Preset 1) will flash on the display.
•Press ‘Prev’ button (Ref.14) or ‘Next’ (Ref.16) to change the “01” to the number you want to store the station as.
•Then press ‘Save/Scan’ button to save.
To recall a preset radio station
•Press the ‘Preset’ (Ref.6) button to scroll through the preset choices. (Press multiple times to scroll through the 20 options).

IMPORTANT
Aux-In and Dual USB Ports
6
Aux-In Port
•You can connect your phone or tablet with an Aux 3.5mm cable that connects to the Aux in jack (Ref.2).
•Press the ‘Standby’ button (Ref.12).
•Then press the ‘Mode’ button (Ref.7) to switch to “AUX”. (Press multiple times to switch from “TUNER” to “AUX” – it will clearly
show on the display screen.)
•Insert the audio cable, then you will be able to play your music via your phone or tablet.
Dual USB Port –Charging your phone
•Both USB Ports output 5V/2A (Ref.5). When connected via a USB lead into the USB port (Ref.5) the system will charge your phone.
You can not play your music via the USB connection, it is purely for charging your phone. You can play your phone music using an
Aux 3.5mm cable also instructed above.

IMPORTANT
Clock Setting
7
Clock Setting –the time can be changed in standby or when listening to the radio.
•Press and hold the ‘Time’ button (Ref.15) to choose 24 hour or 12 hour Clock.
•To make your choice use the ‘Next’ button (Ref.16) to switch between the two options.
•Press the ‘Time’ (Ref.15) button to confirm your choice.
•The Hour will then flash on the display screen, using the ‘Prev’ (Ref.14) or ‘Next’ (Ref.16) button press until you are on the
required hour.
•To confirm the hour press the ‘Time’ (Ref.15) button.
•The Minutes will then flash on the display screen, using the ‘Prev’ (Ref.14) or ‘Next’ (Ref.16) button press until you are on the
required minute.
•To confirm the minute press the ‘Time’ (Ref.15) button.
•The time is now set.

IMPORTANT
Dual Alarm Setting
8
.Alarm1 Setting/Alarm2 Setting
•Ensure the radio is in standby mode by pressing the ‘Standby’ button (Ref.12).
•Press and hold ‘Alarm/Snooze/Sleep’ Button (Ref.9) to set ALARM1.
•Press ‘Prev’ (Ref.14) or ‘Next’ (Ref.16) to choose the hour of the time you want the alarm to sound. Press ‘Alarm/Snooze/Sleep’
Button (Ref.9) to confirm.
•Then do the same for the minutes using the ‘Prev’ (Ref.14) or ‘Next’ (Ref.16) button to choose the minutes of the time you want
the alarm to sound and press ‘Alarm/Snooze/Sleep Button’ (Ref.9) to confirm.
•The sound option will then flash at the bottom of the display screen, the choices are “BUZZER”, “RADIO” or “NO ALARM”. Using
‘Prev’ (Ref.14) or ‘Next’ (Ref.16) to move between the options. Confirm your option by pressing ‘Alarm/Snooze/Sleep’ button
(Ref.9).
•You then have the option to set ALARM2 in the same way if you want a second alarm. If you don’t wish to use the second alarm
you will need to set this to “No Alarm”. Just keep pressing the ‘Alarm/Snooze/Sleep’ button (Ref.9) until you get to the options:
“BUZZER”, “RADIO”, “NO ALARM”.
•Choose “No Alarm” pressing the ‘Alarm/Snooze/Sleep’ button (Ref.9) to confirm.

IMPORTANT
Alarm Sound and Snooze
9
.
Alarm Sound
•If the alarm is set to “Radio” mode it will play FM Station.
•If two alarms are set, when ALARM1 is sounding and ALARM 2 begins to sound it will automatically turn off ALARM1.
•Alarm will sound for a maximum of 90 minutes if not manually turned off before.
•The volume of the alarm, whichever mode is selected, will sound from low to high.
Snooze/Switch off alarm when sounding
•When alarm rings press the ‘Alarm/Snooze/Sleep’ button (Ref.9) to snooze for 5 minutes. You can keep snoozing every 5 minutes
for up to an hour.
•If ALARM1 is snoozed then ALARM2 will also be snoozed.
•To turn the alarm off completely press and hold the ‘Standby’ button (Ref.12).
This manual suits for next models
1
Table of contents