Lu MOBIL User manual

USER MANUAL
MÖBIL
User manual
Revision
English
April 2021
1st Generation

Playground
Assembling the unit
Keyboard remote
Calibration
Homepage
Lights control
Troubleshooting
Disassembly
Technical Specications
Recommended Servicing
About this manual
Limited Warranty
Complete documentation
Preparation of the site and the home screen
Installation of protective cushions
Projector remote controller
Screen preparation
How to turn ON your Lü
Free play
Settings
Page 4
Page 6
Page 11
Page 10
Page 14
Page 17
Page 16
Page 20
Page 22
Page 26
Page 28
Page 31
Page 32
Page 34
Page 35
Page 5
Page 8
Page 12
Page 19
Page 21
Page 23
Page 25
What is included Page 3
Table des matières
Lü Community
How to turn OFF your Lü

Congratulations for purchasing a Lü!
This system was designed by the Lü team in Canada, which is on a mission to
improve the world of education. We hope you will enjoy using it.
What is included
This system include one main module and ve components:
Page 3
Main module
Projector (WXGA 6500 lumens) and a 3D camera
protected by a custom case
Two light brackets
Three LED projectors (RGBW 108w)
Two speaker brackets
300w speakers
One portable lifting tower
One set of cushions, fourteen components
Two remote controllers:
one remote controller for the projector
one keyboard remote for the Lü system

Page 4
Technical specications
Playground dimensions and specications
Interactive screen
Maximum size: 19 ft (5.8 m) large x 10.1 ft (3.1 m) high
Must be installed on a at, solid and as pale as possible
Playground
Centered in front of the interactive screen
Recommended size: 30 ft (9 m) large x 20 ft (6 m) long
Minimum ceiling height: 10 ft (3 m)
Maximum ceiling height: 28 ft (8.5 m)
To optimize the immersive experience, ambient lighting must be controllable.
When the system is in operation, general lights should be turned off and no
window should allow direct sunlight into the room.

Assembly
Preparing the site and home screen
01 Find the wall that will be used for the projection.
The wall must be at, solid and as pale as possible.
Note : In doubt, you can send us a picture of the place you have in mind
02 Position the lifting tower.
Place the lifting tower at maximum 19 ft (5.8 m) from the wall and centered
with the screen.The crank should point the opposite side from the screen for
easier handling.
03 Secure the lifting tower in place.
Use the pivots on each of the four legs of the tower to stabilize it. Make sure
the tower is perfectly vertical using the bubble level.
Page 5

Assembly
Assembling the unit
01 Install the main module on the stand
The pin underneath the main module has to be inserted inside the pole
of the lifting tower. Important : Make sure you screw the lock bolt in place
before you continue.
02 Install speaker brackets on main module
Lock brackets in place using locking pins.
03 Install light brackets on the main module
Lock brackets in place using the locking pin. Position light xtures to light the
oor between the screen and the lifting tower.
04 Connect all cables from speaker and light brackets to the main module
Follow the ID codes and colors to connect cables to the right socket.
Page 6
A.
A.
B.
B.

Assembly
Assembling the unit
05 Focus light xture positions
Focus the xtures so the light is directed evenly on the oor and not on the
projection screen.
06 Fix the power cable to the main unit
Tie the cable to the top of the lifting tower main shaft using the Velcro strap.
When you lift the tower, the cable will stay close to it.
07 Turn the system on and make sure all components are working
Plug the power cable, turn on projector using the projector controller and
wait for the system to boot. Make sure the volume, the lights, the computer
and the projector are working properly. Set the volume at 50% behind
the speakers.
Note: The computer will turn on as soon as you connect the power cable.
08 Lift the tower to its nal position
Use the crank to raise the tower to the nal position, which should be 6 feet
(1.8 m) from the ground to below the lowest light.
Page 7
6ft (1.8m)

Assembly
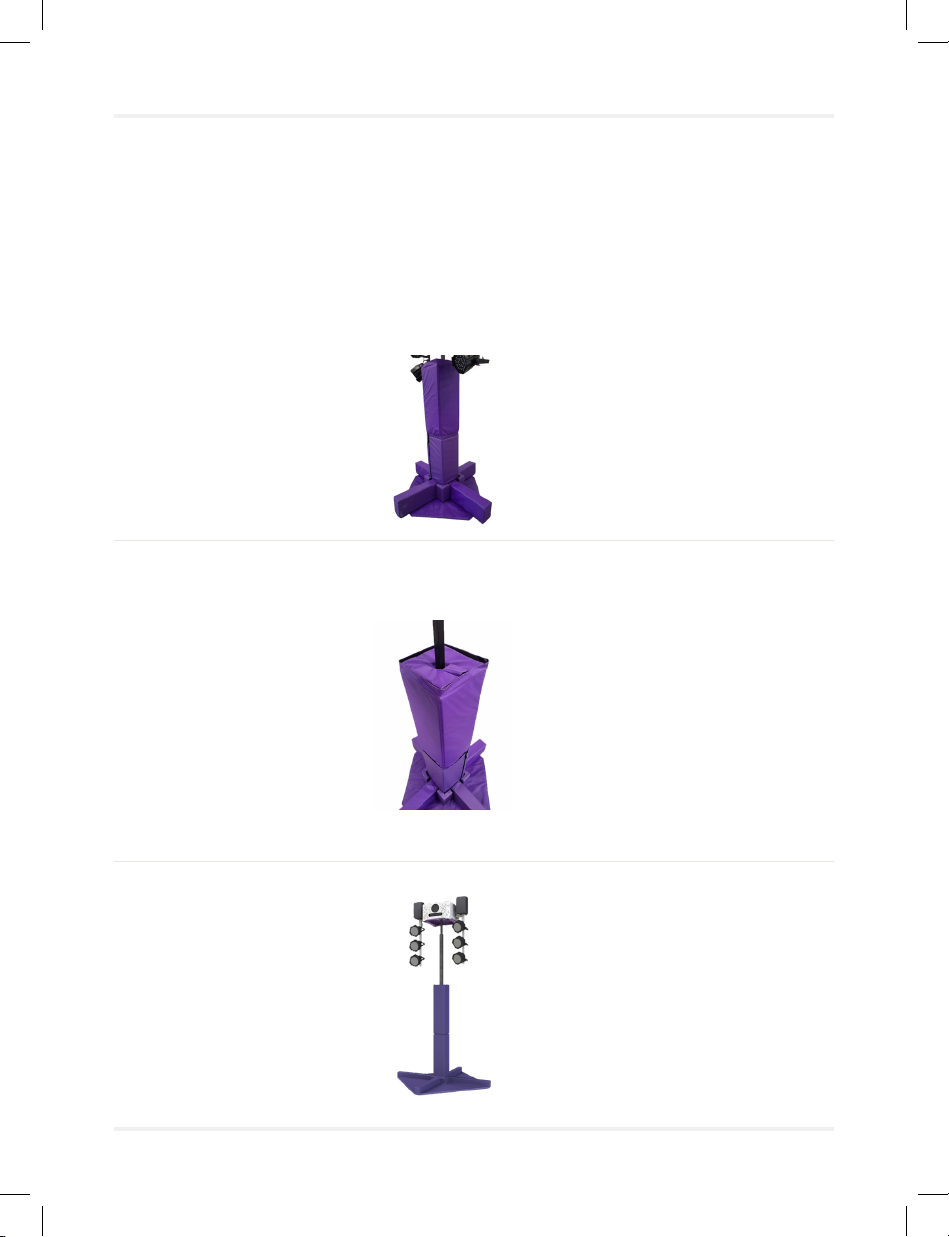
Installation of protective cushions
01 First, place the two thin, triangle-shaped cushions under the legs of
the lifting tower, velcro-side on top.
02 Place the rectangular shaped cushions on each of the legs of the lifting
tower, making sure that the velcro is securely attached to that of the
cushion below.
03 Place the foldable rectangular cushions around the lifting tower. The rst
cushion to be placed has small slots to t well at the bottom of the
lifting tower.
04 Place the corner cushions between each rectangular cushion.
Page 8
Assembly
Installation of protective cushions
05 Then place the second foldable rectangular cushions on top of the rst
one and make sure that it is secured with velcro.
06 Complete the cushions installation by placing the square shaped
cushion around the lifting tower and on top of the last cushion installed
in step 5.
07 Installation is completed
Page 9

How it works
How to turn the projector ON
To turn the projector ON, press the “ON” button using the projector remote
controller and wait for the image to be displayed.
Remote control for the light projector
Page 10
Table of contents
Popular Lighting Equipment manuals by other brands


Qazqa
Qazqa Suplux SL 3 Black 103062 instruction manual

Commercial Electric
Commercial Electric 54568141 Use and care guide

CREE LIGHTING
CREE LIGHTING 304 Series installation instructions

Goobay
Goobay 49867 user manual

ECOMAN ITALIA
ECOMAN ITALIA LED T8 instruction manual

Alkalite
Alkalite Krypton KT-81 user manual


