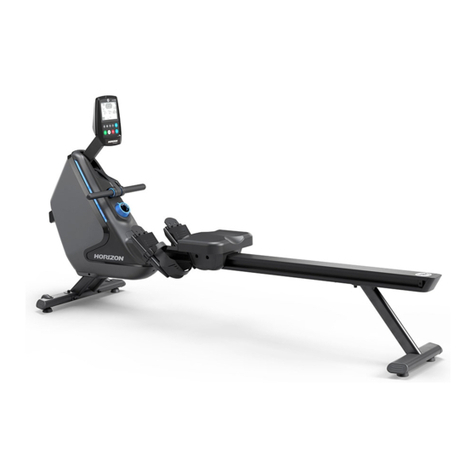
LSG GR03 User manual

Product may vary slightly from the item pictured due to model upgrades.
Read all instructions carefully before using this product.
Retain this owner’s manual for future reference.
NOTE:
This manual may be subject to updates or changes. Up to date manuals are available through our
website at www.lsgfitness.com.au
GR03 Magnetic
Rowing Machine
USER MANUAL
Find the Digital
Manual Online

2
TABLE OF
CONTENTS
I. Important Safety Instructions . . . . . . . . . . . . . . . . . . . . . . . . . . . . . . . 03
II. Care Instructions . . . . . . . . . . . . . . . . . . . . . . . . . . . . . . . . . . . . . . . . . . . . . 04
III. Exploded Diagram . . . . . . . . . . . . . . . . . . . . . . . . . . . . . . . . . . . . . . . . . . . 05
IV. Parts List . . . . . . . . . . . . . . . . . . . . . . . . . . . . . . . . . . . . . . . . . . . . . . . . . . . . . 06
V. Assembly Instructions . . . . . . . . . . . . . . . . . . . . . . . . . . . . . . . . . . . . . . . 08
VI. Exercise Computer Instruction Manual. . . . . . . . . . . . . . . . . . . . . . 19
VII. Exercise Guide . . . . . . . . . . . . . . . . . . . . . . . . . . . . . . . . . . . . . . . . . . . . . . . 20
VIII. Warranty . . . . . . . . . . . . . . . . . . . . . . . . . . . . . . . . . . . . . . . . . . . . . . . . . . . . 22
| TABLE OF CONTENTS

3IMPORTANT SAFETY INSTRUCTIONS |
I. IMPORTANT SAFETY
INSTRUCTIONS
WARNING: Read all instructions before using this machine.
It is important your machine receives regular maintenance to prolong its useful life. Failing to
regularly maintain your machine may void your warranty.
Please keep this manual with you at all times.
•It is important to read this entire manual before assembling and using the equipment. Safe and
effective use can only be achieved if the equipment is assembled, maintained and used properly.
PLEASE NOTE: It is your responsibility to ensure that all users of the equipment are informed of all
warnings and precautions.
•Before starting any exercise program you should consult your doctor to determine if you have any
medical or physical conditions that could put your health and safety at risk, or prevent you from
using the equipment properly. Your doctor’s advice is essential if you are taking medication that
affects your heart rate, blood pressure or cholesterol level.
•Be aware of your body’s signals. Incorrect or excessive exercise can damage your health. Stop
exercising if you experience any of the following symptoms: pain, tightness in your chest, irregular
heartbeat, and extreme shortness of breath, light-headedness, dizziness or feelings of nausea. If you
do experience any of these symptoms, you should consult your doctor before continuing with your
exercise program.
•Keep children and pets away from the equipment. This equipment is designed for adult use only.
•Use the equipment on a solid, flat level surface with a protective cover for your floor or carpet.
To ensure safety, the equipment should have at least 2 meters of free space around it.
•Before using the equipment, check that the nuts and bolts are securely tightened. If you hear any
unusual noises coming from the equipment during use and assembly, stop immediately. Do not use
the equipment until the problem has been rectified.
•Wear suitable clothing while using the equipment. Avoid wearing loose clothing that may get caught
in the equipment or that may restrict or prevent movement.
•This equipment is designed for indoor and family use only.
•Care must be taken when lifting or moving the equipment so as not to injure your back.
•Always keep this instruction manual and assembly tools at hand for reference.
•The equipment is not suitable for therapeutic use.
•The pulse or heart rate sensors are not medical devices. Various factors, including the user’s
movement, may affect the accuracy of heart rate readings. The pulse sensors are intended only as
exercise aids in determining heart rate trends in general.

4| IMPORTANT SAFETY INSTRUCTIONS
II. CARE INSTRUCTIONS
•Lubricate moving joints with grease after periods of usage.
•Be careful not to damage plastic or metal parts of the machine with heavy or sharp objects.
•The machine can be kept clean by wiping it down using dry cloth.
•All nuts and bolts are to be checked and tightened on a regular basis. This includes pedals and other
moving parts. Failure to do so may cause damage to your thread and void your warranty.
•Keep the rowing machine in a clean dry place.
•Grasp the frame to move the rowing machine. Do not use the seat to move it. The seat will move, and
it may hurt your hand and fingers.
•Always make sure all the nuts and bolts are properly tightened.
•Regular inspection is required. Replace any worn or damaged parts immediately.
•Batteries are to be installed or replaced by adult only.
•Do not use rechargeable batteries. Do not mix
different battery types. Do not mix old and new
batteries. Do not mix alkaline, standard (Carbon-Zinc),
or rechargeable (Nickel-Cadmium) batteries.
•Remove batteries when product is not in use.
•Remove exhausted batteries from product and
dispose of in accordance with the manufacturer’s
recommendation
•Do not attempt to recharge non-rechargeable
batteries.
•Batteries are to be inserted with correct polarity.
•The supply terminals are not to be short-circuited.
•Do not dispose of batteries in fire, batteries may
explode or leak.
BATTERY USAGE
+-
+-
BATTERY

5EXPLODED DIAGRAM |
III. EXPLODED DIAGRAM

6
IV. ASSEMBLY PARTS LIST
| PARTS LISTS
Some items on this list may come pre-installed on your equipment. If you feel
like you’re missing anything, please double check your equipment.
54363534
1
2 3 8
9
57
84 85 86
62 65 68 69 76
NO. Description Spec Qty Unit
1Main frame set 1 Set
2Slide rail set 1 Set
3Front stabilizer set 1 Set
8U fixed plate 1 Set
9Rear stabilizer 1 Pc
34 Hexagon head bolts M8*12*S14 4 Pcs
35 Seat 322*261*55 1 Pc
36 Pedal 313.1*136.4*64.7 2 Pcs
54 Computer XT-3015 1 Pc

7PARTS LISTS |
57 Domed nut M8 2 Pcs
62 Carriage bolt M8*42 2 Pcs
65 Hexagon bolt M12*160 M12*160 4 Pcs
68 Hexagon socket head screws M8*15 M8*15 6 Pcs
69 Hexagon socket head screws M8*10 M8*10 2 Pcs
76 Flat washer 8 8 14 Pcs
84 Crosshead spanner S=13,14,15 1 Pc
85 Open spanner S=10,13,17,19 1 Pc
86 Inner hexagon spanner 6# 1 Pc

8| ASSEMBLY INSTRUCTIONS
1. Lock the Front Stabilizer (pt.3) to the Main Frame (pt.1) with two sets of Ø8 Flat Washer (pt.76), M8
Domed nut (pt.57) and M8*42 Carriage bolt (pt.62).
Step 1
V. ASSEMBLY INSTRUCTIONS
STEP 1

9ASSEMBLY INSTRUCTIONS |
1. Use a Crosshead spanner (pt.84) to remove the two sets of M4*10 Cross recessed pan head screws
(pt.70) and the Limiting Pad (pt.28) from the Slide rail set (pt.2)
2. Insert the Seat cushion plate (pt.35) into the Slide rail set (pt.2)
3. Locking the two sets of Cross recessed pan head screws (pt.70) and the Limiting Pad (pt.28) back to
the Slide rail set (pt.2) with a Crosshead spanner (pt.84)
4. Lock the Rear stabilizer (pt.9) to the Slide rail set (pt.2) with four sets of M8*12*S14 Hexagon head
bolts (pt.34) and Ø8 Flat Washer (pt.76).
STEP 2

10 | ASSEMBLY INSTRUCTIONS
1. Put the Slide rail set (pt.2) onto the Main frame set (pt.1) and make sure it is in place.
2. Using the Inner hexagon spanner (pt.86), four sets of the Hexagon socket head screws M8*15 (pt.68),
Flat washer 8 (pt.76) to install the Slide rail set (pt.2) on the Main frame set (pt.1) and lock it.
STEP 3
Table of contents
Other LSG Home Gym manuals