Lightspeed Cat 885 User manual
User Manual
Classroom Audio System


SECTION 1: 4 System Components and Unpacking
Overview 6 Optional Components
7 Front Panel Controls
8 Rear Panel Controls
10 ISR Controls and Connections
11 REDMIKE Controls and Connections
12 Cradle Charger Controls and Connections
SECTION 2: 13 Step 1. Location of the Amplifier
Set-up & Use 14 Step 2. ISR Sensor Installation
17 Step 3. Speaker Installation
Step 4A. Connect the Power Supply
18 Step 4B. ISR Connection
19 Step 4C. Speaker Connection(s)
20 Step 4D. Audio Input Connections
21 Step 5. Audio Integration
22 Step 6. Charging the REDMIKE
23 Step 7. Operating the REDMIKE
24 Step 8. Initial Set-up Speaker Audio
25 Step 9. Setting Mic Priorities
26 Output to Assistive Listening Device
27 Using the REDMIKE to Amplify External
Audio Equipment
SECTION 3: 28 REDMIKE VC: Controls and Connections
Optional Accessories 29 Charging
29 Initial Set-Up
30 LT-71: Controls and Connections
31 Charging
32 Initial Set-Up
33 REDMIKE Share: Controls and Connections
34 Charging
35 Initial Set-Up
36 iR Media Connector: Initial Setup
37 Audio Integration
37 Other Optional Accessories
SECTION 4: 38 Troubleshooting Guide
Troubleshooting 39 Tips to Obtain Optimal Audio Performance
SECTION 5: 40 Warranty Statement
Warranty &
Specifications
41 Safety Instructions
42 Safety Warnings and Certifications
43 System Specifications
TABLE OF CONTENTS
4
1. Overview 2. Setup & Use 3. Optional
Accessories 4. Troubleshooting 5. Warranty, Safety
& Specifications
SECTION 1:
OVERVIEW
SYSTEM COMPONENTS AND UNPACKING
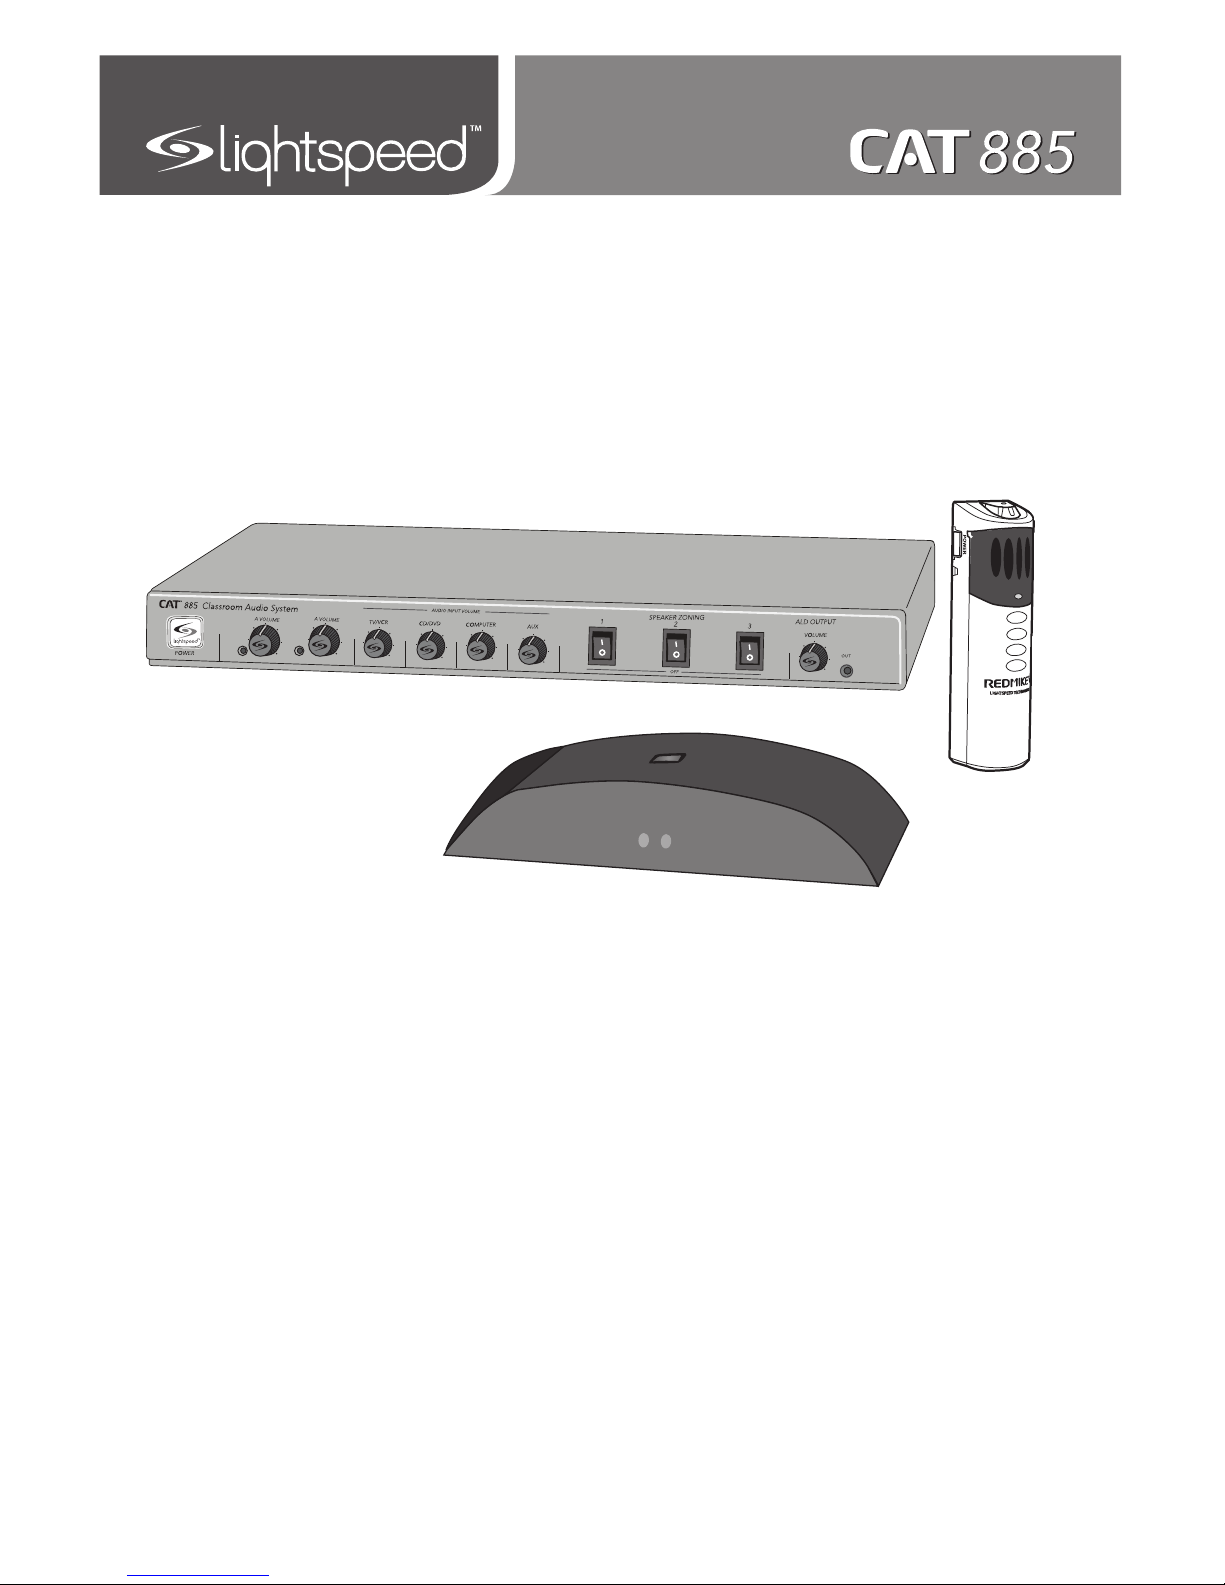
The standard configuration of the CAT 885 will contain:
ISR Infrared
Sensor/Receiver
and Cable
Charging Cradle and
Power Supply
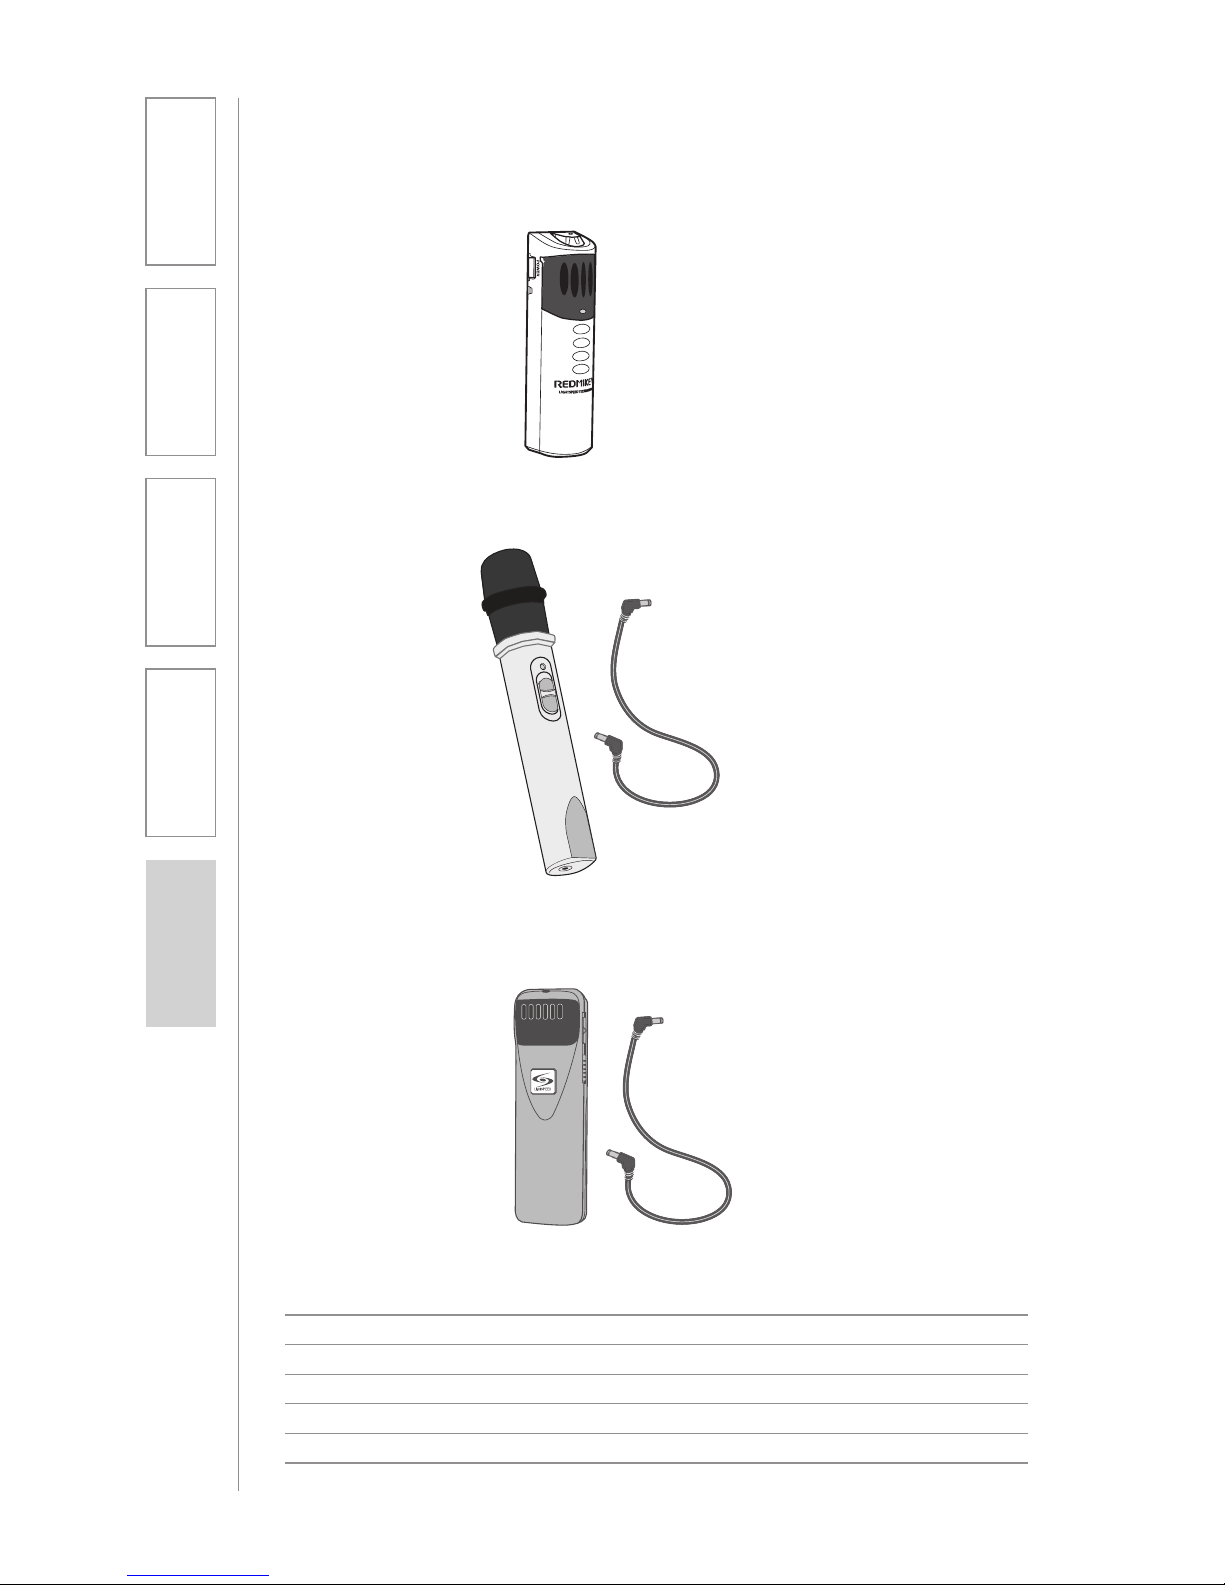
REDMIKE®
Classroom
Microphone
CAT 885 Amplifier
Amplifier Power
Supply
5
1. Overview 2. Setup & Use 3. Optional
Accessories 4. Troubleshooting 5. Warranty, Safety
& Specifications
Speakers and Speaker Wire
Systems can be configured with a variety of different speaker types,
including the following:
Standard Accessories
AMP-885 Audio amplifier/mixer
PS-24V-2.5 24V/2.5A power supply for CAT 885
RX-ISR Infrared sensor/receiver with mounting bracket
CA-P5E50 50’ plenum-rated Cat 5e cable
RMT REDMIKE classroom microphone with battery
BA-NH2A27 AA NiMH rechargeable sensing battery for REDMIKE
AC-RMLC2 REDMIKE lavaliere cord
BC-RMCC REDMIKE cradle charger
PS-5V-1.0 5V/1.0A power supply for cradle charger
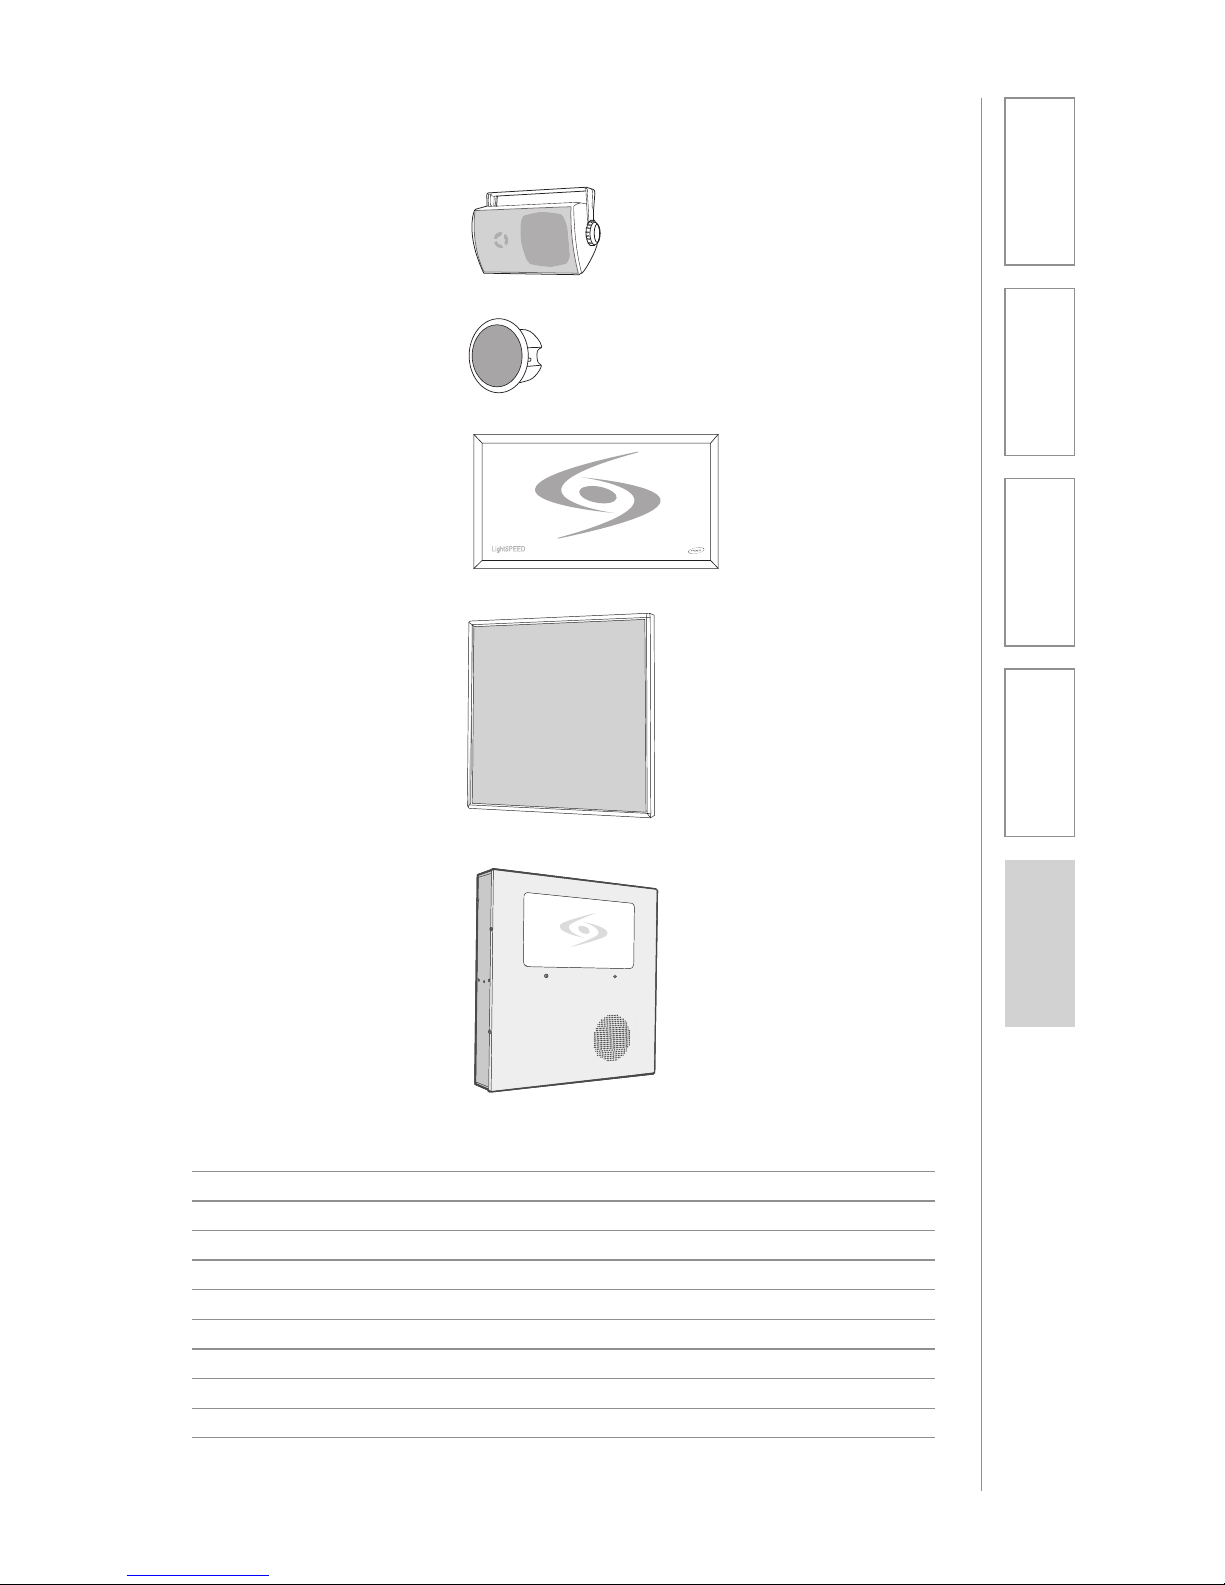
SPEAKERS Contact Lightspeed at 800.732.8999 for speaker info
NXQ (x 1)
WMQ (x 4)
DRQ (x 4)
MCQ (x 1)
CNXQ (x 1)
6
1. Overview 2. Setup & Use 3. Optional
Accessories 4. Troubleshooting 5. Warranty, Safety
& Specifications
OPTIONAL COMPONENTS
Optional equipment which may be part of your CAT 885 system:
REDMIKE® VC
Volume Control
Microphone
LT-7 1
LT-71 LightMic
and Charger
Cable
Optional Components
RMV REDMIKE VC microphone with battery
RMS REDMIKE Share handheld microphone with battery pack
LT71 LightMic microphone with batteries
BA-NH2A27 AA NiMH rechargeable sensing battery for REDMIKE
BA-NH2APK NiMH rechargeable battery pack for REDMIKE Share
BA-NH1 AA NiMH rechargeable battery for LT71 (2 per microphone)
REDMIKE Share
Handheld
Microphone and
Charger Cable
7
1. Overview 2. Setup & Use 3. Optional
Accessories 4. Troubleshooting 5. Warranty, Safety
& Specifications
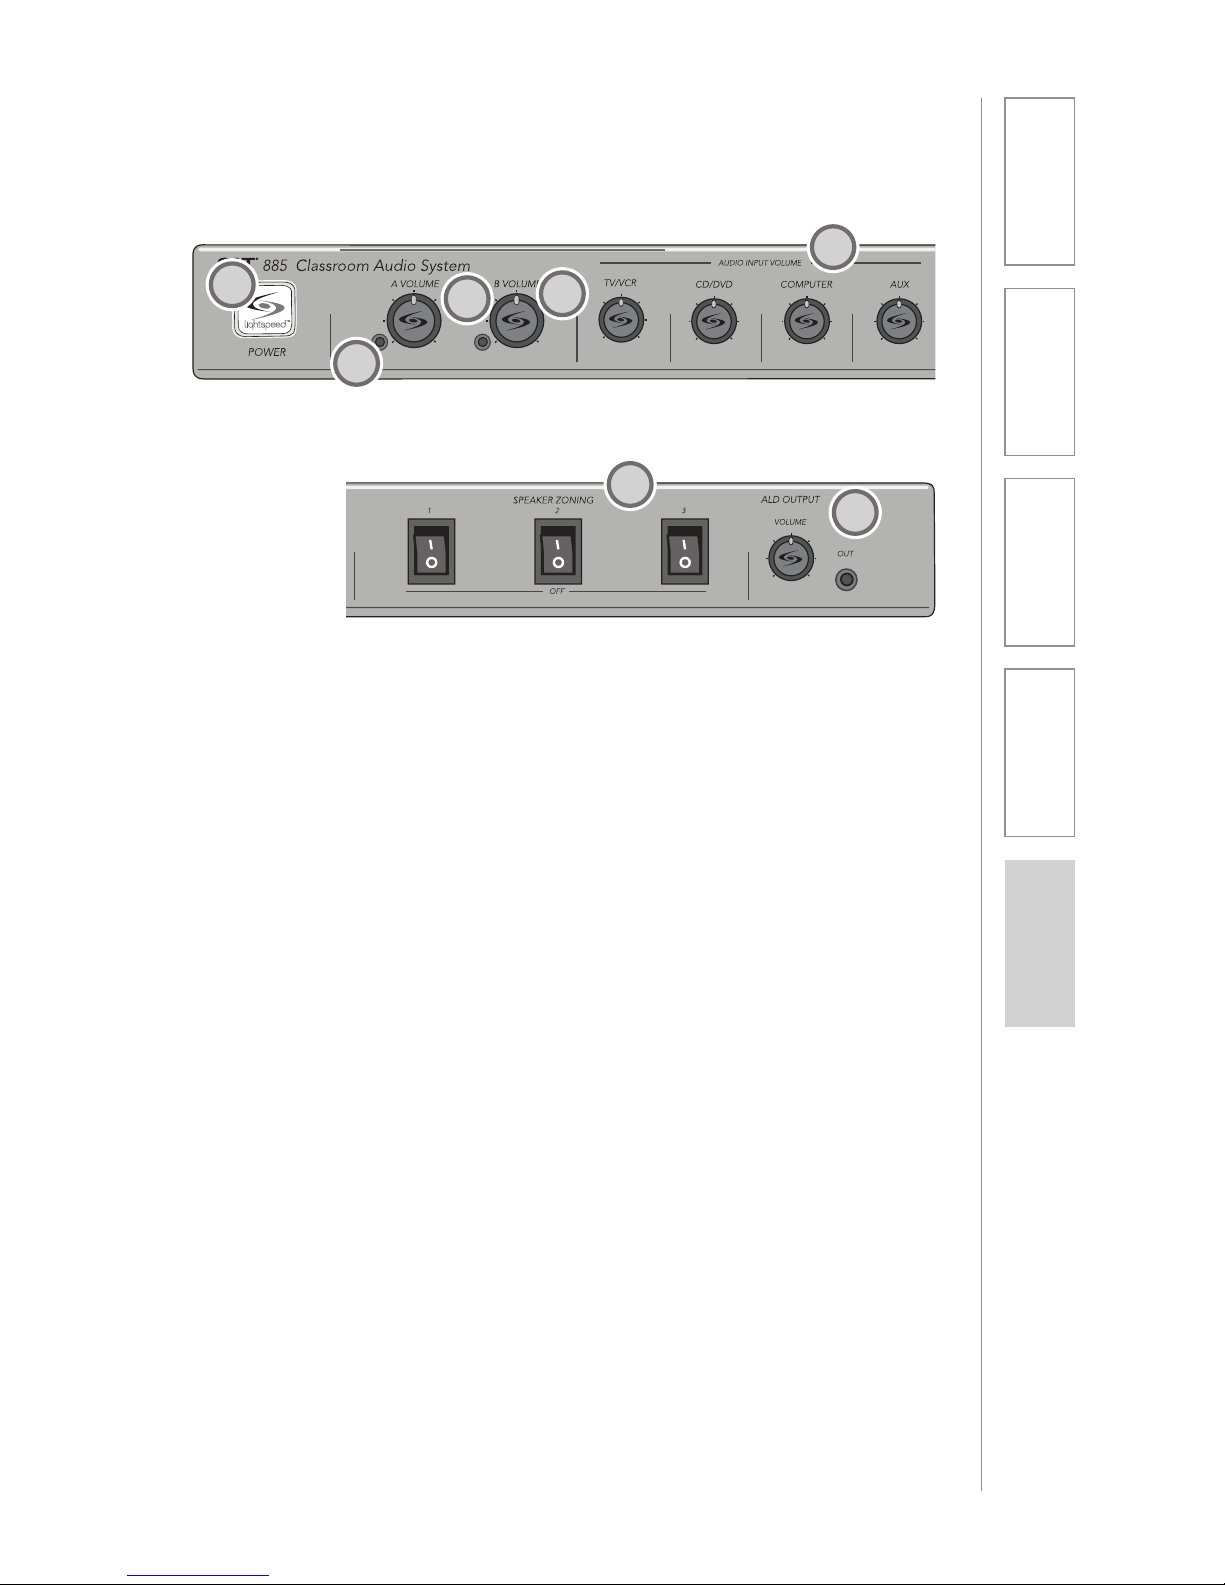
FRONT PANEL CONTROLS
1. POWER SWITCH/INDICATOR:
Press this button to turn the CAT
885 ON (pushed in) or OFF. When
the POWER is switched on, the
blue LED indicator will light.
2. AUDIO INDICATORS: These
lights flash red when audio (voice)
from the microphone is detected.
3. A VOLUME: Controls the volume
of the teacher microphone (set to
channel A).
4. B VOLUME: Controls the volume
of the student or second teacher
microphone (set to channel B).
5. AUDIO INPUT VOLUMES:
Control the volume of the audio
coming from the media source
(computer, TV/VCR, CD/DVD, etc.)
connected to the corresponding
input the rear panel.
6. SPEAKER ZONING: These
switches turn the corresponding
speakers (connected to speaker
outputs in the corresponding
zones on the back panel) ON or
OFF.
7. ALD OUTPUT AND VOLUME:
This jack sends audio to external
equipment such as an assistive
listening device (Personal FM
System) or recording device.
Use the volume control to set
the optimum signal level for the
device.
2
5
14
2
3
7
6
8
1. Overview 2. Setup & Use 3. Optional
Accessories 4. Troubleshooting 5. Warranty, Safety
& Specifications
REAR PANEL CONTROLS
1
2
3
45
6
1. SPEAKER VOLUME (1-6):
Controls the output volume of
the corresponding speaker. Fully
clockwise represents maximum
audio level supplied to the
speaker.
2. SPEAKER OUTPUTS (1-6): This
euro-block connector is used
to connect the CAT 885 to the
loudspeaker(s). Up to two 8-ohm
speakers can be connected to
each output (maximum of 12
8-ohm speakers).
3 MONO/STEREO SWITCH: This
switch toggles between mono
and stereo speaker output for
channels 5 (left) and 6 (right). This
switch impacts only the multimedia
sources (voice is always is mono)
and only outputs 5 and 6.
4. DC POWER: Plug the power
supply (24V/2.5A) into this jack.
5. PAGING INPUT AND ADJ:
Connect the input from optional
PageFirst sensor here when
interface with a buildings paging
system. Use the ADJ control to
adjust the sensitivity if needed.
6. TEACHER VOICE PRIORITY: This
3-position switch activates the
Teacher Voice Priority function
9
1. Overview 2. Setup & Use 3. Optional
Accessories 4. Troubleshooting 5. Warranty, Safety
& Specifications
7
8
9
10
11
12
7. AUX OUT AND VOL: This jack
sends audio to external equipment
such as an assistive listening
device (Personal FM System) or
recording device. Use the volume
control to set the optimum signal
level for the device.
8. 805iX INPUT: This input jack
allows for interface with the
Lightspeed 805iX wireless
microphone system, which adds
two additional microphone
channels.
9. AUDIO INPUTS: These
connections accept an audio
signal from other technology so
all multimedia can be distributed
evenly throughout the classroom.
10. 8-BAND GRAPHIC EQUALIZER:
These sliding controls allow the
installer to properly equalize the
system to produce optimum audio
quality.
11. SENSOR INPUT: The infrared
microphone audio from the ISR is
connected to this input via Cat 5
cable.
12. SENSOR SHORT: This LED glows
red when there is a short in the
ISR or cable. The system will not
operate, but is protected from
damage when the LED is lighted.
10
1. Overview 2. Setup & Use 3. Optional
Accessories 4. Troubleshooting 5. Warranty, Safety
& Specifications
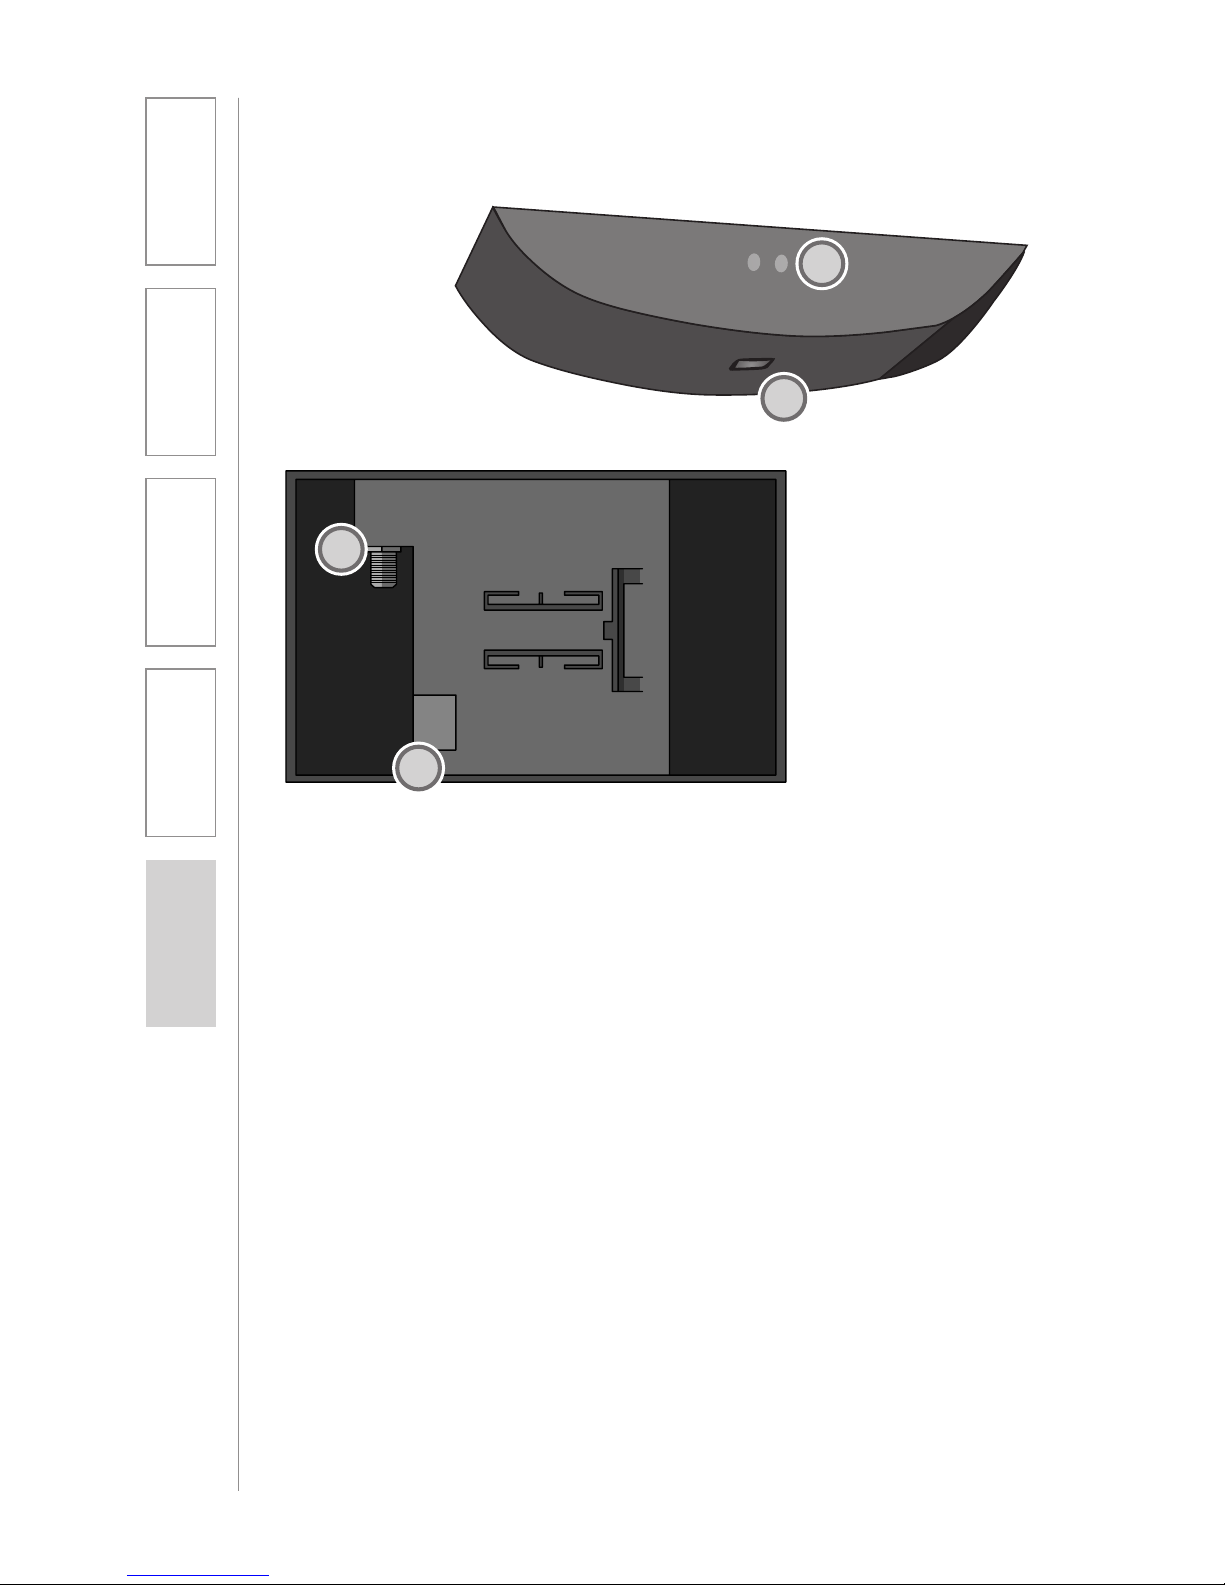
INFRARED SENSOR/RECEIVER (ISR)
CONNECTIONS
1. POWER INDICATOR: This light
will glow blue when the ISR is
receiving power from the CAT 885.
(There is a blue light in the center
of logo on the front side – add
image of this).
2. A/B IR INDICATORS: These lights
glow when the corresponding
microphone (set to channel A or
B) is turned on and transmitting.
A steady light indicates a strong
signal.
3. SENSOR OUT: Connect the Cat 5
sensor cable to this connection to
send audio from the microphones
to the CAT 885 amplifier.
4. IR EXPANSION: Connect up to
three passive IR sensors (IR-SR70F)
to this connection for larger
classrooms. For more than one
additional sensor a 3-way coax
splitter is required (HS3).
1
2
3
4
Other manuals for Cat 885
1
This manual suits for next models
1
Table of contents


