LG LFX25971ST Instruction Manual

P/No. MFL37933507
Please read this guide
thoroughly before
operating and keep it handy
for referen e at all times.
Veuillez lire e guide attentivement
avant la mise en servi e de l’appareil
et gardez-le à portée de main
pour le onsulter en as de besoin.
Lea detenidamente estas
instru iones antes utilizar
el frigorífi o y guárdelas omo
referen ia para el futuro.
LFX25971**, LFX21971**
To onta t LG Ele troni s, 24 hours a day,
7 days a week:
1-800-243-0000
Or visit us on the Web at: us.lge.com
Pour onta ter LG Ele troni s, 24 heures par
jour, 7 jours par semaine:
1-800-243-0000
Ou visitez notre site Web à l’adresse: us.lge.com
Para omuni arse on LG Ele troni s,
24 horas al día, 7 días a la semana:
1-800-243-0000
O visítenos en la Web en: us.lge.com
2
IMPORTANT SAFETY INFORMATION
Basi Safety Pre autions ........................................3
CFC Disposal ..........................................................4
How to Conne t Ele tri ity ......................................5
PARTS AND FEATURES
Spe ial Features .....................................................6
Key Parts and Components ....................................7
INSTALLATION
Choose the Proper Lo ation ...................................8
Clearan es ..............................................................8
Flooring ...................................................................9
Handle Removal......................................................9
Door and Drawer Removal....................................10
Conne ting the Water Supply ...............................16
Conne ting the Water Lines..................................16
Leveling the Refrigerator Doors ............................18
Starting..................................................................19
HOW TO USE
Control Panel Features .........................................20
The LED Display ...................................................21
Adjusting the Temperatures and Display .............22
Operating the Dispenser ......................................23
Setting the Fun tions ...........................................24
In-Door I e Bin .....................................................25
Automati I emaker .............................................26
Storing Foods .......................................................27
Lo ation of Foods .................................................28
Shelf Height Adjustment .......................................29
CARE AND CLEANING
Removing and Repla ing Components ................30
Cleaning the Refrigerator .....................................34
General Information .............................................34
Repla ing the Water Filter.....................................35
TROUBLESHOOTING
Before Calling for Servi e …………………………36
SPECIFICATIONS
Key Dimensions and Spe ifi ations .....................40
WARRANTY
Produ t Registration Information ..........................41
THANK YOU!
Congratulations on your pur hase
and wel ome to the LG family.
Your new LG Fren h Door
Refrigerator ombines
advan ed ooling te hnology
with simple operation and high
effi ien y. Follow the operating
and are instru tions in this
this manual and your refrigerator
will provide you with many years
of reliable servi e.
3
BASIC SAFETY PRECAUTIONS
This guide contains many important safety messages. Always read and obey all
safety messages.
w This is the safety alert symbol. It alerts you to safety messages that inform you of hazards that an kill
or hurt you or others or ause damage to the produ t. All safety messages will be pre eded by the safety
alert symbol and the hazard signal word DANGER, WARNING, or CAUTION. These words mean:
wDANGER You might be killed or seriously injured if you don’t follow instru tions.
wWARNING You can be killed or seriously injured if you don’t follow instru tions.
wCAUTION Indi ates an imminently hazardous situation whi h, if not avoided, may
result in minor or moderate injury, or produ t damage.
All safety messages will identify the hazard, tell you how to redu e the han e of injury, and tell you
what an happen if the instru tions are not followed.
wWARNING
To reduce the risk of fire, electric shock, or
injury to persons when using your product,
basic safety precautions should be followed,
including the following.
Read all instructions before using this appliance.
• NEVER unplug your refrigerator by pulling on the
power ord. Always grip the plug firmly and pull it
straight out from the outlet.
• Repair or repla e immediately all ele tri servi e
ords that have be ome frayed or otherwise
damaged. Do not use a ord that shows ra ks or
abrasion damage along its length or at either the
plug or onne tor end.
• When moving your refrigerator away from the wall,
be areful not to roll over or damage the power ord.
• DO NOT store or use gasoline or other flammable
vapors and liquids in the vi inity of this or any other
applian e.
• DO NOT allow hildren to limb, stand, or hang on
the refrigerator doors or shelves in the refrigerator.
They ould damage the refrigerator and seriously
injure themselves.
• Keep fingers out of pin h point areas; learan es
between the doors and abinet are ne essarily
small. Be areful losing doors when hildren are
in the area.
• Unplug your refrigerator before leaning or making
any repairs.
NOTE: Servi e should be performed by a qualified
te hni ian.
• Before repla ing a burned-out light bulb, unplug the
refrigerator or turn off power at the ir uit breaker
or fuse box in order to avoid onta t with a live wire
filament. (A burned-out light bulb may break when
being repla ed.)
NOTE: Some models have LED interior lighting and
servi e should be performed by a qualified
te hni ian.
NOTE: Setting either or both ontrols to the OFF
position does not remove power to the light ir uit.
• When you are finished, re onne t the refrigerator to
the ele tri al sour e and reset the ontrol
(Thermostat Refrigerator Control, or Freezer
Control, or Freezer Control, depending on the
model) to the desired setting.
• This refrigerator must be properly installed in
a ordan e with the Installer Instructions that
were taped to the front of the refrigerator.
• After your refrigerator is in operation, do not tou h
the old surfa es in the freezer ompartment when
hands are damp or wet. Skin may adhere to the
extremely old surfa es.
• In refrigerators with automati i emakers, avoid
onta t with the moving parts of the eje tor
me hanism or with the heating element that
releases the ubes. DO NOT pla e fingers or hands
on the automati i emaking me hanism while the
refrigerator is plugged in.
• Do not modify or extend the power cord length.
It will ause ele tri sho k or fire.
4
BASIC SAFETY PRECAUTIONS (CONT.)
• DO NOT refreeze frozen foods whi h have
thawed ompletely. The United States
Department of Agri ulture in Home and Garden
Bulletin No. 69 says:
…You may safely refreeze frozen foods that have
thawed if they still ontain i e rystals or if they are
still old—below 40°F (4°C).
…Thawed ground meats, poultry, or fish that have
any off-odor or off- olor should not be refrozen
and should not be eaten. Thawed i e ream
should be dis arded. If the odor or olor of any
food is poor or questionable, dispose of it. The
food may be dangerous to eat.
Even partial thawing and refreezing redu es the
quality of foods, parti ularly fruits, vegetables,
and prepared foods. The eating quality of red
meats is affe ted less than that of many other
foods. Use refrozen foods as soon as possible to
save as mu h of their quality as you an.
CFC DISPOSAL
Your old refrigerator may have a ooling system
that used CFCs ( hlorofluoro arbons). CFCs are
believed to harm stratospheri ozone.
If you are throwing away your old refrigerator,
make sure the CFC refrigerant is removed for
proper disposal by a qualified servi er. If you
intentionally release this CFC refrigerant, you an
be subje t to fines and imprisonment under
provisions of environmental legislation.
wDANGER
Risk of Child Entrapment
Dis arded or abandoned refrigerators are
dangerous, even if they will sit for just a few
days. If you are disposing of your old refrigerator,
please follow the instru tions below to help prevent
a idents.
Before you throw away your old refrigerator or
freezer:
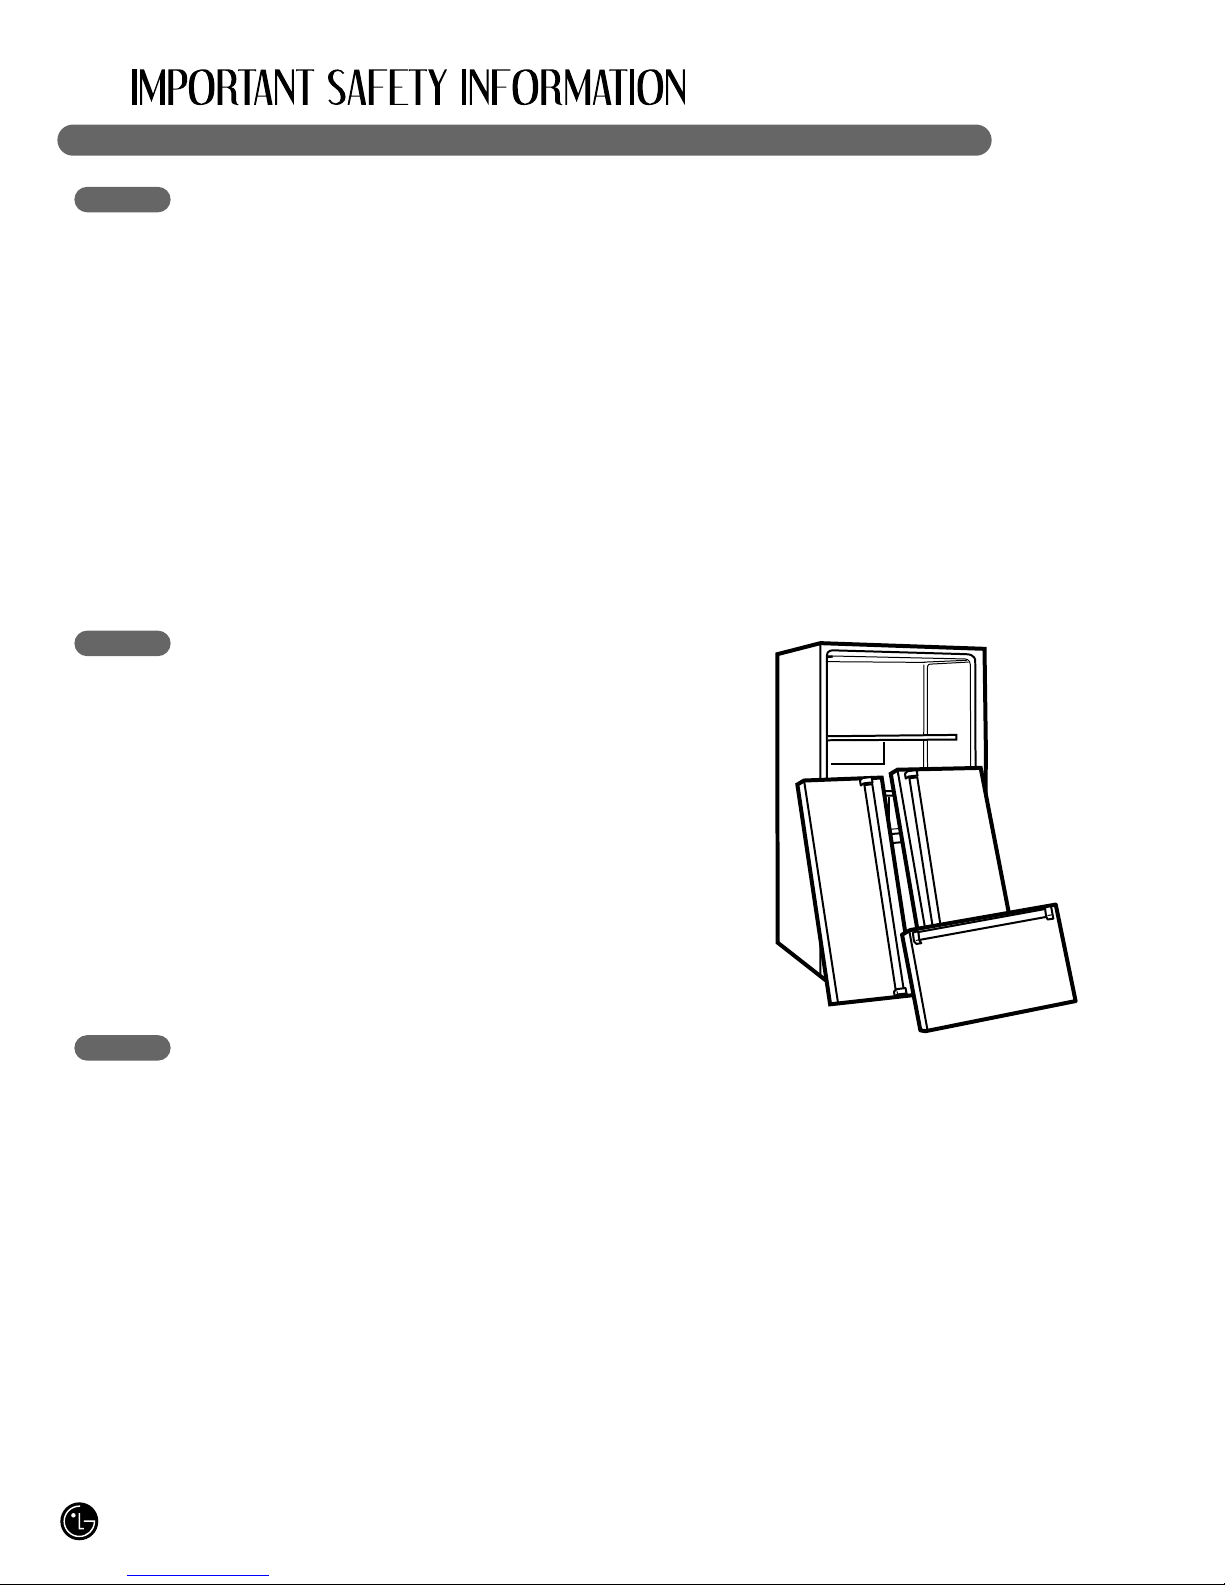
• Take off the doors.
• Leave the shelves in pla e so that hildren may
not easily limb inside.

5
HOW TO CONNECT ELECTRICITY
IMPORTANT: Please read carefully.
wWARNING
Electrical Shock Hazard
For personal safety, this appliance must be
properly grounded. Have the wall outlet and
the circuit checked by a qualified electrician to
make sure the outlet is properly grounded.
RECOMMENDED GROUNDING METHOD
The refrigerator should always be plugged into
its own individual properly grounded ele tri al
outlet rated for 120 volts, 60 Hz, AC only, and
fused at 20 amperes. This provides the
best performan e and also prevents overloading
house wiring ir uits whi h ould ause a fire
hazard from overheated wires. It is
re ommended that a separate ir uit serving
only this applian e be provided.
Use a re epta le whi h annot be turned off with
a swit h or pull hain. Do not use an extension
ord. Where a standard two-prong wall outlet is
en ountered, it is your personal responsibility
and obligation to have it repla ed with a properly
grounded three-prong wall outlet.
Do not, under any circumstances, cut or
remove the third (ground) prong from the
power cord.
Do not use an adapter plug.
NOTE: Some models have LED interior lighting and
servi e should be performed by a qualified te hni ian.
When you are finished, re onne t the refrigerator to
the ele tri al sour e and reset the ontrol
(Thermostat, Refrigerator Control, or Freezer Control,
depending on the model) to the desired setting.
USE OF EXTENSION CORDS
Because of potential safety hazards under
certain conditions, we strongly recommend
against the use of an extension cord.
However, if you still ele t to use an extension
ord, it is absolutely ne essary that it be a UL-listed
(USA), 3-wire grounding-type applian e
extension ord having a grounding-type plug
and outlet and that the ele tri al rating of the
ord be 20 amperes (minimum) and 120 volts.
Use of an extension ord will in rease the
learan e needed for the ba k of the
refrigerator.
SAVE THESE INSTRUCTIONS

6
SPECIAL FEATURES
CONTROL PANEL LED DISPLAY SCREEN
Simple ele troni ontrols are user-friendly.
The LED s reen shows refrigerator and freezer
temperatures, displays water filter status,
dispenser information, and more.
ICE PLUS
When this feature is a tivated, the freezer se tion
will run at the oldest temperature for a 24- hour
period to in rease i e produ tion by about 20
per ent.
FILTERED WATER AND ICE DISPENSER
The water dispenser offers fresh, hilled, filtered
water through the door. The i e dispenser offers
ubed or rushed i e.
DOOR ALARM
A warning alarm sounds at 30-se ond intervals
when the refrigerator or freezer door is left open
for more than 60 se onds.
IN-DOOR ICE BIN
The i emaker automati ally produ es 80–130
i e ubes in a 24-hour period to keep the i e
dispenser fully supplied. The in-door design
reates more shelf spa e.
CRISPERS
LG’s rispers preserve humidity and
help vegetables stay risp.
1
2
3
4
5
6
1
2
3
4
5
6

7
KEY PARTS AND COMPONENTS
In addition to the spe ial features and
omponents outlined in the Special Features
se tion, there are several other important
omponents that are referen ed in this manual.
ADJUSTABLE REFRIGERATOR SHELVING
The refrigerator ompartment shelves are
adjustable to allow flexibility for storage needs.
MODULAR DOOR BINS
Three inter hangeable bins an be arranged to
suit your storage needs.
REMOVABLE ICE STORAGE BIN
The i e storage bin an be removed to fill i e
bu kets, oolers, or pit hers.
LED INTERIOR LAMPS
Two separate LED arrays light the freezer and
refrigerator interiors.
NON TILTING DOOR BIN
FIXED DOOR BIN
1
2
4
5
36
3
5
4
6
1
2
4

8
CHOOSE THE PROPER LOCATION
wWARNING
Excessive Weight Hazard
Two or more people are required when
moving and unpacking the appliance.
• Store and install the refrigerator where it will not
be exposed to temperatures below freezing or
exposed to outdoor weather onditions.
• Install this applian e in an area where the
temperature is between 55°F (13°C) and 110°F
(43°C). If the temperature around the applian e
is too low or too high, ooling ability may be
adversely affe ted.
• If this refrigerator is installed where the
temperature is above 110°F (43°C), the
freezing apa ity is ompromised and the ost
of ele tri ity used in reases.
• To redu e the risk of ele tri sho k, do not
install the refrigerator in a wet or damp area.
• Sele t a pla e where a water supply an be
easily onne ted for the automati i emaker
and dispenser.
• Unstable installation may ause vibration and
noise. If the floor is not even, make the
refrigerator level by rotating the height adjusting
s rews.
• Properly ground the refrigerator to onform with
all governing odes and ordinan es.
wCAUTION
Avoid placing the unit near heat sources,
direct sunlight, or moisture.
CLEARANCES
• Too small a distan e from adja ent items may
result in lowered freezing apability and
in reased ele tri ity onsumption harges.
Allow at least 24 in. (61 m) in front of the
refrigerator to open the doors.
NOTE: For omplete dimensions and spe ifi ations,
see page 40.
1" (2.54 m)

9
FLOORING
• To minimize noise and vibration, the refrigerator
MUST be installed on a solidly onstru ted
floor.
• To avoid vibration, the unit must be level. If
required, adjust the leveling legs to ompensate
for unevenness of the floor. The front should be
slightly higher than the rear to aid in door
losing. The leveling legs an be turned easily
by pushing against the top of the refrigerator to
take the weight off the feet. Turn the leveling
legs lo kwise to raise the unit or
ounter lo kwise to lower it.
• Carpeting and soft tile surfa es are not
re ommended.
• Never install the refrigerator on a platform or
weakly supported stru ture.
NOTE: When moving the refrigerator for leaning
or servi e, be sure to prote t the floor. Always
pull the refrigerator straight out when moving it.
Do not wiggle or walk the refrigerator when trying
to move it; floor damage ould o ur.
HANDLE REMOVAL
To move the refrigerator through a house door, it
may be ne essary to remove the refrigerator
door handles.
NOTE: Handle appearan e may vary from
illustrations on this page.
wCAUTION
• Use spe ial are when removing handles to
prevent s rat hing the doors.
• The handle ould be damaged if you hit it with
a hammer while removing or atta hing.
• When you assemble or disassemble a handle,
you must push or pull with reasonable for e.
NOTE: It is re ommend that the doors be removed when it is ne essary to move the refrigerator through a
narrow opening.
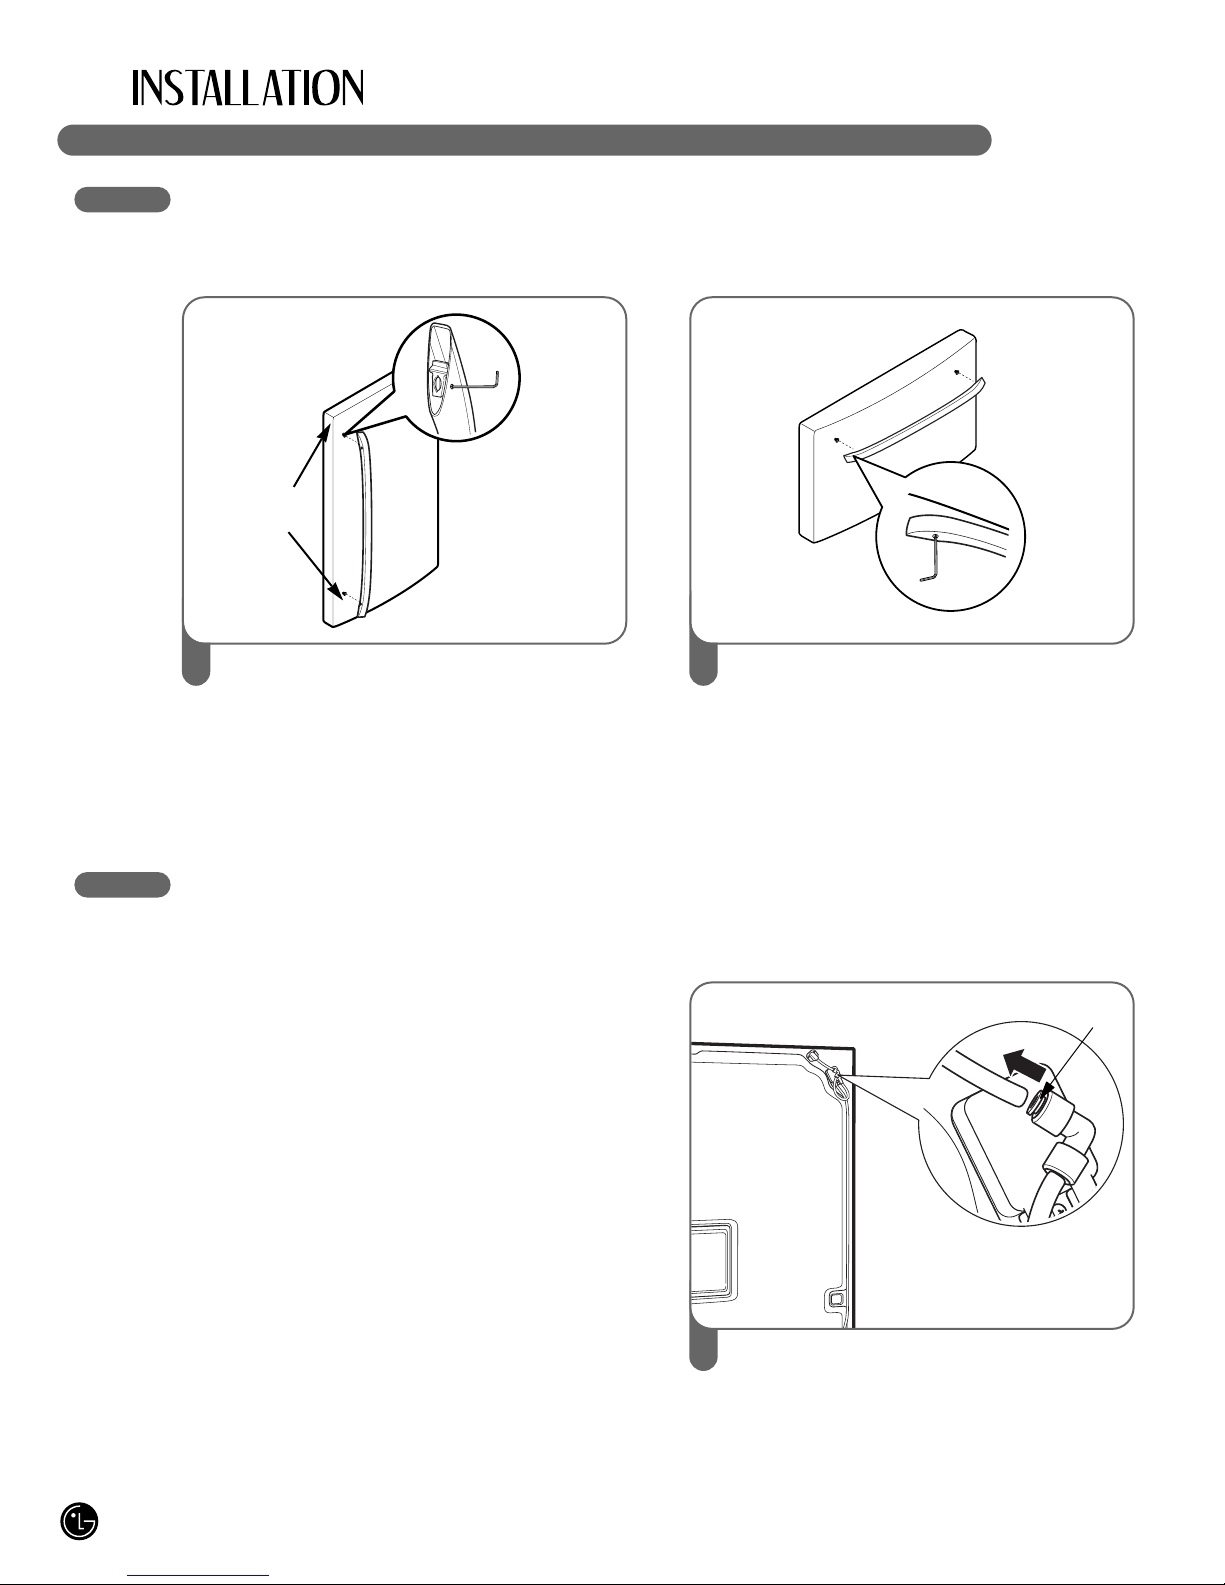
Loosen the set s rews with a 2.5 mm (3/32")
Allen wren h and remove the handle.
NOTE: If the handle mounting fasteners need
to be tightened or removed, use a 1/4" Allen
wren h.
1
Loosen the set s rews lo ated on the lower
side of the handle with a 2.5 mm (3/32") Allen
wren h and remove the handle.
NOTE: If the handle mounting fasteners need
to be tightened or removed, use a 1/4" Allen
wren h.
2
Mounting
Fasteners
Set Screw
Allen Wrench
10
HANDLE REMOVAL (CONT.)
HANDLE REINSTALLATION
DOOR AND DRAWER REMOVAL
DOOR REMOVAL
wWARNING
Electric Shock Hazard
• Dis onne t ele tri al supply to the refrigerator
before installing. Failure to do so ould result in
death or serious injury.
• Do not put hands or feet or metal sti ks into the air
vents, base grille, or bottom of the refrigerator. You
may be injured or re eive an ele tri al sho k.
• Be areful when you work with the hinge, base
grille, and stopper. You may be injured.
Before you begin, remove food and bins from the
doors.
If your entran e door is too narrow for the refrigerator
to pass through, remove the refrigerator door and
move the refrigerator sideways through the doorway.
Pla e the handle on the door by aligning
handle footprints to fit mounting fasteners and
tighten the set s rews with a 2.5 mm (3/32
"
)
Allen wren h.
NOTE: If the handle mounting fasteners need
to be tightened or removed use a 1/4
"
Allen
wren h
1Pla e the handle on the door by aligning
handle footprints to fit mounting fasteners and
tighten the set s rews on the bottom of the
handle with a 2.5 mm (3/32
"
) Allen wren h.
NOTE: If the handle mounting fasteners need
to be tightened or removed use a 1/4
"
Allen
wren h.
2
To remove the left refrigerator door:
Pull the water tube out of the fitting while
pressing the release ring on the fitting.
NOTE : When you pull out the tube, first you
have to push the ollet by opposite dire tion
of arrow in the upper pi ture and pull the tube
out by dire tion of arrow.
1
Mounting
Fasteners
Collet
Other manuals for LFX25971ST
1
This manual suits for next models
6
Table of contents
Other LG Refrigerator manuals