LG 22MB35Y User manual

www.lg.com
22MB35Y
IPS LED MONITOR MODEL
Please read this manual carefully before operating
your set and retain it for future reference.
Owner's Manual
IPS LED MONITOR
(LED MONITOR*)
*LG LED Monitors are LCD Monitors with LED Backlighting.

2
ENG
ENGLISH
TABLE OF CONTENTS
CONTENTS
3 ASSEMBLINGANDPREPAR-
ING
3 Unpacking
4 Partsandbuttons
5 SettinguptheMonitorset
5 - AttachingtheStandBase
5 - DetachingtheStandBase
6 - Mountingonatable
7 - UsingtheKensingtonlockingdevice
8 - Mountingonawall
9 USINGTHEMONITORSET
9 ConnectingtoaPC
9 - D-SUBconnection
9 - DVI-Dconnection
11 - Peripheraldeviceconnection
12 CUSTOMIZINGSETTINGS
13 CustomizingSettings
13 - MenuSettings
14 -Picture
15 -Color
16 -Display
16 -Audio
17 -Others
18 READERSetting
19 -SUPERENERGYSAVING
20 TROUBLESHOOTING
22 SPECIFICATIONS
22 22MB35Y
23 PresetModes(Resolution)
23 Indicator
24 PROPERPOSTURE
24 ProperpostureforusingtheMonitorset.
3
ENG
ENGLISH
ASSEMBLING AND PREPARING
ASSEMBLINGANDPREPARING
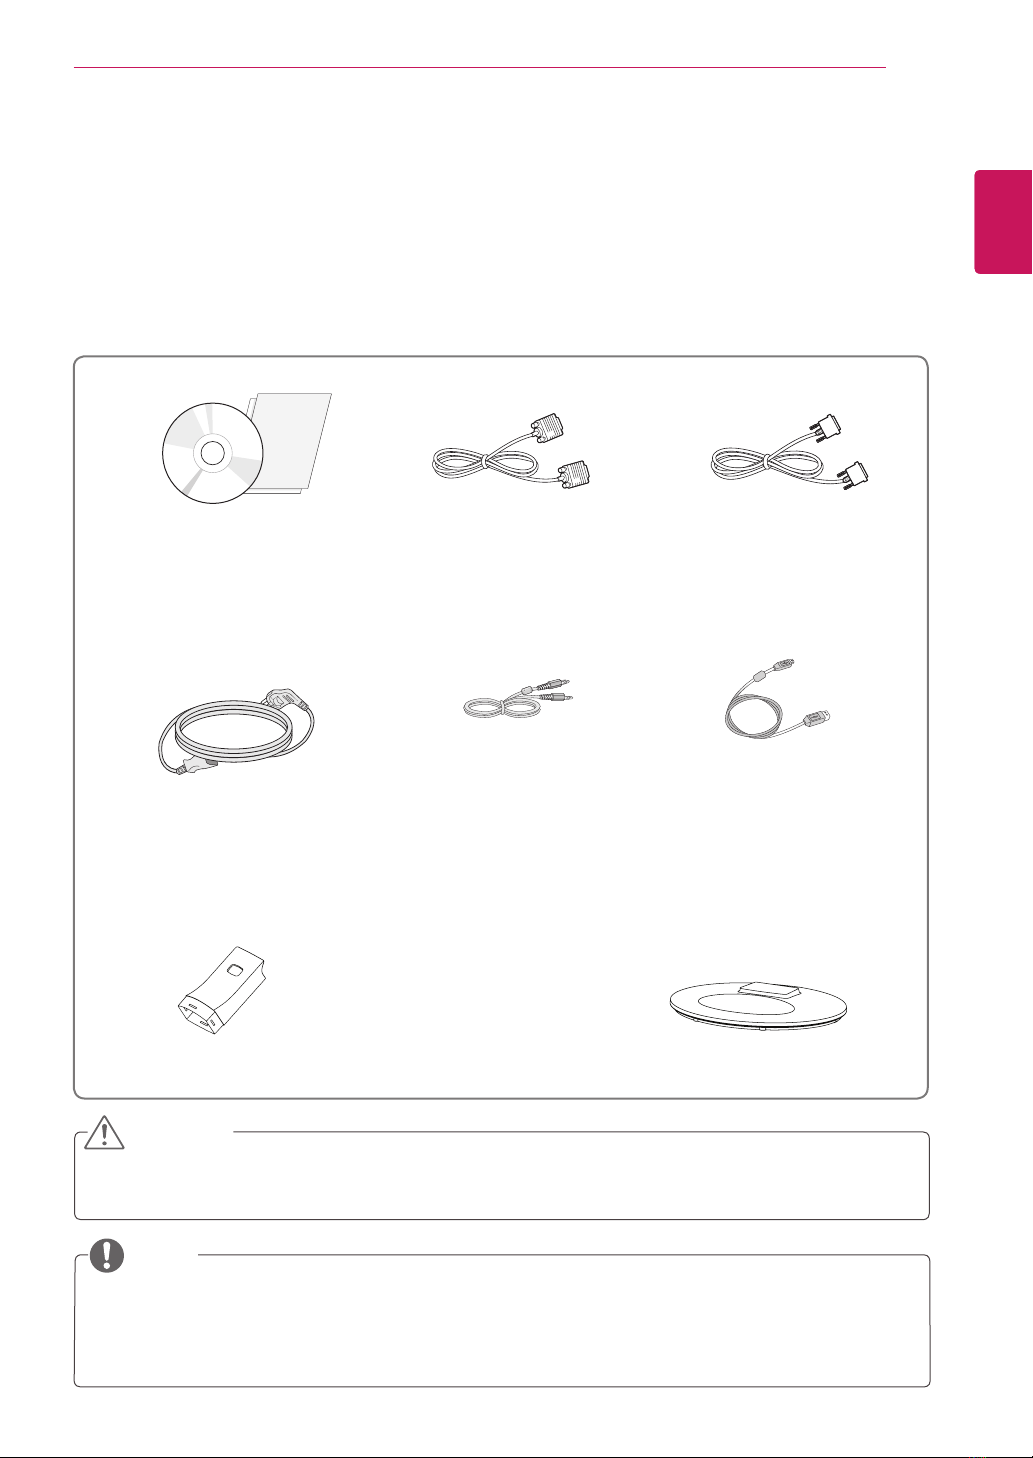
Unpacking
Checkyourproductboxforthefollowingitems.Ifthereareanymissingaccessories,contactthelocal
dealerwhereyoupurchasedyourproduct.Theillustrationsinthismanualmaydifferfromtheactualproduct
andaccessories.
Donotuseanyunapprovedaccessoriestoensurethesafetyandproductlifespan.
Anydamagesorinjuriesbyusingunapprovedaccessoriesarenotcoveredbythewarranty.
Theaccessoriessuppliedwithyourproductmayvarydependingonthemodel.
Productspecificationsorcontentsinthismanualmaybechangedwithoutpriornoticeduetoupgrade
ofproductfunctions.
CAUTION
NOTE
CD(Owner'sManual)/
Card
D-SUBCable
(Thiscableisnotincludedinall
countries.)
PowerCord
DVI-DCable
(Thiscableisnotincludedinall
countries.)
(Dependingonthecountry) (Dependingonthecountry)
USBCable
AudioCable
StandBody StandBase

5
ENG
ENGLISH
ASSEMBLING AND PREPARING
AttachtheStandBodytothemonitorset.
AttachtheStandBase.
Tiedownthebaselocktoperpendicularity
direction.
SettinguptheMonitorset
AttachingtheStandBase
1 PlacetheMonitorsetwiththescreenside
downonaflatandcushionedsurface.
Layafoammatorsoftprotectivecloth
onthesurfacetoprotectthescreenfrom
damage.
CAUTION
2
StandBase
StandBody
1
2
3
DetachingtheStandBase
1 PlacetheMonitorsetwiththescreenside
downonaflatandcushionedsurface.
StandBase
StandBody
PushingthePUSHbutton,TaketheStand
Bodyfromthemonitorset.
Changeyourlockontheproductasit
followsandturnitinthearrowdirection.
PullouttheStandBase.
1
2
3
2
Ifyoucan'treleasethestandbaseeventhe
lockingknobisatareleaseposition,Please
pushtheindicatedknobdownandretryit.
CAUTION
Thisillustrationdepictsthegeneralmodelof
connection.Yourmonitormaydifferfromthe
itemsshowninthepicture.
Donotcarrytheproductupsidedownholding
onlythestandbase.Theproductmayfall
andgetdamagedorinjureyourfoot.
CAUTION

6
ENG
ENGLISH
ASSEMBLING AND PREPARING
Mountingonatable
1 Liftthemonitorandplaceitonthetableinan
uprightposition.
Installatleast10cmawayfromthewallto
ensuresufficientventilation.
2
3 Pressthe (Power)buttononthefrontofthe
monitortoturnonthemonitor.
10 cm
10 cm
10 cm
10 cm
Unplugthepowercordpriortomovingor
installingthemonitor.Thereisriskofelectric
shock.
CAUTION
ConnectthePowercordtothemonitor,then
plugthepowercordintothewalloutlet.
Whenyouadjusttheangle,donotholdthe
bottomoftheMonitorsetframeasshownon
thefollowingillustration,asmayinjureyour
fingers.
Donottouchorpressthescreenwhen
adjustingtheangleofthemonitor.
Donotholdthissetlikebelowpicture.Monitor
screencandetachfromstandbaseandinjure
yourbody.
WARNING
Tiltfrom+20to-5degreesupordowntoadjust
theangleoftheMonitorsettosuityourview.
NOTE
Front Rear
7
ENG
ENGLISH
ASSEMBLING AND PREPARING
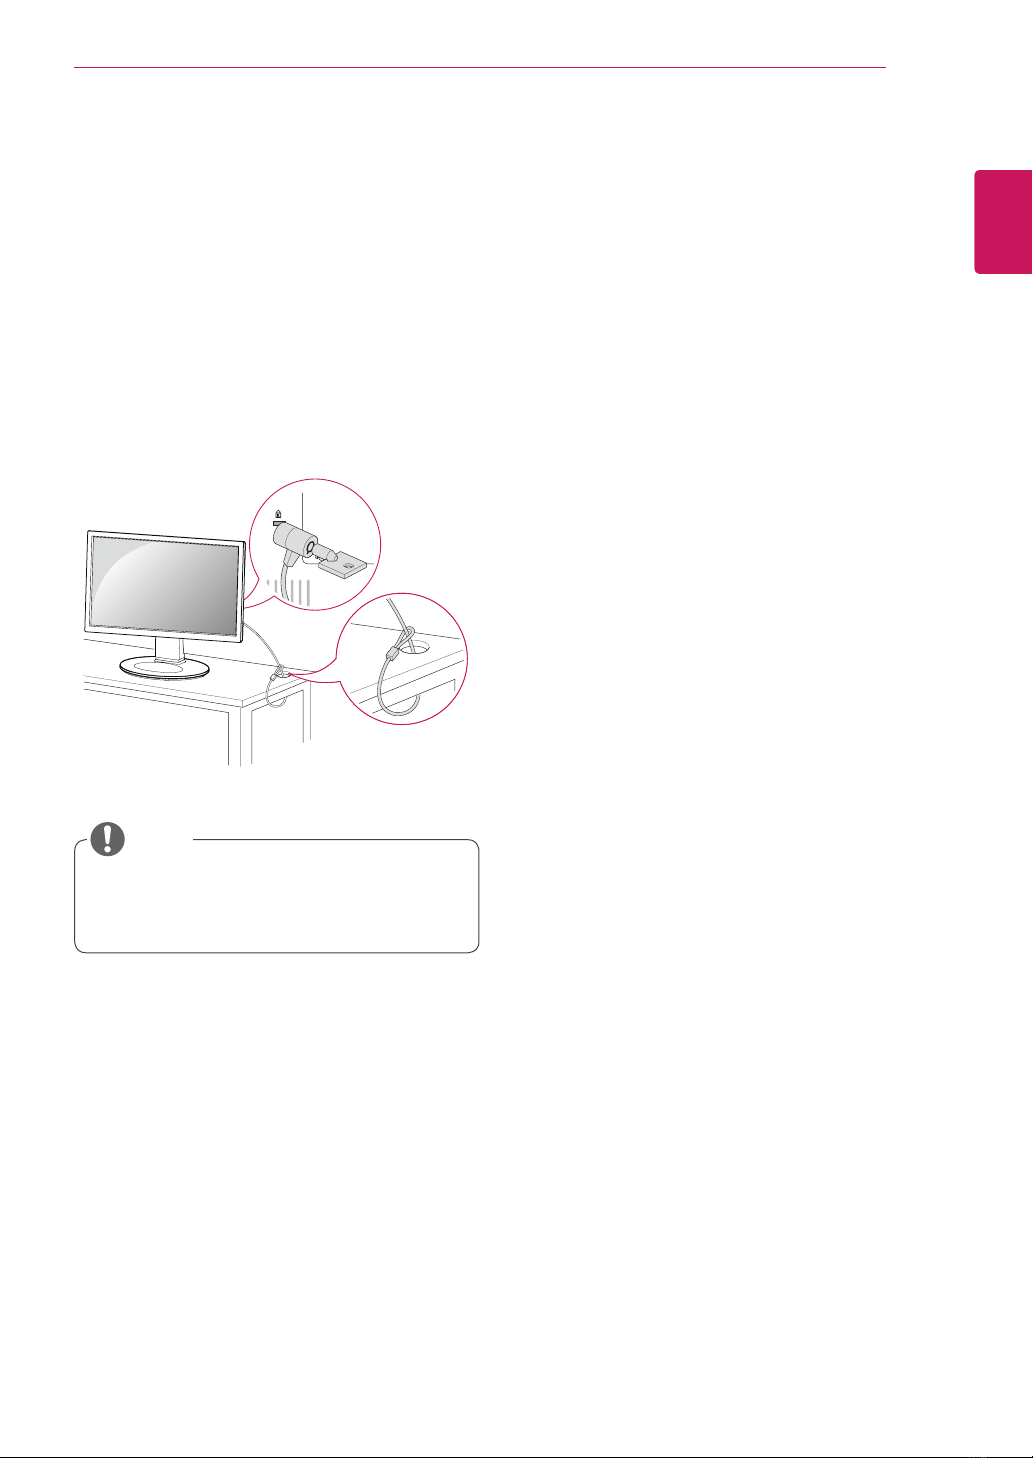
Using the Kensington locking
device
TheconnectorfortheKensingtonlockislocated
ontherearofthemonitor.
Formoreinformationoninstallationandusage,
refertotheKensingtonlockusermanualorvisit
thewebsiteathttp://www.kensington.com.
ConnectthemonitortothetablewiththeKensing-
tonlockcable.
UsingtheKensingtonlockisoptional.The
accessoriescanbepurchasedatyourlocal
electronicsstore.
NOTE
8
ENG
ENGLISH
ASSEMBLING AND PREPARING
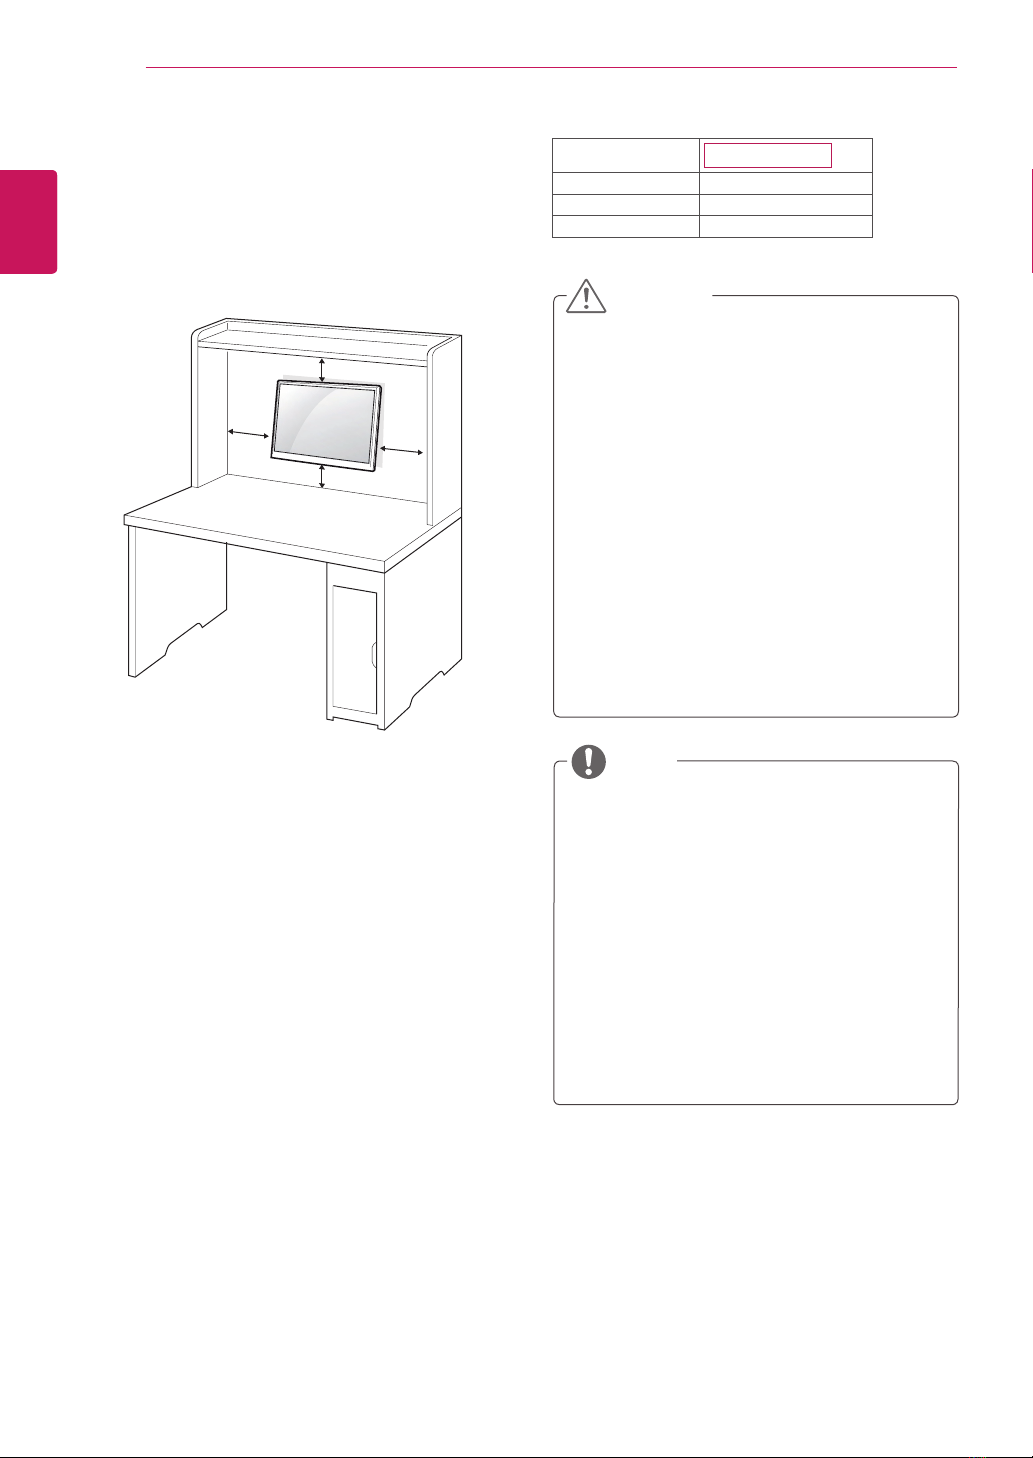
Mountingonawall
Forproperventilation,allowaclearanceof10cm
oneachsideandfromthewall.Detailed
instructionsareavailablefromyourdealer,seethe
optionalTiltWallMountingBracketInstallationand
SetupGuide.
IfyouintendtomounttheMonitorsettoawall,
attachWallmountinginterface(optionalparts)to
thebackoftheset.
WhenyouinstalltheMonitorsetusingawall
mountinginterface(optionalparts),attachit
carefullysoitwillnotdrop.
1Please,Usethescrewandwallmountinterface
inaccordancewithVESAStandards.
2Ifyouusescrewlongerthanstandard,the
monitormightbedamagedinternally.
3Ifyouuseimproperscrew,theproductmightbe
damagedanddropfrommountedposition.In
thiscase,LGElectronicsisnotresponsiblefor
it.
4VESAcompatible.
5PleaseuseVESAstandardasbelow.
784.8mm(30.9inch)andunder
*WallMountPadThickness:2.6mm
*Screw:Φ4.0mmxPitch0.7mmx
Length10mm
787.4mm(31.0inch)andabove
*PleaseuseVESAstandardwallmountpad
andscrews.
10 cm
10 cm
10 cm
10 cm
Disconnectthepowercordfirst,andthen
moveorinstalltheMonitorset.Otherwise
electricshockmayoccur.
IfyouinstalltheMonitorsetonaceilingor
slantedwall,itmayfallandresultinsevere
injury.
UseonlyanauthorizedLGwallmount
andcontactthelocaldealerorqualified
personnel.
Donotovertightenthescrewsasthismay
causedamagetotheMonitorsetandvoid
yourwarranty.
Useonlyscrewsandwallmountsthat
meettheVESAstandard.Anydamages
orinjuriesbymisuseorusinganimproper
accessoryarenotcoveredbythewarranty.
UsethescrewsthatarelistedontheVESA
standardscrewspecifications.
Thewallmountkitwillincludeaninstallation
manualandnecessaryparts.
Thewallmountbracketisoptional.Youcan
obtainadditionalaccessoriesfromyourlocal
dealer.
Thelengthofscrewsmaydifferdepending
onthewallmount.Besuretousetheproper
length.
Formoreinformation,refertothe
instructionssuppliedwiththewallmount.
CAUTION
NOTE
Model 22MB35Y
VESA(AxB) 100x100
Standardscrew M4
Numberofscrews 4
9
ENG
ENGLISH
USING THE MONITOR SET
USINGTHEMONITORSET
ConnectingtoaPC
YourMonitorsetsupportsPlug&Play*.
*Plug&Play:APCrecognizesaconnected
devicethatusersconnecttoaPCandturn
on,withoutdeviceconfigurationoruser
intervention.
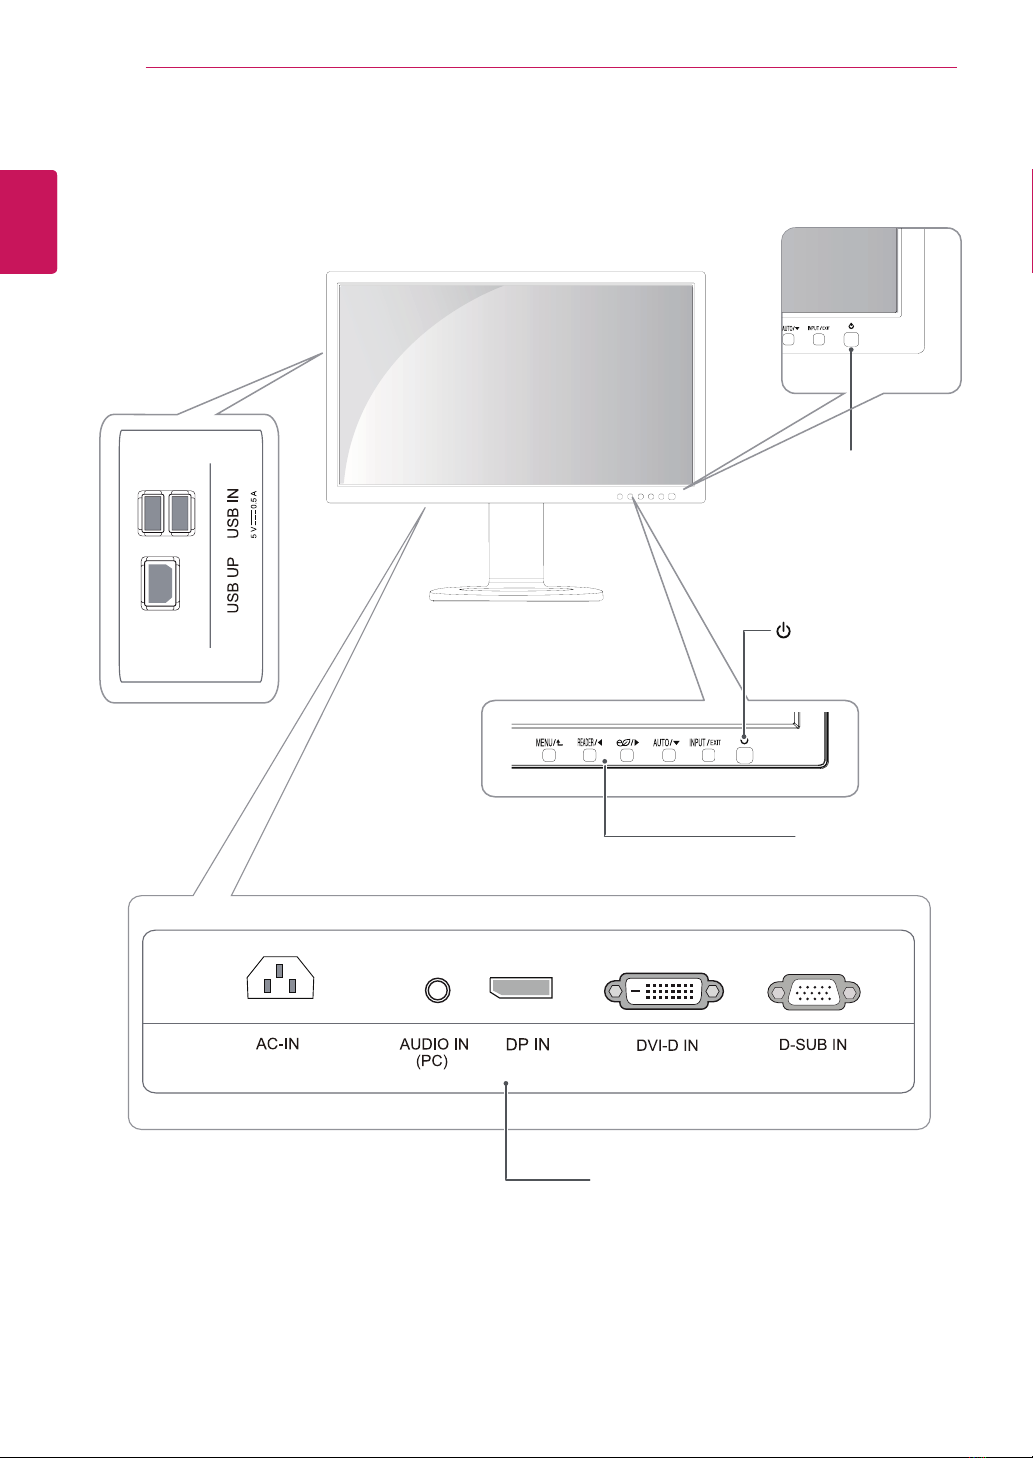
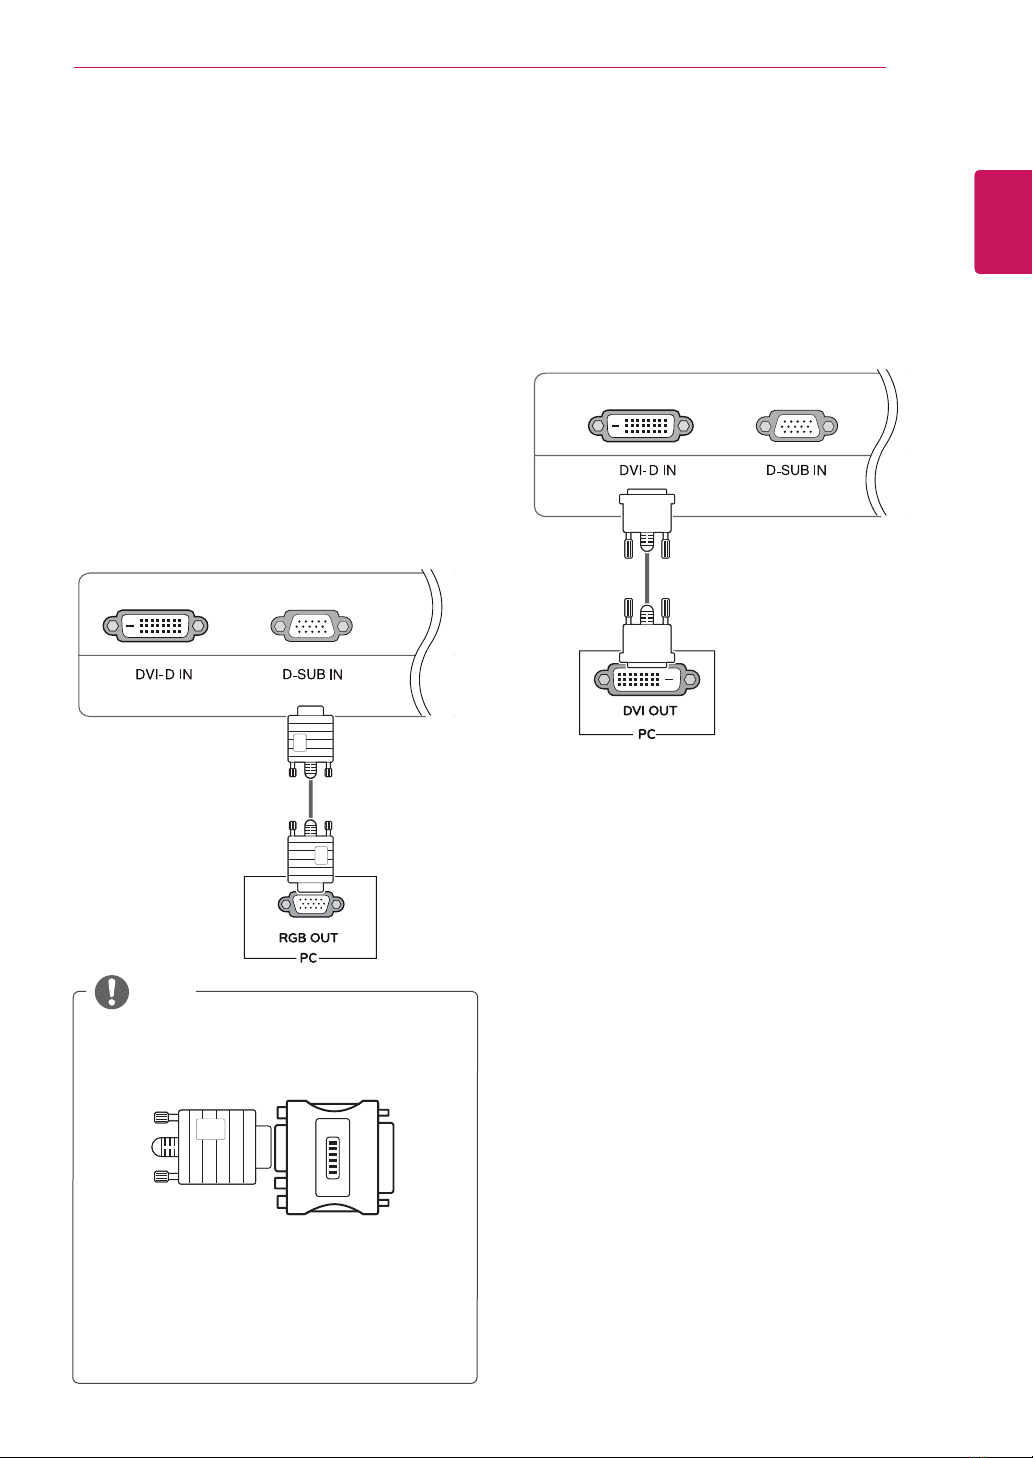
D-SUBconnection
TransmitsanalogvideofromyourPCtothe
Monitorset.ConnectthePCandtheMonitorset
withthesuppliedD-sub15pinsignalcableas
showninthefollowingillustrations.
Macadapter
ForAppleMacintoshuse,aseparateplug
adapterisneededtochangethe15pin
highdensity(3row)D-SUBVGAconnector
onthesuppliedcabletoa15pin2row
connector.
WhenusingaD-Subsignalinputcable
connectorforMacintosh
NOTE
DVI-Dconnection
TransmitsadigitalvideosignalfromyourPCto
theMonitorset.ConnectthePCandtheMonitor
setwithaDVIcableasshowninthefollowing
illustrations.
10
ENG
ENGLISH
USING THE MONITOR SET
"SelfImageSetting"Function.
Thisfunctionprovidestheuserwithoptimal
displaysettings.Whentheuserconnects
themonitorforthefirsttime,thisfunction
automaticallyadjuststhedisplaytooptimal
settingsforindividualinputsignals.(Only
supportedinAnalogMode)
‘AUTO’Function.
Whenyouencounterproblemssuchas
blurryscreen,blurredletters,screenflicker
ortiltedscreenwhileusingthedeviceor
afterchangingscreenresolution,pressthe
AUTOfunctionbuttontoimproveresolution.
(OnlysupportedinAnalogMode)
NOTE
SelfImageSettingFunction
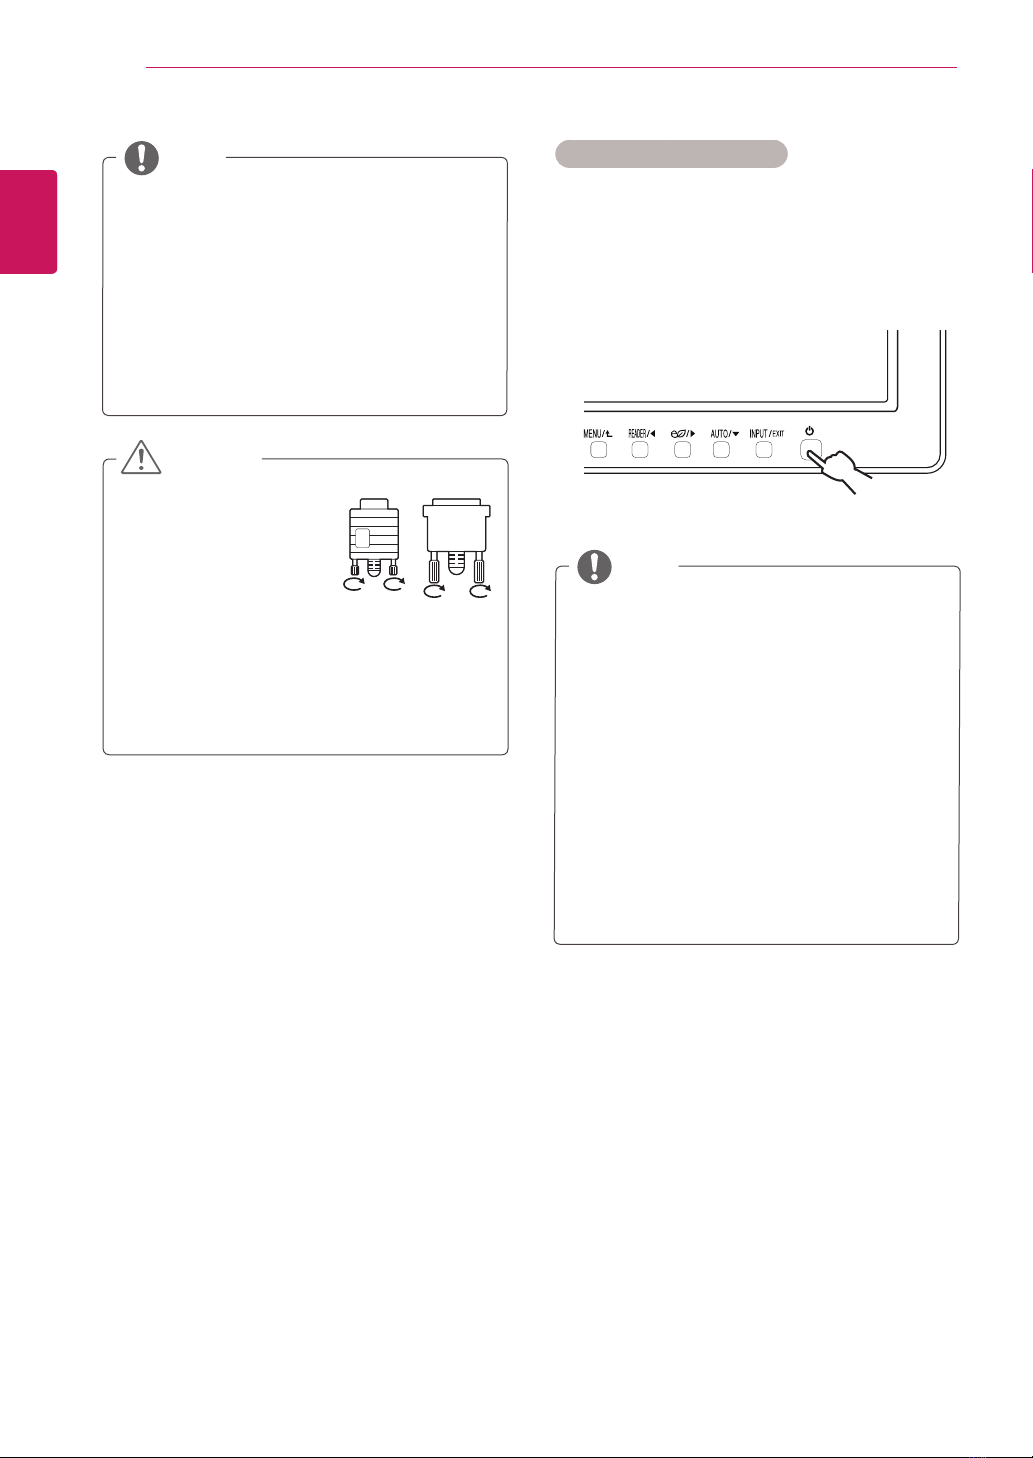
Pressthepowerbuttononthebottompanelto
turnthepoweron.Whenmonitorpoweristurned
on,the"SelfImageSetting"Functionisexecuted
automatically.(OnlysupportedinAnalogMode)
WhenyouwanttousetwoPCinourMonitor,
pleaseconnectthesignalcable(D-SUB/
DVI-D/DP)respectivelyinMonitorset.
IfyouturntheMonitorsetonwhileitiscold,
thescreenmayflicker.Thisisnormal.
Somered,green,orbluespotsmayappear
onthescreen.Thisisnormal.
NOTE
Connectthesignal
inputcableandtighten
itbyturningthescrews
clockwise.
Donotpressthescreen
withyourfingerforalongtimeasthismay
resultintemporarydistortiononthescreen.
Avoiddisplayingafixedimageonthe
screenforalongperiodoftimetoprevent
imageburn.Useascreensaverifpossible.
CAUTION
Table of contents
Other LG Monitor manuals


