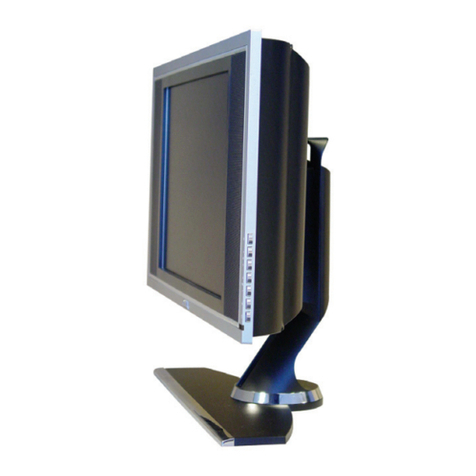
LG M2250D User manual

2
ENGLISH
TABLE OF CONTENTS
CONTENTS
5 LICENSES
6 ASSEMBLING AND PREPARING
6 Unpacking
8 Partsandbuttons
10 LiftingandmovingtheMonitorset
10 SettinguptheMonitorset
10 - AttachingtheStandBase
10 - DetachingtheStandBaseandBody
11 - Mountingonatable
12 - Mountingonawall
13 - Tidyingcables
14 REMOTE CONTROL
17 USING THE MONITOR SET
17 ConnectingtoaPC
17 - HDMIconnection
18 - DVItoHDMIconnection
18 - RGBconnection
19 Adjustingthescreen
19 - Selectinganimagemode
20 - Customizingimageoptions
20 - CustomizingPCdisplayoptions
21 Adjustingthesound
21 - Selectingansoundmode
21 - Customizingsoundoptions
22 WATCHING TV
22 Connectinganantennaorcable
22 - Connectinganantennaorbasiccable
22 - Connectingwithacablebox
23 AccessingtheTVforthefirsttime
24 WatchingTV
24 Managingprogrammes
24 - Automaticallysettingupprogrammes
27 - Manuallysettingupprogrammes(In
digitalmode)
28 - Manuallysettingupprogrammes(In
analoguemode)
29 - CableDTVSetting(InCablemode
only)
29 - Editingyourprogrammelist
30 - InDTV/RADIOmode
30 - InTVmode
31 - SoftwareUpdate
32 - Diagnostics
32 - CI[Commoninterface]Information
33 - Selectingtheprogrammelist
33 - Favouriteprogrammesetup
34 Usingadditionaloptions
34 - Adjustingaspectratio
36 - Usingtheinputlist
37 - On-screenmenulanguage/Country
selection
38 - Languageselection(Indigitalmode
only)
39 UsingtheLockoptions
39 - LockingthebuttonsontheMonitorset.
40 - Parentalcontrol
(Indigitalmodeonly)
40 UsingtheQuickmenu
41 EPG (ELECTRONIC
PROGRAMME GUIDE)
(IN DIGITAL MODE)
41 UsingElectronicProgrammeGuide
41 - Switchon/offEPG
41 - Selectaprogramme
42 - ButtonFunctioninNOW/NEXTGuide
Mode
42 - ButtonFunctionin8DayGuideMode
42 - ButtonFunctioninDateChangeMode
43 - ButtonFunctioninExtendedDescrip-
tionBox
43 - ButtonFunctioninRecord/RemindSet-
tingMode

3
ENGLISH
TABLE OF CONTENTS
43 - ButtonFunctioninScheduleListMode
44 ENTERTAINMENT
44 Usingintegratedmediafeatures
44 - ConnectingUSBstoragedevices
46 - Browsingfiles
47 - ViewingPhotos
48 - ListeningtoMusic
50 - ViewingMovies
53 - DivXregistrationcode
53 - DeactivatingtheDivXfeature
54 3D IMAGING(ONLY 3D MODEL)
54 3DTechnology
54 Precautionstotakewhenviewing3Dim-
ages
55 Whenusing3DGlasses
56 3DImagingViewingRange
56 Viewing3DImaging
57 3DModeSettingOption
58 CUSTOMIZING SETTINGS
58 Accessingmainmenus
59 Customizingsettings
59 - SETUPsettings
60 - PICTUREsettings
63 - AUDIOsettings
66 - TIMEsettings
67 - OPTIONsettings
68 - LOCKsettings
69 - INPUTsettings
70 - USBsettings
71 MAKING CONNECTIONS
71 Connectionoverview
73 ConnectingtoaCamcorder,Camera,HD
receiver,DVD,VCRplayerorGaming
device
73 - HDMIconnection
73 - DVItoHDMIconnection
74 - Componentconnection
74 - EuroScartconnection
75 Connectingtoanaudiosystem
75 - Digitalopticalaudioconnection
75 - Headphoneconnection
76 ConnectingtoaUSB
77 TELETEXT
77 SwitchOn/Off
77 SimpleText
77 - Pageselection
77 TopText
77 - Block/Group/PageSelection
77 - DirectPageSelection
78 Fastext
78 - Pageselection
78 SpecialTeletextFunction
78 - TextOption
79 DIGITAL TELETEXT
79 Teletextwithindigitalservice
79 Teletextindigitalservice
80 MAINTENANCE
80 Screenandframe
80 Cabinetandstand
80 Powercord

4
ENGLISH
TABLE OF CONTENTS
81 TROUBLESHOOTING
81 General
82 PCmode
84 TROUBLESHOOTING WHEN
USING 3D MODE
85 SPECIFICATIONS
94 IR CODES
95 EXTERNAL CONTROL DEVICE
SETUP
95 RS-232CSetup
95 Typeofconnector;D-Sub9-PinMale
96 RS-232Cconfigurations
97 CommunicationParameters
97 Commandreferencelist
98 Transmission/Receivingprotocol

ENGLISH
5
LICENSES
LICENSES
Supportedlicensesmaydifferbymodel.Formoreinformationofthelicenses,visitwww.lg.com.
ManufacturedunderlicensefromDolbyLaboratories.“Dolby“andthe
double-DsymbolaretrademarksofDolbyLaboratories.
HDMI,theHDMIlogoandHigh-DefinitionMultimediaInterfacearetrademarks
orregisteredtrademarksofHDMILicensingLLC.
ABOUTDIVXVIDEO:DivX®isadigitalvideoformatcreatedbyDivX,Inc.
ThisisanofficialDivXCertifieddevicethatplaysDivXvideo.Visitwww.divx.
comformoreinformationandsoftwaretoolstoconvertyourfilesintoDivX
video.
ABOUTDIVXVIDEO-ON-DEMAND:ThisDivXCertified®devicemust
beregisteredinordertoplayDivXVideo-on-Demand(VOD)content.To
generatetheregistrationcode,locatetheDivXVODsectioninthedevice
setupmenu.Gotovod.divx.comwiththiscodetocompletetheregistration
processandlearnmoreaboutDivXVOD.
“DivXCertified®toplayDivX®videouptoHD1080p,includingpremium
content.”
“DivX®,DivXCertified®andassociatedlogosaretrademarksofDivX,Inc.
andareusedunderlicense.”
“Pat.7,295,673;7,460,668;7,515,710;7,519,274”

ENGLISH
6ASSEMBLING AND PREPARING
ASSEMBLING AND PREPARING
Unpacking
Checkyourproductboxforthefollowingitems.Ifthereareanymissingaccessories,contactthelocal
dealerwhereyoupurchasedyourproduct.Theillustrationsinthismanualmaydifferfromtheactualproduct
andaccessories.
Remote control and Batteries Stand Base
Power Cord
Cable Tie
CD (Owner's Manual) /
Card
AC-DC Adapter
RGB Cable
MTV
3D MTV

ENGLISH
7
ASSEMBLING AND PREPARING
Donotuseanypirateditemstoensurethesafetyandproductlifespan.
Anydamagesorinjuriesbyusingpirateditemsarenotcoveredbythewarranty.
Theaccessoriessuppliedwithyourproductmayvarydependingonthemodel.
Productspecificationsorcontentsinthismanualmaybechangedwithoutpriornoticeduetoupgrade
ofproductfunctions.
CAUTION
NOTE
TriDef 3D Game Software CD /
Quick Installation Guide
3D Glasses
(Normaltype)
3D Glasses
(Cliptype)
3D MTV

ENGLISH
8ASSEMBLING AND PREPARING
YoucansetthePowerindicatortoonoroffbyselectingOPTIONinthemainmenus.
NOTE
Parts and buttons
Touch button Description
INPUT Changestheinputsource.
MENU Accessesthemainmenus,orsavesyourinputandexitsthemenus.
OK Selectsthehighlightedmenuoptionorconfirmsaninput.
◄VOL►Adjuststhevolumelevel.
▼PR▲ Scrollsthroughthesavedprogrammes.
/ITurnsthepoweronoroff.
Allofthebuttonsaretouchsensitiveandcanbeoperatedthroughsimpletouchwithyourfinger.
Remote
Control
Sensor
PCMCIA
Card Slot
Power Indicator
Lighting On: Turned on
Lighting Off: Turned off
Connection panel (Seep.71)
Touch Buttons
MTV

ENGLISH
9
ASSEMBLING AND PREPARING
YoucansetthePowerindicatortoonoroffbyselectingOPTIONinthemainmenus.
NOTE
Touch button Description
INPUT Changestheinputsource.
MENU Accessesthemainmenus,orsavesyourinputandexitsthemenus.
OK Selectsthehighlightedmenuoptionorconfirmsaninput.
◄VOL►Adjuststhevolumelevel.
▼PR▲ Scrollsthroughthesavedprogrammes.
/ITurnsthepoweronoroff.
Allofthebuttonsaretouchsensitiveandcanbeoperatedthroughsimpletouchwithyourfinger.
1
2
Remote
Control
Sensor
PCMCIA
Card Slot
Power Indicator
Lighting On: Turned on
Lighting Off: Turned off
Connection panel(Seep.71)
Touch Buttons
3D MTV

ENGLISH
10 ASSEMBLING AND PREPARING
Lifting and moving the
Monitor set
WhenmovingorliftingtheMonitorset,readthe
followingtopreventtheMonitorsetfrombeing
scratchedordamagedandforsavetransportation
regardlessofitstypeandsize.
Setting up the Monitor set
Attaching the Stand Base
1 PlacetheMonitorsetwiththescreenside
downonaflatandcushionedsurface.
Avoidtouchingthescreenatalltimes,asthis
mayresultindamagetothescreenorsome
ofthepixelsusedtocreateimages.
Layafoammatorsoftprotectivecloth
onthesurfacetoprotectthescreenfrom
damage.
CAUTION
CAUTION
ItisrecommendedtomovetheMonitorsetin
theboxorpackingmaterialthattheMonitor
setoriginallycamein.
BeforemovingorliftingtheMonitorset,
disconnectthepowercordandallcables.
HoldthetopandbottomoftheMonitor
setframefirmly.Makesurenottoholdthe
transparentpart,speaker,orspeakergrill
area.
WhenholdingtheMonitorset,thescreen
shouldfaceawayfromyoutopreventthe
screenfromscratches.
WhentransportingtheMonitorset,donot
exposetheMonitorsettojoltsorexcessive
vibration.
WhentransportingtheMonitorset,keepthe
Monitorsetupright,neverturntheMonitor
setonitsside,ortilttowardstheleftorright.
Detaching the Stand Base and Body
1 PlacetheMonitorsetwiththescreenside
downonaflatandcushionedsurface.
2 Turnthescrewtotheleft,andthenpulloutthe
Stand BasefromtheStand Body.
2 AttachtheStand Basefromthesetbyturning
thescrewtotherightwithaCoin.
Other manuals for M2250D
3
This manual suits for next models
7
Table of contents
Other LG LCD TV manuals