INSTALLATION INSTRUCTIONS
Line set and condensation drainage pipe
installation
6. Run the drain hose sloping downward. Do not
install the drain hose as illustrated in Fig.7.
When connecting extension drain hose,
insulate the connecting part of extension drain
hose with a shielded pipe, do not let the drain
hose slack.
7. For the right-hand piping, remove the pipe
cover from the side panel. (Optional)
Install the piping as
shown.
NOTE: For ACDC12b"model, there are
left and right
side drainage ports.
The connection
of
the drain hose is critical
to a successful installation and must be
done
by a
qualified installer to prevent
water leakage.
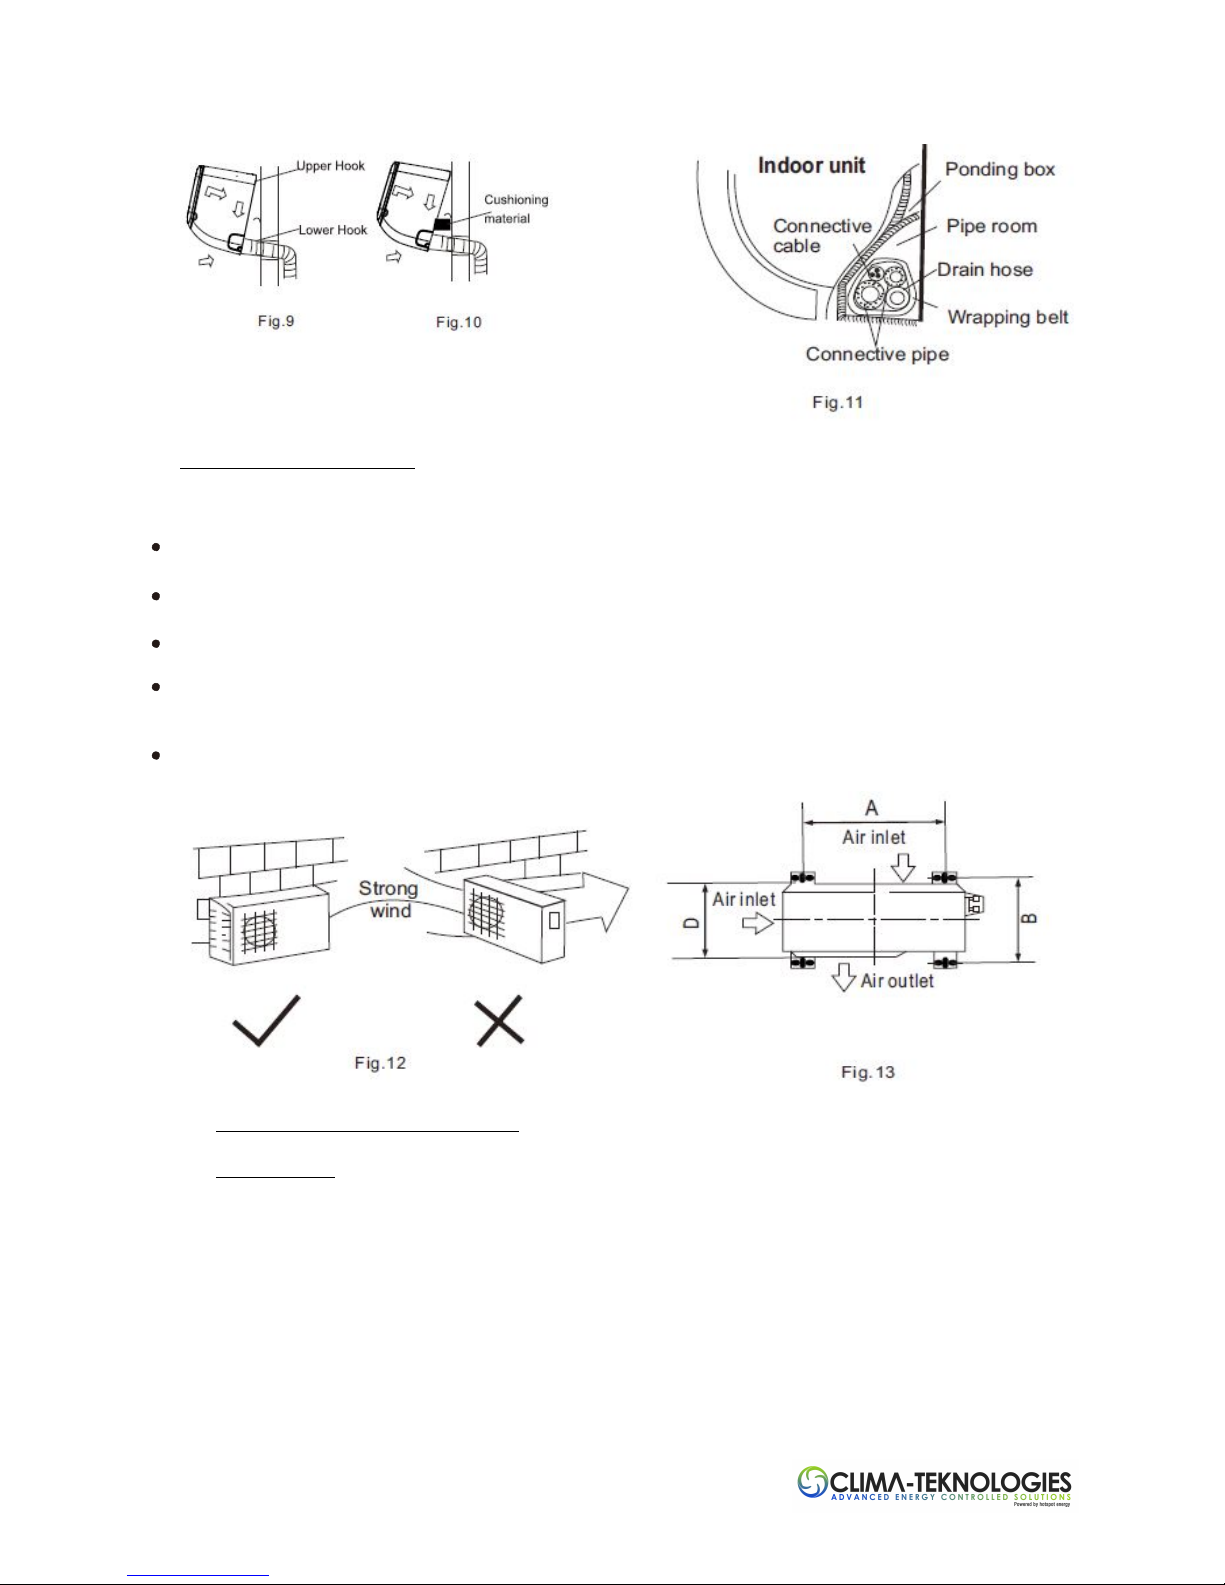
8. Bundle the tubing, connecting cable, and drain
hose with tape securely, evenly as shown in
Figure on the right.
9. The condensed water from the rear of the
outdoor unit is gathered in a ponding box and
is piped out of the room. Do not put any wires
in the box.
10. Pass the piping through the hole in the
wall.
11. Put the upper claw at the back of the indoor
unit on the upper hook of the installation plate,
move the indoor unit side to side to see that it
is securely hooked (see Fig. 9 & 10).
12. Piping can be made easy by lifting the indoor
unit and placing a spacer between the indoor
unit and the wall.
13. Push the lower part of the indoor unit
up
on
the wall, then move the indoor
unit
from side
to side, up and down to
check
if it is hooked
securely.
14. Bundle the tubing, connecting cable and drain
hose securely and evenly with tape as shown
in Fig. 12.
CAUTION
•Connect the indoor unit first, then the
outdoor unit.
•Do not allow the piping to let out from the
back of the indoor unit.
•Be careful not to let the drain hose slack.
•Be sure that the drain hose is located at the
lowest side of the bundle. Locating at the
upper side can cause drain pan to overflow
inside the unit.
•Never intercross or intertwist the power
wires with any other wiring.