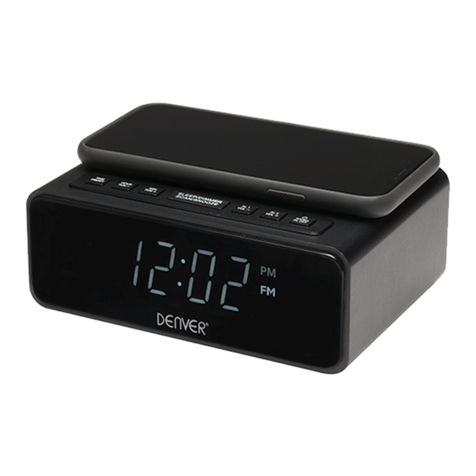
LENCO CR-16 User manual

USER’S MANUAL
CR-16
CLOCK RADIO WITH RADIO CONTROLLED
For more information: www.lenco.com

Outlook and Controls
Item Description
1. ALARM 1 ON-OFF SET
2. << TUNE DOWN
3. SNOOZE/SLEEP/DIMMER
4. MEMORY/M+/NAP
5. PROJECTION ON/OFF
6. PROJECTION TIME 180°
7. ALARM 2 ON-OFF SET
8. VOLUME UP/BETWEEN DISPLAY CONTENTS
9. POWER ON – OFF/ALARM OFF
10. >> TUNE UP/YEAR-MONTH-DAY
11. CLK.ADJ.
12. VOLUME DOWN
13. RATING LABEL (BOTTOM OF UNIT)
14. BATTERY COMPARTMENT COVER (BOTTOM OF UNIT)
15. SPEAKER
16. ANGLE/SHARPNESS CONTROLLER
17. LED DISPLAY
18. AC POWER CORD
19. RADIO CONTROLLED CLOCK ANTENNA
20. FM ANTENNA

LED DISPLAY
POWER CONNECTION
This product operates on AC230V~ 50Hz power supply. Plug the
AC power cord into a household outlet AC source.
INSTALLING/REPLACING THE BACK-UP BATTERY
This unit is equipped with a battery back-up system, requiring one
DC3V CR2032 lithium battery (not included) to maintain the time/
calendar settings and radio presets during AC power outage.
1. Unscrew and remove the BATTERY COMPARTMENT
COVER.
2. Install one fresh CR2032 lithium battery into the battery
compartment following the polarity diagram on the BATTERY
COMPARTMENT COVER. Use only the specied size and
type of battery.
3. Replace the BATTERY COMPARTMENT COVER and tighten
its screw.
Note: The unit will operate without a battery installed but your time
& alarm setting and radio presets will be lost and will have to be
reset in the event of power interruption or failure.
IMPORTANT:
Be sure that the battery is installed correctly. Wrong polarity may
damage the unit and void the warranty. For best performance and
longer operating time, we recommend the use of good quality
battery.
MHz Indicator
RCC ANTENNA
TOWER Indicator
ALARM 2 Indicator
PM Indicator
ALARM 1 Indicator
TIME Indicator

WARNING
DO NOT INGEST BATTERY, CHEMICAL BURN HAZARD
This product contains a coin/button cell battery. If the coin/button
cell battery is swallowed, it can cause severe internal burns in just
2 hours and can lead to death.
Keep new and used batteries away from children. If the battery
compartment does not close securely, stop using the product and
keep it away from children.
If you think batteries might have been swallowed or placed inside
any part of the body, seek immediate medical attention.
BATTERY CARE:
- Use only the size and type of battery specied.
- If the unit is not to be used for an extended period of time,
remove the battery. Old or leaking battery can cause damage
to the unit and may void the warranty.
- Do not try to recharge battery not intended to be recharged;
they can overheat and rupture (Follow battery manufacturer’s
directions).
- Do not dispose of battery in re, battery may leak or explode.
SETTING THE CLOCK
AUTOMATIC (IN STANDBY ONLY)
- After plugging the mains plug into the socket, the time date
from the DCF77 station is automatically transferred after a
few minutes. As long as the “RCC ANTENNA TOWER Indica
tor” symbol is ashing, the device is searching for the radio
signal. If a radio signal has been found, the “RCC ANTENNA
TOWER Indicator” symbol light up. The correct time appears
on the display.
- The time is automatically adjusted on the hour by the station
signal.
NOTE:
The signal can be received without problems within a radius off
approx. 2000 km around Frankfurt/Main, but interference may
occur, depending on local conditions. This may occur especially
in buildings containing a high percentage of metal, as well as in
proximity to TV sets, PCs, mobile phones etc. which are switched

on! If the reception cannot be automatically adjusted after 10
minutes in spite of the alignment of the integrated antenna, the
reception in the respective location is too weak. In this case, set
the time manually or change location.
POWER ON/STANDBY
1. In standby mode, tap the POWER ON-OFF button once to turn
on the unit.
2. Press the POWER ON-OFF button once to return the unit to
standby mode.
CALENDAR AND TIME MANUAL SETTING
SETTING THE CALENDAR AND TIME
When the device is searching for a radio signal, it is not possible
to adjust the time manually.
1. Press the POWER ON-OFF button to switch the device into
standby mode.
2. Press and hold the SNOOZE/SLEEP/DIMMER button. The
“RCC ANTENNA TOWER Indicator” symbol starts ashing in
the display.
3. Press and hold the SNOOZE/SLEEP/DIMMER button for
about 2 seconds. The “RCC ANTENNA TOWER Indicator”
symbol disappears from the display.
4. Press and hold the CLK.ADJ. button for about 2 seconds to
enter the calendar/time set mode.
5. The year indicator will ash on the LED DISPLAY for up to 30
seconds prompting for a new entry.
6. While the display is ashing, repeatedly tap the << or >>
button to adjust to the correct year. Press and hold the << or
>> button for faster scanning backward or forward. Tap the
CLK.ADJ. button to conrm.
7. Repeat steps #2 to #3 to adjust the month, day, time format,
current hour and nally current minute in the same way.
Notes:
- The display sequence in calendar/time set mode will be as
follows:
Year → Month → Date → 12/24 Hour Time Format → Real
Time Hour → Real Time Min → Normal Time

- To check the year while current time is displayed, tap the
YEAR-MONTH-DAY button once. The LED DISPLAY will
change to year display for 5 seconds and then revert to current
time automatically.
- To check the date while current time is displayed, tap the
YEAR-MONTH-DAY button twice. The LED DISPLAY will
change to date display for 5 seconds and then revert to current
time automatically.
- During the time set, if no button is being pressed within 10
seconds, the current display time will be automatically stored.
- Make sure the hour is set so that the PM indicator is displayed
correctly for afternoon/night times.
ALARM SETTING
SETTING THE ALARMS (ALARM 1 and ALARM 2)
You can select either a Beeper Alarm or the FM Radio as the
alarm source. Be sure to observe the PM indicator when setting
the alarm to make sure the alarm time is set correctly for AM or
PM. If the PM Indicator is ‘On’, the alarm time will be afternoon/
night time. The setting sequence for ALARM 1 is as follows:
Normal Time → AL1 Hour → AL1 Minute → AL1 Weekday → AL1
Beeper → AL1 Radio → AL1 nal radio volume → Normal Time
1. In standby mode, tap the ALARM 1 (or ALARM 2) button to
show the preset alarm time.
2. Press and hold the ALARM 1 (or ALARM 2) button again for
about 2 seconds until the Hour Indicator on the LED DISPLAY
ashes. Press the << or >> button to obtain the desired Alarm
Hour.
3. Tap the ALARM 1 (or ALARM 2) button again to advance
to the Minute Indicator. Press the << or >> button to obtain the
desired Alarm Minutes.
4. Tap the ALARM 1 (or ALARM 2) button again to advance to
the Weekday Indicator.
Press the << or >> button to select the desired Alarm Weekday
mode as follows:
1-5 : Monday to Friday
1-7 : Whole week

6-7 : Saturday & Sunday
1-1 : One day of week (you need to further select 1 for
Monday, 2 for Tuesday and so on)
5. Tap the ALARM 1 (or ALARM 2) button again to advance to
select the Alarm source between Beeper or Radio.
Notes:
- When the Beeper alarm begins, it will sound at a lower
beeping rate and gradually increase to the normal rate within
30 seconds.
- If you want to choose radio as the alarm source, you need to
set the radio to your desired radio station in radio mode rst.
- After selecting the Radio as the alarm source during alarm
setting, you need to select FM radio and the preset alarm
volume level (up to maximum level 15). When the radio is
turned ‘On’ at the preset alarm time, the radio will begin to
sound at a low volume and gradually increases to the preset
volume level.
Note: it is not possible to adjust the volume level during the radio
alarm. If volume adjustment is needed, you must turn ‘Off’ the
radio rst, and then turn it ‘On’ again using the POWER ON-OFF
button. The alarm will also be stopped immediately.
6. Press the ALARM 1 (or ALARM 2) button to nish setting and
exit to normal time display.
7. To disable ALARM 1 (or ALARM 2) from automatically
sounding on the upcoming days, press and hold the ALARM
1 (or ALARM 2) button for about 2 seconds, the corresponding
ALARM 1 (or ALARM 2) INDICATOR will go off.
8. To resume ALARM 1 (or ALARM 2) from automatically
sounding on the upcoming days, press and hold the ALARM
1 (or ALARM 2) button for about 2 seconds, the corresponding
ALARM 1 (or ALARM 2) INDICATOR will turn on and the alarm
will sound the following day at the set time.
TURNING OFF THE ALARM
When the preset alarm time is reached, the ALARM 1 (or ALARM
2) INDICATOR will ash on the LCD DISPLAY and the beeper
alarm or radio will sound for 30 minutes unless interrupted
by pressing SNOOZE. To stop the alarm immediately, tap the
corresponding ALARM 1 (or ALARM 2) button or POWER ON-

OFF button. The alarm will ring again at the same alarm time
on the following day, or when set to go off based on your Alarm
settings.
SNOOZE FUNCTION
When the alarm source is sounding, press the SNOOZE button to
suspend the alarm and activate the snooze function. The Alarm
will temporarily stop and sound again 9 minutes later but the
ALARM 1 (or ALARM 2) indicator will keep ashing.
Notes:
- This manual snooze operation can be repeated again and
again.
- To turn off the snooze function before it ends, tap the
corresponding ALARM 1 (or ALARM 2) button or the POWER
ON-OFF button. The ALARM 1 (or ALARM 2) INDICATOR will
stop ashing.
LISTENING TO THE RADIO
RADIO TUNING
1. In standby mode, tap the POWER ON-OFF button to turn the
unit “On”.
2. The LED DISPLAY will show the radio frequency for about 5
seconds and then revert to normal time display.
AUTOMATIC SEARCH FOR RADIO STATIONS
To automatically search for stations with strong signals, press and
hold the TUNE UP >> or DOWN << button until the frequency
readout on the display begins to scan. Release the button. The
tuner will stop on the rst strong station it nds.
MANUAL SEARCH FOR RADIO STATIONS
1. Tap the << or >> button repeatedly to choose your desired
radio station.
2. Tap the VOLUME UP or DOWN button to set the desired
volume level. The volume level reading will appear in the LED
DISPLAY.
Notes:
- Use manual tuning to select weaker stations that might be
skipped during automatic tuning.

- If the automatic tuning does not stop on the exact frequency
of the station, for example, it stops on 88.9 MHz instead of
88.8 MHz, use the manual tuning method to “ne tune” to the
exact frequency of the desired station.
HINTS FOR BEST RECEPTION
FM - To insure maximum FM tuner reception, unwrap and fully
extend the EXTERNAL FM WIRE ANTENNA for best FM radio
reception.
TO SET/RECALL RADIO STATION PRESETS
1. Press the << or >> button to select the desired radio station.
2. Press and hold the MEMORY button, the next available preset
memory number will ash on the LED display. (Note: “P01”
will ash in the display if you are programming presets for the
rst time.)
3. Press the << or >> button to change to the desired preset
number P01 thru P10.
4. Repeat steps #1 thru #3 to preset up to 10 FM stations.
5. To recall one of the preset stations already programmed,
tap the M+ button repeatedly until you reach the desired
preset number/radio station.
SLEEP TIMER OPERATION
The sleep timer allows you to turn the unit off after a designated
time has elapsed.
1. While listening to the radio, tap the SLEEP button and sleep
time ‘90’ (minutes) appears in the LED DISPLAY.
2. Repeatedly tap the SLEEP button to select a sleep timer of
90, 60, 30 or 15 minutes. Wait for about 10 seconds after your
selection for the unit to conrm the selection, the unit will play
for the selected length of time then turn itself ‘Off’
automatically.
3. To cancel the sleep timer, repeatedly tap the SLEEP button
until you see the current time in the LED DISPLAY after last
sleep timer option (15 minutes).
4. To turn the unit ‘Off’ before the selected sleep time, press the
POWER ON-OFF button at any time.

NAP ALARM
The nap alarm can be used for e.g. a short “nap”. The function
only operates in standby.
- Press the unit NAP button to select the time after which the
device will beep. Select from 90 to 10 minutes or OFF (off) in
steps of 10 minutes.
- After the selected time has elapsed, an increasingly fast beep
will sound. Use the unit POWER ON-OFF button to turn off the
beep.
DIMMER CONTROL
Tap the DIMMER button to set the brightness of the LED display
to high, medium or low according to your ambient light conditions.
ALTERNATE DISPLAY BETWEEN TIME AND MONTH-DATE
DISPLAY
1. In radio off mode, press and hold the unit BETWEEN DISPLAY
CONTENTS button for about 3 seconds until “ON” appears in
the LED DISPLAY.
2. The DISPLAY will alternate between the current Time for 10
seconds and month- date for 5 seconds as follows:
PROJECTION FUNCTION
Notes:
- This appliance is featured with a projection function and can
be used in either clock or radio mode. You can use this
appliance to project time on the ceiling or wall.
- Optimal projection distance ranges from ca. 90 to 270cm.
- Press PROJECTION ON/OFF button to illuminate the
projection lens. Time is projected on the ceiling or wall.
- Use angle/sharpness controller to achieve optimal projection
TIME Indicator MONTH Indicator DAY Indicator
Table of contents
Languages:
Other LENCO Clock Radio manuals

LENCO
LENCO CRW-110WH User manual

LENCO
LENCO CR-18 User manual

LENCO
LENCO KCR-9 User manual

LENCO
LENCO CR-333 User manual

LENCO
LENCO CR-12 User manual

LENCO
LENCO CR-2400 User manual

LENCO
LENCO IPD-3560 User manual

LENCO
LENCO RT-2 CD User manual

LENCO
LENCO IPD-3100 User manual

LENCO
LENCO CR-430DAB+ User manual

LENCO
LENCO CRW-1 User manual

LENCO
LENCO KCR-100 User manual

LENCO
LENCO CR-605 User manual

LENCO
LENCO CR-3304 User manual

LENCO
LENCO CRW-2 User manual

LENCO
LENCO CR-605 User manual

LENCO
LENCO RT-2 CD User manual

LENCO
LENCO CR-525 User manual

LENCO
LENCO DIGITAL ALARM CLOCK RADIO User manual

LENCO
LENCO CR-334 User manual