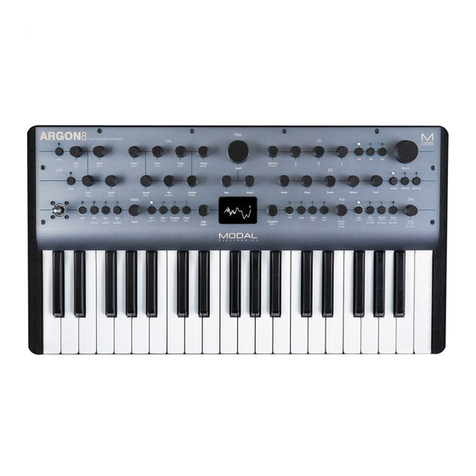
Korg minilogue User manual

E 1
Table of contents
Introduction...........................................2
minilogue Key Features.................................. 2
Block Diagram.................................................... 3
Controls and Connections ....................4
Front Panel Controls ........................................ 4
Rear Panel Connections.................................. 5
Turning the minilogue On and O............. 6
Playing Programs and Sequences........8
Selecting and Playing a Program ................ 8
Using Favorites .................................................. 9
Playing the Sequencer ..................................10
Programs............................................. 11
Program Architecture....................................11
Creating Sounds..............................................12
Saving a Program............................................13
Basic Parameter Editing................................14
Voice modes .....................................................23
Sequencer..........................................................25
Edit Mode ............................................ 31
How to enter the Edit mode .......................31
PROGRAM EDIT mode...................................33
SEQ EDIT mode................................................37
GLOBAL EDIT mode........................................40
Other functions................................... 47
Tuning.................................................................47
Restoring the Factory settings ...................47
Shortcuts using the SHIFT button.............49
Understanding MIDI........................... 50
Connecting Devices via MIDI and USB....50
MIDI-Related Settings....................................52
Program List........................................ 54
Specications...................................... 56
MIDI Implementation Chart............... 57

2
Introduction
minilogue Key Features
• 4-voice polyphonic synthesizer with onboard eects & sequencer.
• All-new innovative redesign of analogue synth circuitry.
• Instant recall of 100 factory Presets plus 100 additional user Programs.
• 8 Voice Modes (mono, poly, unison, duo, etc.) oer maximum exibility.
• 41 dedicated panel controls deliver immediate parameter access.
• Real-time oscilloscope provides visual feedback of parameter changes.
• 16-step polyphonic sequencer can automate up to 4 synth parameters.
• Sync In and Sync Out jacks allow you to expand your session setup.

3
Block Diagram
HPF
pre lter
post lter
bypass
FB
4 VOICE
ASSIGNER
DELAY
VOICE 4
OUTPUT
AUDIO
INPUT
VOICE 3
VOICE 2
VOICE 1
pre VCF mix
pre VCF mix
pre VCF mix
pre VCF mix
enable
VOICE
VCO 1 SAW
pre VCF mix
SQR
PITCH
PITCH
LFO
EG
LFO
VCO 2 WAVE SHAPE
OSC
SYNC
SAW
EG Int
keytrack
int mod
pitch 2
EG Int
SQR
TRI
TRI
FM
LFO
WAVE SHAPE
RING
MOD
NOISE
GEN
VCA
VCF
AMP EG
EG
int
rate mod
velocity
2-pole
4-pole
velocity
VCO1
level
VCO2
level
noise
level
CROSS MOD
depth
gate
gate
0% 100%
wave shape amount

4
Controls and Connections
Front Panel Controls
This diagram shows the layout of the front panel knobs, switches, and buons.
1
2
3
4
56 7891011 12 13 15 17 18
19
20
16
14
1.
MASTER knob
2.
TEMPO knob
3.
OCTAVE switch
4.
Slider
5.
VCO 1
6.
VCO 2
OCTAVE switch
WAVE switch
PITCH knob
SHAPE knob
7.
VCO 2 MODULATION
CROSS MOD DEPTH knob
PITCH EG DEPTH knob
SYNC switch
RING switch
8.
MIXER
VCO 1 knob
VCO 2 knob
NOISE knob
9.
FILTER
CUTOFF knob
RESONANCE knob
EG INT knob
FILTER TYPE switch
KEY TRACK switch
VELOCITY switch
10.
AMP EG
11.
EG
ATTACK knob
DECAY knob
SUSTAIN knob
RELEASE knob
12.
LFO
WAVE switch
EG MOD switch
RATE knob
INT knob
TARGET switch
13.
DELAY
HI PASS CUTOFF knob
TIME knob
FEEDBACK knob
OUTPUT ROUTING switch
14.
Display
15.
EDIT
EDIT MODE buon
EXIT buon
WRITE buon
16.
PROGRAM/VALUE knob
17.
SEQUENCER
1–8/9–16 buons
PLAY buon
REC buon
REST buon
18.
Buttons 1–8
19.
SHIFT button
20.
VOICE MODE DEPTH knob

5
Rear Panel Connections
The illustration below shows a typical example of connections for the mini-
logue. Connect your equipment according to the needs of your own system.
You must make connections with the minilogue turned o. Failure
to observe this precaution may cause malfunctions and/or damage to
your speaker system.
Computer
AC adapter
(included)
Mixer
DC 9V jack
Cable hook
Loop the DC Plug end of the
AC Adapter cable around
this hook to prevent the cable
from being accidentally
pulled out.
USB B connector
This connector allows the minilogue to
exchange MIDI messages with your computer.
Power switch
Hold this switch in to turn the
minilogue On or Off.
MIDI IN, OUT connectors
Connect these to an external MIDI device so that MIDI
data can be transmied or received.
SYNC IN, OUT jacks
T
he minilogue steps can be synchronized with other devices using
th
ese jacks. A pulse sent from the audio output of another device or
DA
W can be used by connecting it to the SYNC IN jack. Use an 1/8"
ca
ble (mini-phone plug) to sync with Korg volca products.
AUDIO IN jack
This standard 1/4" TS jack accepts a
mono audio signal from another
synthesizer, instrument, or external
sound source.
OUTPUT jack
This standard 1/4" TS jack
sends the sound of the
minilogue to your powered
monitoring system, mixer,
recording setup, or external
amplifier. The level is
controlled by the MASTER
knob.
Headphones jack
Connect your headphones
here. This jack outputs the
same sound as the OUTPUT
jack.
Sound module, rhythm machine, etc.
MIDI keyboard, rhythm machine, etc.
Groove machine
Microphone
Monitor speakers
(with internal amp)
Headphones
MIDI cable
USB cable
MIDI OUT
MIDI IN
SYNC IN
USB port
INPUT
OUTPUT

6
Turning the minilogue On and O
Before you turn the minilogue On:
Connect the AC adapter and other equipment.
1. Connect the included AC adapter to the DC 9V jack located on the rear
panel.
Use only the included AC adapter. Using any other AC adapter may
cause malfunctions.
2. Plug the AC adapter into an AC outlet.
3. Hook the AC adapter cable onto the cable hook to relieve stress on the
connector and to prevent the cable from accidently being pulled out.
When disconnecting the power supply, do not use excessive force when
removing the cable from the hook. Doing so may damage the plug.
4. Make sure that any external output devices such as powered monitor
speakers are turned o before connecting them to the minilogue.
TIP If you want to connect a MIDI device or computer to the minilogue’s
MIDI connectors or USB B connector in order to use the minilogue’s
keyboard and controllers to control an external MIDI tone generator,
or if you want to use another MIDI keyboard or a sequencer to play
the minilogue’s sound generator, you will need to congure the set-
tings. For details, (“Understanding MIDI”, p. 50).
Turning the minilogue On
1. Make sure that both the minilogue and any external output devices such
as powered monitor speakers are turned o, and turn the volume of all
devices all the way down.
2. Hold down the Power switch on the rear panel of the minilogue; once the
“minilogue” logo appears in the display, take your nger o the Power
switch.
3. Turn on any external output devices such as powered monitor speakers.
4. Adjust the volume of your external output equipment, and adjust the
minilogue’s volume using the MASTER knob.

7
Turning the minilogue O
Any Program data in the minilogue that has not been saved will be lost when
the power is turned o. Be sure to save any Program and other important data
that you have edited (“Saving a Program”, p. 13).
1. Turn the MASTER knob of the minilogue to the left to turn the volume
all the way down.
Also, turn the volume all the way down on any external output devices
that might be connected, such as powered monitor speakers.
2. Hold down the Power switch on the rear panel of the minilogue; to turn
o the power after the display goes blank, take your nger o the power
switch.
Once you have turned the minilogue o, wait about 10 seconds before
turning the minilogue on again.
Auto Power O Feature
The minilogue features an Auto Power O feature that can automatically turn the
minilogue o after 4 hours have elapsed with no operation of the knobs, switches,
buons, or keyboard of the minilogue. By default, the factory seing for the Auto
Power O is enabled. The Auto Power O can be disabled using the steps below.
1. Press the EDIT MODE buon.
The minilogue will enter the Edit Mode,
and the display will look like the illustration
shown below.
2. Turn the PROGRAM/VALUE knob, and se-
lect GLOBAL EDIT.
TIP GLOBAL EDIT can also be selected by pressing the EDIT MODE buon.
3. Press buon 6 twice.
“Auto Power O” will be displayed.
4. Turn the PROGRAM/VALUE knob, and select “O”.
5. Press the EXIT buon.
The minilogue will enter the Play mode, and the display will indicate the
current Program.
6
3
1
2, 4

8
Playing Programs and Sequences
Selecting and Playing a Program
The minilogue comes equipped with 200 Programs. Of those, 100 are ready-to-
play preset Programs and 100 locations are available to save your own sounds
and custom edits.
Each Program includes seings for the sound, as well as sequence data and
Voice mode seings.
1. Enter the Play mode.
When the minilogue is turned on, it will automatically enter the Play mode.
In the Play mode, verify that all of the EDIT MODE and 1–8/9–16 buons
on the front panel are unlit.
TIP If the EDIT MODE buon or the 1–8/9–
16 buon is lit, press the EXIT buon.
The PLAY or REC buons will light to
indicate when the sequence data saved
in a Program is being played back or is
recording. You can still select other Pro-
grams in this state, but press the PLAY
buon if you wish to stop the Sequencer.
2. Turn the PROGRAM/VALUE knob to select a Program.
The display will indicate the Program name and number.
The minilogue comes with 100 preset Programs (001–100) as part of the fac-
tory preload data. These preset Programs are instantly accessible and ready
for you to enjoy. For details, refer to “Program List” (p. 54).
TIP Hold down the SHIFT buon while turning the PROGRAM/VALUE
knob to skip through the Program List in increments of 10.
TIP In addition to showing Program name and number, the display can
also be used as an oscilloscope, to show the electrical signals created
by the waveform of the sound. For details on the display, refer to “Os-
cilloscope” (p. 45).
2
1
Make sure they are unlit.

9
3. Adjusting the OCTAVE range, using the Slider, and changing the Voice
Mode.
As you play, you can use the ve-way OCTAVE Switch to
transpose the playing area of the keyboard by ± 2 octaves.
In addition, you can move the Slider from left to right to add
real-time performance control.
TIP The parameter assigned to the slider will vary depend-
ing on the Program. Rrefer to “Program List” (p. 54)
to see which parameter is assigned to the slider in each
Program.
TIP The Slider Assign function in PROGRAM EDIT mode is
used to assign parameters to the slider (“Slider Assign”, p. 33).
In the Play mode, the LEDs below buons
1–8 show the Voice mode status of the cur-
rent Program. You can use these buons
1–8 to switch between the dierent modes.
For details, refer to “Voice modes” (p. 23).
Using Favorites
Recalling your Favorite Programs
The minilogue includes a Favorites func-
tion, which can be used to instantly recall
any one of the up to eight Programs that
you have previously registered as Favorites
on the minilogue.
1. In the Play mode, press one of the but-
tons from 1–8 while holding down the
SHIFT buon.
The Favorite Program previously regis-
tered to that buon will be recalled, and
the Program name and number will be
indicated in the display.
12345678
1
1
12345678

10
Registering your Favorite Programs
You can register up to eight Programs that you particularly like as Favorite
Programs.
1. In Play mode, turn the PROGRAM/
VALUE knob to select a Program you
like.
The display will indicate the Program
name and number.
2. Hold down one of the buons from
1–8 while keeping the SHIFT buon
pressed.
The Program will be registered as a Fa-
vorite program, and “Registered to Fa-
vorite” will be indicated in the display.
TIP The favorite Programs that you
register will be saved in the Global seings.
Playing the Sequencer
Each Program in the minilogue includes sequence data. In this section, we’ll
play the sequence data saved as part of the preset Programs.
1. Turn the PROGRAM/VALUE knob to select
a Program.
The display will indicate the Program name
and number.
2. Press the PLAY buon in the SEQUENCER
section.
The sequence data that is recorded in the cur-
rent Program will begin playing.
The 1–8 buons will light up in steps while the sequencer is playing.
TIP The Sequencer tempo is set for each Program in the SEQ EDIT mode
and saved as part of the Program, but you can adjust the tempo from
56.0 to 240.0 BPM (Beats Per Minute) by turning the TEMPO knob.
3. Press the PLAY buon once more to end the Sequencer playback.
2
1
12345678
2
1
2, 3
Other manuals for minilogue
1
Table of contents
Other Korg Synthesizer manuals

Korg
Korg R3 User manual

Korg
Korg TRITON taktile User manual

Korg
Korg TRITON Le User manual

Korg
Korg MONOPOLY POLYSIX MS-20 User manual

Korg
Korg MS2000R User manual

Korg
Korg MicroKORG XL Product information sheet

Korg
Korg X5 User manual

Korg
Korg 707 User manual

Korg
Korg RK-100S User manual

Korg
Korg DW-8000 User manual