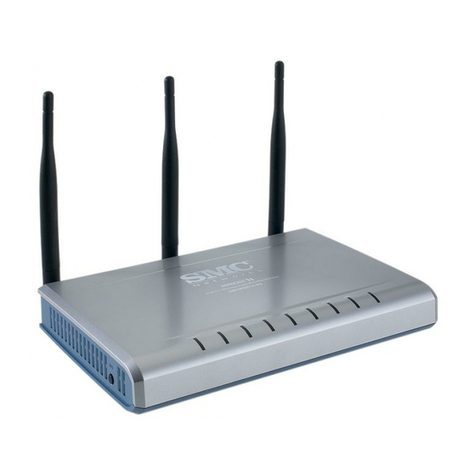
Konig CMP-WNROUT50 User manual

2013-02-25
CMP-WNROUT50
CMP-WNROUT55
CMP-WNROUT60
MANUAL (p. 2)
Wireless router
ANLEITUNG (S. 11)
WLAN-Router
MODE D’EMPLOI (p. 21)
Routeur sans fil
GEBRUIKSAANWIJZING (p. 30)
Draadloze router
MANUALE (p. 39)
Router Wireless
MANUAL DE USO (p. 48)
Router inalámbrico
HASZNÁLATI ÚTMUTATÓ (o. 57.)
Vezeték nélküli útválasztó
KÄYTTÖOHJE (s. 66)
Langaton reititin
BRUKSANVISNING (s. 75)
Trådlös router
NÁVOD K POUŽITÍ (s. 84)
Bezdrátový router
MANUAL DE UTILIZARE (p. 93)
Ruter wireless
ΕΓΧΕΙΡΙΔΙΟ XPHΣHΣ(σελ. 102)
Ασύρματο ρούτερ
BRUGERVEJLEDNING (s. 111)
Trådløs router
VEILEDNING (s. 120)
Trådløs ruter
ИНСТРУКЦИЯ (стр. 129)
Беспроводной маршрутизатор

2
ENGLISH
Wireless router
1) HARDWARE CONFIGURATION
CMP-WNROUT50
Auto MDI/MDIX RJ-45 Ports
Automatically senses the types of WAN and
LAN when connecting to the Ethernet
Reset Button
Power Jack
Antenna
LAN1~LAN4 LEDs
Status LED WAN LED Wi-Fi LED
2 in 1 Button
1. WPS
2. Wireless On

3
LED INDICATORS
LED status Description
Status Green flash Device status is working
Green RJ45 cable is plugged in
WAN LED
Green flash Data access
Green RJ45 cable is plugged in
LAN LED
Green flash Data access
Green WLAN is on
Green flash Data access
Green fast flash Device is in WPS PBC mode
WiFi LED
Dark green Wi-Fi Radio is disabled
BUTTON DEFINITION
Description
WPS
1. When Wireless is Off, press this button for about 1 second to enable “wireless
radio”.
2. When wireless is On, press this button for about 1 second to execute WPS
function.
Reset Press for 6 seconds to reset to default settings

4
CMP-WNROUT55 and CMP-WNROUT60
Power Jack
Antenna
Auto MDI/MDIX RJ-45 Ports
Automatically senses the types of WAN and
LAN when connecting to the Ethernet
LAN1~LAN4 LEDs
Status LED WAN LED Wi-Fi LED
CMP-WNROUT60
2 in1 Button
1. WPS
2. Wireless On
CMP-WNROUT55
3 in 1 Button
1. WPS
2. Wireless ON
3. Reset

5
LED INDICATORS
LED status Description
Status Green flash Device status is working
Green RJ45 cable is plugged in
WAN LED
Green flash Data access
Green RJ45 cable is plugged in
LAN LED
Green flash Data access
Green WLAN is on
Green flash Data access
Green fast flash Device is in WPS PBC mode
WiFi LED
Dark green Wi-Fi Radio is disabled
BUTTON DEFINITION
Description
CMP-WNROUT55
When Wireless is On, press this button (about 1 sec) to execute WPS function
WPS CMP-WNROUT60
1. When Wireless is off, press this button (about 1 sec) to enable “Wireless
Radio”
2. When Wireless is On, press this button (about 1 sec) to execute WPS function
Wireless On
(CMP-WNROUT55
only)
When Wireless is off, press this button (about 1 sec) to enable “Wireless Radio”
CMP-WNROUT55
1. Press this button then Power on the device
2. Press for about 3 – 4 seconds, the device will reset to default then the Status
LED flashes per sec in Normal status
Notice: If the Status LED flashes very fast, it means this button was pressed too
long and to please try again
Reset
CMP-WNROUT60
Press 6 seconds to reset to default settings then release the button when the
device works simultaneously

6
2) HOW TO OPERATE
Step 1. Insert the Ethernet cable into the LAN
Port:
Insert the Ethernet patch cable into the LAN port
on the back panel of the router, and an available
Ethernet port on the network adapter in the
computer you will use to configure the unit.
Step 2. Insert the Ethernet patch cable into
the wired WAN port:
Insert the Ethernet patch cable from the DSL
Modem into the Wired WAN port on the back
panel of the router.
Step 3. Power on the router:
Connect the power adapter to the receptor on the
back panel of your router.
Step 4. Complete the setup.

7
Insert the CD into your computer. The program will be executed automatically via “Autorun”. Click the
Easy setup icon to configure the router by following the steps below.
2.1
Select the correct language then click “Next”
to continue.
2.2 Setup Mode
You can select Wizard mode to run the setup
step by step or run advanced mode to
diagnose the network settings of the router.
2.3 Advanced Mode Setup.
Check the PC, router or Internet icons for the
status of your PC, router or Internet.

8
2.4 Quick Wizard Install Mode Setup
1. Check if the router is powered on.
2. Check if your network adapter is connected
to the LAN port of the router.
3. Check if your network adapter has an IP
address.
Click “Next” to continue.
2.5 Wireless Setting
Key in the SSID, Channel and Security
options, and then click “Next” to continue.
2.6 Auto Detect WAN Service.
Click “Next” to continue.
Disable this function by selecting “Let me
select WAN service by myself”.
Note: This function only supports
detecting the Dynamic and PPPoE WAN
Services.

9
For example, the Dynamic WAN type is
detected.
After detecting the router is ready for use.
2.7 Manual select WAN Service
In manual mode, select an icon and click
“Next” to continue.
2.8 Apply Settings or Modify.
Click “Next” to apply the settings and continue.
Click “Modify Settings” to change the settings.

10
2.9 Test the Internet Connection.
Test WAN Networking service. Click “Next” to
continue.
You can ignore this step by selecting
“Ignore Test”.
2.10 Setup Completed.
The EzSetup is complete. You can now open
the default web browser to configure the
advanced settings of the router.
Click “Finish” to complete the installation.
Safety precautions:
To reduce risk of electric shock, this product should ONLY be
opened by an authorised technician when service is required.
Disconnect the product from mains and other equipment if a
problem should occur. Do not expose the product to water or
moisture.
Maintenance:
Clean only with a dry cloth. Do not use cleaning solvents or abrasives.
Warranty:
No guarantee or liability can be accepted for any changes and modifications of the product or damage
caused due to incorrect use of this product.
General:
- Designs and specifications are subject to change without notice.
- All logos, brands or brand logos and product names are trademarks or registered trademarks of their
respective holders and are hereby recognised as such.
- This manual was produced with care. However, no rights can be derived. König Electronic can not
accept liability for any errors in this manual or their consequences.

Other manuals for CMP-WNROUT50
1
This manual suits for next models
2
Table of contents
Languages:
Other Konig Wireless Router manuals