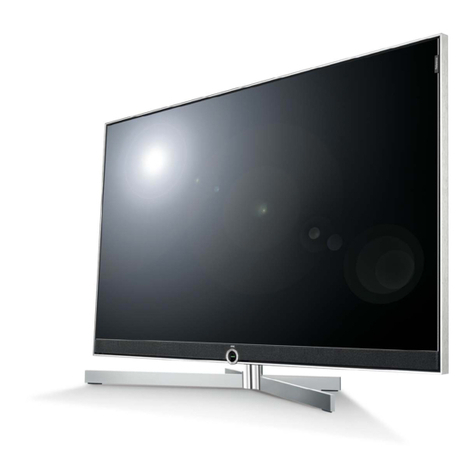
JVC AV-29QS17B User manual

ENGLISH
GGT0155-002A-H
COLOUR TELEVISION
INSTRUCTIONS
AV-29QS17B AV-21QS17B
AV-21QS19B
The illustrations of AV-29QS17B is used in this instruction manual for
explanation purpose. Your TV may not look exactly the same as illustrated.
This illustration shows AV-29QS17B.

2
If a television is not positioned in a sufficiently stable location,
it can be potentially hazardous due to falling. Many injuries,
particularly to children, can be avoided by taking simple
precautions such as:
• Using cabinets or stands recommended by the manufacturer of
the television.
• Only using furniture that can safely support the television.
• Ensuring the television is not overhanging the edge of the
supporting furniture.
• Not placing the television on tall furniture (for example, cupboards
or bookcases) without anchoring both the furniture and the
television to a suitable support.
• Not standing the televisions on cloth or other materials placed
between the television and supporting furniture.
• Educating children about the dangers of climbing on furniture to
reach the television or its controls.
• Never listen to headphones at high volume!
- It may damage your hearing.
Thank you for buying this JVC colour television.
To make sure you understand how to use your new TV, please read this manual thoroughly before you begin.
CAUTION TO ENSURE PERSONAL SAFETY, OBSERVE THE
FOLLOWING RULES REGARDING THE USE OF
THIS TV.
• Operate only
from the
power source
indicated on
the rear of the
TV.
• Avoid damaging the power
cord and mains plug. When
unplugging the TV, grasp the
mains plug. Do not pull on the
power cord.
• This TV can be
turned on/off power
by connecting/
disconnecting the
AC plug into AC outlet. While this
TV is being installed, enough
space should be reserved for
connection/disconnecting the AC
plug into AC outlet by hand.
WARNING TO PREVENT FIRE OR SHOCK HAZARD, DO
NOT EXPOSE THIS APPLIANCE TO RAIN OR
MOISTURE.
• Never block or cover the ventilation openings.
• Never install the TV where good ventilation is unattainable.
• When installing this TV, leave spaces for ventilation around
the TV of more than the minimum distances as shown.
• The apparatus
shall not be
exposed to
dripping or
splashing and that no objects filled
with liquids, such as vases, shall be
placed on the apparatus.
• Do not allow
objects or liquid
into the cabinet
openings. • The surface of the TV screen is easily
damaged. Be very careful with it when
handling the TV. Should the TV screen
become soiled, wipe it with a soft dry cloth.
Never rub it forcefully. Never use any
cleaner or detergent on it.
In the event of a
fault, unplug the unit and
call a service technician. Do
not attempt to repair it yourself
or remove the
rear cover.

3
Knowing your TV’s features Contents
Knowing your TV’s features ...................3
Connections ..........................................4
Initial settings .........................................5
Remote control buttons and basic
functions ................................................6
TV buttons and functions .......................7
Operating the menus .............................7
Picture setting ........................................9
Sound setting ......................................11
Customized setting ..............................13
TV channel presetting .........................15
Troubleshooting ...................................17
Specifications ......................................18
PREPARATION FUNCTIONS REFERENCE
Function
Features Descriptions
DVD MENU Just connect DVD player to the television. The television will detect DVD signal and
display picture on the screen automatically and you can adjust pictures and sound while
you are watching DVD as your desire. When disconnect DVD player, the television will
display the previous channel.
FAVORITE CH (Channel) You can register up to four favorite channels for quick recall with one press.
A2/NICAM
(STEREO / I†II)
You can listen to the stereo sound or bilingual sound from TV programme broadcasting
by A2 or NICAM Sound-multiplex system.
ECO MODE You can adjust TV screen contrast according to the brightness of your room to suitable
level for a better eyecare.
AI VOLUME TV adjusts the volume automatically for all TV channels to avoid sudden change of the
volume when selecting different TV channels or selecting Video Mode.
VNR You can reduce the picture noise when viewing noisy TV programmes or video sources.
WHITE BALANCE You can choose one of three tones of white to match to the video source such as movie,
sport, etc. Changing White balance affects the appearance of all other colours on the
screen.
TINT You can adjust TINT setting for all colour systems, including PAL.
Note : Some functions written in this instruction manual may not be available for your TV.
Please see the chart below and check the function are equipped for your TV's model number.
The model number is indicated at the rear of your TV. When you press a button concerned to a function that is not
available for your TV, it does not work and the logo "Ø" appears on the screen.
Model No.
Function
AV-29QS17B
AV-21QS17B
AV-21QS19B
PICTURE TILT •– –

4
The illustration of AV-29QS17B is shown here for explanation purpose. Your TV may not look exactly the same as illustrated.
CAUTION
Ensure to turn off all equipments including the TV before connecting the AC mains plug to the AC outlet.
Connections
After all the connections have been made,
insert the mains plug to the AC outlet.
• When connecting to COMPONENT (VIDEO-2) input,
depending on the connection, choose the appropriate
video input using the menu (\ page 14).
Connecting to the front video input terminal
Connecting to the rear component/video
input terminal and output terminal
75-ohm
coaxial cable
(not supplied)
VHF/UHF
outdoor
aerial
Rear of VCR
Camcorder or TV game
DVD player
(with component
video signals
input)
VCR (for playing)
DVD player
(composite signals)
VCR (for recording)
Connecting to the aerial cable and VCR
(Connect
directly if not
using a VCR)
Aerial cable RF output
Video output
(Connect via a VCR)
Audio output
S-video output
RF input
TV rear terminals
Headphones

5
AUTO PROGRAM
OK / : EDIT
22%
PREPARATION
Initial settings
1or wait 15 seconds to
run Setup Tour
3
2
To stop or wait until AUTO PROGRAM
finishes
Select a language
Searching for the channels (AUTO PROGRAM)
4Edit the channel list
To complete
Setup Tour
To edit the
channel list,
\ page 15.
JVC logo appears
1 Select
2 Confirm
Turn on the TV
To restart Setup Tour after above setup has completed
(while the cursor is pointing to
PICTURE MODE and within 3
seconds)

6
WARNING:
Batteries shall not be exposed
to excessive heat such as direct
sunshine, fire or the like.
If this symbol is
shown, it is only valid
in the European
Union.
Remote control buttons and basic functions
Turn the TV on from standby and vice versa
Programme and recall 4 favourite channels
(colour buttons: red, green, yellow, blue)
Choose the TV channel you wish to programme
Press and hold
any button
PROGRAMMED! ■
Repeat to programme another favourite channel.
To recall the favourite channel, press the
corresponding colour button.
• When the TV is in Text function or MENU mode, the
favourite channel function is not available.
• When the TV is in PIP function, the favourite channel
function cannot be programmed but can recall the
favourite channel.
TV or video terminal input selection, Exit from the menu
Turn the volume Off / On
Programme number selection
For two digits :
Adjust the volume level, Turn off Muting
Channel selection
Select the desired channel number.
For Hyper Scan
Press and hold
RETURN PLUS function
Return to the frequently viewed channel.
Choose the channel you want to programme
Press and hold
RETURN PLUS
PROGRAMMED!
To cancel
Press and hold
RETURN PLUS
CANCELED!
RETURN function
If you have not set or have canceled the RETURN PLUS
channel, this will return to the previously viewed channel.
PR changes without changing the
picture. Once you stop pressing
CHANNEL+ or CHANNEL– button,
picture will change to the desired PR.
Operating the menus (\ page 7)
• Insert two batteries by following the
and polarities and inserting the end
first.
• Use AA/R6/UM-3 dry cell batteries.
• If the remote control does not work
properly, fit new batteries. The supplied
batteries are for testing, not regular use.
• Display the programme or video terminal number and
stereo/bilingual broadcast system.
• To return to the previous menu

7
PREPARATION
TV buttons and functions
Operating the menus
To display the
MENU.
To select a Top menu. To select a second menu. To select, adjust or
choose the setting of a
function.
When the cursor is at MENU. To display
other pages.
To return to
the previous
menu.
TOP menuMENU 2nd menu 3rd menu
SET UP menuMENU EDIT/MANUAL EDIT
Example:
To select for go to third
menu.
Depend to the on screen
guide.
Select
Select
Select
Adjust
To exit.
Select
Depend to the on screen
guide.
or Select
or
Video and audio
input jacks for
VIDEO-3 mode
Remote control sensor TV’s main power on/off
Power lamp - Indicates the TV’s status.
No colour: TV’s main power is being turned off.
Red: TV’s main power is turned on.
Blink: While the TV is in standby mode, ON TIMER function is in used.
While the TV is in turn on mode, OFF TIMER function is in used.
Note: When you turn off the power switch while TV is in standby mode,
the power lamp will go off in 5-10 seconds. When you operate the
TV, POWER Lamp will blink.
The illustration of AV-29QS17B is shown here for explanation purpose. Your TV may not look exactly the same as illustrated.
Display the menu and exit after finish setting
Channel selection, To select menu function
Volume level adjustment, To choose a Top
menu and adjust the desired menu function
TV or Video terminal input selection,
Exit from the menu
Headphone jeck

8
Operating the menus (continued)
You can use the DVD MENU by switch channel to VIDEO-2. See the menus location in the below table.
For RF / Video-1 / Video-3 (MENU) For Video-2 (DVD MENU)
Top menu Page 2nd menu 3rd menu / Adjustments 3rd menu / Adjustments
9
PICTURE MODE USER / VIVID / SOFT DVD THEATER STATUS set to OFF : USER / SHARP / CLEAR / VIVID / SOFT
DVD THEATER STATUS set to ON : USER / SHARP / CLEAR
PICTURE
9
PICTURE SETTING
PICTURE MODE set to USER : CONTRAST / BRIGHT/ SHARP/
COLOUR / TINT
PICTURE MODE set to SOFT or VIVID:
–
PICTURE MODE set to USER : CONTRAST / BRIGHT/ SHARP / COLOUR / TINT
PICTURE MODE set to SHARP or CLEAR or SOFT or VIVID :
–
or
9
WHITE BALANCE NORMAL / COOL / WARM DVD THEATER STATUS set to OFF : NORMAL / COOL / WARM
DVD THEATER STATUS set to ON :
–
DVD MENU
PICTURE
*
13
VNR
(Only available in RF, VIDEO-1 and VIDEO-3) OFF / AUTO / MIN / MAX
–
13
AUTO SIGNAL DETECT
(Only available in VIDEO-2)
–
ON / OFF
13
DVD THEATER STATUS
(Only available in VIDEO-2)
–
ON / OFF
11
STEREO / IRII (Only available in RF)
m / u / I / II –
11
AI VOLUME ON / OFF ON / OFF
SOUND
11
SOUND MODE USER / MUSIC / CINEMA / NEWS USER / MUSIC / CINEMA / DRAMA
or
11
EQUALIZER (SOUND MODE set to USER
and CINEMA SURROUND set to OFF only) Adjust the sound level of each frequencies. Adjust the sound level of each frequencies.
DVD MENU
SOUND
*
11
BALANCE Left Stronger / Right Stronger Left Stronger / Right Stronger
11
CINEMA SURROUND ON / OFF ON / OFF
14
ON TIMER Set timer for turn on the TV Set timer for turn on the TV
14
OFF TIMER Set timer for turn off the TV Set timer for turn off the TV
14
CHILD LOCK ON / OFF ON / OFF
9
COMPRESS (16:9 ) ON / OFF ON / OFF
FEATURES
10
ECO MODE OFF / ECO-1 / ECO-2 DVD THEATER STATUS set to OFF :
OFF / ECO-1 / ECO-2
DVD THEATER STATUS set to ON :
–
14
VIDEO-2 SETTING VIDEO / COMPONENT VIDEO / COMPONENT
9
BLUE BACK ON / OFF ON / OFF
10
PICTURE TILT Tilt the picture. Tilt the picture.
14
BEEP ON / OFF ON / OFF
15
AUTO PROGRAM Register the TV channel. Register the TV channel.
15
EDIT / MANUAL MOVE / INSERT / DELETE / MANUAL MANUAL / MOVE / DELETE / INSERT
SET UP
9
COLOUR SYSTEM AUTO / PAL / SECAM / NTSC3.58 / NTSC4.43 ViDEO-2 SETTING set to COMPONENT : AUTO
ViDEO-2 SETTING set to VIDEO : AUTO / PAL / SECAM / NTSC3.58 / NTSC4.43
13
LANGUAGE Select the languages. Select the languages.
* For DVD THEATER STATUS set to ON only

9
FUNCTIONS
Picture setting
COLOUR SYSTEM
You can select the appropriate colour system when the picture is not clear
or no colour appears.
AUTO → PAL → SECAM → NTSC3.58 → NTSC4.43
You can also operate this function from the menu.
SET UP menuMENU COLOUR SYSTEM
For the colour system in each country or region, see the table below:
Area Country or Region System
Asia,
Middle East
Bahrain, Kuwait, Oman, Qatar, United Arab Emirates, Yemen,
Indonesia, Malaysia, Singapore, Thailand, India, China, Vietnam,
Hong Kong, etc.
PAL
Islamic Republic of Iran, Lebanon, Saudi Arabia, etc. SECAM
Philippines, Taiwan, Myanmar, etc. NTSC
Europe Russia, etc. SECAM
Czech Republic, Poland, Germany, Holland, Belgium, UK, etc. PAL
Oceania Australia, New Zealand, etc. PAL
Africa Republic of South Africa, Nigeria, etc. PAL
Egypt, Morocco, etc. SECAM
WHITE BALANCE
You can change the white balance of the picture to better match the type
of video being viewed.
PICTURE menuMENU WHITE BALANCE
NORMAL Normal white balance
COOL Bluish white
WARM Reddish white
When DVD THEATER STATUS set to ON, WHITE BALANCE is not
available. \ Page 8.
COMPRESS (16:9)
You can convert a normal picture (4:3 aspect ratio) into a wide picture
(16:9 aspect ratio).
(Choose ON or OFF)
FEATURES menu
MENU COMPRESS (16:9)
PICTURE MODE
You can choose the desired picture setting with one-touch.
USER You can change this picture setting (CONTRAST,
BRIGHT, SHARP, COLOUR, TINT) as you like.
(\ PICTURE SETTING)
SHARP To sharpen this picuture.
VIVID Heightens contrast and sharpness.
SOFT Softens contrast and sharpness.
CLEAR To soften the picture.
You can also operate this function from the menu.
PICTURE menuMENU PICTURE MODE
To return the USER setting to default, press the blue button when the
PICTURE SETTING menu is displayed.
See details for the location menus in "Operating the menus" \ Page 8.
PICTURE SETTING
You can adjust the desired picture setting when selecting USER in
PICTURE MODE.
1 PICTURE menuMENU PICTURE MODE USER
2 PICTURE menuMENU PICTURE SETTING
CONTRAST 2 : Lower contrast 3 : Higher contrast
BRIGHT 2 : Darker 3 : Brighter
SHARP 2 : Softer 3 : Higher
COLOUR 2 : Lighter 3 : Deeper
TINT 2 : Reddish 3 : Greenish
See details for the location menus in “Operating the menus” \ Page 8.
BLUE BACK
You can set the TV to automatically change to a blue screen and mute the
sound if the signal is weak or absent, or when there is no input from an
antenna.
FEATURES menuMENU BLUE BACK (Choose ON or OFF)
This function is only available in RF mode.

10
Picture setting (continued)
ECO MODE
You can adjust TV screen contrast according to the brightness of your
room.
OFF Cancel the function.
ECO-1 Mild contrast (recommended).
ECO-2 Even contrast.
You can also operate this function from the menu.
When DVD THEATER STATUS set to ON, ECO MODE is not available.
\ Page 8.
Correcting the Slanting Picture (PICTURE TILT)
You can correct the picture tilt caused by the earth’s magnetic force.
1 FEATURES menuMENU PICTURE TILT
The following display appears.
PICTURE TILT
DISPLAY : BACK
MENU : EXIT
2 Tilt the picture
becomes level
To confirm
FEATURES menuMENU ECO MODE
This manual suits for next models
2
Table of contents
Other JVC TV manuals

JVC
JVC AV-28WX1EP User manual

JVC
JVC AV-32WP2EN User manual

JVC
JVC AV-T2912/ZAR User manual

JVC
JVC AV-28F3SJ User manual

JVC
JVC AV-29RX User manual

JVC
JVC LT-43VU6205 User manual

JVC
JVC AV-16N211 User manual

JVC
JVC AV-28BT80EP User manual

JVC
JVC I'Art Pro AV-32S565 User manual

JVC
JVC 56028 Use and maintenance manual