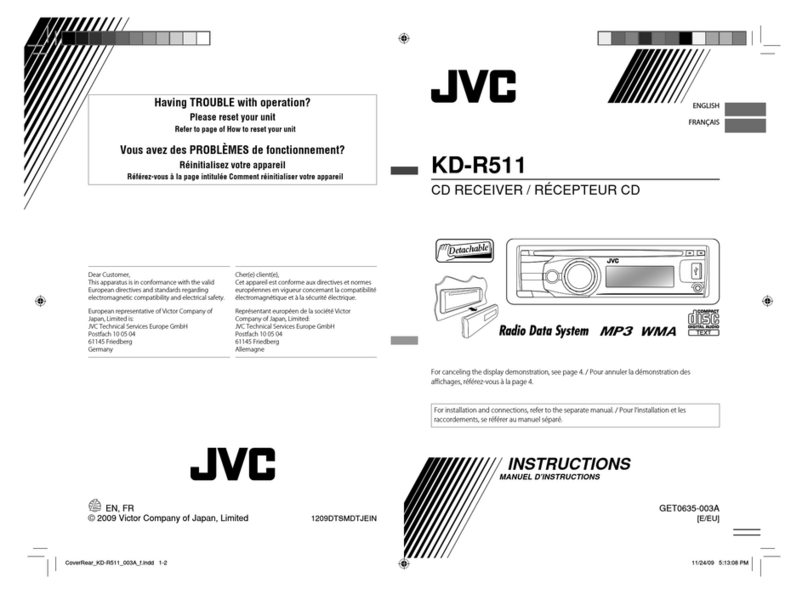
JVC KD-PDR45 User manual

ENGLISH
INDONESIA
CD RECEIVER KD-PDR45
ALAT PENERIMA CD KD-PDR45
For canceling the display demonstration, see page 6.
Untuk membatalkan tampilan demonstrasi, lihat halaman 6.
For installation and connections, refer to the separate manual.
Untuk instalasi dan penyambungan, lihat buku pedoman terpisah.
INSTRUCTIONS
BUKU PETUNJUK
GET0489-004A
[UN]
Cover_KD-PDR45[U]_004A.indd 1Cover_KD-PDR45[U]_004A.indd 1 7/25/07 10:44:16 AM7/25/07 10:44:16 AM

2
ENGLISH
[European Union only]
Warning:
If you need to operate the unit while driving, be
sure to look around carefully or you may be involved
in a traffic accident.
Thank you for purchasing a VC product.
Please read all instructions carefully before operation, to ensure your complete understanding and to obtain the best
possible performance from the unit.
IMPORTANT FOR LASER PRODUCTS
1. CLASS 1 LASER PRODUCT
2. CAUTION: Do not open the top cover. There are no user serviceable parts inside the unit; leave all servicing to
qualified service personnel.
3. CAUTION: Visible and/or invisible class 1M laser radiation when open. Do not view directly with optical
instruments.
4. REPRODUCTION OF LABEL: CAUTION LABEL, PLACED OUTSIDE THE UNIT.
Detaching the control panel
Attaching the control panel
EN02-05_KD-PDR45[U]_5.indd 2EN02-05_KD-PDR45[U]_5.indd 2 11/2/07 8:56:33 AM11/2/07 8:56:33 AM

ENGLISH
3
Ho to reset your unit
• Your preset adjustments will also be erased.
Ho to forcibly eject a disc
• Be careful not to drop the disc when it ejects.
• If this does not work, reset your unit.
Ho to use the M MODE button
If you press M MODE, the unit goes into functions mode,
then the number buttons and 5/∞ buttons work as
different function buttons.
Ex.: When number button 2 works as
MO (monaural) button.
To use these buttons for their original functions
again after pressing M MODE, press M MODE again.
• Waiting for about 5 seconds without pressing any of
these buttons will automatically cancels the functions
mode.
CONTENTS
Control panel .................................. 4
Remote controller — RM-RK50 ........... 5
Getting started ................................ 6
Basic operations ................................................... 6
Radio operations ............................. 7
Disc operations ................................ 8
Playing a disc in the unit ..................................... 8
iPod operations ............................... 10
Sound adjustments .......................... 12
General settings — PSM .................. 14
Other external component
operations ................................... 16
Title assignment .............................. 16
Maintenance ................................... 17
More about this unit ........................ 17
Troubleshooting .............................. 20
Specifications .................................. 22
For safety...
• Do not raise the volume level too much, as this will
block outside sounds, making driving dangerous.
• Stop the car before performing any complicated
operations.
Temperature inside the car...
If you have parked the car for a long time in hot or cold
weather, wait until the temperature in the car becomes
normal before operating the unit.
EN02-05_KD-PDR45[U]_5.indd 3EN02-05_KD-PDR45[U]_5.indd 3 11/2/07 8:56:34 AM11/2/07 8:56:34 AM

4
ENGLISH
1 5 (up) / ∞ (down) buttons
2 0 (eject) button
3 (standby/on attenuator) button
4 Control dial
5 Remote sensor
DO NO expose the remote sensor to strong light
(direct sunlight or artificial lighting).
6 BAND button
7 Loading slot
8 Display window
9 EQ (equalizer) button
p DISP (display) button
q (control panel release) button
w i (iPod) button
e 4 /¢ buttons
r SRC (source) button
t SEL (select) button
y M MODE button
u MO (monaural) button
i SSM (Strong-station Sequential Memory) button
o Number buttons
; RPT (repeat) button
a RND (random) button
s AUX (auxiliary) input jack
d Source display / Track number / Folder number /
Time countdown indicator
f Tr (track) indicator
g DISC indicator
h Playback mode / item indicators— RND (random),
(disc), (folder), RPT (repeat)
j Tuner reception indicators—ST (stereo),
MO (monaural)
k Sound mode (iEQ: intelligent equalizer) indicators
—CLASSIC, HIP HOP, AZZ, ROCK, POPS, USER
l LOUD (loudness) indicator
/ EQ (equalizer) indicator
z Disc information indicators—
TAG (Tag information), (folder), (track/file)
Main display
Parts identification
Control panel
Display indo
EN02-05_KD-PDR45[U]_5.indd 4EN02-05_KD-PDR45[U]_5.indd 4 11/2/07 8:56:35 AM11/2/07 8:56:35 AM

ENGLISH
5
Remote controller — RM-RK50
Installing the lithium coin battery
(CR2025)
Aim the remote controller directly at the remote
sensor on the unit. Make sure there is no obstacle
in between.
arning:
• Do not install any battery other than CR2025 or its
equivalent; otherwise, it may explode.
• Do not leave the remote ontroller in a pla e
(su h as the dashboard) exposed to dire t
sunlight for a long time; otherwise, it may
explode.
• Store the battery in a pla e where hildren annot
rea h to avoid the risk of a idents.
• To prevent the battery from over-heating,
ra king, or starting a fire:
– Do not re harge, short, disassemble, heat the
battery, or dispose of it in a fire.
– Do not leave the battery with other metalli
materials.
– Do not poke the battery with tweezers or
similar tools.
– Wrap the battery with tape and insulate when
throwing away or saving it.
Main elements and features
1 (standby/on/attenuator) button
• Turns the power on if pressed briefly or
attenuates the sound when the power is on.
• Turns the power off if pressed and held.
2 5 U (up) / D (down) ∞ buttons
• Changes the FM/AM bands with 5 U.
• Changes the preset stations with D ∞.
• Changes the folder of the MP3/WMA dis s.
• While listening to an Apple iPod.
– Enters the main menu if pressed and held.
(Now 5 U/D ∞/2 R/F 3 work as the menu
sele ting buttons.)
• While listening to an iPod (in menu sele ting
mode):
– Sele ts an item if pressed D ∞ briefly. (Then,
press and hold D ∞ to play ba k the sele tion
dire tly.)
– Returns to the previous menu if pressed 5 U
briefly.
3 VOL – / VOL + buttons
• Adjusts the volume level.
4 SOUND button
• Sele ts the sound mode (iEQ: intelligent
equalizer).
5 SOURCE button
• Sele ts the sour e.
6 2 R (reverse) / F (forward) 3 buttons
• Sear hes for stations if pressed briefly.
• Fast-forwards or reverses the tra k if pressed and
held.
• Changes the tra k if pressed briefly.
• While listening to an iPod (in menu sele ting
mode):
– A elerated file sear h: Hold 2 R/F 3 to fast
skip during song sear h in the main menu.
EN02-05_KD-PDR45[U]_7.indd 5EN02-05_KD-PDR45[U]_7.indd 5 11/20/07 12:16:46 PM11/20/07 12:16:46 PM

6
ENGLISH
To drop the volume in a
moment (ATT)
To restore the sound, press
the button again.
To turn off the power
Basic settings
• See also “General settings — PSM” on pages
14 and 15.
1
2
1 Canceling the display demonstrations
Select “ EMO,” then “ EMO OFF.”
2 Setting the clock
Select “CLOCK HOUR,” then adjust the hour.
Select “CLOCK MIN” (minute), then adjust the
minute.
3 Finish the procedure.
To check the current clock time while the
power is turned off
Clock time is shown on the display for
about 5 seconds. See also page 14.
Getting started
Basic operations
~ Turn on the power.
Ÿ
*1 You cannot select “CD” as the playback source
if there is no disc in the unit.
*2 “NO IPOD” appears if an iPod is not connected.
! For F /A tuner
⁄ Adjust the volume.
@ Adjust the sound as you want. (See
pages 12 and 13.)
Caution on volume setting:
iscs produce very little noise compared with other
sources. Lower the volume before playing a disc
to avoid damaging the speakers by the sudden
increase of the output level.
Volume level appears.
EN06-13_KD-PDR45[U]_5.indd 6EN06-13_KD-PDR45[U]_5.indd 6 11/2/07 8:56:47 AM11/2/07 8:56:47 AM

7
ENGLISH
Radio operations
~
Ÿ
! Start searching for a station.
When a station is received, searching stops.
To stop searching, press the same button
again.
To tune in to a station manually
In step ! above...
1
2 Select a desired station frequency.
Lights up when receiving an FM stereo
broadcast with sufficient signal strength.
When an F stereo broadcast is hard to
receive
Reception improves, but the stereo effect will be lost.
To restore the stereo effect, repeat the same
procedure. “MONO OFF” appears and the MO indicator
goes off.
Storing stations in memory
You can preset six stations for each band.
F station automatic presetting —
SS (Strong-station Sequential
emory)
1 Select the F band (F 1 – F 3) you want to
store into.
2
3
“SSM” flashes, then disappears when automatic
presetting is over.
Local FM stations with the strongest signals are
searched and stored automatically in the FM band.
Lights up when monaural mode is activated.
EN06-13_KD-PDR45[U]_5.indd 7EN06-13_KD-PDR45[U]_5.indd 7 11/2/07 8:56:48 AM11/2/07 8:56:48 AM

8
ENGLISH
Disc operations
Playing a disc in the unit
All tracks will be played repeatedly until you change the
source or eject the disc.
To stop play and eject the disc
• Press SRC to listen to another
playback source.
[Hold] To fast-forward or reverse the
track
[Press] To go to the next or previous
track
[Press] To go to the next or previous
folder (only for MP3 or WMA
discs)
To locate a particular track (for CD) or folder
(for P3 or W A discs) directly
To select a number from 01 – 06:
To select a number from 07 – 12:
anual presetting
Ex.: Storing the FM station of 92.50 MHz into preset
number 4 of the FM1 band.
1
2
3
Listening to a preset station
1
2 Select the preset station (1 – 6) you want.
or
To check other information while listening
to the radio
Frequency = Clock =
Station name * = (back to the
beginning)
* If no title is assigned to a station “NO NAME” appears.
To assign a title to a station see page 16.
Preset number flashes for a while.
EN06-13_KD-PDR45[U]_5.indd 8EN06-13_KD-PDR45[U]_5.indd 8 11/2/07 8:56:49 AM11/2/07 8:56:49 AM

9
ENGLISH
• To use direct folder access on MP3/WMA discs, it
is required that folders are assigned with 2-digit
numbers at the beginning of their folder names—
01, 02, 03, and so on.
To select a particular track in a folder
(for MP3 or WMA discs):
Other main functions
Skipping tracks quickly during play
• For MP3 or WMA discs, you can skip tracks within the
same folder.
Ex.: To select track 32 while playing a track whose
number is a single digit (1 to 9)
1
2
Each time you press the button, you can skip 10
tracks.
• After the last track, the first track will be selected
and vice versa.
3
Prohibiting disc ejection
You can lock a disc in the loading slot.
“EJECT LOCK” flashes on the display.
To cancel the prohibition, repeat the same
procedure.
Changing the display information
While playing an audio CD or CD Text
A = B = Disc title/performer *1 = Track
title *1 [ ] = (back to the beginning)
While playing an P3 or a W A track
• When “TAG DISPLAY” is set to “TAG ON”
(see page 15)
A = B = Album name/performer (folder
name *2) [ ] = Track title (file
name *2) [ ] = (back to the beginning)
• When “TAG DISPLAY” is set to “TAG OFF”
A = B = Folder name [ ] = File name
[ ] = (back to the beginning)
A : Current track number with the elapsed playing
time
B : Current track number with the clock time
[ ] : Corresponding indicator lights up on the display.
*1 If the current disc is an audio CD “NO NAME” appears.
*2 If an MP3/WMA file does not have Tag information
folder name and file name appear. In this case the
TAG indicator will not light up.
EN06-13_KD-PDR45[U]_5.indd 9EN06-13_KD-PDR45[U]_5.indd 9 11/2/07 8:56:49 AM11/2/07 8:56:49 AM

10
ENGLISH
Selecting the playback modes
You can use only one of the following playback modes
at a time.
1
2 Select your desired playback mode.
7 Repeat play
ode Plays repeatedly
TRACK RPT : The current track. [ ]
FOLDER RPT * : All tracks of the current folder.
[ ]
RPT OFF : Cancels.
7 Random play
ode Plays at random
FOLDER RND * : All tracks of the current folder,
then the tracks of the next folder
and so on. [ ]
ALL RND : All tracks of the current disc.
[ ]
RND OFF : Cancels.
* Only while playing an MP3 or a WMA disc.
[ ] : Corresponding indicator lights up on the
display.
iPod operations
You can play songs in an Apple iPod by connecting it
with the supplied direct connection cable for iPod.
You can control playback from the unit or from your
iPod.
• isconnecting the iPod will stop playback. Press SRC
to listen to another playback source.
Caution:
• Avoid using the iPod if it might hinder your safety
while driving.
• Make sure all important data has been backed up
to avoid losing the data.
• For connection, see the Installation/Connection
Manual (separate volume).
• For details, refer also to the manual supplied for your
iPod.
~ Connect an iPod.
If an iPod has been connected...
To directly select “IPO ” as the source
while listening to another source or
when the power is turned off.
Playback starts automatically from where it had
been paused previously.
Ÿ Adjust the volume.
irect connection
cable for iPod
EN06-13_KD-PDR45[U]_5.indd 10EN06-13_KD-PDR45[U]_5.indd 10 11/2/07 8:56:50 AM11/2/07 8:56:50 AM
Other manuals for KD-PDR45
1
Table of contents
Languages:
Other JVC Car Receiver manuals