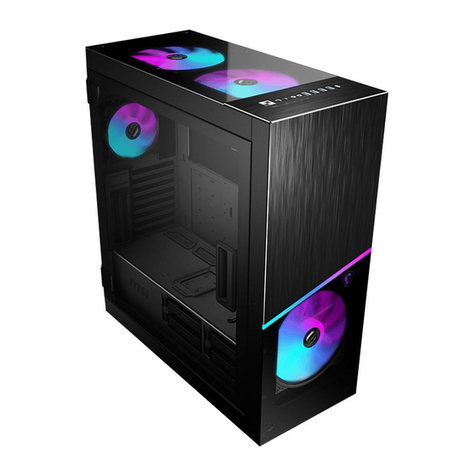
Joy-it JT-RD6006-Case02 User manual

LARGE CASE FOR RD6006
JT-RD6006-Case02
1. GENERAL INFORMATION
Dear customer,
Thank you for purchasing our product. In the following, we will show you
which things should be noted during the use.
Should you encounter any unexpected problems, do not hesitate to
contact us.
This case is available in two versions, version A and B. These versions
dier by a lead-out of the temperature sensor, which only version B
features.
This case is made for an additional power supply which allows
you to connect this lab power supply directly to alternating
current.
For your own safety, this product may only be
installed by a qualified electrician! Working on
electric devices / systems implies the hazard of
electric shocks which may cause serious injuries or
even death!
!

2. ASSEMBLY OF VERSION A
This case is made for the JT-RD6006 / JT-RD6006P and the corresponding
power supply JT-RD6006-NT. Both products are not included in the scope
of delivery.
1. First of all, unscrew the eight screws from the outside and open up
the case.
2. Screw the feet onto the case with the black screws.
3. Now, insert the switch, the power connector and the fan into the
case and screw them tight with the screws and nuts shown below.

4. Now, mount the power supply into the case. Therefore, you have to
screw it from the bottom of the case with the big silver screws.
5. Now, screw the fan control next to the Power Supply with the
remaining black screws and connect the fan to the connector
provided for this purpose.
6. This is followed by the wiring. You start by wiring the switch. First,
connect the short brown cable (phase) to the switch and the
bottom connection of the power connector. From the switch,
connect another brown cable to the screw terminal of the power
supply unit (marked as L). The blue cable is connected from the
middle connection of the power connector to the N connection of
the power supply unit. The yellow-green cable is connected from
the top pin of the power connector to the earth terminal of the
power supply unit (marked as ).

7. Now, connect the black cables of the fan controller and the RD6006
power supply unit to the V- terminals and the red cables to the V+
terminals.
8. Now, you have to connect the last loose cable with the RD6006.
Therefore, the black cable will be connected in IN- and red with IN+.

10. Now screw on the cover and your laboratory power supply unit is
ready for use.
You can adjust the output voltage of the RD6006-NT with the help of the
fine-tuning potentiometer. You can see your adjustment at the input
voltage of your RD6006 / RD6006P. Ideally, the RD6006 / RD6006P has an
input voltage of 65 V to be able to reach the complete 60 V.
9. The RD6006-NT has a switch with which you can set the input
voltage to 110 or 230V.

3. ASSEMBLY OF VERSION B
This case is made for the JT-RD6006 / JT-RD6006P and the related power
supply JT-RD6006-NT. Both products are not included in the scope of
delivery.
1. Screw the feet onto the case with the black screws.
2. Now, place the switch, the power connector, the fan control and the
fan in the enclosure and screw them in place with the silver screws
and nuts, if necessary. Place the temperature sensor board on the
back of the fan control and screw them both into the enclosure
together.

3. Now, mount the power supply into the case. Therefore, you have to
screw it from the bottom of the case with the big silver screws.
5. The rest of the wiring follows. You start by wiring the switch. First,
connect the short brown cable (phase) to the switch and the
bottom connection of the power connector. From the switch,
connect another brown cable to the screw terminal of the power
supply unit (marked as L). The blue cable is connected from the
middle connection of the power connection to the N connection of
the power supply unit. The yellow-green cable is connected from
the top pin of the power connector to the earth terminal of the
power supply unit (marked as ).
4. Now, connect the fan to the fan controller and the fan controller to
the power supply. Therefore, connect the black cable of the fan
control to the power supply with one of the anticipated terminals
V- and the red cable with one of the V+ terminals.

6. Now, you have to connect the last loose cables with the RD6006 and
the power supply. Therefore, the black cable will be connected
between IN– on the RD6006 and V– on the power supply and the red
cable between IN+ on the RD6006 and V+ on the power supply.
7. You can also connect the connector from the temperature sensor
lead-out if you want to lead the temperature sensor outside of the
case. Otherwise, connect the temperature sensor now to the
RD6006 / RD6006P.

9. Now, screw on the cover and your laboratory power supply unit is
ready for use.
You can adjust the output voltage of the RD6006-NT with the help of the
fine-tuning potentiometer. You can see your adjustment at the input
voltage of your RD6006 / RD6006P. Ideally, the RD6006 / RD6006P has an
input voltage of 65 V to be able to reach the complete 60 V.
8. The RD6006-NT has a switch with which you can set the input
voltage to 110 or 230V.

PR
4. OTHER INFORMATION
Our Information and Take-back Obligations according to the
German Electronic Law (ElektroG)
Symbol on Electrial and Electronic Products:
This crossed-out bin means that electrical and electronic pro-
ducts do not belong into the household waste. You must hand over your
old
appliance to a registration place. Before you can hand over the old
appliance, you must remove used batteries and replacement batteries
which are not enclosed by the device.
Return Options:
As the end user, you can hand over your old appliance (which has
essentially the same functions as the new one bought with us) free of
charge for disposal with the purchase of a new device. Small devices,
which do not have outer dimensions bigger than 25 cm can be handed in
for disposal independently of the purchase of a new product in normal
household quantities.
1. Possibility of return at our company location during our opening
hours
Simac Electronics Handel GmbH, Pascalstr. 8, D-47506 Neukirchen-Vluyn
2. Possibility of return nearby
We will send you a parcel stamp with which you can send us your old
appliance free of charge. For this possibility, please contact us via e-mail
at service@joy-it.net or via telephone.
Information about Package:
Please package your old appliance safe for transport. Should you not
have suitable packaging material or you do not want to use your own
material, you can contact us and we will send you an appropriate
package.
5. SUPPORT
If any questions remained open or problems may arise aer your
purchase,we are available by e-mail, telephone and ticket support
system to answer these.
E-Mail: service@joy-it.net
Ticket-system: http://support.joy-it.net
Telephone: +49 (0)2845 98469 – 66 (10 - 17 o'clock)
For further information visit our website:
www.joy-it.net
Published: 19.05.2021
www.joy-it.net
SIMAC Electronics GmbH
Pascalstr. 8, 47506 Neukirchen-Vluyn
Other manuals for JT-RD6006-Case02
1
This manual suits for next models
1
Table of contents
Other Joy-it Enclosure manuals

Joy-it
Joy-it JT-RD6006-Case01 User manual

Joy-it
Joy-it RB-StromPi3-Case User manual

Joy-it
Joy-it JT-RD6012-Case1 User manual

Joy-it
Joy-it RB-CASEP4+03B User manual

Joy-it
Joy-it ARMOR CASE BLOCK ACTIVE User manual

Joy-it
Joy-it ACRYLIC CASE User manual

Joy-it
Joy-it DPS CASE User manual

Joy-it
Joy-it RB-AlucaseP4+08 User manual

Joy-it
Joy-it RB-AlucaseP4+03B User manual