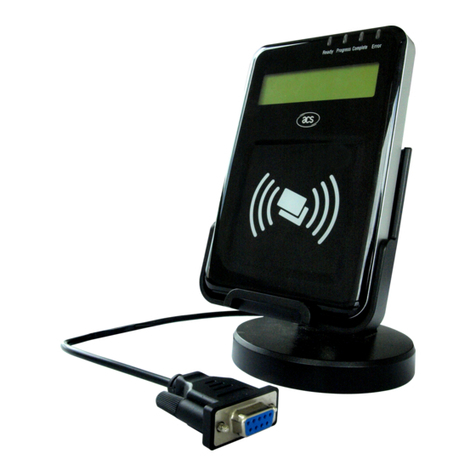
IDTECK SR10/30V User manual

User Manual
SR10/30V
RFID Reader

Table of contents
p.ii
Table of contents
1 Safety Information
1 IMPORTANT SAFETY INSTRUCTIONS
2 Product introduction
1 Features
2 What's included
2.1 What's included in SR10-V
2.2 What's included in SR30-V
3 At a glance
3.1 Front / Rear
4 Cable color scheme
5 Cable selection
3 Installation and external connection
1 Installation
2 Precautions on installation
2.1 If installing on a metal wall
2.2 If installing more than one reader side by side or front and back
3 External connection
3.1 Wiring Diagram
4 Initialization
1 Basic operations
1.1 Initial state (when the power is supplied)
1.2 Using the card
1.3 LED Control
1.4 Buzzer Control
5 Output format
. . . . . . . . . . . . . . . . . . . . . . . . . . . . . . . . . . . . . . . . . . . . . . . . . . . . . . ii
. . . . . . . . . . . . . . . . . . . . . . . . . . . . . . . . . . . . . . . . . . . . . . . . . . . 1
. . . . . . . . . . . . . . . . . . . . . . . . . . . . . . . . . . . . . . . . . 3
. . . . . . . . . . . . . . . . . . . . . . . . . . . . . . . . . . . . . . . . . . . . . . . . . 4
. . . . . . . . . . . . . . . . . . . . . . . . . . . . . . . . . . . . . . . . . . . . . . . . . . . . . . . . . . . . . . . 4
. . . . . . . . . . . . . . . . . . . . . . . . . . . . . . . . . . . . . . . . . . . . . . . . . . . . . . . . . 4
. . . . . . . . . . . . . . . . . . . . . . . . . . . . . . . . . . . . . . . . . . . . . . . 5
. . . . . . . . . . . . . . . . . . . . . . . . . . . . . . . . . . . . . . . . . . . . . . . 5
. . . . . . . . . . . . . . . . . . . . . . . . . . . . . . . . . . . . . . . . . . . . . . . . . . . . . . . . . . . . . 5
. . . . . . . . . . . . . . . . . . . . . . . . . . . . . . . . . . . . . . . . . . . . . . . . . . . . . . . . . . 5
. . . . . . . . . . . . . . . . . . . . . . . . . . . . . . . . . . . . . . . . . . . . . . . . . . . . . . 6
. . . . . . . . . . . . . . . . . . . . . . . . . . . . . . . . . . . . . . . . . . . . . . . . . . . . . . . . . . 6
. . . . . . . . . . . . . . . . . . . . . . . . . . . . . . . . . . . . . 7
. . . . . . . . . . . . . . . . . . . . . . . . . . . . . . . . . . . . . . . . . . . . . . . . . . . . . . . . . . . . . 7
. . . . . . . . . . . . . . . . . . . . . . . . . . . . . . . . . . . . . . . . . . . . . . . . . 8
. . . . . . . . . . . . . . . . . . . . . . . . . . . . . . . . . . . . . . . . . . . . . . . 8
. . . . . . . . . . . . . . . . . . 8
. . . . . . . . . . . . . . . . . . . . . . . . . . . . . . . . . . . . . . . . . . . . . . . . . . . . . . 9
. . . . . . . . . . . . . . . . . . . . . . . . . . . . . . . . . . . . . . . . . . . . . . . . . . . . . . . 9
. . . . . . . . . . . . . . . . . . . . . . . . . . . . . . . . . . . . . . . . . . . . . . . . . . . . . . . . 11
. . . . . . . . . . . . . . . . . . . . . . . . . . . . . . . . . . . . . . . . . . . . . . . . . . . . . . . . . 11
. . . . . . . . . . . . . . . . . . . . . . . . . . . . . . . . . . . . 11
. . . . . . . . . . . . . . . . . . . . . . . . . . . . . . . . . . . . . . . . . . . . . . . . . . . . . . . . 11
. . . . . . . . . . . . . . . . . . . . . . . . . . . . . . . . . . . . . . . . . . . . . . . . . . . . . . . . . . 11
. . . . . . . . . . . . . . . . . . . . . . . . . . . . . . . . . . . . . . . . . . . . . . . . . . . . . . . . 12
. . . . . . . . . . . . . . . . . . . . . . . . . . . . . . . . . . . . . . . . . . . . . . . . . . . . . . 13

p.iii Table of contents
SR10/30V
1 WIEGAND output
1.1 Timing Diagram
1.2 Data type
2 RS-232 output
2.1 Output waveform
2.2 Data type
6 Troubleshooting
1 Troubleshooting
7 Product specifications
1 Product specifications
8 RMA Request
9 Warranty Policy and Limitation of Liability
Back cover
. . . . . . . . . . . . . . . . . . . . . . . . . . . . . . . . . . . . . . . . . . . . . . . . . . . . . . . . 13
. . . . . . . . . . . . . . . . . . . . . . . . . . . . . . . . . . . . . . . . . . . . . . . . . . . . . . . 13
. . . . . . . . . . . . . . . . . . . . . . . . . . . . . . . . . . . . . . . . . . . . . . . . . . . . . . . . . . . . 13
. . . . . . . . . . . . . . . . . . . . . . . . . . . . . . . . . . . . . . . . . . . . . . . . . . . . . . . . . . 14
. . . . . . . . . . . . . . . . . . . . . . . . . . . . . . . . . . . . . . . . . . . . . . . . . . . . . . 14
. . . . . . . . . . . . . . . . . . . . . . . . . . . . . . . . . . . . . . . . . . . . . . . . . . . . . . . . . . . . 14
. . . . . . . . . . . . . . . . . . . . . . . . . . . . . . . . . . . . . . . . . . . . . . . . . . . . 15
. . . . . . . . . . . . . . . . . . . . . . . . . . . . . . . . . . . . . . . . . . . . . . . . . . . . . . . . . 15
. . . . . . . . . . . . . . . . . . . . . . . . . . . . . . . . . . . . . . . . . . . . . . . . 17
. . . . . . . . . . . . . . . . . . . . . . . . . . . . . . . . . . . . . . . . . . . . . . . . . . . . 17
. . . . . . . . . . . . . . . . . . . . . . . . . . . . . . . . . . . . . . . . . . . . . . . . . . . . . . . 18
. . . . . . . . . . . . . . . . . . . . . . . . . . . . . . . . . 20
. . . . . . . . . . . . . . . . . . . . . . . . . . . . . . . . . . . . . . . . . . . . . . . . . . . . . . . . . . . . 22

Safety Information 1
p.1
CAUTION: TO REDUCE THE RISK OF ELECTRIC SHOCK, DO NOT REMOVE COVER
(OR BACK) NO USER SERVICEABLE PARTS INSIDE. REFER SERVICING TO
QUALIFIED SERVICE PERSONNEL.
This symbol indicates that dangerous voltage consisting a risk of electric shock is
present within this unit.
This exclamation point symbol is intended to alert the user to the presence of
important operating and maintenance (servicing) instructions in the literature accompanying
the appliance.
WARNING
To reduce the risk of fire or electric shock, do not expose this appliance to rain or moisture.
WARNING
1. Be sure to use only the standard adapter that is specified in the specification sheet.
Using any other adapter could cause fire, electrical shock, or damage to the product.
2. Incorrectly connecting the power supply or replacing battery may cause explosion, fire,
electric shock, or damage to the product.
3. Do not connect multiple controllers to a single adapter. Exceeding the capacity may
cause abnormal heat generation or fire.
4. Securely plug the power cord into the power receptacle. Insecure connection may
cause fire.

p.2 Safety Information
SR10/30V
5. When installing the controller, fasten it securely and firmly. The fall of controller may
cause personal injury.
6. Do not place conductive objects (e.g. screwdrivers, coins, metal parts, etc.) or
containers filled with water on top of the controller. Doing so may cause personal injury
due to fire, electric shock, or falling objects.
7. Do not install the unit in humid, dusty, or sooty locations. Doing so may cause fire or
electric shock.
8. If any unusual smells or smoke come from the unit, stop using the product. In such
case, immediately disconnect the power source and contact the service center.
Continued use in such a condition may cause fire or electric shock.
9. If this product fails to operate normally, contact the nearest service center. Never
disassemble or modify this product in any way. (SAMSUNG is not liable for problems
caused by unauthorized modifications or attempted repair.)
10. When cleaning, do not spray water directly onto parts of the product. Doing so may
cause fire or electric shock.
CAUTION
1. Do not drop objects on the product or apply strong blows to it. Keep away from a
location subject to excessive vibration or magnetic interference.
2. Do not install in a location subject to high temperature (over 50°C), low temperature
(below -30°C), or high humidity. Doing so may cause fire or electric shock.
3. If you want to relocate the already installed product, be sure to turn off the power and
then move or reinstall it.
4. Remove the power plug from the outlet when there is a lighting storm. Neglecting to
do so may cause fire or damage to the product.
5. Keep out of direct sunlight and heat radiation sources. It may cause fire.
6. Install it in a place with good ventilation.
7. Avoid aiming the controller directly towards extremely bright objects such as sun.
8. Apparatus shall not be exposed to dripping or splashing and no objects filled with
liquids, such as vases, shall be placed on the apparatus.
9. The Mains plug is used as a disconnect device and shall stay readily operable at any
time.

Safety Information
SR10/30V
p.3
1IMPORTANT SAFETY INSTRUCTIONS
1. Read these instructions.
2. Keep these instructions.
3. Heed all warnings.
4. Follow all instructions.
5. Do not use this apparatus near water.
6. Clean only with dry cloth.
7. Do not block any ventilation openings. Install in accordance with the manufacturer’s
instructions.
8. Do not install near any heat sources such as radiators, heat registers, or other apparatus
(including amplifiers) that produce heat.
9. Do not defeat the safety purpose of the polarized or grounding-type plug. A polarized
plug has two blades with one wider than the other. A grounding type plug has two
blades and a third grounding prong. The wide blade or the third prong is provided for
your safety. If the provided plug does not fit into your outlet, consult an electrician for
replacement of the obsolete outlet.
10. Protect the power cord from being walked on or pinched particularly at plugs,
convenience receptacles, and the point where they exit from the apparatus.
11. Only use attachments/accessories specified by the manufacturer.
12. Use only with cart, stand, tripod, bracket, or table specified by the manufacturer, or
sold with the apparatus.
13. Unplug this apparatus when a card is used. Use caution when moving the cart/
apparatus combination to avoid injury from tip-over.
14. Refer all servicing to qualified service personnel. Servicing is required when the
apparatus has been damaged in any way, such as power supply cord or plug is
damaged, liquid has been spilled or objects have fallen into the apparatus, the
apparatus has been exposed to rain or moisture, does not operate normally, or has
been dropped.

Product introduction 2
p.4
1Features
This model is an elegant-looking proximity reader that can be easily attached to a metal
doorframe or the wall. Featured by the epoxy adhesion and aluminium case, SR10-V /
SR30-V is shock-resistant with a high level of weather-proofing in any challenging weather
conditions. The red and green indicators as well as the Piezo buzzer guarantee a stable and
proper operation for you.
●13.56 MHz [MIFARE] Contactless Smart Card Reader
●Compatible with ISO14443 Type A
●3 Array LED Indicators (red and green) and Built-in Buzzer
●34 bit Wiegand / RS-232 Output Format
●Control of External LED Indicators
●Control of External Buzzer
●Epoxy adhesion and aluminium case
●Reverse Polarity Protection
●Weatherproof and Dustproof
2What's included
Check if the following items are included in the product package.

Product introduction
SR10/30V
p.5
2.1 What's included in SR10-V
2.2 What's included in SR30-V
3At a glance
3.1 Front / Rear

p.6 Product introduction
SR10/30V
1. LED Displays the system operation status using red and green indicators.
2. Buzzer Piezo buzzer.
3. Connection Cable Used to connect to the power or I/O cable.
4. Fixing Hole Fixing hole for wall-mounting.
5. Tamper Switch A tamper switch to detect falling from the wall.
4Cable color scheme
Item Cable color Signal Line Description
Power Red DC + 12V DC +12V supplied
Black GND Earth-grounding for power
Input Blue Buzzer control BUZZER control input port
Yellow LED control LED control input port
Output Green Out Wiegand 0 Wiegand Data 0 Output Port
White Out Wiegand 1 Wiegand Data 1 Output Port
Communication Purple RS-232 (TX) RS-232 Transmission output port
Tamper Pink Tamper output (COM) Tamper output port
Light yellow Tamper output (NC) Tamper output port
Not used Gray NC Not connected
Brown
Orange
5Cable selection
Item Cable type
Power (DC12V) Belden #9409, 18 AWG 2 Conductor, Unshielded
WIEGAND Output
Buzzer Control
LED Control
Tamper Output
Belden #9512, 22 AWG 4 Conductor, Shielded
Belden #9514, 22 AWG 8 Conductor, Shielded
RS-232 Cable Belden #9829, 24 AWG 2-twisted pair, Shielded

Installation and external connection 3
p.7
1Installation
Inserted in the doorframe / attached to the wall
1. Two 6-32 or M3 holes are 3.3” (8.38 cm) away from each other vertically; between the
two exists one 1/2” hole through which the reader cables are arranged. The midway
hole is located 1.7” (4.31cm) down from the upper hole. (If the product is already
installed, you can skip this step.)
2. Insert the reader cables to the midway hole and fi x the reader module with two 6-32
or M3 screws.
3. Insert the reader module into the appearance case and tighten the screw (M6x8 mm)
using the hex wrench.
Table of contents
Other IDTECK Card Reader manuals

IDTECK
IDTECK Star SR10 User manual

IDTECK
IDTECK Star RFK101 User manual

IDTECK
IDTECK Star RFK101 User manual

IDTECK
IDTECK PROX10 User manual

IDTECK
IDTECK Star RF30 User manual

IDTECK
IDTECK SR10RW User manual

IDTECK
IDTECK SR30 User manual

IDTECK
IDTECK Star RF10 User manual

IDTECK
IDTECK Star SR10 User manual

IDTECK
IDTECK Star RFK505 User manual

IDTECK
IDTECK STAR RF70 User manual

IDTECK
IDTECK Star FINGER006 User manual

IDTECK
IDTECK PROX10 User manual

IDTECK
IDTECK Star RFK101 User manual

IDTECK
IDTECK RF900I-8 User manual

IDTECK
IDTECK Star RFK505 User manual

IDTECK
IDTECK Star SR10 User manual

IDTECK
IDTECK Star RFK101 User manual

IDTECK
IDTECK ipass IP10 User manual

IDTECK
IDTECK SRK101 User manual