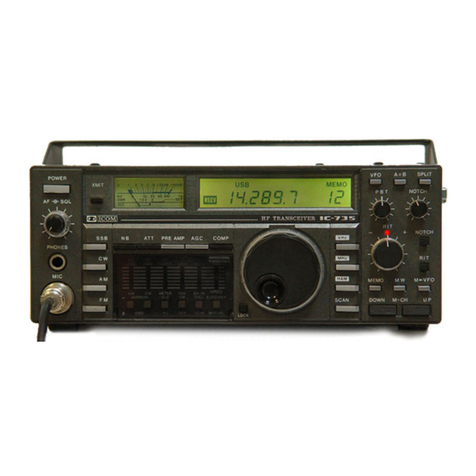
Icom IC-F3021T/S User manual

INSTRUCTION MANUAL
This device complies with Part 15 of the FCC
Rules. Operation is subject to the condition that
this device does not cause harmful interference.
The photo shows the 10-key
version VHF transceiver.
iF3023T/S
iF3021T/S
VHF TRANSCEIVERS
iF3026T/S
iF4023T/S
iF4021T/S
UHF TRANSCEIVERS
iF4026T/S

i
RCAUTION! NEVER hold the transceiver so that
the antenna is very close to, or touching exposed parts of
the body, especially the face or eyes, while transmitting. The
transceiver will perform best if the microphone is 2 to 4 in. (5
to 10 cm) away from the lips and the transceiver is vertical.
RCAUTION! NEVER operate the transceiver with a
headset or other audio accessories at high volume levels.
RCAUTION! NEVER short the terminals of the bat-
tery pack.
RCAUTION! NEVER use non-Icom battery packs/
chargers to prevent the loss of the transceiver’s good per-
formance and warranty.
DO NOT push [PTT] when not actually desiring to trans-
mit.
DO NOT use or place the transceiver in direct sunlight or
in areas with temperatures below +22°F (–30°C) or above
+140°F (+60°C).
DO NOT modify the transceiver for any reason.
READ ALL INSTRUCTIONS carefully and com-
pletely before using the transceiver.
SAVE THIS INSTRUCTION MANUAL — This
instruction manual contains important operating instruc-
tions for the IC-F3021T/S, IC-F3023T/S, IC-F3026T/S VHF
TRANSCEIVERS and the IC-F4021T/S, IC-F4023T/S, IC-
F4026T/S UHF TRANSCEIVERS.
Icom, Icom Inc. and the logo are registered trademarks of Icom
Incorporated (Japan) in the United States, the United Kingdom, Germany,
France, Spain, Russia and/or other countries.
EXPLICIT DEFENITIONS
WORD DEFINITION
RWARNING Personal injury, fire hazard or electric
shock may occur.
CAUTION Equipment damage may occur.
NOTE
If disregarded, inconvenience only. No risk
of personal injury, fire or electric shock.
IMPORTANT PRECAUTIONS

ii
KEEP the transceiver from the heavy rain, and Never im-
merse it in the water. The transceiver construction is water
resistant, not waterproof.
The basic operations, transmission and reception of the
transceiver are guaranteed within the specified operating
temperature range. However, the LCD display may not be
operate correctly, or show an indication in the case of long
hours of operation, or after being placed in extremely cold
areas.
Icom optional equipment is designed for optimal perform-
ance when used with this transceiver. We are not respon-
sible for the transceiver being damaged or any accident
caused when using non-Icom optional equipment.
For U.S.A. only
CAUTION: Changes or modifications to this transceiver, not
expressly approved by Icom Inc., could void your authority to
operate this transceiver under FCC regulations.
FCC INFORMATION
• FOR CLASS B UNINTENTIONAL RADIATORS:
This equipment has been tested and found to comply with
the limits for a Class B digital device, pursuant to part 15 of
the FCC Rules. These limits are designed to provide reason-
able protection against harmful interference in a residential
installation. This equipment generates, uses and can radiate
radio frequency energy and, if not installed and used in ac-
cordance with the instructions, may cause harmful interfer-
ence to radio communications. However, there is no guaran-
tee that interference will not occur in a particular installation.
If this equipment does cause harmful interference to radio or
television reception, which can be determined by turning the
equipment off and on, the user is encouraged to try to cor-
rect the interference by one or more of the following meas-
ures:
• Reorient or relocate the receiving antenna.
• Increase the separation between the equipment and re-
ceiver.
• Connect the equipment into an outlet on a circuit differ-
ent from that to which the receiver is connected.
• Consult the dealer or an experienced radio/TV techni-
cian for help.
PRECAUTIONS

iii
TABLE OF CONTENTS
IMPORTANT.......................................................................... i
EXPLICIT DEFENITIONS ..................................................... i
PRECAUTIONS..................................................................... i
FCC INFORMATION ............................................................ ii
TABLE OF CONTENTS....................................................... iii
1 ACCESSORIES ...........................................................1−3
■Supplied accessories ...................................................1
■Accessory attachments ................................................1
2 PANEL DESCRIPTION................................................4−9
■Front panel ...................................................................4
■Function display ...........................................................6
■Programmable function keys ........................................7
3 BASIC OPERATION................................................10−15
■Turning power ON ......................................................10
■Channel selection.......................................................11
■Call procedure ............................................................ 11
■Receiving and transmitting .........................................12
■User set mode ............................................................14
■Stun function ..............................................................14
■Emergency Call .......................................................... 14
■Man Down Emergency Call........................................14
■Scrambler function .....................................................15
■Priority A channel selection........................................15
■MDC 1200 system operation......................................15
4 OPTIONAL SmarTrunk OPERATION.....................16−17
■SmarTrunk 3G™ mode selection ...............................16
■SmarTrunk 3G™ operation.........................................16
5 BATTERY CHARGING ............................................18−21
■ Caution.......................................................................18
■Optional battery chargers...........................................20
6 BATTERY CASE............................................................22
■ Optional battery case (BP-240)..................................22
7 OPTIONAL SWIVEL BELT CLIP ............................23−24
■MB-93 contents ..........................................................23
■Attaching ....................................................................23
■Detaching ...................................................................24
8 OPTIONS.................................................................25−26
9 SAFETY TRAINING INFORMATION.............................27

1
1
ACCESSORIES
1
■Supplied accessories
NOTE: Some accessories are not supplied with depend-
ing on versions.
■Accessory attachments
DFlexible antenna
Connect the supplied flexible antenna
to the antenna connector.
CAUTION!
• NEVERHOLD the antenna when
carrying the transceiver.
• Transmitting without an antenna
may damage the transceiver.
Flexible antenna Battery pack Belt clip
Unit cover
(double-sided tape)*
Jack cover
(with screws)
*Use the unit cover as a spare. Ask your dealer for details.

2
1ACCESSORIES
DBattery pack
To attach the battery pack:
Slide the battery pack in the direction of the arrow (q), then
lock it with the battery release button.
• Slide the battery pack until the battery release button makes a
‘click’ sound.
To release the battery pack:
Slide the battery release button in the direction of the arrow
(w) as shown below. The battery pack is then released.
NEVER release or attach the battery pack when the
transceiver is wet or soiled. This may result water or dust
getting into the transceiver/battery pack and may result in
the transceiver being damaged.
DBelt clip
To attach the belt clip:
qRelease the battery pack if it is attached.
wSlide the belt clip in the direction of the arrow until the belt
clip is locked and makes a ‘click’ sound.
To detach the belt clip:
qRelease the battery pack if it is attached.
wPinch the clip (q), and slide the belt clip in the direction
of the arrow (w).
q
w
Battery release button
q
w

3
1
ACCESSORIES
1
DJack cover
Attach the jack cover when the optional speaker-microphone
or headset is not used.
To attach the jack cover:
qAttach the jack cover to the [MIC/SP] jack.
wTighten the screws.
CAUTION!
• Attach the jack cover when the optional speaker-micro-
phone or headset is not used.
• Use the supplied screws only.
To detach the jack cover:
qUnscrew the screws using a phillips screwdriver.
wDetach the jack cover for the speaker-microphone or
headset connection.
q
q
w
qw
[MIC/SP] jac
k
Jack cover

4
2PANEL DESCRIPTION
■Front panel
qANTENNA CONNECTOR
Connects the supplied antenna.
wDEALER-PROGRAMMABLE KEY [Emer]
Desired function can be programmed by your dealer.
(p. 7)
eDEALER-PROGRAMMABLE KEY [Side1]
Desired function can be programmed by your dealer.
(p. 7)
rPTT SWITCH [PTT]
Push and hold to transmit; release to receive.
tDEALER-PROGRAMMABLE KEYS [Side2]/[Side3]
Desired functions can be programmed independently by
your dealer. (p. 7)
y10-KEYPAD (Depending on version)
The keypad allows you to enter digits to:
• Select memory channels
• Select tone channels
• Select DTMF codes (during transmit)
• Set TX codes
• Start up with the password
uDEALER-PROGRAMMABLE KEYS [P0] to [P3]
Desired functions can be programmed independently by
your dealer. (p. 7)
iFUNCTION DISPLAY (p. 6)
Displays a variety of information such as an operating
channel number/name, 2-tone code, DTMF numbers, se-
lected function, etc.
q
w
r
eo
i
u
y
Microphone
Speaker
!0
t

5
2
PANEL DESCRIPTION
2
oEXTERNAL MICROPHONE/SPEAKER JACK
Connect an optional speaker-microphone or headset.
NOTE: Connect or disconnect the optional equipment
after the transceiver is turned OFF.
!0 VOLUME CONTROL [VOL]
Rotate to turn the power ON/OFF and adjusts the audio
level.
Jack cover
NOTE: Attach the jack
cover when the optional
equipment is not used.
See (p. 3) for details.

6
2PANEL DESCRIPTION
■Function display
yq iutrew
o
!0
qTRANSMIT INDICATOR
Appears while transmitting.
wBUSY INDICATOR
Appears while the channel is busy.
eSIGNAL STRENGTH INDICATOR
Indicates relative signal strength level.
rLOW POWER INDICATOR
Appears when low output power is selected.
• When the battery power decreases to a specified level, low
power is selected automatically.
tAUDIBLE INDICATOR
➥ Appears when the channel is in the ‘audible’ (unmute)
condition.
➥ Appears when the specified 2-tone code is received.
ySCRAMBLER INDICATOR
Appears when the voice scrambler function is activated.
uBELL INDICATOR
Appears/blinks when the specific 2-tone code is received,
according to the pre-programming.
iKEY LOCK INDICATOR
Appears during the key lock function is ON.
oBATTERY INDICATOR
Appears or blinks when the battery power decreases to a
specified level.
!0 ALPHANUMERIC DISPLAY
Displays an operating channel number, channel name,
Set mode contents, DTMF code, etc.
Other manuals for IC-F3021T/S
1
This manual suits for next models
16
Table of contents
Other Icom Transceiver manuals