Helmholz REX 100 User manual
Quick Start Guide REX100
www.helmholz.com
Version
3en

Quick Start Guide REX 1002
Content
1. Introduction 3
2. Preparing the REX 100 unit 3
3. Creating a REX 100 conguration in the myREX24 portal 3
4. Router conguration transfer options 6
5. Establishing a VPN connection to your REX 100 12
6. Remotely servicing an Ethernet PLC 14
7. Description of LEDs and buttons 15
8. Restoring the REX 100 router to its default settings 15
9. Loading the conguration or rmware update from a USB ash drive 15
10. Technical specications 16

Quick Start Guide REX 100 3
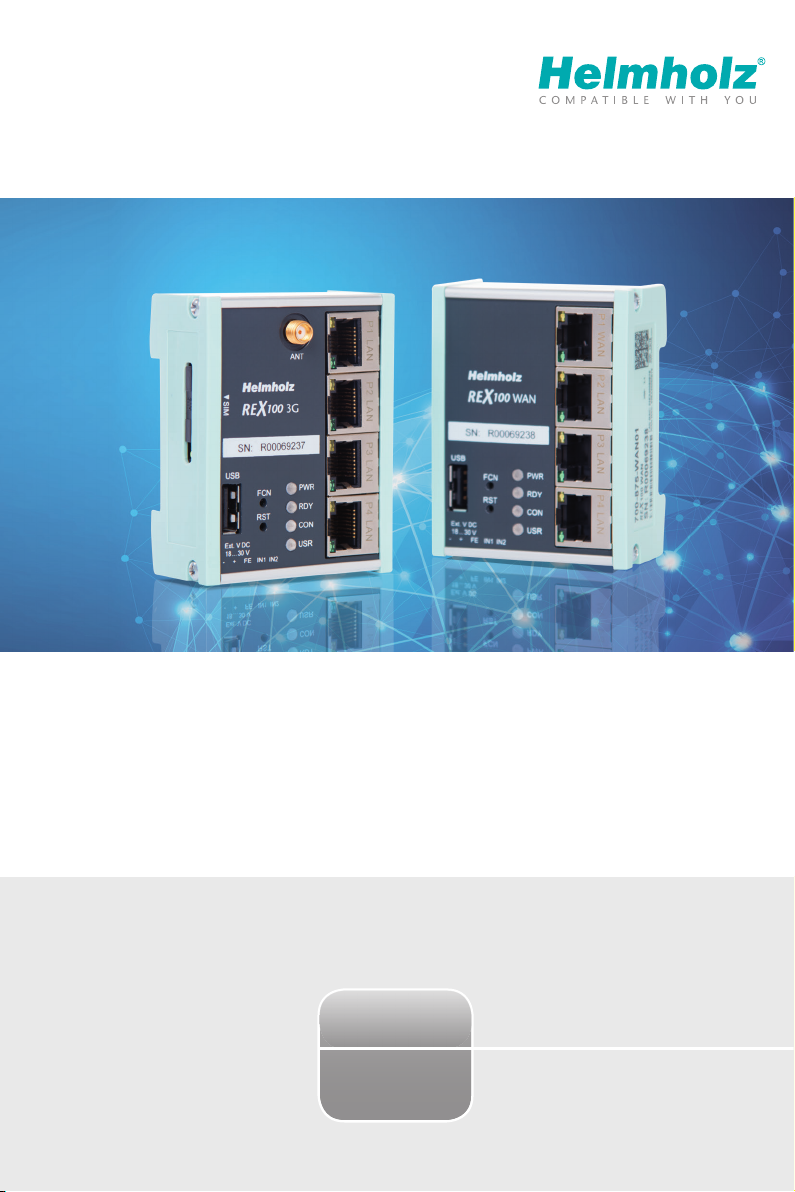
2. Preparing the REX 100 unit
2.1 REX 100 3G/LAN
Connect the antenna and insert your SIM card.
Connect a supply voltage of 10–30 V DC to the provided
connector.
2.2 REX 100 WAN/LAN
Connect the REX 100 router’s WAN port (port 1) to the
network or DSL modem being used to establish an Internet
connection.
Connect a supply voltage of 10–30 V DC to the provided
connector.
1. Introduction
Before getting started:
For commissioning please use the latest version (as of v3) of the dial-up software “shDIALUP”.
Write down the serial number and MAC address of your REX 100 router before installing the router in your system. You
will need the serial number in order to congure the device!
The REX 100 is an industrial router designed to be installed on DIN rails and is suitable for worldwide remote access
to IP-enabled devices (PLCs, HMIs, IP cameras, etc.)
This Quick Start Guide goes over the basic settings in the myREX24 portal and shows how to use the portal to
create a conguration and transfer it to your REX 100 unit.
3.1 Register
If you do not yet have a myREX24 account, you will rst
have to visit www.myREX24.net and register under “Re-
quest access.” Make sure to ll out all mandatory elds.
Once you submit the form, you will receive an e-mail
containing your login data.
You can download the software necessary for establish-
ing a connection with myREX24-Portal (shDIALUP and
shCHECK), as well as other documents with supplementa-
ry example applications anytime from the download area
under www.myREX24.net and www.helmholz.com.
3.2 Log in to the myREX24 portal
Once you install and open the shDIALUP program, you can
use your login data to log in to the myREX24 portal.
Note: Your login name is composed of a user name preceding
the @ character and the name of your company.
Example: admin@helmholz
Other users can be created and managed after you log onto
the myREX24 portal.
3. Creating a REX 100 conguration in the myREX24 portal
REX 100 routers are fully congured using the myREX24 portal. Once the corresponding conguration le is ready,
it can be transferred to the actual REX 100 unit in a variety of ways.

Quick Start Guide REX 1004
A eld for entering a phone number for the SIM card will be shown for GSM devices only. If you do enter a number,
the myREX24 portal will be able to control the REX 100 router using SMS text messages.
No entry needs to be made in the „Change VPN password eld“. The password is generated automatically.
In order that the con guration is sent to the correct end device, the serial number of the REX 100 must be entered
for purposes of recognition. The purpose of the additional description eld is to make it possible to distinguish
between several remote servicing units internally.
Go to the „Network“ tab without .
3.3 Create a router con guration
The con guration points necessary to realize a VPN portal connection are described in the following. For a more
detailed description of the advanced functions and con guration options available, please use the portal’s online
help.
Note: You should always individualize your access data (user names/passwords).
For more information, make sure to consult the portal‘s online help (
You should always individualize your access data (user names/passwords).
For more information, make sure to consult the portal‘s online help (
).
Once a connection to the myREX24 portal is successfully established, a new browser window with your myREX24
online account will open. Create a new device in the „Machines“ menu.
With the button you go to the next submenu.
Note: The device name must start with a letter. Umlauts, special characters and spaces are generally not permitted.
In addition, every device name must be unique.
The description page for the device you just created will appear now. Please note that the location and contact
information elds are optional.

Quick Start Guide REX 100 5
Under „Connect to server on“, select the actions with which this device should connect to your myREX24 account.
Depending upon the device version, you must carry out corresponding adjustments for establishing a connection:
-In the case of devices with a radio modem, all information concerning the access point (Access Point Name) of
the card provider must be provided and the SIM PIN entered.
-In the case of wired devices and when using static IP addresses, the customer specications for the subsequent
router start must be used for the gateway, DNS server and VPN port.
Prior to dening a pre-selectable VPN port, clarify whether this is also open on the system side at the customer
location (also see the chapter 5.2 „Tips and Tricks“, page 13).
The basic settings have thus been completed and the conguration can be transferred to the REX 100 with the
button via the channels available in the menu (see page 6, point 4).
In the event that the dialog for „Submit to Device“ appears automatically, you can cancel this dialog and call it up
later when needed.
Note: The myREX24 portal’s online help provides information on the function of the advanced settings. If you enable
DHCP, make sure that the DHCP server does not assign the WAN port an IP address that is already in use on the LAN
side. Each router must be assigned to the LAN and WAN interface IP addresses from 2 different sub-networks.
If you would like to connect additional TCP/IP components for purposes of remote maintenance at the LAN inter-
face of the REX 100, this IP address is also the standard gateway for these devices (see page 14, point 6).
Open the „Internet“ tab without clicking on .
Enter the IP address and the appropriate subnet mask for your equipment network into the LAN parameter elds.
All REX 100 routers come with a default IP address of 192.168.0.100/24. If you don‘t have to/don‘t wish to change
this address, it should be noted that this address area on the REX 100 WAN side may not be used.
Quick Start Guide REX 1006
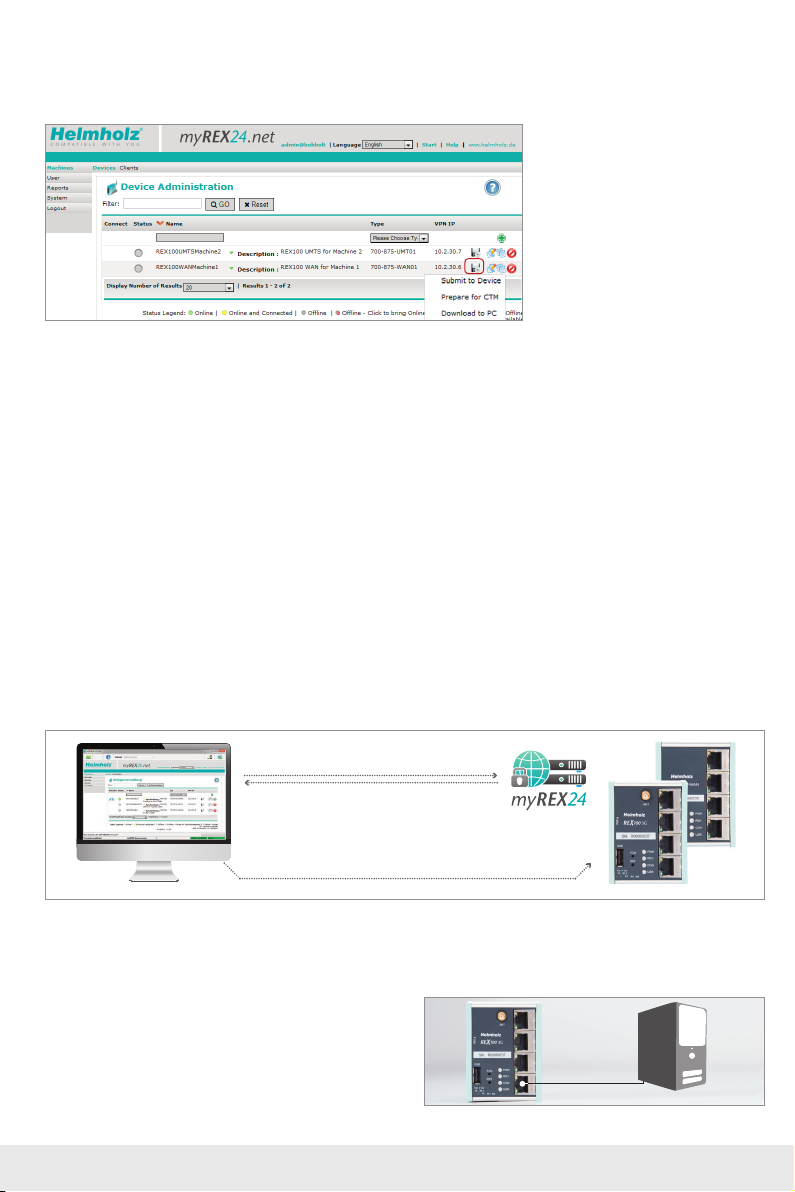
4. Router conguration transfer options
After you have created a conguration, you can select one of three transmission methods via the diskette symbol:
1* Submit to device:
Used to transfer the conguration via the local LAN connection of the computer on which shDIALUP is running (see
point 4.2 below).
You can use this option if the REX 100 router can be reached directly through the local network (LAN).
2* Prepare for CTM:
The conguration is downloaded via an Internet connection of the REX 100 from the myREX24-Portal (CTM = Con-
guration Transfer Manager, see chapter 4.2, page 8).
Internet transfer is the standard conguration channel as soon as the REX 100 has established a connection to the
myREX24 portal. When the REX 100 has a connection to the myREX24 portal, the CTM is automatically used for all
subsequent conguration changes.
3* Download to PC:
The conguration le is saved and subsequently transferred to the REX 100 using a USB stick
(see point 4.3, page 12).
Choose this option if the REX 100 router cannot be reached through the local network (LAN) or through the Inter-
net when it is rst being set up.
1*
2*
3*
4.1 Transfer conguration via a local LAN connection
LAN
1. Login via shDIALUP
3. Search for the device on the LAN network
4. Transfer the configuration
2. Create/edit and
download the REX 100
configuration
LAN
LAN
In order to be able to transfer the conguration through the LAN network, it must be possible to reach the REX 100
unit (the one being congured) on the same network on which the computer with the shDIALUP program is found.
4.1.1
Connect the LAN socket of your PC (LAN card) with a LAN
socket of the REX 100.
Make sure to use a standard Cat5 patch cable to establish
the direct connection between your computer and the
router. PC

Quick Start Guide REX 100 7
4.1.2
In the myREX24 portal (shDIALUP) in Device Administra-
tion, select the option “Submit to Device”.
4.1.3
After you have selected the corresponding PC-LAN net-
work card in the device search menu, the search for locally
connected REX routers is carried out automatically in the
following dialogue.
The transfer will start if a device with the right serial num-
ber is found. Once the transfer is complete, the REX 100
router will start using the new conguration after being
restarted.
4.2 Conguration Transfer Manager (CTM)
The Conguration Transfer Manager enables the transfer of the conguration to the REX 100 when the router has
established an Internet connection with the myREX24 portal.
If the REX 100 unit has a connection to the myREX24 portal, it will check whether there is a newer conguration
available for its serial number. If there is one, it will load it automatically.
This method is ideal for retroactive changes to the conguration.
Note: Only with version 3 and up of the dial-up software “shDIALUP” is the CTM function supported.
In order to be able to transfer the conguration, the Conguration Transfer Manager needs an Internet connection
established using a WAN network or SIM card.
If you are using your REX 100 router for the rst time, you can establish this connection directly on the router by using
the First Start webpage.
1. Create/edit the REX 100
configuration and deposit
it in the CTM
Cyclic check
whenever there
is an Internet
connection
2. The configuration
is downloaded
and activated
4.2.1 Establishing an Internet connection through the First Start webpage
If you have not yet congured your REX 100 router using one of the other two conguration methods (directly
on the computer or using a USB ash drive), you can establish an Internet connection directly with the REX 100
router’s web interface by using the First Start webpage so that you can set the router up.
If the REX 100 unit is already able to establish an Internet connection, please skip ahead to page 10, point 4.2.5
“Automatic download of the conguration.”
Commissioning via the “First Start” website presumes that the REX 100 can be addressed in the local network
under its default IP address. REX 100 routers come with a default IP address of 192.168.0.100 (subnet mask:
255.255.255.0).
In order to be able to reach the REX 300 router, the PC network adapter must also be set to the IP address space
and subnet of the router.

Quick Start Guide REX 1008
4.2.2 Establish Internet connection via “First Start” with REX 100 3G
If you are using a REX 100 3G model, you will now need to provide the following for the modem:
The login data for the carrier (APN) and the SIM card ID number (SIM PIN).
Start by opening the properties for your LAN connection.
Windows1) XP: Start -> Settings -> Control panel -> Network connections.
Windows1) 7: Start -> Control panel -> Network and sharing center -> Change adapter settings
Open the Properties dialog box for the network connection
that you want to use in order to establish a connection to
your REX 100 unit. To change your computer’s IP address,
select “Internet Protocol (TCP/IP)” and click on the “Prop-
erties” button.
Your IP address must lie within the address range
“192.168.0.x”. The subnet mask must match the subnet
mask used by the REX 100 unit (default: 255.255.255.0).
Note: Make sure that there are no address space conicts
with any other network ports (do not assign the same IP
address more than once). If there are, you will not be able to
communicate with your REX 100 unit properly.
When your PC network card has accepted the new settings, start a browser (Firefox, Chrome, Opera) and enter the
IP address of the router in the address line (URL) as follows: http://192.168.0.100.
Enter the standard login data now required for logging into the REX 100:
Username: helmholz
Password: router
Note: Please note that the login data must be changed for your security after the router is set up. To change them, go to
the conguration menu on the myREX24 portal.
The Internet connection path of the REX 100 is now dened uniquely at the “First Start” website.

Quick Start Guide REX 100 9
4.2.3 Establish Internet connection via “First Start” with REX 100 WAN
In the case of wired models, access to the Internet can only be established through the “external router” on the
equipment side.
To this purpose, the WAN interface must be connected with the customer server/DSL modem.
No WAN settings need to be made when selecting “DHCP”.
Please note that either the MAC address lter at the DSL modem or in the external rewall is deactivated or the MAC
address of the REX device has been activated there.
The values for the statically set WAN interface are dened by the responsible network administrator.
Settings for access via the proxy server are also stored in the WAN settings when needed.

Quick Start Guide REX 10010
As soon as all settings have been transferred and saved in the REX 100 router, the router will establish an Internet
connection.
4.2.4 Complete “First Start” steps with REX 100 3G and WAN
The cloudserver preset here doesn’t need to be changed. The code for the session key is optional and does not have
to be entered when setting up the router.
4.2.5 Automatic download of the confi guration
If the REX 100 router is able to establish an Internet con-
nection, it will connect to the myREX24 portal and verify
itself using its serial number.
The successful establishing of a connection is displayed at
the router by the blinking “CON” LED (see LED descrip-
tion, page 15).
If a con guration le is available on the portal server, it will
be automatically loaded onto the device and enabled.
4.2.26 REX 100 Quick Start status page
The status page on the REX 100 router’s web interface will show the router’s connection status and active con gu-
ration data.
To get more information on each step of the router connection, click on the Info icon in the various status
elds.
You can use the status page to trigger test functions or to manually make the router obtain its con guration using
the CTM.
Other manuals for REX 100
2
Table of contents
Other Helmholz Network Router manuals

Helmholz
Helmholz REX 100 WAN User manual

Helmholz
Helmholz REX 100 WiFi User manual

Helmholz
Helmholz WALL IE User manual

Helmholz
Helmholz REX 300 User manual

Helmholz
Helmholz REX 100 3G User manual

Helmholz
Helmholz REX 200 User manual

Helmholz
Helmholz 700-877-WAN02 User manual

Helmholz
Helmholz REX 100 WiFi User manual

Helmholz
Helmholz REX 100 User manual

Helmholz
Helmholz 700-200-LAN01 User manual


