Hawking Net-Stor HNAS1 User manual

1

Trademarks & Copyright
Windows 95/98/ME and Windows NT/2000/XP are registered trademarks of Microsoft Corp. All other brands and
product names are trademarks of their respective companies.
No part of this publication may be reproduced in any form or by any means or used to make any derivative (such as
translation, transformation or adaptation) without the express written consent of the manufacturer as stipulated by
the United States Copyright Act of 1976.
FCC Certifications
This equipment has been tested and found to comply with the limits for a Class B digital device, pursuant to Part 15
of the FCC Rules. These limits are designed to provide reasonable protection against harmful interference in a
residential installation. This equipment generates, uses and can radiate radio frequency energy and, if not installed
and used in accordance with the instructions, may cause harmful interference to radio communications. However,
there is no guarantee that interference will not occur in a particular installation. If this equipment does cause
harmful interference to radio or television reception, which can be determined by turning the equipment off and on,
the user is encouraged to try to correct the interference by one or more of the following measures:
x Reorient or relocate the receiving antenna.
x Increase the separation between the equipment and receiver.
x Connect the equipment into an outlet on a circuit different from that to which the receiver is connected.
x Consult the dealer or an experienced radio/TV technician for help.
Shielded interface cables must be used in order to comply with emission limits.
You are cautioned that changes or modifications not expressly approved by the party responsible for compliance
could void your authority to operate the equipment.
This device complies with Part 15 of the FCC rules. Operation is subject to the following two conditions: (1) This
device may not cause harmful interference, and (2) This device must accept any interference received, including
interference that may cause undesired operation.
CE Mark Warning
This is a Class B product. In a domestic environment, this product may cause radio interference, in which case the
user may be required to take adequate measures.
All trademarks and brand names are the property of their respective proprietors.
Specifications are subject to change without prior notification.
HAWKING LIMITED WARRANTY
Hawking Technology guarantees that every Net-StorTM HNAS1 Network Storage Center is free from physical
defects in material and workmanship under normal use for (1) year from the date of purchase. If the product
proves defective during this one-year warranty period, call Hawking Customer Service in order to obtain a
Return Authorization number. Warranty is for repair or replacement only. Hawking Technology does not
issue any refunds. BE SURE TO HAVE YOUR PROOF OF PURCHASE. RETURN REQUESTS CANNOT
BE PROCESSED WITHOUT PROOF OF PURCHASE. When returning a product, mark the Return
Authorization number clearly on the outside of the package and include your original proof of purchase.
IN NO EVENT SHALL HAWKING TECHNOLOGY’S LIABILTY EXCEED THE PRICE PAID FOR THE
PRODUCT FROM DIRECT, INDIRECT, SPECIAL, INCIDENTAL OR CONSEQUENTIAL DAMAGES
RESULTING FROM THE USE OF THE PRODUCT, ITS ACCOMPANYING SOFTWARE OR ITS
DOCUMENTATION. Hawking Technology makes no warranty or representation, expressed, implied or
statutory, with respect to its products or the contents or use of this documentation and all accompanying
software, and specifically disclaims its quality, performance, merchantability, or fitness for any particular
purpose. Hawking Technology reserves the right to revise or update its products, software, or documentation
without obligation to notify any individual or entity. Please direct all inquiries to:
2

Introduction 4
Package Contents 5
Hardware Description 6
IP Protocol Setup 7
Hard Drive Installation 17
Quick Setup Wizard 19
Access the Device 27
Management Guide 28
Set Up the Network Storage Center 28
Homepage 29
Status Details 30
Network Settings 31
Host Name 31
IP Address 32
Superuser/Password 33
Administration 34
RestartSystem 34
HD Format 35
Factory Default Reset 36
SystemTime 37
Character Set 37
Share 38
User Configuration 41
Folder Configuration 41
FTP 44
FTP Configuration 44
FTP Password 45
Setup Tip 46
Applications for the Device 49
Troubleshooting 51
Specifications 53
3

Powerful and Easy
The compact Hawking HNAS1 Net-StorTM Network Storage Center is an economical and powerful
device, and provides an ideal solution for small business and small office/home office users. The HNAS1
functions as both a file server and FTP server, and can be used to easily share video, music, and data files.
It can also be configured to allow the transfer or backup of files directly over the Internet via the web
browser or FTP. The HNAS1 is compatible with Windows95/98/98SE/ME/XP/2000/NT4.0 network
environments. It supports all standard 3.5” IDE Hard Drives of up to 250GB (hard drive not included).
The Smart Setup Wizard makes installation of the Network Storage Center simple and the user-friendly
web interface makes it easy to manage.
Smart Wizard
The HNAS1 features a smart Setup Wizard that makes installation easy. Powerful auto-installation
features, hard drive auto-detection, pre-defined user accounts, and auto-networking settings all provide
the user with a simple and convenient way to install and set up the Network Storage Center. All the user
has to do is plug in the device and turn it on, utilize the Setup Wizard, and the Network Storage Center is
ready for use.
Key Features
x Supports one 10/100Mbps Ethernet port (Auto MDI/MDIX) for network connection
x Web-based user interface for easy configuration and management
x Supports one user-selectable high speed ATA/ATAPI-6 hard drive
x Supports all standard 3.5” IDE hard drives up to 250GB (hard drive not included)
x Replaceable hard-drive feature
x Auto-Networking Configuration Utility for Windows OS
x Supports CIFS/SMB for Microsoft Network remote users, allowing them to easily retrieve files using
“My Neighborhood”
x Built-in FTP server, allowing users to conveniently transfer files via FTP client
x Compatible with Windows 95/98/98SE/ME/XP/2000/NT4.0
x Built-in hardware button for Factory Default Reset (if necessary)
x Firmware upgrade via web interface page
x Features three pre-defined user levels: all/power/guest, for access accounts.
x Allows for five online SAMBA users (concurrently connected) and five online FTP users
(concurrently connected)
x Auto-detects Network Storage Centers for newly installed Network Storage Centers (only for the 1st
FAT32 partition)
x Supports static IP addresses
x Provides password security for web management & Network Storage Center access
x FCC, CE, VCCI Class B
4

Unpack and Inspect
Open the package and carefully remove all items. The complete HNAS1 package consists of:
x One HNAS1 Network Storage Center (hard drive not included)
x One CD with utility, user’s manual, and quick installation guide
x One quick installation guide
x One power adapter (12V/3A)
x Four rubber feet
x Four screws for fastening/securing the hard drive
Please check to make sure that the unit was not damaged during shipping and that no items are missing. If
you encounter a problem, please contact your dealer.
Please read this manual thoroughly, and follow the installation and operation procedures contained
within.
5
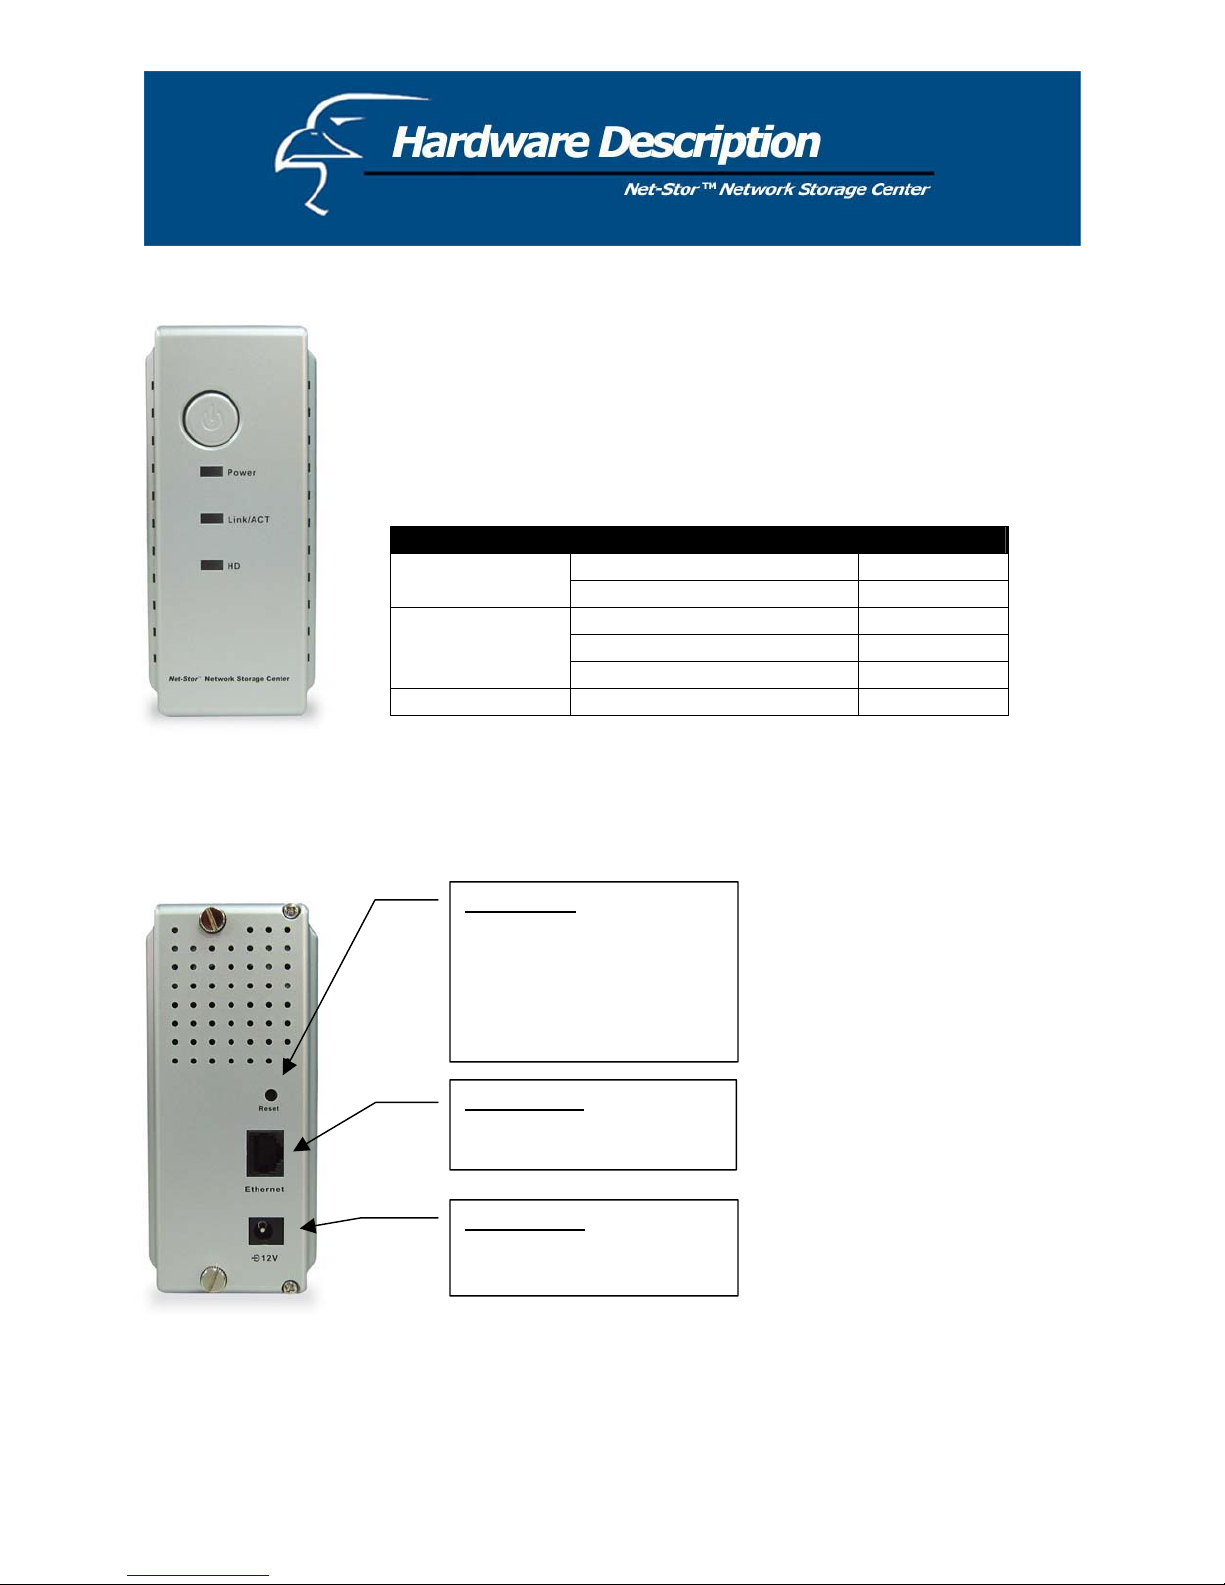
Front Panel
Power Button
To activate the Network Storage Center, press this Power button located on
the front panel of the device. To power off the unit, press the Power button
for two seconds until the Power LED starts to blink.
LED Definitions
Rear Panel
LED Status
ON /OFF Green/DarkPower
Boot/Shutdown: Blinking
Ethernet Connected Green
Ethernet Not Connected Dark
Link/ACT
Ethernet Data Transfer Blinking
HD Hard Drive Data Transfer Amber/Blinking
Reset Button
To restore the default settings,
use the tip of a ballpoint pen or
paper clip to hold this button
down for at least five seconds.
This will cause the default reset
to begin.
Ethernet Port
Use an RJ-45 Ethernet cable to
connect the device.
Power Supply
External power adapter:
DC 12V/3A.
6

Configuring the Network Protocols
Please Note: If your PC obtains its IP address automatically, the Setup Wizard will not be able to get the
PC’s IP in order to setup its network configuration, etc. To solve this problem, you will need to connect
your PC to a router with a DHCP Server, or set a static IP address in your Windows Network dialog box.
How to Configure the TCP/IP Network Protocol
Regardless of what version of Windows you are using, TCP/IP will be the most appropriate protocol to
use because it is typically installed automatically when first installing the drivers. If it is not installed
automatically, it can easily be added to your system. Please Note: if it is already installed, you can
proceed directly to the Hard Drive Installation section, and Quick Setup Wizard section that follows it.
You need to configure a unique IP address for each PC on the network in order to complete the setup
process successfully. To do this, follow the instructions below:
An IP address is a set of numbers consisting of four segments (or octets), with each segment separated by
periods. The number in the last segment must always be between 0 and 255. The first three segments can
be set to something such as 192.168.1. These three segments must be the same for all clients. The last
segment is the one that applies specifically to your PC (or other client) and should be a number between 2
to 255 (for example, 192.168.1.2) so that it does not conflict with the Network Storage Center’s default IP
address of “192.168.1.1”.
7
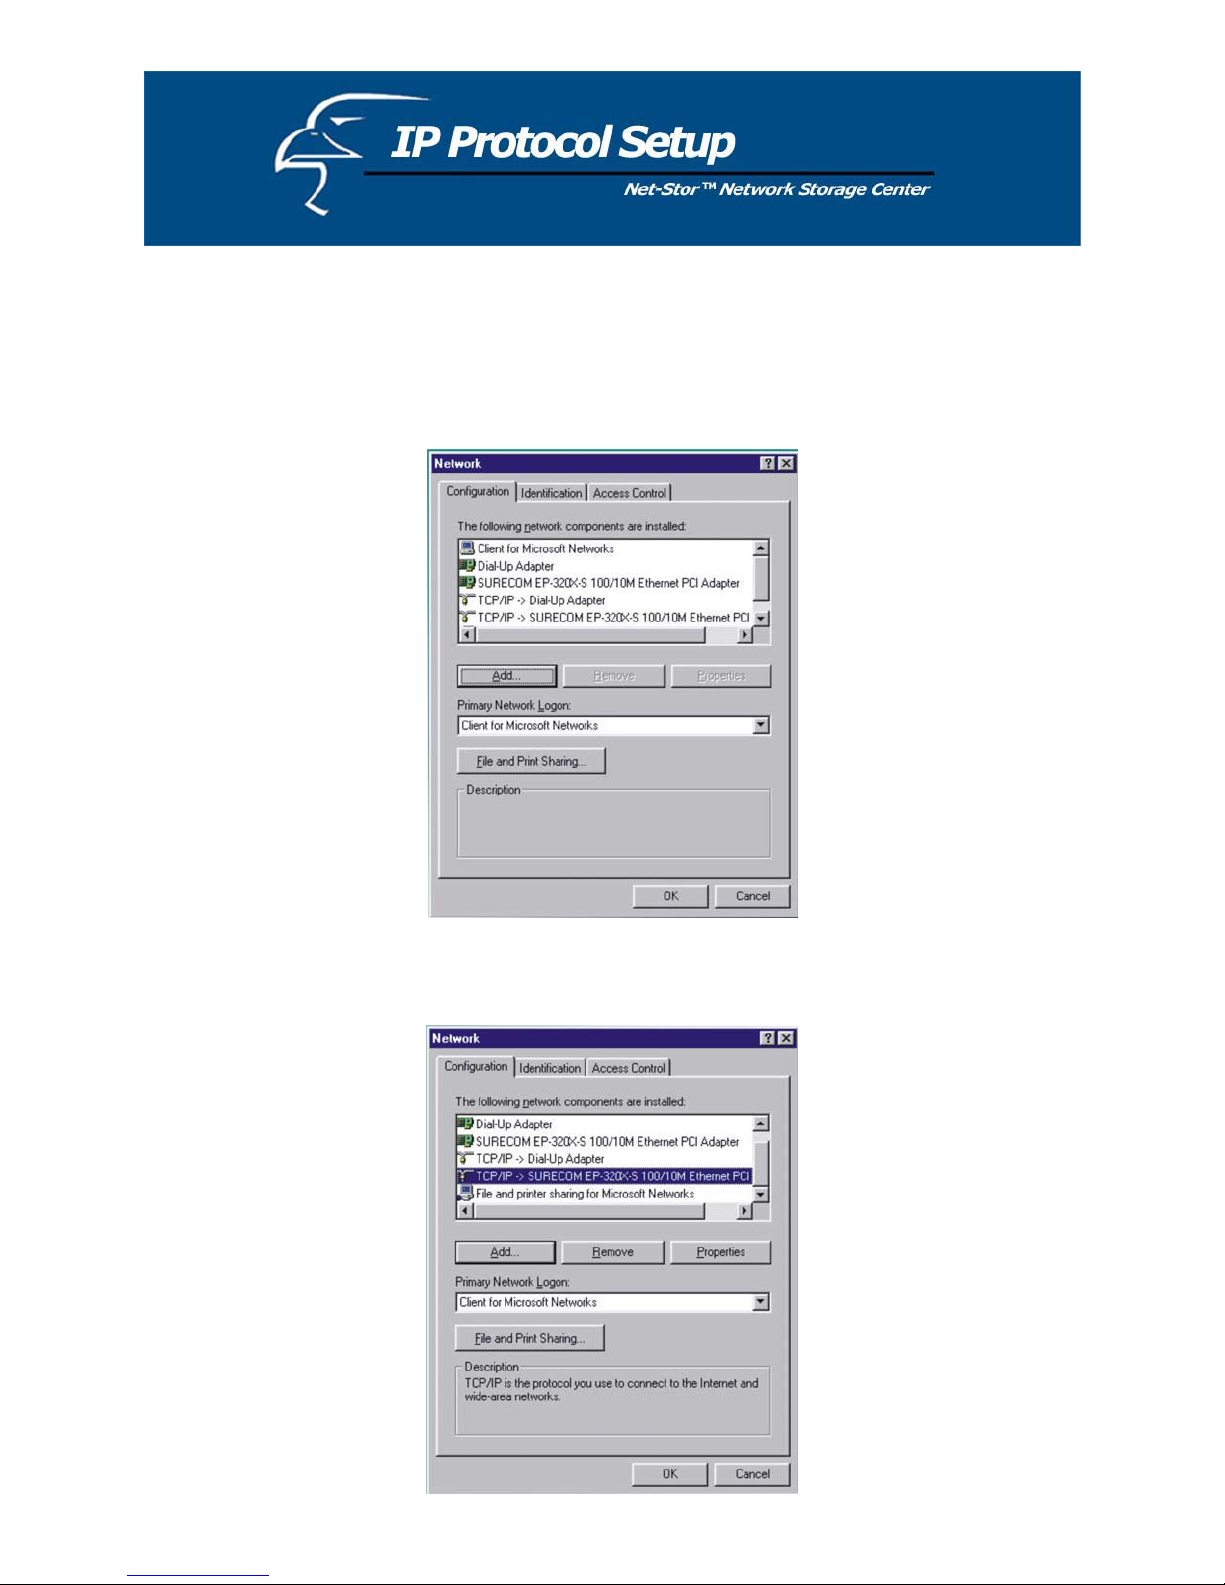
How to Configure the TCP/IP Network Protocol
Windows 98/Me:
1. Click on Start-> Settings-> Control Panel-> Network.
2. Click TCP/IP -> Ethernet Adaptor and click Properties.
8
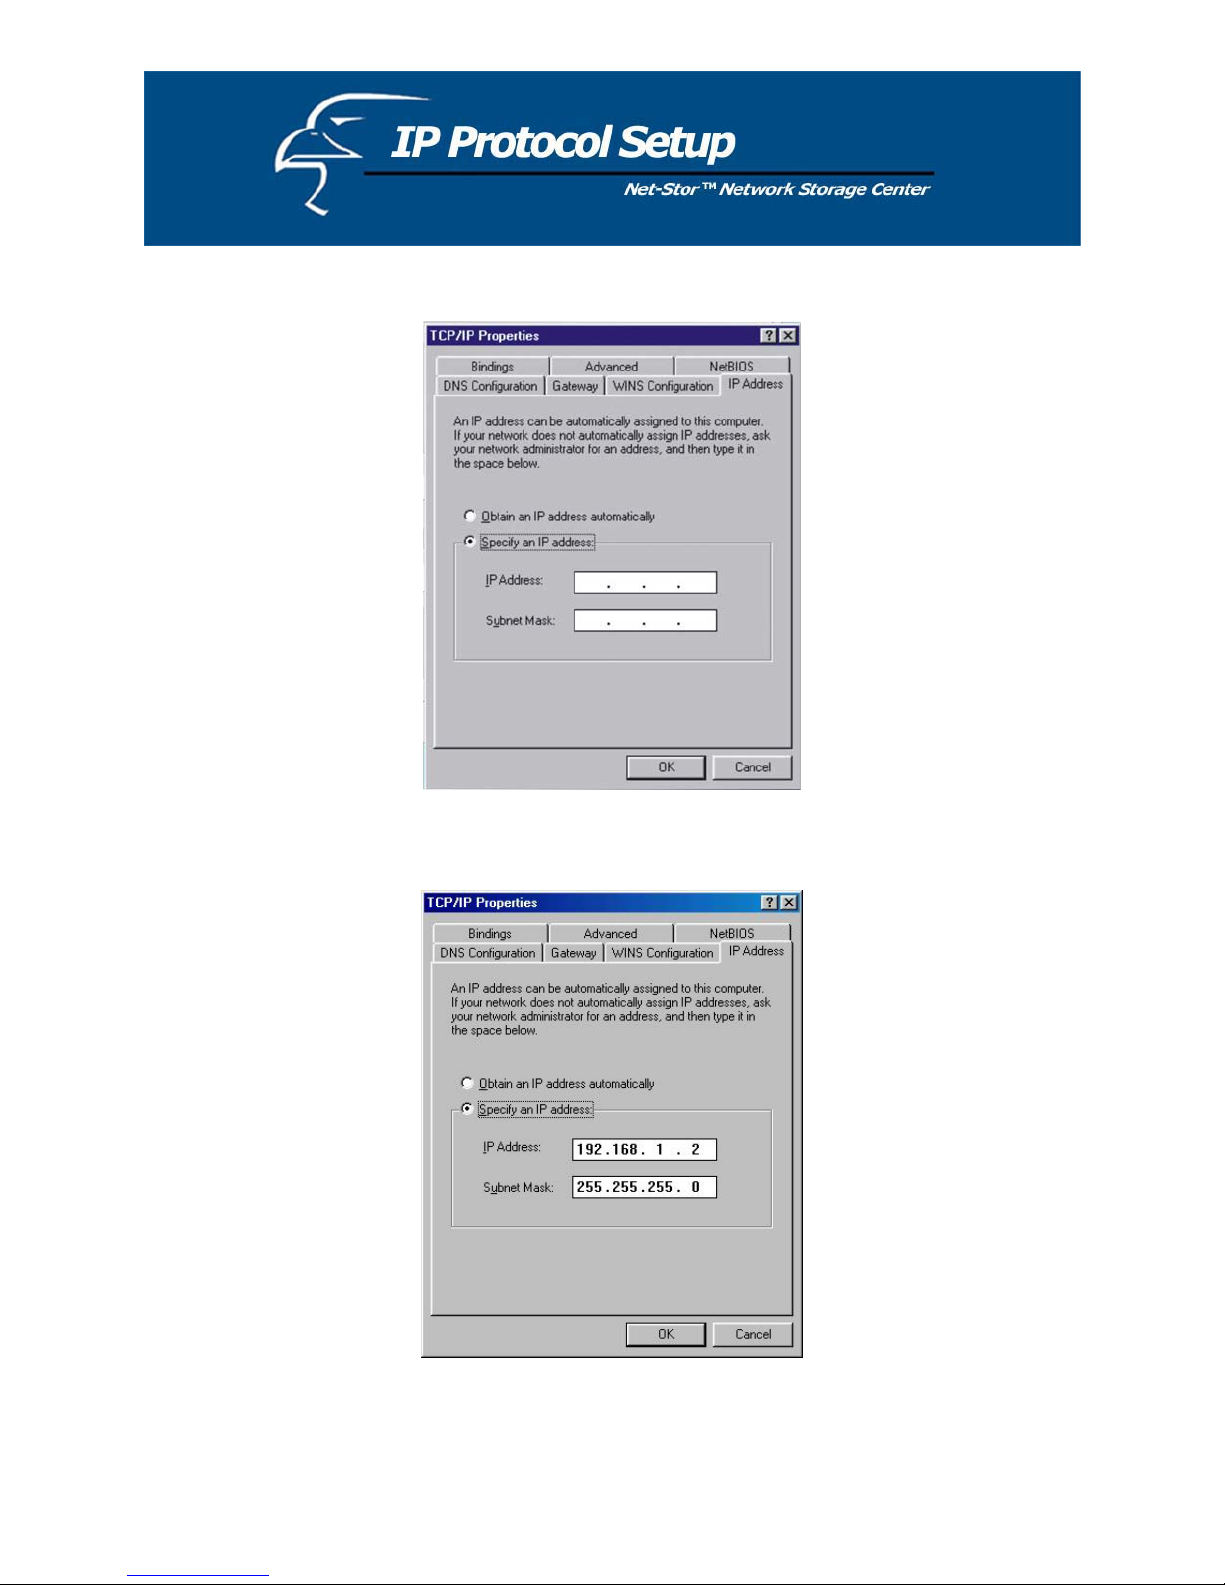
3. Click IP Address and click on Specify IP Address.
4. Type in the IP Address. Make sure you set the Subnet Mask to 255.255.255.0.
5. Click OK. At this point, you may be asked for your Windows disk. Follow the on-screen displays and
then restart your computer.
9
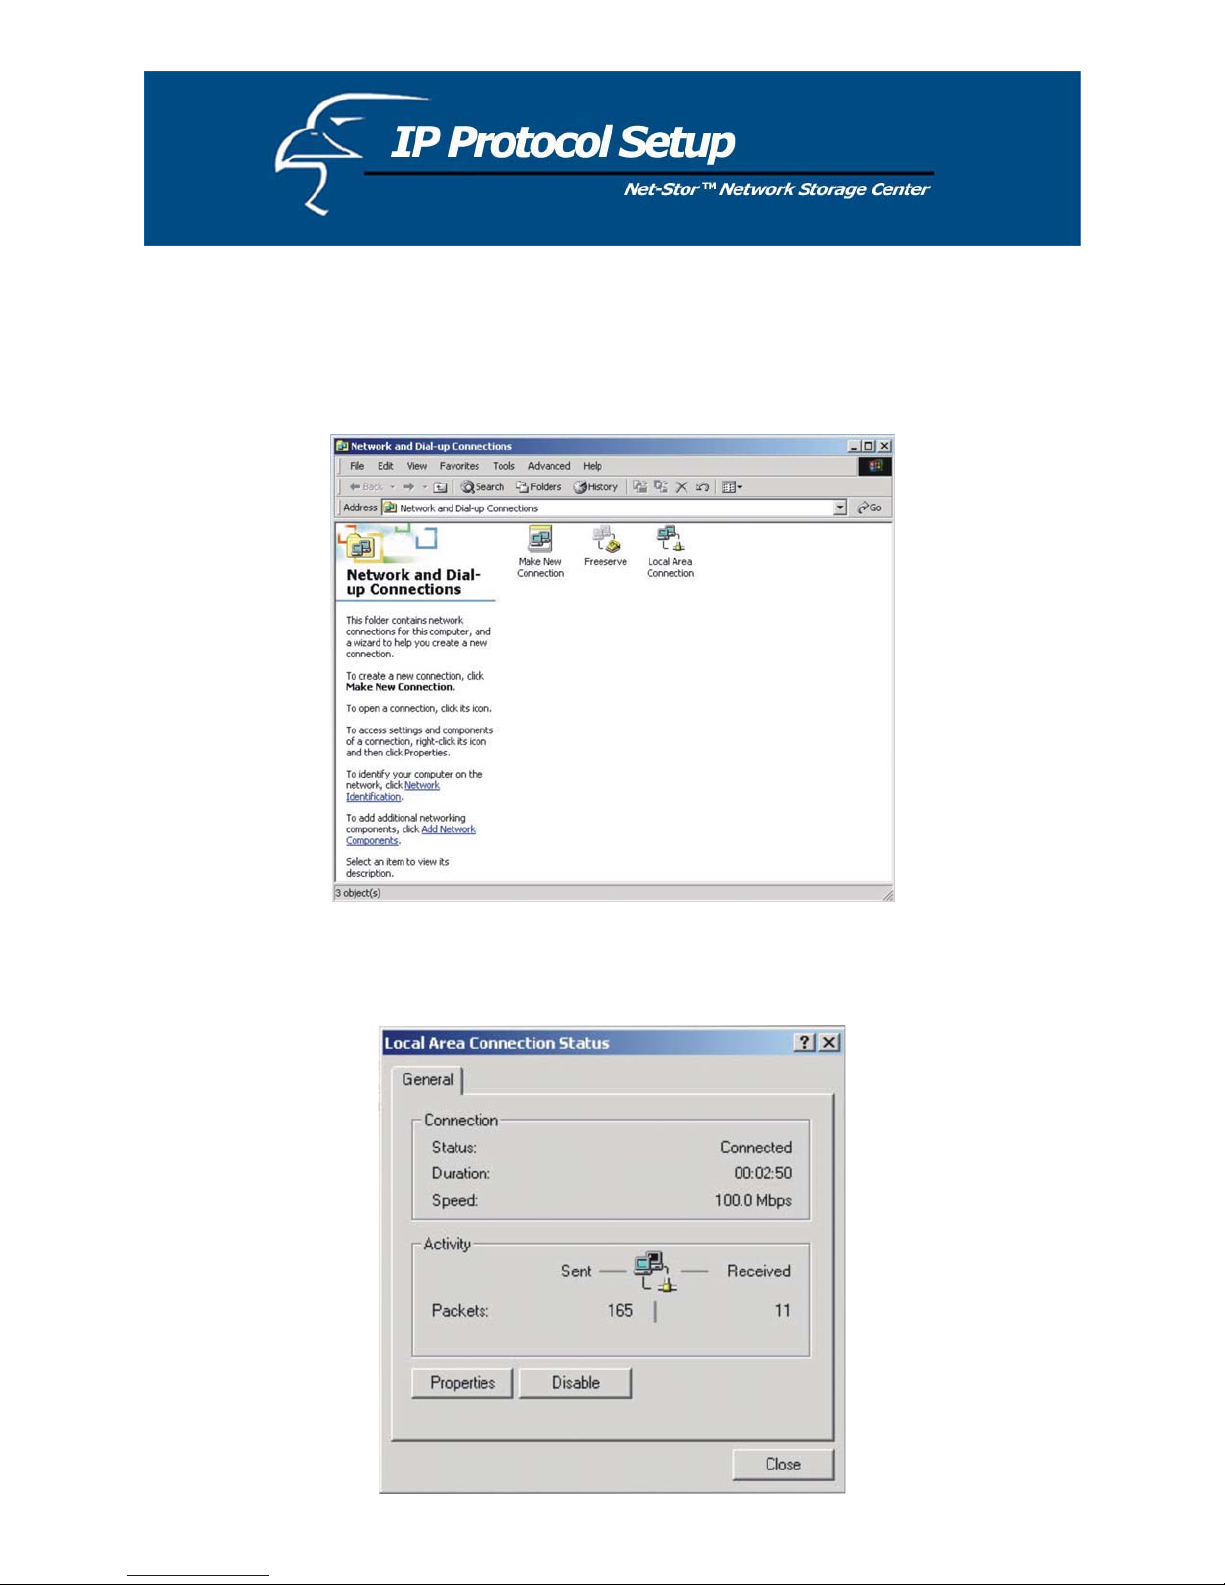
How to Configure the TCP/IP Network Protocol
Windows 2000:
1. Click on Start-> Settings-> Network and Dial-up Connections.
2. Choose Local Area Connection and click on Properties.
10
Other manuals for Net-Stor HNAS1
2
Table of contents
Popular Network Storage Server manuals by other brands

HP
HP NetStorage 6000 user guide

Seagate
Seagate U10 ST320423A installation guide

Synology
Synology RackStation RS816 Hardware installation guide

D-Link
D-Link ShareCenter Pro DNS-1200-05 user manual

Avid Technology
Avid Technology VideoRAID ST Setup and user guide

Western Digital
Western Digital My Cloud Home Duo user manual


