Hama 136203 User manual

00136203
00136204
00136205
„RC 650“
Radio Controlled Alarm Clock
E
F
D
GB
RUS
I
PL
CZ
SK
RO
Operating Instructions
Bedienungsanleitung
Mode d‘emploi
Instrucciones de uso
Руководство по эксплуатации
Istruzioni per l‘uso
Instrukcja obsługi
Návod k použití
Návod na použitie
Manual de utilizare

AL2 DOWN SET UP AL1
11 910 87
1
2
3
654
12

2
GOperating instruction
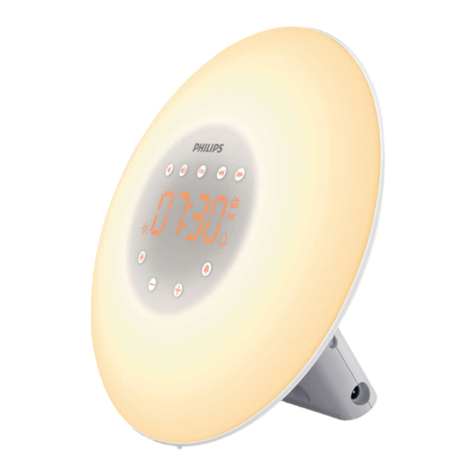
Controls and Displays
1. Snooze function/light
2. Radio icon
3. Time
4. Date
5. Weekday
6. Room temperature
7. AL1 (Alarm 1) button
8. UP button (set value up)
9. SET button (conrms the set value)
10. DOWN button (set value down)
11. AL2 (Alarm 2) button
12. Battery compartment
Thank you for choosing a Hama product.
Take your time and read the following instructions and information completely. Please
keep these instructions in a safe place for future reference. If you sell the device, please
pass these operating instructions on to the new owner.
1. Explanation of Warning Symbols and Notes
Warning
This symbol is used to indicate safety instructions or to draw your attention to
specic hazards and risks.
Note
This symbol is used to indicate additional information or important notes.

3
2. Package Contents
•“RC 650” radio-controlled alarm clock
•2x AAA batteries
•These operating instructions
3. Safety Instructions
•The product is intended for private, non-commercial use only.
•Protect the product from dirt, moisture and overheating, and only use it in a dry
environment.
•Do not use the product in areas where the use of electronic devices is not permitted.
•Do not place the product near interference elds, metal frames, computers, TVs,
etc. Electronic devices and window frames can negatively affect the product’s
functionality.
•Do not drop the product and do not expose it to any major shocks.
•Do not attempt to service or repair the product yourself. Leave any and all service
work to qualied experts.
•Do not modify the product in any way. Doing so voids the warranty.
•Keep the packaging material out of the reach of children due to the risk of
suffocation.
•Dispose of packaging material immediately according to locally applicable
regulations.
Warning – Batteries
•Immediately remove and dispose of dead batteries from the product.
•Only use batteries (or rechargeable batteries) that match the specied type.
•When inserting batteries, note the correct polarity (+ and - markings) and insert
the batteries accordingly. Failure to do so could result in the batteries leaking
or exploding.
•Do not overcharge batteries.
•Keep batteries out of the reach of children.
•Do not short circuit the batteries/rechargeable batteries and keep them away
from uncoated metal objects.
4. Getting Started
Open the battery compartment cover (12), remove the contact breaker and then
close the battery compartment cover again.

4
5. Operation
5.1. Automatic time setting using the DCF signal
•Once you have removed the contact breaker, an acoustic signal sounds and the
alarm clock automatically starts searching for a DCF signal. During the search, the
radio icon (2) will ash.
•After 5-10 minutes (depending on how quickly the radio signal is received), the
clock sets itself to the correct time.
•When the wireless signal is received, the date, time, weekday and temperature are
automatically set and the radio icon (2) is displayed.
•If the clock is unable to receive a time signal wirelessly, the time/weekday/
temperature are displayed and the radio icon (2) is not visible. In this case, you
can set the time manually.
Display Searching for the DCF signal
Display ashing
Active
Displayed continuously
Successful – signal is being received
Not displayed Deactivated
5.2. Manual setting
Manually setting the date/time/calendar
•Press and hold the Down (10) button for approx. 3 seconds to stop the search for
the DCF signal. The radio icon (2) goes out and you can set the time manually.
•Press and hold the SET button (9) for approx. 3 seconds to start manually setting
the date/time.
•Set the following information in the order listed:
•To select the individual values, press the UP (8) button or the Down (10) button
and conrm each selection by pressing the SET button (9).

5
•After setting the date, you will be able to select the language in which the weekday
will be displayed. You can choose between the following languages:
GER for German, ENG for English, FRA for French, ITA for Italian, NET for Dutch, ESP
for Spanish, DAN for Danish
Note – Summer time
The clock automatically switches to summer time. Sappears on the display as long
as summer time is activated.
Note – Time zone
•The time zone is used if the DCF time signal is received in a country whose time
zone does not correspond to German time.
•If the time shift is +1 hour, for example, you need to set the time zone to +1. This
will automatically set the clock forward one hour.
5.3. Setting the alarm
Setting Alarm 1
•Press the AL1 (7) button. The bell icon appears.
•Press the AL1 (7) button for approx. 3 seconds until the hour digits start ashing.
You can set the hours with the UP (8) and DOWN (10) buttons.
•Press the SET (9) button until the minutes digits start ashing. You can set the
minutes with the UP (8) and DOWN (10) buttons.
•Press the SET (9) button to save the set alarm time.
Setting Alarm 2
•Press the AL2 (11) button. The (bell) icon appears.
•Press the AL2 (11) button for approx. 3 seconds until the hour digits start ashing.
You can set the hours with the UP (8) and DOWN (10) buttons.
•Press the SET (9) button until the minutes digits start ashing. You can set the
minutes with the UP (8) and DOWN (10) buttons.
•Press the SET (9) button to save the set alarm time.
Activating Alarm 1/Alarm 2:
•Press AL 1 to activate Alarm 1. The bell icon appears above the time
•Press AL 2 to activate Alarm 2. The bell icon appears below the time
•Alarm 1 and Alarm 2 can both be activated at the same time.

6
Deactivating Alarm 1/Alarm 2
•When ALARM 1 / ALARM 2 goes off, the corresponding alarm symbol (bell with AL1
/ bell with AL2) ashes.
•Press the alarm button AL1 to switch off Alarm 1.
•Press the alarm button AL2 to switch off Alarm 2.
•Moving your hand over the SNOOZE/LIGHT sensor (1) stops the alarm and turns
on the backlight for 5 seconds.
•The display for repeating the alarm Zzashes . The alarm will start again after 4
minutes.
5.4. Backlighting
•Press the SNOOZE / LIGHT button on the top of the clock to activate the backlight.
6. Care and Maintenance
Only clean this product with a slightly moist, lint-free cloth, and do not use aggressive
cleaning agents. Make sure that water does not get into the product.
7. Warranty Disclaimer
Hama GmbH & Co. KG assumes no liability and provides no warranty for damage
resulting from improper installation/mounting, improper use of the product or from
failure to observe the operating instructions and/or safety notes.
8. Service and Support
Please contact Hama Product Consulting if you have any questions about this product.
Hotline: +49 9091 502-115 (German/English)
Further support information can be found here:
www.hama.com
9. Technical Data
RC 650 radio-controlled alarm clock
Power supply 2 x AAA batteries
Measuring range
Temperature 0°C to 50°C (32°F to 122°F)

7
10. Recycling Information
Note on environmental protection:
After the implementation of the European Directive 2012/19/EU and
2006/66/EU in the national legal system, the following applies: Electric
and electronic devices as well as batteries must not be disposed of with
household waste. Consumers are obliged by law to return electrical and
electronic devices as well as batteries at the end of their service lives to
the public collecting points set up for this purpose or point of sale. Details to this are
dened by the national law of the respective country. This symbol on the product, the
instruction manual or the package indicates that a product is subject to these
regulations. By recycling, reusing the materials or other forms of utilising old devices/
Batteries, you are making an important contribution to protecting our environment.
11. Declaration of Conformity
Hama GmbH & Co. KG hereby declares that the device complies with the
essential requirements and other relevant provisions of Directive 2014/53/
EU. See www.hama.com for the declaration of conformity with the
relevant directive.

8
Bedienungselemente und Anzeigen
1. Schlummerfunktion /Licht
2. Funksymbol
3. Uhrzeit
4. Datum
5. Wochentag
6. Raumtemperatur
7. AL1 (Alarm 1) Taste
8. UP Taste (Einstellwert aufwärts)
9. SET –Taste (Bestätigung des Einstellungswerts)
10. DOWN Taste (Einstellwert abwärts)
11. AL2 (Alarm 2) Taste
12. Batteriefach
Vielen Dank, dass Sie sich für ein Hama Produkt entschieden haben!
Nehmen Sie sich Zeit und lesen Sie die folgenden Anweisungen und Hinweise zunächst
ganz durch. Bewahren Sie diese Bedienungsanleitung anschließend an einem sicheren
Ort auf, um bei Bedarf darin nachschlagen zu können. Sollten Sie das Gerät veräußern,
geben Sie diese Bedienungsanleitung an den neuen Eigentümer weiter.
1. Erklärung von Warnsymbolen und Hinweisen
Warnung
Wird verwendet, um Sicherheitshinweise zu kennzeichnen oder um
Aufmerksamkeit auf besondere Gefahren und Risiken zu lenken.
Hinweis
Wird verwendet, um zusätzlich Informationen oder wichtige Hinweise zu
kennzeichnen.
DBedienungsanleitung

9
2. Packungsinhalt
•Funkwecker „RC 650“
•2x AAA Batterien
•diese Bedienungsanleitung
3. Sicherheitshinweise
•Das Produkt ist für den privaten, nicht-gewerblichen Haushaltsgebrauch
vorgesehen.
•Schützen Sie das Produkt vor Schmutz, Feuchtigkeit und Überhitzung und
verwenden Sie es nur in trockenen Umgebungen.
•Benutzen Sie das Produkt nicht in Bereichen, in denen elektronische Produkte nicht
erlaubt sind.
•Positionieren Sie das Produkt nicht in der Nähe von Störfeldern, Metallrahmen,
Computern und Fernsehern etc. Elektronische Geräte sowie Fensterrahmen
beeinträchtigen die Funktion des Produktes negativ.
•Lassen Sie das Produkt nicht fallen und setzen Sie es keinen heftigen
Erschütterungen aus.
•Versuchen Sie nicht, das Produkt selbst zu warten oder zu reparieren. Überlassen Sie
jegliche Wartungsarbeit dem zuständigen Fachpersonal.
•Nehmen Sie keine Veränderungen am Produkt vor. Dadurch verlieren sie jegliche
Gewährleistungsansprüche.
•Halten Sie Kinder unbedingt von dem Verpackungsmaterial fern, es besteht
Erstickungsgefahr.
•Entsorgen Sie das Verpackungsmaterial sofort gemäß den örtlich gültigen
Entsorgungsvorschriften.
This manual suits for next models
2
Table of contents
Languages:
Other Hama Alarm Clock manuals