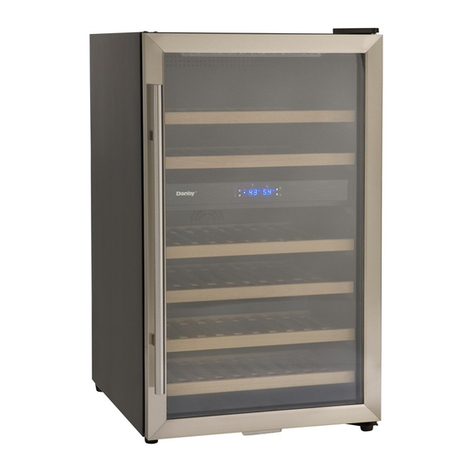
Haier HVZ035AB User manual

(Features and Size May Vary per Model)
(Les caractéristiques et la taille Peuvent Varier par le Modèle)
(Las características y el tamaño Pueden Variar por el Modelo)
Dual Compartment Flex – Zone Wine Cellar
Cave à vin compartiment double Flex Zone
Enfriador de vino con Compartimiento
doble Flex – Zone
User Manual
Model # HVZ035AB / HVZ040AB
Guide de l’Utilisateur
Modéle # HVZ035AB / HVZ040AB
Manual del Usuario
Para Modelo de # HVZ035AB / HVZ040AB
Quality • Innovation • Style
(HVZ035AB)

IMPORTANT SAFEGUARDS
When using this appliance, always exercise basic safety
precautions, including the following:
1. Read all of the instructions before using this appliance.
2. Use this appliance only for its intended purpose as described in this
use and care guide.
3. This wine cellar must be properly installed in accordance with the
installation instructions before it is used. See grounding instructions in
the installation section.
4. Never unplug your wine cellar by pulling on the power cord. Always
grasp the plug firmly and pull straight out from the outlet.
5. Unplug your wine cellar before cleaning or before making any
repairs. Note: If for any reason this product requires service, we
strongly
recommend that a certified technician performs the service.
6. Repair or replace immediately, all electric power cords that have
become frayed or otherwise damaged. Do not use a cord that shows
cracks or abrasion damage along its length, the plug or the connector
end.
7. This wine cellar should not be recessed or built-in an enclosed cabi-
net.
It is designed for freestanding installation only.
8. If your old wine cellar is not being used, we recommend that you
remove the door and leave the shelves in place. This will reduce
possibility of danger to children.
9. Do not operate your wine cellar in the presence of explosive fumes.
10. Do not store foods in wine cellar as interior temperature may
not be cool enough to prevent spoilage or may cause bacteria growth.
SAVE THESE INSTRUCTIONS
1
English

2
Thank you for using our Haier
product. This easy-to-use manual
will guide you in getting the best
use of your wine cellar.
Remember to record the model and
serial number. They are on a label
in back of the wine cellar.
Model number
Serial number
Date of purchase
Staple your receipt to your manual. You will need it to obtain
warranty service.
DANGER
Risk of child entrapment. Before you throw away your old wine
cellar, take off the doors. Leave the shelves in place so that chil-
dren may not easily climb inside.
English

Table Of Contents
PAGE
Important Safeguards ....................................................................1
Parts And Features ..........................................................................4
Installing Your Wine Cellar ............................................................5
Unpacking Your Wine Cellar ................................................................5
Leveling Your Wine Cellar ....................................................................5
Proper Air Circulation ..........................................................................5
Electrical Requirements ........................................................................6
Installation Limitations ..........................................................................6
Use of Extension Cords ........................................................................6
Wine Cellar Features And Use ............................................................7
Initial Set Up........................................................................................7
Temperature Adjustment ......................................................................7
Flex-Temperature Zone ........................................................................7
Shelving ..............................................................................................8
Interior Light ........................................................................................8
Normal Operating Sounds ..................................................................8
Proper Wine Cellar Care and Cleaning ........................................9
Cleaning and Maintenance ..................................................................9
Power Interruptions ..............................................................................9
Vacation and Moving Care ..................................................................9
Troubleshooting ............................................................................10
Warranty Information....................................................................11
3
English

1. Red Wine Indicator
2. White Wine Indicator
3. LED Temperature Display - Upper
Compartment
4. LED Temperature Display - Lower
Compartment
5. Temperature Set Button
6. Interior Light Button
7. Temperature Adjustment (up/down)
8. Door Handle (handle style may
vary per model purchased)
9. Auto Light Switch
10. Adjustable Leveling Legs
11. Interior Shelves (storage quantity
and style varies per model)
12. Tinted Double Panel Glass Door
4
Red
White Upper Lower
88
˚F
88
˚F
Red
White
Set Light
1 2
3456
English
(HVZ035AB)
(Features may vary per model)
7
8
Parts And Features
10 9
11
12
1 2

1. Remove all packaging material. This includes the foam base and all
adhesive tape holding the wine cellar accessories inside and outside.
2. Inspect and remove any remains of packing, tape or printed
materials before powering on the wine cellar.
• Your wine cellar has four leveling legs which are located in the
front and rear corners of your wine cellar.After properly placing your
wine cellar in its final position, you can level your wine cellar.
• Leveling legs can be adjusted by turning them clockwise to raise your
wine cellar or by turning them counterclockwise to lower your wine
cellar. The wine cellar door will close easier when the leveling legs
are extended.
• To assure your wine cellar works at the maximum efficiency it was
designed for, you should install it in a location where there is proper
air circulation, plumbing and electrical connections.
• The following are recommended clearances around the wine cellar:
Sides……………2" (50mm)
Top....................2" (50mm)
Back..................2" (50mm)
•Do not over fill your wine cellar for proper wine cooling.
Note: If your wine cellar has been tilted for any reason, wait 24 hours
before plugging it in.
Installing Your Wine Cellar
Unpacking Your Wine Cellar
Proper Air Circulation
Leveling Your Wine Cellar
5
English

Electrical Requirement
•Make sure there is a suitable power Outlet (115 volts, 15 amps
outlet) with proper grounding to power the wine cellar.
• Avoid the use of three plug adapters or cutting off the third grounding
in order to accommodate a two plug outlet. This is a dangerous prac-
tice since it provides no effective grounding for the wine cellar and
may result in shock hazard.
• Do not install your wine cellar in any location not properly insulated
or heated e.g.garage etc. Your wine cellar was not designed to
operate in temperature settings below 55˚ Fahrenheit.
• Select a suitable location for the wine cellar on a hard even
surface away from direct sunlight or heat source e.g. radiators,
baseboard heaters, cooking appliances etc. Any floor unevenness
should be corrected with the leveling legs located on the front and
rear bottom corners of the wine cellar.
• Your wine cellar is designed for free-standing installation only. It is
not designed for built-in application.
• Avoid the use of an extension cord because of potential safety haz-
ards under certain conditions. If it is necessary to use an extension
cord, use only a 3-wire extension cord that has a 3-blade grounding
plug and a 3-slot outlet that will accept the plug.The marked rating
of the extension cord must be equal to or greater than the electrical
rating of the appliance.
Install Limitations
6
English
Use of Extension Cord

•The wine cellar is preset from the factory to automatically
to accommodate temperature requirements for red or white wines.
• The wine cellar can be set to any temperature between 39˚ and 65˚F
in either of the compartments to accommodate your wine storage
requirements. Toset the temperature hold the "Set" button for about 3
seconds. You will notice the temperature display blink for the upper
compartment. Press the up or down arrow button to increase or
decrease the temperature setting.Once the desired temperature is
attained, press the "Set" button. Doing this, the electronic control
panel will memorize the setting. The temperature display will revert
back to display the inside temperature. It may take some time to
reach the set temperature.
• Once the tempurature is set for the upper compartment, you will
notice the temperature display blink for the lower compartment.
Again press the up or down arrow button to increase or decrease the
temperature. Once the desired temperature is attained, press the "Set"
button. Doing this, the electronic control panel will memorize the set-
ting.The temperature display will revert back to display the inside
temperature. It may take some time to reach the set temperature.
Wine Cellar Features And Use
Initial Setup
Once you have plugged the unit into an electrical outlet, let the unit run for at
least 30 minutes to acclimatize itself before making any adjustments. During this
time, depending on the internal temperature, the red or white wine light will stay
on for the upper compartment and red or white wine light will stay on for the
lower compartment. The LED display will show the current internal temperature.
Temperature Adjustments: See fig. # 1
fig. # 1
7
English
Red
White Upper Lower
88
˚F
88
˚F
Red
White
Set Light
This offers wine lovers a whole new level of storage flexibility.
Flexi-Temp allows the top and bottom compartments to each be set
at a temperature between 39˚F - 65˚F
,independent of each other.
Allowing you to store wine your way.
Flexi Temperature Zone

•The shelves are designed for appearance and easy cleaning. Larger
bottles or Magnums can be more easily accommodated at the cross
shelves at the bottom of the cellar.
• To complement the look of your wine collection, a soft light has been
built into the wine cellar. Simply push the "Light" button and the light
comes on, push again for off. For maximum energy efficiency, leave
light off when not viewing your collection.
• When door is open the light will go on.Upon closing the door,the
light will go off.
• Boiling water, gurgling sounds or slight vibrations that are the result
of the refrigerant circulating through the cooling coils.
•The thermostat control will click when it cycles on and off.
Shelving (Type and number of shelves will vary per model)
8
English
Interior Light See fig. #1
Normal Operating Sounds You May Hear

Warning: To avoid electric shock always unplug your
wine cellar before cleaning. Ignoring this warning
may result in death or injury.
Caution: Before using cleaning products, always read and
follow manufacturer’s instructions and warnings to
avoid personal injury or product damage.
General:
• Prepare a cleaning solution of 3-4 tablespoons of
baking soda mixed with warm water. Use sponge or
soft cloth, dampened with the cleaning solution, to
wipe down your wine cellar.
• Rinse with clean warm water and dry with a soft
cloth.
•Do not use harsh chemicals, abrasives, ammonia,
chlorine bleach,concentrated detergents, solvents or
metal scouring pads. SOME of these chemicals may
dissolve, damage and/or discolor your wine cellar.
• Clean door gaskets every three months according to
general instructions. Gaskets must be kept clean and
pliable to assure a proper seal.
• Petroleum jelly applied lightly on the hinge side of
gaskets will keep the gasket pliable and assure a
good seal.
Proper Wine Cellar Care and Cleaning
Cleaning and Maintenance
Door Gaskets:
9
English
•Occasionally there may be power interruptions due to thunderstorms
or other causes. Remove the power cord from AC outlet when a
power
outage occurs. When power has been restored, replug power cord to
AC outlet.
• For long vacations or absences, unplug the wine cellar and clean the
wine cellar and door gaskets according to "General cleaning" section.
Leave doors open, so air can circulate inside.
•When moving always move the wine cellar vertically. Do not move
with the unit lying down, as possible damage to the sealed system
could occur.
Note: After moving, wait for 24 hours before plugging in the
wine cellar.
Power Interruptions
Vacation and Moving Care

This manual suits for next models
1
Table of contents
Languages:
Other Haier Wine Cooler manuals

Haier
Haier HEWFT36BXB User manual

Haier
Haier HVTS18 User manual

Haier
Haier HVFM102A User manual

Haier
Haier HVUE06 User manual

Haier
Haier HVD042M User manual

Haier
Haier HWS84GA User manual

Haier
Haier BC112G - 30 Bottles Wine Cooler User manual

Haier
Haier HWS79GDG User manual

Haier
Haier HVD024E User manual

Haier
Haier HWS33GG User manual

Haier
Haier HVT12A - 09-05 User manual

Haier
Haier WC200GS User manual

Haier
Haier WS GA Series User manual

Haier
Haier JC-112G User manual

Haier
Haier HVFE024BBB User manual

Haier
Haier HVR036ALL User manual

Haier
Haier HWS84GA User manual

Haier
Haier JC-82G User manual

Haier
Haier GWB03FAWSSC Safety guide

Haier
Haier JQ-332A User manual