Haier AWCE50ARS User manual

Issued: January 2006
IMPORTANT
Do Not Return This Product To The Store
If you have a problem with this product, please contact the "Haier Customer Satisfaction
Center" at 1-877-337-3639.
DATED PROOF OF PURCHASE REQUIRED FOR WARRANTY SERVICE
IMPORTANT
Ne pas Réexpédier ce Produit au Magasin
Pour tout problème concernant ce produit, veuillez contacter le service des
consommateurs ‘Haier Customer Satisfaction Center’ au 1-877-337-3639.
UNE PREUVE D’ACHAT DATEE EST REQUISE POUR BENEFICIER DE LA GARANTIE.
IMPORTANTE
No regrese este producto a la tienda
Si tiene algún problema con este producto, por favor contacte el "Centro de Servicio al
Consumidor de Haier" al 1-877-337-3639 (Válido solo en E.U.A).
NECESITA UNA PRUEBA DE COMPRA FECHADA PARA EL SERVICIO DE LA GARANTIA
115V~60 Hz
Made in China
Fabriqué en Chine
Hecho en China
Haier America
New York, NY 10018
Printed in China
Part#RF-9999-234
ROOM AIR CONDITIONING AND DEHUMIDIFIER PRODUCTS

ROOM AIR CONDITIONING AND DEHUMIDIFIER PRODUCTS
User Manual
Model # AWCE50ARS
Guide de l’Utilisateur
Modéle # AWCE50ARS
Manual del Usuario
Para Modelo de # AWCE50ARS
Built In / Freestanding Wine Vault
Construire Dans / Indépendant Vin Cave
Construido En / Bodega Aislada
Amana is a registered trademark of the Maytag Corporation and is used under license to Haier America.

1
English
Recognize Safety Symbols,
Words and Labels
What you need to know about Safety Instructions
Warning and Important Safety Instructions appearing in this manual are not meant
to cover all possible conditions and situations that may occur. Common sense, cau-
tion and care must be exercised when operating, moving or cleaning this
product.
Always contact your dealer, distributor, service agent or manufacturer about
problems or conditions you do not understand.
This is the safety alert symbol. It is used to alert you to poten-
tial personal injury hazards. Obey all safety messages that fol-
low this symbol to avoid possible injury or death.
DANGER indicates an imminently hazardous situation
which, if not avoided, will result in death or serious
injury.
WARNING indicates a potentially hazardous situation
which, if not avoided, could result in death or serious
injury.
CAUTION indicates a potentially hazardous situation
which, if not avoided, may result in minor or moderate
injury.
CAUTION used without the safety alertsymbol
indicates a potentially hazardous situation which, if not
avoided, may result in property damage.
DANGER
WARNING
CAUTION
CAUTION

2
SAFETY PRECAUTIONS
Read all of the instructions before using this appliance. When using this
appliance, always exercise basic safety precautions, including the
following:
1) Use this appliance only for its intended purpose as described in this use and care
guide.
2) This wine cellar must be properly installed in accordance with the
installation instructions before it is used. See grounding instructions in the installa-
tion section.
3) Never unplug your wine cellar by pulling on the power cord. Always grasp the
plug firmly and pull straight out from the outlet.
4) Repair or replace immediately, all electric service cords that have become frayed
or otherwise damaged. Do not use a cord that shows cracks or
abrasion damage along its length, the plug or the connector end.
5) Unplug your wine cellar before cleaning or before making any repairs.
Note: If for any reason this product requires service, we strongly
recommend that a certified technician performs the service.
6) If your old wine cellar is not being used, we recommend that you remove the
door and leave the shelves in place. This will reduce the possibility
of danger to children.
7) Do not operate your wine cellar in the presence of explosive fumes.
8) Do not store foods in wine cellar as interior temperature may not be cool enough
to prevent spoilage.
SAVE THESE INSTRUCTIONS
English

English
3
Staple your receipt to your manual. You will need it to obtain warranty service.
Thank you for using our Amana product. This easy-
to-use manual will guide you in getting the best use
of your wine cellar.
Remember to record the model and serial number.
They are on a label in back of the wine
cooler.
Model number
Serial number
Date of purchase
Risk of child entrapment. Before you throw away your old
refrigerator or freezer, take off the doors. Leave the shelves in place
so that children may not easily climb inside.
DANGER

English
4
TABLE OF CONTENTS
PAGE
Section One
Recognize Safety Symbols Words and Labels ...........................................1
Safety Precautions ...............................................................................2-3
Section One
Parts And Features..................................................................................5
Installing Your Wine Cellar......................................................................6
Unpacking Your wine cellar.....................................................................6
Leveling Your wine cellar.........................................................................6
Electrical Requirements............................................................................6
Use of Extension Cord.............................................................................6
Section Three
Wine Cellar Features And Use.................................................................7
Initial Set Up ..........................................................................................7
Shelving.................................................................................................7
Interior Light...........................................................................................7
Normal Operating Sounds ......................................................................7
Wine Cellar Installation...........................................................................8
Install Limitations.....................................................................................8
Door Handle Installation..........................................................................8
Dimensions.............................................................................................8
Door Reversal....................................................................................9-10
Section Four
Replace Light Bulbs ...............................................................................10
Proper Wine Cellar Care and Cleaning..................................................11
Cleaning and Maintenance ...................................................................11
Power Interruptions ...............................................................................11
Vacation and Moving Care ...................................................................11
Troubleshooting ....................................................................................12
Section Five
Limited Warranty..................................................................................13

5
English
PARTS AND FEATURES
1
4
2
3
5
1. Door Handle
2. Door Trim
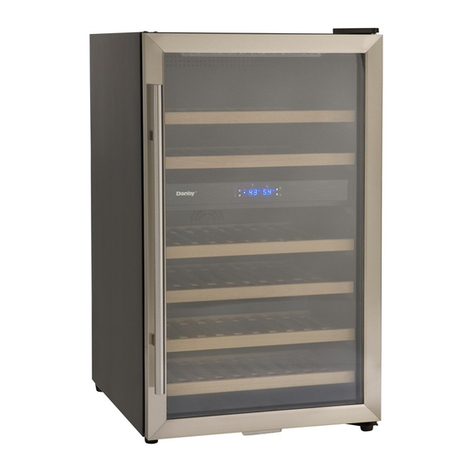
3. Shelving - 5 glide out with wood trim & 1 chrome
4. Tinted Glass
5. Leveling Legs
6. Adjustable Temp. Control (not shown)
7. Interior Light (not shown)
8. Reversible Door (not shown)

English
6
Unpacking Your Wine Cellar
1. Remove all packaging material. This includes the foam base and all adhesive tape
holding the wine cellar accessories inside and outside.
2. Inspect and remove any remains of packing, tape or printed
materials before powering on the wine cellar.
Leveling Your Wine Cellar
•Your wine cellar has four leveling legs which are located in the front and rear corners of your wine cellar.
After properly placing your wine cellar in its final position, you can level your wine cellar.
• Leveling legs can be adjusted by turning them clockwise to raise your wine cellar or by turning them coun-
terclockwise to lower your wine cellar. The wine cellar door will close easier when the leveling legs are
extended.
Electrical Requirement
•Make sure there is a suitable power Outlet (115 volts, 15 amps outlet) with proper grounding to power
the wine cellar.
• Avoid the use of three plug adapters or cutting off the third grounding in order to accommodate a two
plug outlet. This is a dangerous practice since it provides no
effective grounding for the wine cellar and may result in shock hazard.
Use of Extension Cords
•Avoid the use of an extension cord because of potential safety hazards under certain conditions. If it is
necessary to use an extension cord, use only a 3-wire extension cord that has a 3-blade grounding plug
and a 3-slot outlet that will accept the plug. The marked rating of the extension cord must be equal to or
greater than the electrical rating of the appliance.
INSTALLING YOUR WINE CELLAR
WARNING
CAUTION

7
English
Shelving
•The shelves are chrome plated your model purchased. They are designed for flexibility and easy clean-
ing. To accommodate different sized bottles the shelves slide out and can be moved up or down into any
of the tracks molded into the cooler cabinet. Larger bottles or Magnums can be more easily accommodat-
ed on the bottom of the cooler. You will notice that the shelves are designed so the bottles do not line-up
directly over one another. The shelves are designed to allow free air movement and provides more space.
Interior Light
•To complement the look of your wine collection, a soft light has been built into the wine cellar. The light
switch is on the electronic control panel.
Normal Operating Sounds You May Hear
•Boiling water, gurgling sounds or slight vibrations that are the result of the refrigerant circulating through
the cooling coils.
• The thermostat control will click when it cycles on and off.
WINE CELLAR FEATURES AND USE
Initial Setup
•Once you have plugged the unit into an electrical outlet, let the unit run for at least 30 minutes to
acclimate itself before making any adjustments. During this time the Red Wine light will stay on.
Temperature inside the cooler, if not adjusted, will be at 55°-60°F.
•The wine cellar can be set to any temperature you desire to accommodate your wine storage
requirements. To set the temperature, press both the "White Wine" and "Red Wine" buttons
simultaneously and hold for approximately 3 seconds. Now you are in temperature set mode. Decrease
the temperature by pushing the "White Wine" button and increase the temperature by pressing the "Red
Wine" button. Pressing the appropriate button 3 times will adjust the temperature 3 degrees, press 4 times
equals 4 degrees, 5 times equals 5 degrees, and so on. Once you have selected the temperature you
desire, push the "On/Off" button. Now the wine cellar is programmed and the LED readout will return to
current internal temperature reading.
• There will be a 3 degree variance +/- between the temperature you select and the temperature
indicated on the LED readout. This occurs because the wine cellar activates and deactivates trying to
maintain your desired temperature. There is often a variance between the top and bottom shelves of the
wine cellar. Therefore, if you have set the wine cellar for 50° and have a mix of red and white wines, you
may want to put the white wine on the bottom shelf where the temperature will be cooler, and place the
red wine on the top shelf where the temperature will be warmer.

Down
White Red
Up on / off

8
English
WINE CELLAR INSTALLATIONS
Install Limitations
•Do not install your wine cellar in any location not properly insulated or heated e.g. garage etc. Your wine
cellar was not designed to operate in temperature settings below 55˚ Fahrenheit.
• Select a suitable location for the wine cellar on a hard even surface away from direct sunlight or heat
source e.g. radiators, baseboard heaters, cooking appliances etc. Any floor unevenness should be correct-
ed with the leveling legs located on the front and rear bottom corners of the wine cellar.
Door Handle Installation
•Once you have unpacked your wine cellar you will have to install the grip handle on the door with the
supplied screws.
Dimensions
•Built-in wine cellars need to be ventilated from the front. This feature allows the unit to be built in an
enclosed area. The bottom front grille should be clear of all obstructions. This is absolutely necessary for
the air to circulate and for the unit to operate efficiently. The dimensions for installation are as follows. (W
xDxH)
Unit Dimensions: 23-7/8” x 23-3/4” x 34-11/16”
Built-In Dimensions: 24” x 24” x 35”
34-11/16”
23-7/8”
23-3/4”
Table of contents
Languages:
Other Haier Wine Cooler manuals

Haier
Haier HVC15A User manual

Haier
Haier HBF110G User manual

Haier
Haier HWS116GAE User manual

Haier
Haier JC-298GF User manual

Haier
Haier HVT18DFBB User manual

Haier
Haier HSVCD24 User manual

Haier
Haier WS120GA User manual

Haier
Haier HWS33GG User manual

Haier
Haier HWS33GG User manual

Haier
Haier JC-110GD User manual

Haier
Haier JC-125G User manual

Haier
Haier HVF020A User manual

Haier
Haier HVA037-5S - 08-03 User manual

Haier
Haier HVDW20ABB -01 User manual

Haier
Haier JC-82G User manual

Haier
Haier HVD060E-4S User manual

Haier
Haier JC-163 User manual

Haier
Haier JQ-F160A User manual

Haier
Haier HC-122 User manual

Haier
Haier HJC-83KB User manual