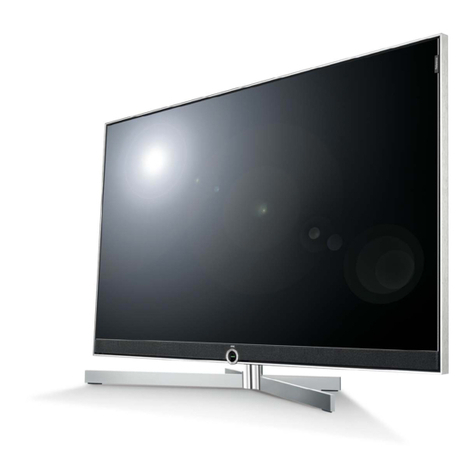
Haier HL22FO1 User manual

1
WARNING
This service information is designed for experienced repair technicians only and is not designed for use by the general public. It does
not contain warnings or cautions to advise non-technical individuals of potential dangers in attempting to service a product. Products
powered b electricity should be serviced or repaired only by experienced professional technicians. Any attempt to service or repair the
product deal with in this service information by anyone else could result in serious injury or death.
COLOR
TV
@2009(Full name of the company who issues the service information)
All rights reserved. Unauthorized copying and distribution is a violation of
law.
Chassis:MTK5380LC
Service Model:HL22FO1a
Customer Model:HL22FO1

2
CONTENTS
Table of conents………………..................…………………………….2
1. General Information…………...............…………………………..3
1-1. General Guidelines...…………………………………………………..3
1-2. Important notice………………………………………………………...3
1-3. How to read this Service Manual……………………………………..4
2. Specifications……………………………………………....................6
3. Location of Controls and Components ...........................7
3-1.Board Location…………………………………………………………..7
3-2. Main Board & AV Board………………………………………………..7
3-3. Power Board…………………………………………………………….9
3-4. LCD Panel………………………………………………………………10
4. Disassemble and assemble…………………...........………….11
4-1 Remove the Pedestal ……………………………………………….…12
4-2 Remove the Back Cover…………………...…………………………..12
4-3 Remove the adhesive tape…….........…………………………………12
4-4 Remove the Terminal Bracket……………....…………………………12
4-5 Remove the power module……….......……………………………….13
4-6 Remove the Main board……………....……………………………….13
4-7 Remove the small power board……………………….………………13
4-8 Remove the speaker …....……………………………………………..13
4-9 Remove the remote control board …….....…………………………..13
5. Installation Instructions ………..................………………..…..14
5-1 External Equipment Connections …………………………..........…..14
5-2 HDMI Connections ..………………………….............................…...16
6. Operation Instructions …………………………........................19
6-1 Front Panel Controls …………………………………………….........19
6-2 Back Panel Controls ……………...……………………………..........19
6-3 Universal Remote Controller...........................................................19
7. Electrical parts ............................................................................21
7-1. Block diagram ...............................................................................21
7-2. Circuit Diagram..............................................................................21
7-3 .Wiring Connection Diagram...........................................................36
8. Measurements and Adjustments .......................................37
8-1. Service Mode ..................................................................................37

3
8-1-1.How to enter into Service Mode ......................................................37
8-1-2.How to exit ..................................................................................37
8-2. Measurements and Adjustments ..................................................37
9. Trouble shooting ......................................................................43
9-1. Simple check ...............................................................................43
9-2. Power Supply Board failure check ..............................................44
9-3. Main board failure check ..............................................................45
9-4. Pannel failure ...............................................................................47

4
1. General Information
1-1 General Guidelines
When servicing, observe the original lead dress. If a short circuit is found, replace all parts which
have been overheated or damaged by the short circuit.
After servicing, see to it that all the protective devices such as insulation barriers, insulation papers
shields are properly installed.
After servicing, make the following leakage current checks to prevent the customer from being
exposed to shock hazards.
1) Leakage Current Cold Check
2) Leakage Current Hot Check
3)Prevention of Electro Static Discharge(ESD)to Electrostatically Sensitive
1-2 Important notice
1-2-1. Follow the regulations and warnings
Most important thing is to list up the potential hazard or risk for the service personnel to open the
units and disassemble the units. For example, we need to describe properly how to avoid the
possibility to get electrical shock from the live power supply or charged electrical parts (even the
power is off).
This symbol indicates that high voltage is present inside. It is dangerous to
make any king of contact with any inside part of this product.
This symbol indicates that there are important operating and maintenance
instructions in the literture accompanying the appliance
1-2-2. Be careful to the electrical shock
To prevent damage which might result in electric shock or fire, do not expose this TV set to rain or
excessive moisture. This TV must not be exposed to dripping or splashing water, and objects
Filled with liquid, such as vases, must not be place on top of or above the TV
1-2-3. Electro static discharge (ESD)
Some semiconductor (solid state) devices can be damaged easily by static electricity. Such
Components commonly are called Electrostatically Sensitive (ES) Devices. The following
tech-niquesshouldbeusedtohelpreducetheincidenceofcomponentdamagecausedbyelectro
Static discharge (ESD).
1-2-4. About lead free solder (PbF)
This product is manufactured using lead-free solder as a part of a movement within the consum-er
products industry at large to be environmentally responsible. Lead-free solder must be used in the
servicing and repair of this product.
1-2-5. Use the genewing parts (specified parts)
Special parts which have purposes of fire retardant (resistors),high-quality sound (capacitors), low
noise(resistors), etc. are used.
When replacing any of components, be sure to use only manufacture's specified parts shown in
the parts list.
Safety Component
●Components identified by mark have special characteristics important for safety.

5
1-2-7. Safety Check after Repairment
Confirm that the screws ,parts and wiring which were removed in order to service are put in the
original positions, or whether there are the portions which are deteriorated around the serviced
places serviced or not. Check the insulation between the antenna terminal or external metal and
the AC cord plug blades. And be sure the safety of that.
Insuration Test
1. Unplug the plug from the AC outlet.
2. Remove the antenna terminal on TV and turn on the TV.
3. Insulation resistance between the cord plug terminals and the eternal exposure metal
should be more than M ohm by using the 500V insulation resistance meter
4. If the insulation resistance is less than M ohm, the inspection repair should be required.
If you have not the 500V insulation resistance meter, use a Tester.
External exposure metal: Antenna terminal Headphone jack
1-2-8. Ordering Spare Parts
Please include the following informations when you order parts. (Particularly the Version
letter)
1. Model number and Version letter
The model number can be found on the back of each product and the Version letter can
be found at the end of the serial number.
2. Part No. and Description
You can find them in your service manual
.
The illustration and photos used in this Manual may not base on the final design of products, which
may differ from your products in some way.
1-3. How to read this Service Manual
1-4-1. Using Icons
Icons are used to attract the attention of the reader to specific information. The meaning of each icon is
described in the table below:
Note:
A “note” provides information that is not indispensable, but may nevertheless be valuable to the
reader, such as tips and tricks.
Caution:
A “caution” is used when there is danger that the reader, through incorrect manipulation,
1-2-6. Photo used in this manual

6
may damage equipment, loose data, get an unexpected result or has to restart(part of)
a procedure.
Warning: A “warning” is used when there is danger of personal injury.
Reference:
A “reference” guides the reader to other places in this binder or in this manual, where he/she will
find additional information on a specific topic.
2. Specification
Model
Screen size 21.6inch
Aspect ratio 16:9
Resolution 1366×768
Contrast Ratio 1000:1
Angel of view H:170/V:160
Color display 16.7M
OSD language English
Color system ATSC/NTSC
Color Temperature Cold/Standard/Warm
Audio output power(Built-in)(W) 3W×2
Power Consmption(in Standby) 1W
Total power input(W)50W
Voltage range(V)120V±10% V
Power frequency(Hz)60HZ
Time of sleep timer(MINS) 240Min
Net weight(KG) 4.5
Gross weight(KG) 5.6
Net dimension(MM) 534/164/392
Packaged dimension(MM) 600/210/460
3. LOCATION OF CONTROLS AND COMPONENTS
HL22FO1

7
3-1 Board Location
No. Parts number Description
B Board Power Board
3-2 Main Board & AV Board
3-2-1 Function Description:
Main Board:
Process signal which incept from exterior equipment,then translate into signal that panel can
display.
3-2-2 Connector definition
Main board connector
Power connectors (CN3, CN5)
CN3 CN5
A Board BBoard
A Board Main Board

8
Notes:
CN3-Pin 3: Backlight on/off:
The system can turn on or turn off the backlight of TFT LCD Panel through the power supply unit
path.
CN3-Pin 7: System power on / standby
System board will use this pin to control system power.
CN3-Pin 4: Control the luminance of backlight
The system can generate the PWN signal to control the strength of TFT LCD Panel’s backlight
through this connector.
Keypad and remote connector (CN2)
Pin number Signal name Description
1 IR_IN IR
2 CPU5V 5V
3 LED_G LAMP GREEN
4 GND GND
5 LED_R LAMPRED
6 K7 POWER
7 K6 MENU
8 K5 P_
9 K4 P+
10 K3 V_
11 K2 V+
12 K1 SOURCE
Speaker connector (CN1)
Pin number Signal name Description
1 LSPK LSPK
2 GND GND
3 GND GND
4 RSPK RSPK
DVD VIDEO Connector: CN6
Pin number Signal name Description
Pin number Signal name Pin number Signal name
1 +12V 1 +12V
2 +12V 2 GND
3 BL 3 GND
4 DIM 4 +5V
5 GND 5 STB
6 GND
7 SW

9
1 GPIO GPIO
2 PB_IN PB1 IN
3 Y_IN Y1_IN
4 GND GND
5 PR_IN PR1 IN
6 GND GND
7 IR DVD IR
DVD AUDIO Connector: P1
Pin number Signal name Description
1 LI YPBPR1L_IN
2 RI YPBPR1R_IN
3 GND GND
Other connectors:
CN19 to Upgrade the program of MTK5380LC (U13) AND FLASH (U17)
U0TX
+3V3SB
U0RX
J3
4x1 W/HOUSING
DIP4/W/H/P2.0
1
2
3
4
3-3. Power Board
3-3-1 Function Description:
Supply power for Main board, Panel.
3-3-2Connectordefinition
INPUT CONNECTOR (CN6)
CN10 Signal name

10
3-4. LCD Panel
3-4-1 Function Description: Display the signal.
3-4-2 Connector definition
1 N
2 GND
3 GND
4 DIM
5 EN
6 +12V
7 +12V
Pin number Signal name Description
1-3 LVDSVDD Power for panel
4-6 GND Ground
7 A0N LVDS EVEN 0 - Signal
8 A0P LVDS EVEN 0 + Signal
9 A1N LVDS EVEN 1 - Signal
10 A1P LVDS EVEN 1 + Signal
11 A2N LVDS EVEN 2 - Signal
12 A2P LVDS EVEN 2 + Signal
13,14 GND Ground
15 CK1N LVDS EVEN Clock - Signal
16 CK1P LVDS EVEN Clock + Signal
17 A3N LVDS EVEN 3 - Signal
18 A3P LVDS EVEN 3 + Signal
19 A4N LVDS ODD 0 - Signal
20 A4P LVDS ODD 0 + Signal
21 A5N LVDS ODD 1 - Signal
C M O (V 2 1 6 B 1- L 01)
Table of contents
Other Haier TV manuals


Haier
Haier 25T7A User manual

Haier
Haier L39B2180 Assembly instructions

Haier
Haier HL32K1b User manual

Haier
Haier 21FV6T User manual

Haier
Haier LT15R1WW User manual

Haier
Haier L42B1180 User manual

Haier
Haier HL26B-A User manual

Haier
Haier HTN20R15 User manual

Haier
Haier BH2004D User manual

Haier
Haier LE32F32200 User manual